Friant
| Revision as of 16:45, 29 March 2017 | Revision as of 15:13, 10 March 2019 | |||
12 intermediate revisions by 7 users not shown | ||||
| Line 4: | Line 4: | |||
| |Anno=<!-- you can write below short description for the ship. it will replace default once. --> | |Anno=<!-- you can write below short description for the ship. it will replace default once. --> | |||
| + | A light cruiser project designed after the end of World War I that revealed an acute shortage of this type of ship in the French Navy. The primary features of the project were high speed, weak armor, powerful torpedo armament and main guns placed in turrets.<br><br>{{Model3DViewer|0ca62e08795447f9b1f286de470666c2}} | |||
| |Performance=<!-- write text about performance in battles below --> | |Performance=<!-- write text about performance in battles below --> | |||
| + | Tier III's ''Friant'' is a ship of extremes. Her 30 knot top speed places her amongst the fastest cruisers at Tier III (though she is less maneuverable), while her 23mm of maximum armor protection make her the least-armored cruiser at her tier. ''Friant'' is exceedingly fragile, but her armaments give her a lot of flexibility that most of her Tier III counterparts can't match. | |||
| + | ||||
| + | For starters, her HE shells have solid performance; they are more than capable of punishing destroyers that get too close, while her torpedoes make a lovely surprise for battleships and cruisers who think she will be an easy kill. She must be carefully angled in order to get the best performance out of her armor, as she takes a lot of damage from shell penetrations. A major advantage for ''Friant'' is the all-centreline arrangement of her main battery, which allows her to bring all of her guns to bear on a single target---a feature some cruiser lines don't acquire until three tiers later. Unfortunately, her slower reload means that she cannot put out the same number of shells as ships like ''[[Kolberg]]'' or ''[[St. Louis]]'', so ''Friant'' captains must make every shot count. And, while her gun range is better than average for her tier, her low muzzle velocity and high dispersion are challenging at-range. Additionally, captains may want to take Expert Marksman to make up for slower turret traverse. | |||
| + | ||||
| + | Beyond Damage Control Party, she has no additional consumables. | |||
| |Pros=<!-- write list of positive points below. use * as in ordinary wiki-list. --> | |Pros=<!-- write list of positive points below. use * as in ordinary wiki-list. --> | |||
| + | * Torpedoes with decent range and excellent firing arcs. | |||
| + | * Large health pool. | |||
| + | * Good speed and maneuverability. | |||
| + | * All-centreline AB-XY turret layout is excellent for its tier. | |||
| |Cons=<!-- write list of negative points below. use * as in ordinary wiki-list. --> | |Cons=<!-- write list of negative points below. use * as in ordinary wiki-list. --> | |||
| + | * Takes heavy damage from hits. | |||
| + | * Slow main gun reload. | |||
| |Research=<!-- write text about priority sequence of research below --> | |Research=<!-- write text about priority sequence of research below --> | |||
| + | The hull upgrade should be researched first. The additional hit points and faster rudder shift will make the ship more comfortable to play. The addition of secondary and anti-aircraft weaponry is marginal. After the hull, either research the Gun Fire Control System to add 10% to her gun range, or save the experience in order to unlock ''[[Duguay-Trouin]]'' faster. | |||
| |OptimalConfiguration=<!-- write some general text about selection of optimal configuration below (optional)--> | |OptimalConfiguration=<!-- write some general text about selection of optimal configuration below (optional)--> | |||
| + | ''Friant'' is best set up to function as a long-range support cruiser. She will want to fire at medium and long range until the battle is nearly decided; then she can close in and use her torpedoes for maximum effect. Captains are recommended to stick close to their heavy hitting battleships and ward off any destroyers that attempt to kill them. | |||
| |Upgrades=<!-- write text about best upgrades below --> | |Upgrades=<!-- write text about best upgrades below --> | |||
| ? | + | For [[Ship:Upgrades#Tier_I.2B_Equipment_.28Slot_1.29|Upgrade Slot 1]], {{Main Armaments Modification 1}} is recommended; it will keep ''Friant''’s guns and torpedoes firing. In [[Ship:Upgrades#Tier_V.2B_Equipment_.28Slot_2.29|Upgrade Slot 2]], either take {{Damage Control System Modification 1}} for reduced fire/flood chance, or {{Steering Gears Modification 1}} to ensure your rudder survives so you can continue to angle against incoming fire. | ||
| ? | + | |||
| ? | [[Ship:Upgrades#Tier_V.2B_Equipment_.28Slot_2.29|Upgrade Slot 2]] | + | ||
| ? | + | |||
| ? | + | |||
| ? | + | |||
| ? | + | |||
| |CommanderSkills=<!-- write text about best set of Commander Skills below --> | |CommanderSkills=<!-- write text about best set of Commander Skills below --> | |||
| + | Like most long-range cruisers, ''Friant'' will benefit most from skills that help the ship survive and also punish enemies who push too close to her. | |||
| {{Commander Skills | {{Commander Skills | |||
| ? | | Priority Target = | + | | Priority Target = 3 | |
| ? | | Preventative Maintenance = | + | | Preventative Maintenance = 2 | |
| ? | | Expert Loader = | + | | Expert Loader = 1 | |
| | Aircraft Servicing Expert = | | Aircraft Servicing Expert = | |||
| | Direction Center for Catapult Aircraft = | | Direction Center for Catapult Aircraft = | |||
| | Dogfighting Expert = | | Dogfighting Expert = | |||
| ? | | Incoming Fire Alert = | + | | Incoming Fire Alert = 2 | |
| | Evasive Maneuver = | | Evasive Maneuver = | |||
| ? | | High Alert = | + | | High Alert = 1 | |
| | Jack of All Trades = | | Jack of All Trades = | |||
| ? | | Expert Marksman = | + | | Expert Marksman = 2 | |
| ? | | Torpedo Acceleration = | + | | Torpedo Acceleration = 1 | |
| | Smoke Screen Expert = | | Smoke Screen Expert = | |||
| | Expert Rear Gunner = | | Expert Rear Gunner = | |||
| ? | | Adrenaline Rush = | + | | Adrenaline Rush = 3 | |
| ? | | Last Stand = | + | | Last Stand = 1 | |
| ? | | Basics of Survivability = | + | | Basics of Survivability = 1 | |
| ? | | Survivability Expert = | + | | Survivability Expert = 1 | |
| ? | | Torpedo Armament Expertise = | + | | Torpedo Armament Expertise = 1 | |
| | Emergency Takeoff = | | Emergency Takeoff = | |||
| | Basic Firing Training = | | Basic Firing Training = | |||
| | Superintendent = | | Superintendent = | |||
| ? | | Demolition Expert = | + | | Demolition Expert = 3 | |
| ? | | Vigilance = | + | | Vigilance = 2 | |
| | Manual Fire Control for Secondary Armament = | | Manual Fire Control for Secondary Armament = | |||
| ? | | Fire Prevention = | + | | Fire Prevention = 1 | |
| ? | | Inertia Fuse for HE Shells = | + | | Inertia Fuse for HE Shells = 3 | |
| | Air Supremacy = | | Air Supremacy = | |||
| | Advanced Firing Training = | | Advanced Firing Training = | |||
| | Manual Fire Control for AA Armament = | | Manual Fire Control for AA Armament = | |||
| ? | | Radio Position Finding = | + | | Radio Position Finding = 2 | |
| ? | | Concealment Expert = | + | | Concealment Expert = 3 | |
| }} | }} | |||
| |Consumables=<!-- write text about selection of Consumables below --> | |Consumables=<!-- write text about selection of Consumables below --> | |||
| + | The premium [[Ship:Consumables#Damage Control Party|Damage Control Party]] is recommended to help ensure the ship's vital systems are running at maximum efficiency. | |||
| |Camouflage=<!-- write text about useful camouflage below --> | |Camouflage=<!-- write text about useful camouflage below --> | |||
| + | [[Ship:Camouflage#Standard Camouflage|Type 1, 2, or 5 camouflage]] can be equipped for credits; Types 2 or 5 are recommended at a minimum to reduce the accuracy of incoming shells. | |||
| |Signals=<!-- write text about best set of signals below --> | |Signals=<!-- write text about best set of signals below --> | |||
| Line 72: | Line 83: | |||
| {{Signal Flags | {{Signal Flags | |||
| | Hotel Yankee = | | Hotel Yankee = | |||
| ? | | Juliet Charlie = | + | | Juliet Charlie = 1 | |
| | November Foxtrot = | | November Foxtrot = | |||
| | Zulu = | | Zulu = | |||
| Line 78: | Line 89: | |||
| | India Delta = | | India Delta = | |||
| ? | | India Yankee = | + | | India Yankee = 1 | |
| | November Echo Setteseven = | | November Echo Setteseven = | |||
| | Zulu Hotel = | | Zulu Hotel = | |||
| | India Bravo Terrathree = | | India Bravo Terrathree = | |||
| ? | | Sierra Mike = | + | | Sierra Mike = 1 | |
| ? | | Victor Lima = | + | | Victor Lima = 1 | |
| | Mike Yankee Soxisix = | | Mike Yankee Soxisix = | |||
| | Papa Papa = | | Papa Papa = | |||
| ? | | India X-Ray = | + | | India X-Ray = 1 | |
| | Equal Speed Charlie London = | | Equal Speed Charlie London = | |||
| ? | | Juliet Whiskey Unaone = | + | | Juliet Whiskey Unaone = 1 | |
| | Dragon Flag = | | Dragon Flag = | |||
| }} | }} | |||
| + | ||||
| + | |History= | |||
| + | ===Historical Inaccuracies=== | |||
| + | The original ''Friant'' was a protected cruiser from 1895. However, this version reflects the French ''Project 171'' from 1919, which was a part of designs leading up to ''Duguay-Trouin''. The 75 mm and 90 mm anti-aircraft guns were developed in 1922 and 1926 respectively. | |||
| |Gallery=<!-- write below list of files with description (if necessary) separated with | --><gallery> | |Gallery=<!-- write below list of files with description (if necessary) separated with | --><gallery> | |||
| ? | + | File:FriantStart.jpg | ||
| ? | + | File:FriantBroadside.jpg | ||
| ? | + | File:FriantFireEverything.jpg | ||
| ? | + | File:FriantCloseup.jpg | ||
| ? | + | |||
| ? | + | |||
| ? | + | |||
| </gallery> | </gallery> | |||
Revision as of 15:13, 10 March 2019

| Research price2150 exp |
| Purchase price247,000 |
| Hit Points18,900 |
| 139 mm/55 Mle 1923 in a turret4 х 2 pcs. |
| Rate of Fire5 shots/min. |
| Reload Time12 sec. |
| Rotation Speed7 deg./sec. |
| 180 Degree Turn Time25.71 sec. |
| Firing Range11.72 km. |
| Maximum Dispersion113 m. |
| HE Shell139 mm HE OEA Mle 1923 |
| Maximum HE Shell Damage2,000 |
| Chance of Fire on Target Caused by HE Shell8 % |
| Initial HE Shell Velocity840 m./s. |
| HE Shell Weight31.5 kg. |
| AP Shell139 mm AP OPFA Mle 1923 |
| Maximum AP Shell Damage2,700 |
| Initial AP Shell Velocity790 m./s. |
| AP Shell Weight39.5 kg. |
| 550 mm tube lance-torpilles4 х 3 pcs. |
| Rate of Fire0.71 shots/min. |
| Reload Time84 sec. |
| Rotation Speed25 deg./sec. |
| 180 Degree Turn Time7.2 sec. |
| Torpedo550 mm 19D |
| Maximum Damage12,233 |
| Torpedo Speed57 knot |
| Torpedo Range6 km. |
| 75 mm/50 Mle 1922 on an Mle 1922 mount4 х 1 pcs. |
| . . . Average Damage per Second6.8 |
| . . . Firing Range3 km. |
| 8 mm Hotchkiss Mle 1914 on a single mount2 х 1 pcs. |
| . . . Average Damage per Second2.6 |
| . . . Firing Range0.99 km. |
| Maximum Speed30 knot |
| Turning Circle Radius560 m. |
| Rudder Shift Time8.4 sec. |
| Surface Detectability Range11 km. |
| Air Detectability Range5.11 km. |

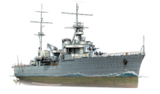
Friant — French Tier III cruiser.
A light cruiser project designed after the end of World War I that revealed an acute shortage of this type of ship in the French Navy. The primary features of the project were high speed, weak armor, powerful torpedo armament and main guns placed in turrets.
Modules
 |
Rate of Fire (shots/min) | 180° Turn Time (sec) | Maximum Dispersion (m) | Maximum HE Shell Damage (HP) | Chance of Fire on Target Caused by HE Shell (%) | Maximum AP Shell Damage (HP) |
Research price (exp) |
Purchase price ( | |
|---|---|---|---|---|---|---|---|---|---|
| 139 mm/55 Mle 1923 in a turret | 5 | 25.7 | 113 | 2,000 | 8 | 2,700 | 0 | 28,000 |
 |
Hit Points (HP) | Armor (mm) | Armor (mm) | Main Turrets (pcs.) | Secondary Gun Turrets (pcs.) | AA Mounts (pcs.) | Torpedo Tubes (pcs.) | Hangar Capacity (pcs.) |
Research price (exp) |
Purchase price ( | |
|---|---|---|---|---|---|---|---|---|---|---|---|
| Friant (A) | 18,900 | 6 | 30 | 4 | 2/4 | 4 | 0 | 40,000 | |||
| Friant (B) | 20,300 | 6 | 30 | 4 | 4 | 2/4 | 4 | 800 | 98,000 |
 |
Rate of Fire (shots/min) | Torpedo Tubes Reload Time (sec) | 180° Turn Time (sec) | Maximum Damage (HP) | Torpedo Speed (knot) | Torpedo Range (km) |
Research price (exp) |
Purchase price ( | |
|---|---|---|---|---|---|---|---|---|---|
| 550 mm 19D | 0.7 | 84 | 7.2 | 12,233 | 57 | 6 | 0 | 22,000 |
 |
IDS_SHIP_PARAM_SUO_INCREASE_DIST (%) | Maximum Firing Range (km) |
Research price (exp) |
Purchase price ( | |
|---|---|---|---|---|---|
| PCA n° 3 Mle 1 | 0 | 0 | 21,000 | ||
| PCA n° 3 Mle 2 | 0 | 400 | 53,000 |
 |
Maximum Speed (knot) |
Research price (exp) |
Purchase price ( | |
|---|---|---|---|---|
| Propulsion: 54,000 hp | 30 | 0 | 18,000 |
Compatible Upgrades
| Slot 1 |
||||
|---|---|---|---|---|
| Slot 2 |
Player Opinion
Performance
Tier III's Friant is a ship of extremes. Her 30 knot top speed places her amongst the fastest cruisers at Tier III (though she is less maneuverable), while her 23mm of maximum armor protection make her the least-armored cruiser at her tier. Friant is exceedingly fragile, but her armaments give her a lot of flexibility that most of her Tier III counterparts can't match.
For starters, her HE shells have solid performance; they are more than capable of punishing destroyers that get too close, while her torpedoes make a lovely surprise for battleships and cruisers who think she will be an easy kill. She must be carefully angled in order to get the best performance out of her armor, as she takes a lot of damage from shell penetrations. A major advantage for Friant is the all-centreline arrangement of her main battery, which allows her to bring all of her guns to bear on a single target---a feature some cruiser lines don't acquire until three tiers later. Unfortunately, her slower reload means that she cannot put out the same number of shells as ships like Kolberg or St. Louis, so Friant captains must make every shot count. And, while her gun range is better than average for her tier, her low muzzle velocity and high dispersion are challenging at-range. Additionally, captains may want to take Expert Marksman to make up for slower turret traverse.
Beyond Damage Control Party, she has no additional consumables.Pros:
- Torpedoes with decent range and excellent firing arcs.
- Large health pool.
- Good speed and maneuverability.
- All-centreline AB-XY turret layout is excellent for its tier.
Cons:
- Takes heavy damage from hits.
- Slow main gun reload.
Research
Optimal Configuration
Friant is best set up to function as a long-range support cruiser. She will want to fire at medium and long range until the battle is nearly decided; then she can close in and use her torpedoes for maximum effect. Captains are recommended to stick close to their heavy hitting battleships and ward off any destroyers that attempt to kill them.
Upgrades
For Upgrade Slot 1, Main Armaments Modification 1 ![]() is recommended; it will keep Friant’s guns and torpedoes firing. In Upgrade Slot 2, either take Damage Control System Modification 1
is recommended; it will keep Friant’s guns and torpedoes firing. In Upgrade Slot 2, either take Damage Control System Modification 1 ![]() for reduced fire/flood chance, or Steering Gears Modification 1
for reduced fire/flood chance, or Steering Gears Modification 1 ![]() to ensure your rudder survives so you can continue to angle against incoming fire.
to ensure your rudder survives so you can continue to angle against incoming fire.
Commander Skills
Like most long-range cruisers, Friant will benefit most from skills that help the ship survive and also punish enemies who push too close to her.
| Recommended Commander Skills | ||||||||
|---|---|---|---|---|---|---|---|---|
| Cost (points) |
Endurance | Attack | Support | Versatility | ||||
| 1 |
★★★ |
★★ |
★ |
|
|
|
★★ |
|
| 2 |
★ |
|
★★ |
★ |
|
|
★★★ |
★ |
| 3 |
★ |
★ |
★ |
|
|
|
★★★ |
★★ |
| 4 |
|
★ |
★★★ |
|
|
|
★★ |
★★★ |
| Key: ★★★ - Extremely Useful ★★ - Frequently Useful ★ - Occasionally Useful No stars - Meh Χ - Not recommended | ||||||||
Consumables
The premium Damage Control Party is recommended to help ensure the ship's vital systems are running at maximum efficiency.
Camouflage
Type 1, 2, or 5 camouflage can be equipped for credits; Types 2 or 5 are recommended at a minimum to reduce the accuracy of incoming shells.
Signals
Recommended Signal Flags 
| |||||
|---|---|---|---|---|---|
| Combat | |||||
 ★ |

|
 ★ |

|
 ★ |
 ★ |
 ★ |

|

|
 ★ |

|

|

|

| ||||
Note: Use of the Juliet Charlie signal makes detonation impossible.
Gallery


Historical Info
| Destroyers | II Enseigne Gabolde • III Fusilier • IV Bourrasque • V Jaguar • V Siroco |
| Cruisers | I Bougainville • II Jurien de la Gravière • III Friant • IV Duguay-Trouin • V Émile Bertin • VI La Galissonnière • VI De Grasse |
| Battleships | III Turenne • IV Courbet • V Bretagne • VI Normandie • VI Dunkerque |
| Aircraft Carriers | VI Béarn |