Haarlem

| Research price110000 exp |
| Purchase price9,000,000 |
| Hit Points36,250 |
| IDS_PHGM025_203_56_SK_C383 х 3 pcs. |
| Rate of Fire4 shots/min. |
| Reload Time15 sec. |
| Rotation Speed8 deg./sec. |
| 180 Degree Turn Time22.5 sec. |
| Firing Range14.16 km. |
| Maximum Dispersion178 m. |
| HE Shell203 mm Spr.Gr. L/4.7 Kz. |
| Maximum HE Shell Damage2,850 |
| Chance of Fire on Target Caused by HE Shell13 % |
| Initial HE Shell Velocity925 m./s. |
| HE Shell Weight122 kg. |
| AP Shell203 mm P.Spr.Gr. L/4.4 |
| Maximum AP Shell Damage4,800 |
| Initial AP Shell Velocity925 m./s. |
| AP Shell Weight122 kg. |
| 120 mm/50 Model 1942 in a turret4 х 2 pcs. |
| Firing Range6.6 km. |
| Rate of Fire20 shots/min. |
| Reload Time3 sec. |
| HE Shell120 mm HE Brisantgranaat |
| Maximum HE Shell Damage1,700 |
| Initial HE Shell Velocity850 m./s. |
| Chance of Fire on Target Caused by HE Shell7 % |
| 120 mm/50 Model 1942 in a turret4 х 2 pcs. |
| . . . Average Damage per Second97.2 |
| . . . Firing Range5.19 km. |
| 20 mm Oerlikon Mk.II on a Mk.VIIA mount14 х 1 pcs. |
| . . . Average Damage per Second50.4 |
| . . . Firing Range2.01 km. |
| 40 mm/56 Bofors on a Mk.3 mount10 х 1 pcs. |
| . . . Average Damage per Second76 |
| . . . Firing Range3.51 km. |
| Maximum Speed32.5 knot |
| Turning Circle Radius730 m. |
| Rudder Shift Time15.6 sec. |
| Surface Detectability Range12.14 km. |
| Air Detectability Range9.03 km. |

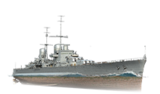
Haarlem — Dutch Tier VIII cruiser.
In 1939, the Dutch authorities decided to construct capital ships for their navy. Following lengthy discussions on what the new ship class should look like, it was determined that the main requirement was high speed. If deemed necessary, the ship needed to have a chance to avoid fighting against stronger opponents, such as Japanese Kongō-class battlecruisers. According to the project, the cruiser's displacement was 16,000 tons; she could accelerate up to 32–33 knots and carry 203 mm guns on board. But the armor of such a ship was considered insufficient by the naval committee, and the project was never completed.
Modules
 |
Rate of Fire (shots/min) | 180° Turn Time (sec) | Maximum Dispersion (m) | Maximum HE Shell Damage (HP) | Chance of Fire on Target Caused by HE Shell (%) | Maximum AP Shell Damage (HP) |
Research price (exp) |
Purchase price ( | |
|---|---|---|---|---|---|---|---|---|---|
| 203 mm/60 SK C/34 in a turret | 4 | 22.5 | 178 | 2,850 | 13 | 4,800 | 0 | 900,000 |
 |
Hit Points (HP) | Armor (mm) | Armor (mm) | Main Turrets (pcs.) | Secondary Gun Turrets (pcs.) | AA Mounts (pcs.) | Torpedo Tubes (pcs.) | Hangar Capacity (pcs.) |
Research price (exp) |
Purchase price ( | |
|---|---|---|---|---|---|---|---|---|---|---|---|
| Haarlem (A) | 36,250 | 16 | 200 | 3 | 4 | 14/10/4 | 0 | 1,350,000 | |||
| Haarlem (B) | 40,100 | 16 | 200 | 3 | 4 | 14/10/4 | 36,000 | 2,100,000 |
 |
IDS_SHIP_PARAM_SUO_INCREASE_DIST (%) | Maximum Firing Range (km) |
Research price (exp) |
Purchase price ( | |
|---|---|---|---|---|---|
| SUO Mk 8 Mod. 1 | 0 | 0 | 900,000 | ||
| SUO Mk 8 Mod. 2 | 0 | 24,000 | 1,400,000 |
 |
Maximum Speed (knot) |
Research price (exp) |
Purchase price ( | |
|---|---|---|---|---|
| Propulsion: 140,000 hp | 32.5 | 0 | 900,000 |
Compatible Upgrades
| Slot 1 |
|||||
|---|---|---|---|---|---|
| Slot 2 |
|||||
| Slot 3 |
|||||
| Slot 4 |
|||||
| Slot 5 |
Player Opinion
Performance
Refer to the in-game Port screens for more useful data.
As the first large cruiser in the Dutch branch, Haarlem transitions away from her light cruiser predecessors and inherits the unique characteristics of high tier Dutch cruisers – above average durability, poor performing main battery guns, and powerful airstrikes.
Hull
For a cruiser, Haarlem is well protected. Her 25 mm bow is additionally protected by a 40 mm icebreaker, making it difficult to citadel her through the nose. Her midsection features a 30 mm deck, which is immune to overmatch from guns below 457 mm, and her 40 mm side plating allows her to ricochet battleship shells while angled. Her citadel is protected by a 200 mm main belt and 25 mm turtleback, the latter of which provides effective protection against cruisers. Haarlem however suffers from the same fire and flooding duration as battleships, making her survivability from damage over time poor.
Haarlem’s maneuverability is poor, with a top speed of 32.5 knots, and a rudder shift at 11.1 seconds when upgraded. Her concealment, on the other hand is excellent for a large cruiser, reaching 9.8 km when fully specced, which is superior to many other cruisers she can meet in-battle. She is able to take advantage of positions that many other cruisers cannot.
Armament
Haarlem is equipped with nine 203 mm guns, which are identical to same-tier cruiser Admiral Hipper in many aspects, including ballistics, AP penetration and HE fire chance. However, they are significantly worse in terms of reload, accuracy and range, as well as lacking her German counterpart’s improved HE pen. As a result, her damage output from her main battery is extremely poor, being similar to lower tiered cruisers. Captains should be mostly using HE shells to deal damage, regulating the AP to almost-perfect broadsides.
Haarlem also has access to the unique Dutch airstrike. As the first high tier cruiser in the line, Haarlem has access to two charges of the armament instead of one like the preceding cruisers. Their drop pattern, long reload and delay makes them most effective against large, immobile targets, such as battleships or bow-in island-hugging ships. A particularly useful tactic is using the airstrikes to set fires on enemy ships, forcing them to use their Damage Control Party ![]() , and then using the main battery to set permanent fires.
, and then using the main battery to set permanent fires.
Haarlem’s AA is well above average, with great range and good DPS values, in addition to having access to Defensive AA Fire ![]() . While not as outstanding as her successors, her AA is a significant threat to Tier VI and VIII aircraft squadrons. Tier X carriers, however, can often get strikes off with little to moderate casualties.
. While not as outstanding as her successors, her AA is a significant threat to Tier VI and VIII aircraft squadrons. Tier X carriers, however, can often get strikes off with little to moderate casualties.
Defining Consumables
Haarlem’s most unique consumable is her Repair Party ![]() , which features an enhanced cooldown, only taking half the time of a standard one to reload. While her Hydroacoustic Search
, which features an enhanced cooldown, only taking half the time of a standard one to reload. While her Hydroacoustic Search ![]() and Defensive AA Fire
and Defensive AA Fire ![]() are standard for her tier, they are in separate slots, meaning captains don’t have to choose between taking one or the other.
are standard for her tier, they are in separate slots, meaning captains don’t have to choose between taking one or the other.
Gameplay
Haarlem shines on the defensive. With her concealment, she can take aggressive positions, such as nearby islands, and use her airstrikes in tandem with her main battery to dissuade enemy ships from pushing in. She can also easily disengage and reposition to catch the enemies off-guard. Her armor and special Repair Party ![]() give her good survivability to hold down key positions.
give her good survivability to hold down key positions.
Pros:
- Durable cruiser: Well armored midsection, icebreaker bow, and short Repair Party
 cooldown
- Access to airstrikes with 2 total charges, 60 total bombs dropped, and good range
- Good AA suite, aided by the Defensive AA Fire
 consumable
- Has the Hydroacoustic Search
 and Defensive AA Fire consumables in separate slots
- Excellent concealment, can outspot the vast majority of cruiser in her matchmaking bracket
- Good shell ballistics
Cons:
- Very weak main battery performance due to poor dispersion, limited range and slow reload
- Low main battery DPM, essentially on par with Tier VI cruisers for effective damage output
- Lacks torpedoes unlike most cruisers
- Vulnerable to damage over time effects, with battleship duration fires and floods
- Top speed and rudder shift are fairly sluggish
- Rather long cooldown on airstrikes
Research
Researchable module upgrades for Haarlem:
- Hull: Upgrade to Hull (B) for more health and improved AA and maneuverability. Research of this module unlocks progression to Johan de Witt.
- Gun Fire Control System: Upgrade to SUO Mk 8 Mod. 2 for an extra 10% range on the main battery.
Optimal Configuration
Upgrades
The recommended upgrades for Haarlem are:
- Slot 1: Main Armaments Modification 1

- Slot 2: Damage Control System Modification 1
 or Hydroacoustic Search Modification 1
- Slot 3: Aiming Systems Modification 1

- Slot 4: Airstrike Modification 1
 *
*
- Slot 5: Concealment System Modification 1

In Slot 4, captains can opt to use Damage Control System Modification 2 ![]() if they wish to minimize the damage from fires and floods.
if they wish to minimize the damage from fires and floods.
Commander Skills
| Recommended Commander Skills | ||||||
|---|---|---|---|---|---|---|
| Cost (points) |
Attack | Defense | ||||
| 1 |
★ |
|
|
★★ |
★ |
|
| 2 |
★ |
|
★ |
|
★★★ |
★★★ |
| 3 |
|
|
★★★ |
★★ |
★★★ |
★★ |
| 4 |
★ |
|
|
|
★★★ |
|
| Key: ★★★ - Extremely Useful ★★ - Frequently Useful ★ - Occasionally Useful No stars - Not Useful | ||||||
Consumables
Haarlem can equip the following consumables:
- Slot 1: Damage Control Party

- Slot 2: Hydroacoustic Search – 3 charges
- Slot 3: Defensive AA Fire – 3 charges
- Slot 4: Repair Party – 3 charges
Signals
Recommended Signal Flags 
| |||||
|---|---|---|---|---|---|
| Combat | |||||
 ★★ |
 ★★ |
 ★★ |
 ★ |
 ★★★ |
 ★★★ |

|

|
 ★★ |
 ★★ |
 ★★ |
 ★★★ |

|
 ★★ | ||||
Note: Use of the Juliet Charlie signal makes detonation impossible.
Gallery
Historical Info
Historical Gallery
References
Ship Change Log
See here for links to Update notes.
- Available for testing by supertesters in the game starting from Update 0.10.4.
Testing Changes
- DevBlog 137:
- Preliminary characteristics.
- DevBlog 150:
- Airstrike parameters changed:
- Size of Attacking Flight increased from 8 to 10 planes.
- Maximum range of operation increased from 10 to 12 km.
- Bomb drop time decreased from 10 to 8 s.
- Fore-End armor belt thickness decreased from 50 to 40 mm.
- Casemate armor belt thickness decreased from 50 to 40 mm.
- Airstrike parameters changed:
- DevBlog 164:
- Airstrike reload time increased from 80 to 100 s.
- Bomb penetration increased from 32 to 34 mm.
- Bomb fall time decreased from 8 to 6 s.
- DevBlog 168:
- Bomb fall time decreased from 6 to 5 s.
- Update 0.10.6:
- Available in early access for Netherlands tokens in sequential bundles in the Armory.
- Introduced into the game as a researchable ship in Update 0.10.8.
- Update 12.0:
- Added Depth Charges with the following characteristics:
- Maximum damage: 2,000
- Number of Charges: 2
- Bombs per Charge: 8
- Reload Time: 40 s
- Added Depth Charges with the following characteristics:
| Destroyers | IX Groningen |
| Cruisers | I Van Kinsbergen • II Gelderland • III Java • IV De Ruyter • V Celebes • VI Kijkduin • VII Eendracht • VIII Haarlem • VIII De Zeven Provinciën |
| Battleships | |
| Aircraft Carriers |