Hatsuharu
| Revision as of 22:53, 11 December 2016 | Revision as of 09:40, 13 September 2018 | |||
8 intermediate revisions by 5 users not shown | ||||
| Line 3: | Line 3: | |||
| |Anno=<!-- you can write below short description for the ship. it will replace default once. --> | |Anno=<!-- you can write below short description for the ship. it will replace default once. --> | |||
| ? | ''Hatsuharu'' was a high performance ship despite displacement limitations imposed by the London Naval Treaty of 1930. The ship boasted a comparatively good AA defense. The powerful main battery guns were placed in enclosed turret mounts and could deliver anti-aircraft fire. | + | ''Hatsuharu'' was a high performance ship despite displacement limitations imposed by the London Naval Treaty of 1930. The ship boasted a comparatively good AA defense. The powerful main battery guns were placed in enclosed turret mounts and could deliver anti-aircraft fire.<br><br> | |
| + | {{Model3DViewer|0c6d65ee86fc4f5ab6c62cfed4977ec2}} | |||
| |Performance=<!-- write text about performance in battles below --> | |Performance=<!-- write text about performance in battles below --> | |||
| ? | As a part of the Japanese destroyer line re-organization and expansion in [[Ship:Update_0.5.15|Update 0.5.15]], '' | + | As a part of the Japanese destroyer line re-organization and expansion in [[Ship:Update_0.5.15|Update 0.5.15]], ''{{#var:ship_name}}'' falls one tier to her new home at Tier VI. There have been a few minor tweaks to ''{{#var:ship_name}}'' with the change, but she is largely the same. As before, upgrading to Hull (B) increases her health and anti-aircraft battery, but costs her one of her main battery guns. She retains the same twin triple-tube launchers she had previously. Her detection radius remains 6.7 km, while she loses minor amounts of speed and maneuverability from her previous incarnation. Captains who believed that ''{{#var:ship_name}}'' was under-gunned in her previous slot at Tier VII will likely be more comfortable with her armament one tier lower. | |
| ? | On the other hand, new Japanese destroyer captains who are moving up to '' | + | On the other hand, new Japanese destroyer captains who are moving up to ''{{#var:ship_name}}'' from ''[[Minekaze]]'' will find their new acquisition to be something a mixed bag: her guns are a significant upgrade from those of ''Minekaze'', while it can be argued that her torpedo armament is a downgrade. Not only is she less flexible with only two torpedo launchers, the reload time is very nearly double that of ''Minekaze''; in exchange, ''{{#var:ship_name}}''’s torpedoes can eventually be upgraded to longer-ranged with a bigger punch. Further complicating things is the fact that her torpedo upgrade is locked behind Hull (B), meaning captains must invest experience in the hull upgrade first before having the ability to upgrade her torpedoes. | |
| ? | Without her improved torpedoes, '' | + | Without her improved torpedoes, ''{{#var:ship_name}}'' is stuck with fish that have a paltry 6.0 km range. This forces ''{{#var:ship_name}}'' into more of a mid-tier American destroyer play style, requiring captains to utilize islands and smoke effectively to land successful torpedo strikes against enemy capital ships. ''{{#var:ship_name}}'' plays like a completely different ship once she has her upgraded torpedoes, however. The 10.0 km range of her Type 8 mod. 2 torpedoes is more than workable, and her guns can add notable contributions to her damage when used judiciously in the right situations. | |
| ? | '' | + | ''{{#var:ship_name}}'' comes off as the inferior destroyer when compared side-by-side with ''[[Fubuki]]'', but things flip back the other way one tier up when the same comparison is made between the successors of both ships (''[[Akatsuki]]'' and ''[[Shiratsuyu]]''). Captains frustrated with ''{{#var:ship_name}}'' should remember that she is merely a stepping-stone to better things beyond. | |
| |Pros=<!-- write list of positive points below. use * as in ordinary wiki-list. --> | |Pros=<!-- write list of positive points below. use * as in ordinary wiki-list. --> | |||
| ? | * Improved guns gain significantly increased | + | * Improved guns gain significantly increased rate of fire, range, and shell arcs. | |
| * Lowest detection range of Tier VI destroyers. | * Lowest detection range of Tier VI destroyers. | |||
| * Decent torpedo speed makes her torpedoes harder to dodge. | * Decent torpedo speed makes her torpedoes harder to dodge. | |||
| Line 27: | Line 28: | |||
| |Research=<!-- write text about priority sequence of research below --> | |Research=<!-- write text about priority sequence of research below --> | |||
| ? | Like the other Tier VI Japanese destroyer, ''[[Fubuki]]'', '' | + | Like the other Tier VI Japanese destroyer, ''[[Fubuki]]'', ''{{#var:ship_name}}'' is painful to play until Hull (B) and the Torpedo upgrade module are unlocked and equipped. Those need to be top priority. Save the Fire Control System module for last, or skip it altogether and move on to ''[[Shiratsuyu]]''. | |
| |OptimalConfiguration=<!-- write some general text about selection of optimal configuration below (optional)--> | |OptimalConfiguration=<!-- write some general text about selection of optimal configuration below (optional)--> | |||
| |Upgrades=<!-- write text about best upgrades below --> | |Upgrades=<!-- write text about best upgrades below --> | |||
| ? | Mid-tier destroyers like '' | + | The recommended upgrades for ''{{#var:ship_name}}'' are as follows: | |
| + | * '''Slot 1''': {{Main Armaments Modification 1}} | |||
| + | * '''Slot 2''': {{Propulsion Modification 1}} | |||
| + | * '''Slot 3''': {{Aiming Systems Modification 1}} or {{Main Battery Modification 2}} | |||
| + | * '''Slot 4''': {{Propulsion Modification 2}} | |||
| + | ||||
| + | Mid-tier destroyers like ''{{#var:ship_name}}'' don't have many outstanding options for upgrades. '''Main Armaments Modification 1''' is the best pick for '''Slot 1''', while '''Propulsion Modification 1''' is recommended in '''Slot 2'''. '''Propulsion Modification 2''' is the best pick of a sorry lot for '''Slot 4'''. '''Slot 3''' offers either '''Aiming Systems Modification 1''' or '''Main Battery Modification 2'''; either provides a minor boost to ''{{#var:ship_name}}''’s main battery. | |||
| |CommanderSkills=<!-- write text about best set of Commander Skills below --> | |CommanderSkills=<!-- write text about best set of Commander Skills below --> | |||
| ? | ||||
| ? | ||||
| ? | ||||
| ? | ||||
| ? | ||||
| {{Commander Skills | {{Commander Skills | |||
| ? | | Expert Loader= | + | | Priority Target = 1 | |
| ? | | | + | | Preventative Maintenance = 3 | |
| ? | | | + | | Expert Loader = | |
| ? | | Expert | + | | Aircraft Servicing Expert = | |
| + | | Direction Center for Catapult Aircraft = | |||
| + | | Dogfighting Expert = | |||
| + | | Incoming Fire Alert = | |||
| + | | Evasive Maneuver = | |||
| ? | | Expert Marksman= | + | | High Alert = 1 | |
| ? | | Torpedo | + | | Jack of All Trades = 2 | |
| ? | | | + | | Expert Marksman = 1 | |
| ? | | | + | | Torpedo Acceleration = 1 | |
| ? | | Last Stand=3 | + | | Smoke Screen Expert = 1 | |
| + | | Expert Rear Gunner = | |||
| + | | Adrenaline Rush = 2 | |||
| + | | Last Stand = 3 | |||
| ? | | | + | | Survivability Expert = 1 | |
| ? | | | + | | Basics of Survivability = 2 | |
| ? | | | + | | Torpedo Armament Expertise = 2 | |
| ? | | | + | | Emergency Takeoff = | |
| ? | | Superintendent=3 | + | | Basic Firing Training = | |
| + | | Superintendent = 3 | |||
| + | | Demolition Expert = | |||
| + | | Vigilance = 1 | |||
| ? | | | + | | Manual Fire Control for Secondary Armament = | |
| ? | | | + | | Fire Prevention = | |
| ? | | | + | | Inertia Fuse for HE Shells = 1 | |
| ? | | | + | | Air Supremacy = | |
| ? | | | + | | Advanced Firing Training = 2 | |
| ? | + | | Manual Fire Control for AA Armament = | ||
| ? | + | | Radio Position Finding = 2 | ||
| ? | | Manual Fire Control for | + | | Concealment Expert = 3 | |
| ? | | | + | ||
| ? | | Concealment Expert=3 | + | ||
| ? | + | |||
| ? | + | |||
| }} | }} | |||
| |Consumables=<!-- write text about selection of Consumables below --> | |Consumables=<!-- write text about selection of Consumables below --> | |||
| ? | All destroyers should invest credits (or doubloons) in | + | ''{{#var:ship_name}}'' can equip the following consumables: | |
| + | * '''Slot 1:''' {{Damage Control Party}} | |||
| + | * '''Slot 2:''' {{Smoke Generator}} | |||
| + | * '''Slot 3:''' {{Engine Boost}} | |||
| + | ||||
| + | All destroyers should invest credits (or doubloons) in {{Damage Control Party II}}. {{Engine Boost II}} probably isn't worth it — ''Hatsuharu''’s speed isn't amazing, but it's not awful either — while {{Smoke Generator II}} likely is, especially if her commander does not have the Concealment Expert skill. | |||
| |Camouflage=<!-- write text about useful camouflage below --> | |Camouflage=<!-- write text about useful camouflage below --> | |||
| [[Ship:Camouflage#Standard Camouflage|Type 1, 2, or 5 camouflage]] can be equipped for credits; Types 1 or 5 are recommended at a minimum to reduce detectibility range. | [[Ship:Camouflage#Standard Camouflage|Type 1, 2, or 5 camouflage]] can be equipped for credits; Types 1 or 5 are recommended at a minimum to reduce detectibility range. | |||
| ? | Players who wish to spend doubloons can equip '' | + | Players who wish to spend doubloons can equip ''{{#var:ship_name}}'' with [[Ship:Camouflage#Permanent_Camouflage|Type 16 camouflage]] that lowers her detection radius, reduces the accuracy of incoming shells, and increases the amount of experience she earns. | |
| |Signals=<!-- write text about best set of signals below --> | |Signals=<!-- write text about best set of signals below --> | |||
| Line 91: | Line 104: | |||
| |History=<!-- write text below --> | |History=<!-- write text below --> | |||
| ? | == | + | <div class="thumb tright"> | |
| + | {{AnnoWiki|content= | |||
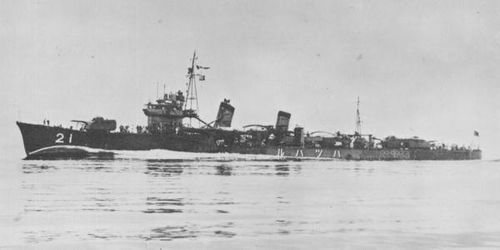
| + | <h3>Construction</h3> | |||
| :Sasebo Dockyard; Nagasaki, Japan | :Sasebo Dockyard; Nagasaki, Japan | |||
| :Laid down: 14 May 1931 | :Laid down: 14 May 1931 | |||
| :Launched: 27 February 1933 | :Launched: 27 February 1933 | |||
| :Commissioned: 30 September 1933 | :Commissioned: 30 September 1933 | |||
| ? | + | ---- | ||
| ===Specifications=== | ===Specifications=== | |||
| :1,490tons displacement, standard | :1,490tons displacement, standard | |||
| Line 102: | Line 117: | |||
| :10m beam | :10m beam | |||
| :3.03m draft | :3.03m draft | |||
| ? | + | ---- | ||
| ====Machinery==== | ====Machinery==== | |||
| :3 boilers, 2 turbines | :3 boilers, 2 turbines | |||
| ? | + | ---- | ||
| ====Performance==== | ====Performance==== | |||
| :36.5 knots at 42,000 shaft horsepower | :36.5 knots at 42,000 shaft horsepower | |||
| :6,000nm at 15 knots | :6,000nm at 15 knots | |||
| ? | + | ---- | ||
| ====Armament==== | ====Armament==== | |||
| =====Main===== | =====Main===== | |||
| Line 117: | Line 132: | |||
| =====Torpedoes===== | =====Torpedoes===== | |||
| :Nine (3x3) 610mm torpedo tubes | :Nine (3x3) 610mm torpedo tubes | |||
| ? | + | }} | ||
| + | </div> | |||
| + | [[File:Hatsuharu (1932).jpg|500px|link=]] | |||
| ===History=== | ===History=== | |||
| Line 140: | Line 157: | |||
| Six ''Hatsuharu'' class destroyers were built and commissioned in the mid-1930s. | Six ''Hatsuharu'' class destroyers were built and commissioned in the mid-1930s. | |||
| ? | '''DesDiv 27''' (''Ariake'', ''Yugure'') Joined with CarDiv 2 (''Hiryu'', ''Soryu'') in the Netherlands East Indies to support landings there. Engaged in convoy escort until April, 1942. Participated in the Battle of the Coral Sea. Assigned to the Aleutian diversionary force for the Battle of Midway. Participated in operations against the US landing at Guadalcanal. Continued transport and escort operations to reinforce Japanese garrisons in the Solomons. | + | '''DesDiv 27''' (''Ariake'', ''Yugure'') Joined with CarDiv 2 (''[[Hiryu]]'', ''Soryu'') in the Netherlands East Indies to support landings there. Engaged in convoy escort until April, 1942. Participated in the Battle of the Coral Sea. Assigned to the Aleutian diversionary force for the Battle of Midway. Participated in operations against the US landing at Guadalcanal. Continued transport and escort operations to reinforce Japanese garrisons in the Solomons. | |
| :''Ariake'' was torpedoed and sunk by submarine on 28 July 1943. | :''Ariake'' was torpedoed and sunk by submarine on 28 July 1943. | |||
| :''Yugure'' was bombed and sunk by air attack on 20 July 1943. | :''Yugure'' was bombed and sunk by air attack on 20 July 1943. | |||
| '''DesDiv 21''' (''Hatsuharu'', ''Hatsushimo'', ''Nenohi'', ''Wakaba'') | '''DesDiv 21''' (''Hatsuharu'', ''Hatsushimo'', ''Nenohi'', ''Wakaba'') | |||
| ? | Joined operations in support of landings in the Netherlands East Indies. Participated in the Aleutian campaign. Performed convoy escort operations in the Central Pacific, 1943-1944. Participated in the Leyte campaign. Escorted ''Yamato'' in her attempt to reach Okinawa. | + | Joined operations in support of landings in the Netherlands East Indies. Participated in the Aleutian campaign. Performed convoy escort operations in the Central Pacific, 1943-1944. Participated in the Leyte campaign. Escorted ''[[Yamato]]'' in her attempt to reach Okinawa. | |
| :''Hatsuharu'' was sunk by air attack in Manila Bay on 14 November 1944. | :''Hatsuharu'' was sunk by air attack in Manila Bay on 14 November 1944. | |||
| :''Hatsushimo'' was sunk by mine as she was evading air attack on 30 July 1945. | :''Hatsushimo'' was sunk by mine as she was evading air attack on 30 July 1945. | |||
Revision as of 09:40, 13 September 2018

| Research price34000 exp |
| Purchase price2,950,000 |
| Hit Points10,500 |
| 127 mm/50 3rd Year Type on a Type B mount2 х 2 pcs. |
| Rate of Fire8 shots/min. |
| Reload Time7.5 sec. |
| Rotation Speed7 deg./sec. |
| 180 Degree Turn Time25.71 sec. |
| Firing Range9.85 km. |
| Maximum Dispersion88 m. |
| HE Shell127 mm HE Type1 |
| Maximum HE Shell Damage2,150 |
| Chance of Fire on Target Caused by HE Shell9 % |
| Initial HE Shell Velocity915 m./s. |
| HE Shell Weight23 kg. |
| AP Shell127 mm AP Type0 |
| Maximum AP Shell Damage2,200 |
| Initial AP Shell Velocity915 m./s. |
| AP Shell Weight23 kg. |
| 610 mm Triple2 х 3 pcs. |
| Rate of Fire0.82 shots/min. |
| Reload Time73 sec. |
| Rotation Speed25 deg./sec. |
| 180 Degree Turn Time7.2 sec. |
| TorpedoType8 |
| Maximum Damage14,600 |
| Torpedo Speed63 knot |
| Torpedo Range6 km. |
| 127 mm/50 3rd Year Type on a Type B mount2 х 2 pcs. |
| . . . Average Damage per Second20.2 |
| . . . Firing Range5.01 km. |
| 25 mm/60 Type 96 on a twin mount4 х 2 pcs. |
| . . . Average Damage per Second10.8 |
| . . . Firing Range2.49 km. |
| Maximum Speed36.5 knot |
| Turning Circle Radius580 m. |
| Rudder Shift Time3.4 sec. |
| Surface Detectability Range6.46 km. |
| Air Detectability Range2.81 km. |

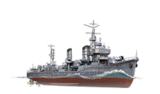
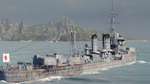
Hatsuharu — Japanese Tier VI destroyer.
Hatsuharu was a high performance ship despite displacement limitations imposed by the London Naval Treaty of 1930. The ship boasted a comparatively good AA defense. The powerful main battery guns were placed in enclosed turret mounts and could deliver anti-aircraft fire.
Modules
 |
Rate of Fire (shots/min) | 180° Turn Time (sec) | Maximum Dispersion (m) | Maximum HE Shell Damage (HP) | Chance of Fire on Target Caused by HE Shell (%) | Maximum AP Shell Damage (HP) |
Research price (exp) |
Purchase price ( | |
|---|---|---|---|---|---|---|---|---|---|
| 127 mm/50 3rd Year Type on a Type B mount | 8 | 25.7 | 88 | 2,150 | 9 | 2,200 | 0 | 190,000 |
 |
Hit Points (HP) | Armor (mm) | Armor (mm) | Main Turrets (pcs.) | Secondary Gun Turrets (pcs.) | AA Mounts (pcs.) | Torpedo Tubes (pcs.) | Hangar Capacity (pcs.) |
Research price (exp) |
Purchase price ( | |
|---|---|---|---|---|---|---|---|---|---|---|---|
| Hatsuharu (A) | 10,500 | 6 | 20 | 2 | 4/2 | 2 | 0 | 245,000 | |||
| Hatsuharu (B) | 11,700 | 6 | 20 | 2 | 14/1/3/2 | 2 | 10,000 | 1,000,000 |
 |
Rate of Fire (shots/min) | Torpedo Tubes Reload Time (sec) | 180° Turn Time (sec) | Maximum Damage (HP) | Torpedo Speed (knot) | Torpedo Range (km) |
Research price (exp) |
Purchase price ( | |
|---|---|---|---|---|---|---|---|---|---|
| Type8 mod. 1 | 0.8 | 73 | 7.2 | 14,600 | 63 | 6 | 0 | 180,000 | |
| Type8 mod. 2 | 0.8 | 76 | 7.2 | 16,266 | 59 | 10 | 4,000 | 400,000 |
 |
IDS_SHIP_PARAM_SUO_INCREASE_DIST (%) | Maximum Firing Range (km) |
Research price (exp) |
Purchase price ( | |
|---|---|---|---|---|---|
| Type6 mod. 1 | 0 | 0 | 105,000 | ||
| Type6 mod. 2 | 0 | 3,200 | 220,000 |
 |
Maximum Speed (knot) |
Research price (exp) |
Purchase price ( | |
|---|---|---|---|---|
| Propulsion: 42,000 hp | 36.5 | 0 | 110,000 |
Compatible Upgrades
| Slot 1 |
|||||
|---|---|---|---|---|---|
| Slot 2 |
|||||
| Slot 3 |
|||||
| Slot 4 |
Player Opinion
Performance
As a part of the Japanese destroyer line re-organization and expansion in Update 0.5.15, Hatsuharu falls one tier to her new home at Tier VI. There have been a few minor tweaks to Hatsuharu with the change, but she is largely the same. As before, upgrading to Hull (B) increases her health and anti-aircraft battery, but costs her one of her main battery guns. She retains the same twin triple-tube launchers she had previously. Her detection radius remains 6.7 km, while she loses minor amounts of speed and maneuverability from her previous incarnation. Captains who believed that Hatsuharu was under-gunned in her previous slot at Tier VII will likely be more comfortable with her armament one tier lower.
On the other hand, new Japanese destroyer captains who are moving up to Hatsuharu from Minekaze will find their new acquisition to be something a mixed bag: her guns are a significant upgrade from those of Minekaze, while it can be argued that her torpedo armament is a downgrade. Not only is she less flexible with only two torpedo launchers, the reload time is very nearly double that of Minekaze; in exchange, Hatsuharu’s torpedoes can eventually be upgraded to longer-ranged with a bigger punch. Further complicating things is the fact that her torpedo upgrade is locked behind Hull (B), meaning captains must invest experience in the hull upgrade first before having the ability to upgrade her torpedoes.
Without her improved torpedoes, Hatsuharu is stuck with fish that have a paltry 6.0 km range. This forces Hatsuharu into more of a mid-tier American destroyer play style, requiring captains to utilize islands and smoke effectively to land successful torpedo strikes against enemy capital ships. Hatsuharu plays like a completely different ship once she has her upgraded torpedoes, however. The 10.0 km range of her Type 8 mod. 2 torpedoes is more than workable, and her guns can add notable contributions to her damage when used judiciously in the right situations.
Hatsuharu comes off as the inferior destroyer when compared side-by-side with Fubuki, but things flip back the other way one tier up when the same comparison is made between the successors of both ships (Akatsuki and Shiratsuyu). Captains frustrated with Hatsuharu should remember that she is merely a stepping-stone to better things beyond.Pros:
- Improved guns gain significantly increased rate of fire, range, and shell arcs.
- Lowest detection range of Tier VI destroyers.
- Decent torpedo speed makes her torpedoes harder to dodge.
- Generous torpedo launch arcs.
Cons:
Research
Optimal Configuration
Upgrades
The recommended upgrades for Hatsuharu are as follows:
- Slot 1: Main Armaments Modification 1

- Slot 2: Propulsion Modification 1

- Slot 3: Aiming Systems Modification 1
 or Main Battery Modification 2
- Slot 4: Propulsion Modification 1 (
 )
)
Mid-tier destroyers like Hatsuharu don't have many outstanding options for upgrades. Main Armaments Modification 1 is the best pick for Slot 1, while Propulsion Modification 1 is recommended in Slot 2. Propulsion Modification 2 is the best pick of a sorry lot for Slot 4. Slot 3 offers either Aiming Systems Modification 1 or Main Battery Modification 2; either provides a minor boost to Hatsuharu’s main battery.
Commander Skills
| Recommended Commander Skills | ||||||||
|---|---|---|---|---|---|---|---|---|
| Cost (points) |
Endurance | Attack | Support | Versatility | ||||
| 1 |
★ |
★★★ |
|
|
|
|
|
|
| 2 |
★ |
★★ |
★ |
★ |
★ |
|
★★ |
★★★ |
| 3 |
★★ |
★ |
★★ |
|
|
★★★ |
|
★ |
| 4 |
|
|
★ |
|
★★ |
|
★★ |
★★★ |
| Key: ★★★ - Extremely Useful ★★ - Frequently Useful ★ - Occasionally Useful No stars - Meh Χ - Not recommended | ||||||||
Consumables
Hatsuharu can equip the following consumables:
- Slot 1: Damage Control Party

- Slot 2: Smoke Generator

- Slot 3: Engine Boost

All destroyers should invest credits (or doubloons) in Damage Control Party II (![]() ). Engine Boost II (
). Engine Boost II (![]() ) probably isn't worth it — Hatsuharu’s speed isn't amazing, but it's not awful either — while Smoke Generator II (
) probably isn't worth it — Hatsuharu’s speed isn't amazing, but it's not awful either — while Smoke Generator II (![]() ) likely is, especially if her commander does not have the Concealment Expert skill.
) likely is, especially if her commander does not have the Concealment Expert skill.
Camouflage
Type 1, 2, or 5 camouflage can be equipped for credits; Types 1 or 5 are recommended at a minimum to reduce detectibility range.
Players who wish to spend doubloons can equip Hatsuharu with Type 16 camouflage that lowers her detection radius, reduces the accuracy of incoming shells, and increases the amount of experience she earns.Gallery
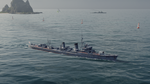
Hatsuharu scouts ahead for her team.
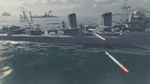
Hatsuharu launches her torpedoes at the enemies entering the capture point.
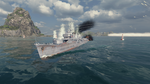
Hatsuharu attempts to dodge incoming shells from multiple enemy vessels.
Hatsuharu prepares to attack an enemy Gneisenau.


Historical Info
Historical Gallery
.jpg)
.jpg)
.jpg)


.jpg)

