Welcome to Wargaming.net Wiki!
Variants

Mogami

Jump to: navigation, search
Revision as of 10:01, 23 January 2017Revision as of 07:41, 15 May 2017
Line 26:Line 26:
 * 203's reload time is slower than Myoko's by a second * 203's reload time is slower than Myoko's by a second
 * 155's have a very low shell velocity, making long-range sniping hard. * 155's have a very low shell velocity, making long-range sniping hard.
?* 155 turrets turn very slowly at 51 degrees, although the Expert Marksman skill slightly mitigates this+* 155mm turrets turn slowly at 36 seconds for 180 degrees, although the Expert Marksman skill and the [[Ship:Upgrades#Main_Armaments_Modification.C2.A02|Main Armaments Modification 2]] upgrade help mitigate this
 * Inconvenient torpedo tube placement, very limited arc * Inconvenient torpedo tube placement, very limited arc
  

Revision as of 07:41, 15 May 2017

Mogami
Mogami_wows_main.jpg
Cruiser | Japan | Tier VIII
Tech Tree Position
Myōkō
Arrow_down.png
Mogami_icon_small.png
Arrow_down.png
Ibuki
stock
 top
General
Research price109000 exp
Purchase price8,800,000 Credits
Hit Points35,500 
Main Battery
155 mm/60 3rd Year Type in a triple turret5 х 3 pcs.
Rate of Fireshots/min.
Reload Time10 sec.
Rotation Speeddeg./sec.
180 Degree Turn Time36 sec.
Firing Range14.25 km.
Maximum Dispersion131 m.
HE Shell155 mm HE Type0 
Maximum HE Shell Damage2,600 
Chance of Fire on Target Caused by HE Shell10 %
Initial HE Shell Velocity925 m./s.
HE Shell Weight55.87 kg.
AP Shell155 mm AP/APC Type91 
Maximum AP Shell Damage3,300 
Initial AP Shell Velocity925 m./s.
AP Shell Weight55.87 kg.
Secondary Armament #1
127 mm/40 Type 89 on a Model A1 Mod.1 mount4 х 2 pcs.
Firing Range6.6 km.
Rate of Fireshots/min.
Reload Time7.5 sec.
HE Shell127 mm HE Type0 
Maximum HE Shell Damage2,100 
Initial HE Shell Velocity725 m./s.
Chance of Fire on Target Caused by HE Shell%
Torpedo Tubes
610 mm Quad4 х 4 pcs.
Rate of Fire0.59 shots/min.
Reload Time101 sec.
Rotation Speed25 deg./sec.
180 Degree Turn Time7.2 sec.
TorpedoType90 mod. 1 
Maximum Damage17,233 
Torpedo Speed62 knot
Torpedo Range9.99 km.
AA Defense
127 mm/40 Type 89 on a Model A1 Mod.1 mount4 х 2 pcs.
. . . Average Damage per Second40.4 
. . . Firing Range5.01 km.
25 mm/60 Type 96 on a triple mount6 х 3 pcs.
. . . Average Damage per Second19.8 
. . . Firing Range2.49 km.
25 mm/60 Type 96 on a twin mount6 х 2 pcs.
. . . Average Damage per Second16.2 
. . . Firing Range2.49 km.
Maneuverability
Maximum Speed34.5 knot
Turning Circle Radius750 m.
Rudder Shift Time9.3 sec.
Concealment
Surface Detectability Range11.7 km.
Air Detectability Range7.16 km.
Battle Levels
12345678910
Wows_anno_flag_japan.png
VIII
Ship_PJSC009_Mogami_1935.png
8,800,000

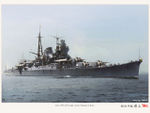
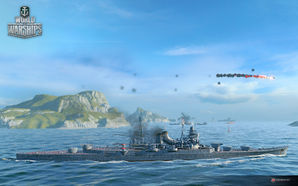
Mogami — Japanese Tier VIII cruiser.

According to the London Naval Treaty, Japan had the right to build cruisers with artillery up to 155 mm. New cruisers with 155 mm guns were ordered, but the weaponry was later replaced with 203 mm (8-inch) guns. During World War II, Mogami participated in the occupation of Indochina, as well as the invasions of Malaya, Sarawak, and Indonesia. She also fought in the Sunda Strait, the Battle of Midway, and the Battle of the Philippine Sea. On October 25, 1944, during the Battle of Leyte Gulf, Mogami was heavily damaged by American torpedo bombers and finally finished off by destroyer Akebono.

Modules

Main Battery Guns Rate of Fire
(shots/min)
180° Turn Time
(sec)
Maximum Dispersion
(m)
Maximum HE Shell Damage
(HP)
Chance of Fire on Target Caused by HE Shell
(%)
Maximum AP Shell Damage
(HP)
Research price
(exp)
Purchase price
(Credits)
155 mm/60 3rd Year Type in a triple turret6361312,600103,300 0700,000
203 mm/50 3rd Year Type No.2 in a Model E3/E turret4.3301213,300174,700 15,0001,600,000
Hull Hit Points
(HP)
Armor
(mm)
Armor
(mm)
Main Turrets
(pcs.)
Secondary Gun Turrets
(pcs.)
AA Mounts
(pcs.)
Torpedo Tubes
(pcs.)
Hangar Capacity
(pcs.)
Research price
(exp)
Purchase price
(Credits)
Mogami (A)35,5006140546/6/44 0690,000
Mogami (B)39,10061405410/4/8/44 28,0002,100,000
Torpedoes Rate of Fire
(shots/min)
Torpedo Tubes Reload Time
(sec)
180° Turn Time
(sec)
Maximum Damage
(HP)
Torpedo Speed
(knot)
Torpedo Range
(km)
Research price
(exp)
Purchase price
(Credits)
Type90 mod. 10.61017.217,2336210 01,300,000
Fire Control System IDS_SHIP_PARAM_SUO_INCREASE_DIST
(%)
Maximum Firing Range
(km)
Research price
(exp)
Purchase price
(Credits)
Type8 mod. 10 0420,000
Type8 mod. 20 12,000900,000
Engine Maximum Speed
(knot)
Research price
(exp)
Purchase price
(Credits)
Propulsion: 152,000 hp34.5 0650,000

Compatible Upgrades

 Slot 1 
Main Armaments Modification 1
Auxiliary Armaments Modification 1
Magazine Modification 1
Damage Control Party Modification 1
 Slot 2 
Damage Control System Modification 1
Defensive AA Fire Modification 1
Hydroacoustic Search Modification 1
Engine Room Protection
 Slot 3 
Main Battery Modification 2
Secondary Battery Modification 1
AA Guns Modification 1
Aiming Systems Modification 1
Torpedo Tubes Modification 1
 Slot 4 
Damage Control System Modification 2
Propulsion Modification 1
Steering Gears Modification 1
Airstrike Modification 1
 Slot 5 
Torpedo Lookout System
Concealment System Modification 1
Steering Gears Modification 2
Ship Consumables Modification 1

Player Opinion

Performance

Affectionately called "Mogamin" by some, the Mogami has a rather unique style in gameplay among all the cruisers at the current iteration as she can have two modes of offense: her 155's which can burn or pummel ships or the harder yet slower loading 203's which technically turns her into a heavy cruiser. The 155 guns comes at her stock hull as she was actually armed with them before being reformatted and reclassified as a heavy cruiser in between 1938 to 1939 and once you fully upgrade the heavy cruiser, this heavy cruiser can, to an extent, emulate the infamous US tier 6 light cruiser Cleveland in terms of ability to pummel enemy ships into submission such as battleships which makes her into a more armored version of the infamous American light cruiser with better range albeit with very slow turning turrets. The 203's make her into a standard heavy cruiser that has good damage at the cost of slower loading time and reasonable turret turn although this gives her the much needed punch to deal with other heavy cruisers and potentially battleships. Whatever guns you mount, you will find her to be one dynamic ship at her tier.

Pros:

  • Modular gun system which gives you freedom of play style
  • Reasonable range
  • Friendly ergonomics and handling
  • Good shell and turret turning speed on the 203's
  • Impressive rudder shift
  • Good torpedo range
  • Very high concealment rating if installed with concealment mod and with the commander's concealment expert, will have the detection range at an astounding 9.3 km for a cruiser her size
  • Impressive turret speed of 26.2 seconds if the commander has expert marksman

Cons:

  • the AA suite, despite having a good array, is insufficient to defend yourself alone
  • 155 turrets have a good chance to be incapacitated, if not outright destroyed
  • The 155's, although very effective against destroyers and setting fires on carriers, will have problems against battleships, forcing the player to rely on HE to deal damage and set the deck on fire and still doing little damage against the heavy armor.
  • 203's reload time is slower than Myoko's by a second
  • 155's have a very low shell velocity, making long-range sniping hard.
  • 155mm turrets turn slowly at 36 seconds for 180 degrees, although the Expert Marksman skill and the Main Armaments Modification 2 upgrade help mitigate this
  • Inconvenient torpedo tube placement, very limited arc

Research

Due to her detection range, it is suggested to research hull B, then acquire the top GFCS, then the 203's and finally hull C for more AA guns.

Optimal Configuration


Commander Skills

Gallery

Historical Info

Historical Gallery

Ships of Japan
Destroyers  II TachibanaDoubloons • II Umikaze • II Tachibana LimaDoubloons • III Wakatake • IV Isokaze • V Minekaze • V FūjinDoubloons • V KamikazeDoubloons • V Kamikaze RDoubloons • V Mutsuki • VI Fubuki • VI Hatsuharu • VI Shinonome BDoubloons • VI ShinonomeDoubloons • VII Akatsuki • VII Shiratsuyu • VII YūdachiDoubloons • VIII Akizuki • VIII Kagerō • VIII AsashioDoubloons • VIII HSF Harekaze IIDoubloons • VIII Asashio BDoubloons • VIII HSF HarekazeDoubloons • VIII AL YukikazeDoubloons • IX Yūgumo • IX Kitakaze • IX MinegumoDoubloons • IX STAR KitakazeDoubloons • X Shimakaze • X Harugumo • X HayateDoubloons •  Yamagiri 
Cruisers  I Hashidate • II Chikuma • III Tenryū • III KatoriDoubloons • IV YūbariDoubloons • IV Kuma • IV Iwaki AlphaDoubloons • V Furutaka • V Agano • V YahagiDoubloons • VI Aoba • VI Gokase • VII Myōkō • VII Omono • VII TokachiDoubloons • VII MayaDoubloons • VII ARP MyōkōDoubloons • VII ARP AshigaraDoubloons • VII ARP HaguroDoubloons • VII Southern DragonDoubloons • VII Eastern DragonDoubloons • VII ARP NachiDoubloons • VIII Mogami • VIII ToneDoubloons • VIII AtagoDoubloons • VIII Shimanto • VIII Atago BDoubloons • VIII ARP TakaoDoubloons • VIII ARP MayaDoubloons • IX Ibuki • IX Takahashi • IX AzumaDoubloons • IX AL AzumaDoubloons • IX Chikuma II • X Zaō • X Yodo • X YoshinoDoubloons • X Yoshino BDoubloons • X Kitakami 
Battleships  II MikasaDoubloons • III Kawachi • IV Myōgi • IV IshizuchiDoubloons • V Kongō • V ARP KongōDoubloons • V ARP KirishimaDoubloons • V ARP HarunaDoubloons • V ARP HieiDoubloons • V HSF HieiDoubloons • VI Fusō • VI MutsuDoubloons • VI IseDoubloons • VII Nagato • VII AshitakaDoubloons • VII HyūgaDoubloons • VIII Amagi • VIII Yumihari • VIII KiiDoubloons • VIII Ignis PurgatioDoubloons • VIII RagnarokDoubloons • IX Izumo • IX Adatara • IX MusashiDoubloons • IX HizenDoubloons • IX IwamiDoubloons • IX DaisenDoubloons • IX TsurugiDoubloons • IX Iwami BDoubloons • X Yamato • X Bungo • X ShikishimaDoubloons • X ARP YamatoDoubloons •  Satsuma 
Aircraft Carriers  IV Hōshō • VI Ryūjō • VIII Shōkaku • VIII KagaDoubloons • VIII Kaga BDoubloons • X Hakuryū •  Sekiryu
Cruisers
Japan  I Hashidate • II Chikuma • III Tenryū • III KatoriDoubloons • IV YūbariDoubloons • IV Kuma • IV Iwaki AlphaDoubloons • V Furutaka • V Agano • V YahagiDoubloons • VI Aoba • VI Gokase • VII Myōkō • VII Omono • VII TokachiDoubloons • VII MayaDoubloons • VII ARP MyōkōDoubloons • VII ARP AshigaraDoubloons • VII ARP HaguroDoubloons • VII Southern DragonDoubloons • VII Eastern DragonDoubloons • VII ARP NachiDoubloons • VIII Mogami • VIII ToneDoubloons • VIII AtagoDoubloons • VIII Shimanto • VIII Atago BDoubloons • VIII ARP TakaoDoubloons • VIII ARP MayaDoubloons • IX Ibuki • IX Takahashi • IX AzumaDoubloons • IX AL AzumaDoubloons • IX Chikuma II • X Zaō • X Yodo • X YoshinoDoubloons • X Yoshino BDoubloons • X Kitakami 
U.K.  I Black Swan • II Weymouth • III Caledon • IV Danae • V Emerald • V Hawkins • V ExeterDoubloons • VI Leander • VI Devonshire • VI LondonDoubloons • VI DidoDoubloons • VI Orion '44Doubloons • VII Fiji • VII Surrey • VII BelfastDoubloons • VIII Edinburgh • VIII Albemarle • VIII CheshireDoubloons • VIII Tiger '59Doubloons • VIII Belfast '43Doubloons • VIII HampshireDoubloons • VIII NottinghamDoubloons • VIII AL CheshireDoubloons • VIII STAR EdinburghDoubloons • IX Neptune • IX Drake • X Monmouth • X Minotaur • X Goliath • X PlymouthDoubloons • X GibraltarDoubloons • X Defence •  Edgar 
France  I Bougainville • II Jurien de la Gravière • III Friant • IV Duguay-Trouin • V Émile Bertin • VI La Galissonnière • VI De GrasseDoubloons • VI DupleixDoubloons • VI MontcalmDoubloons • VII Algérie • VII ToulonDoubloons • VIII Charles Martel • VIII Cherbourg • VIII BayardDoubloons • IX Saint-Louis • IX Brest • IX CarnotDoubloons • X Henri IV • X Marseille • X ColbertDoubloons •  Condé 
U.S.S.R.  I Orlan • II DianaDoubloons • II Diana LimaDoubloons • II Novik • III AuroraDoubloons • III Bogatyr • III OlegDoubloons • III VaryagDoubloons • III AL AvroraDoubloons • IV Svietlana • V MurmanskDoubloons • V Kotovsky • V Krasny KrymDoubloons • V MikoyanDoubloons • V KirovDoubloons • VI Budyonny • VI MolotovDoubloons • VI Admiral MakarovDoubloons • VII Shchors • VII LazoDoubloons • VII Lazo BDoubloons • VIII Chapayev • VIII Tallinn • VIII Mikhail KutuzovDoubloons • VIII OchakovDoubloons • VIII Pyotr BagrationDoubloons • VIII Dmitry PozharskyDoubloons • IX Dmitri Donskoi • IX Riga • IX KronshtadtDoubloons • X MoskvaDoubloons • X Alexander Nevsky • X Petropavlovsk • X StalingradDoubloons • X Smolensk B • X SmolenskDoubloons • X SevastopolDoubloons • X Kommissar •  Novosibirsk 
U.S.A.  I Erie • II Chester • II AlbanyDoubloons • III St. Louis • III CharlestonDoubloons • IV Phoenix • V Omaha • V MarbleheadDoubloons • V Marblehead LimaDoubloons • V RattleheadDoubloons • VI Pensacola • VI Dallas • VII AtlantaDoubloons • VII New Orleans • VII Helena • VII IndianapolisDoubloons • VII Atlanta BDoubloons • VII BoiseDoubloons • VII FlintDoubloons • VIII Baltimore • VIII Cleveland • VIII WichitaDoubloons • VIII AnchorageDoubloons • VIII CongressDoubloons • VIII RochesterDoubloons • VIII San DiegoDoubloons • VIII AL MontpelierDoubloons • IX Buffalo • IX Seattle • IX VallejoDoubloons • IX AlaskaDoubloons • IX TulsaDoubloons • IX Alaska BDoubloons • X Des Moines • X Worcester • X Puerto RicoDoubloons • X SalemDoubloons • X AustinDoubloons •  Annapolis 
Germany  I Hermelin • II Dresden • II EmdenDoubloons • III Kolberg • IV Karlsruhe • V Königsberg • VI Nürnberg • VI Admiral Graf SpeeDoubloons • VI LeipzigDoubloons • VI HSF Admiral Graf SpeeDoubloons • VII Yorck • VII MünchenDoubloons • VII WeimarDoubloons • VIII Admiral Hipper • VIII Prinz EugenDoubloons • VIII MainzDoubloons • VIII SchillDoubloons • VIII Mainz BDoubloons • VIII Cross of DornDoubloons • VIII Wiesbaden • IX Roon • IX SiegfriedDoubloons • IX ÄgirDoubloons • IX Admiral SchröderDoubloons • IX Roon CLRDoubloons • X Hindenburg •  Clausewitz 
Pan-Asia  I Chengan • III Ning HaiDoubloons • V Chungking • VI Rahmat • VI HuangheDoubloons • VII Chumphon • VIII Harbin • VIII IrianDoubloons • VIII WukongDoubloons • IX Sejong • IX DalianDoubloons • IX MengchongDoubloons • IX TianjinDoubloons • X Jinan 
Spain  I Júpiter • II Méndez Núñez • III Navarra • IV Almirante Cervera • V Galicia • VI Baleares • VI CanariasDoubloons • VII Asturias • VIII Cataluña • VIII NumanciaDoubloons • IX Andalucía • X Castilla 
Europe  I Gryf • VI ElliDoubloons 
Netherlands  I Van Kinsbergen • II Gelderland • III Java • IV De Ruyter • V Celebes • VI Kijkduin • VII Eendracht • VIII Haarlem • VIII De Zeven ProvinciënDoubloons • IX Johan de Witt • IX Van SpeijkDoubloons • X Gouden Leeuw • X Prins van Oranje 
Italy  I Eritrea • II Nino Bixio • III Taranto • IV Alberto di Giussano • V Raimondo Montecuccoli • V GenovaDoubloons • VI Trento • VI Duca d'AostaDoubloons • VII Zara • VII Duca degli AbruzziDoubloons • VII Francesco FerruccioDoubloons • VII GoriziaDoubloons • VIII Amalfi • IX Brindisi • IX MichelangeloDoubloons • X Venezia • X NapoliDoubloons • X Napoli BDoubloons •  Piemonte 
Commonwealth  I Sutlej • II Port Jackson • III Caradoc • IV Dunedin • V Delhi • VI Hobart • VI PerthDoubloons • VI MysoreDoubloons • VII Uganda • VIII Auckland • IX Encounter • IX HectorDoubloons • X Cerberus • X BrisbaneDoubloons 
Pan-America  I Hércules • II Almirante Barroso • II Almirante AbreuDoubloons • III Vicente Guerrero • IV Córdoba • V La Argentina • VI Almirante Cochrane • VII Coronel Bolognesi • VII Nueve de JulioDoubloons • VIII Ignacio Allende • VIII Almirante GrauDoubloons • IX Santander • X San Martín