South Carolina
| Revision as of 23:00, 11 August 2017 | Revision as of 14:05, 12 August 2017 Added upgrades, consumables, and camouflage recommendations. | |||
| Line 28: | Line 28: | |||
| |OptimalConfiguration=<!-- write some general text about selection of optimal configuration below (optional)--> | |OptimalConfiguration=<!-- write some general text about selection of optimal configuration below (optional)--> | |||
| + | ||||
| + | |Upgrades=<!-- write text about best upgrades below --> | |||
| + | ||||
| + | * Slot 1 - Main Armaments Modification 1. | |||
| + | * Slot 2 - Damage Control System Modification 1. | |||
| |CommanderSkills=<!-- write text about best set of Commander Skills below --> | |CommanderSkills=<!-- write text about best set of Commander Skills below --> | |||
| Line 68: | Line 73: | |||
| | Concealment Expert = 3 | | Concealment Expert = 3 | |||
| }} | }} | |||
| + | ||||
| + | |Consumables=<!-- write text about selection of Consumables below --> | |||
| + | ||||
| + | Premium Damage Control Party and Repair Party [[Ship:Consumables|consumables]] are incredibly helpful for low-tier ships like the ''South Carolina.'' She'll be able to stay afloat and therefore influence the battle longer. | |||
| + | ||||
| + | |Camouflage=<!-- write text about useful camouflage below --> | |||
| + | ||||
| + | [[Ship:Camouflage|camouflage]] is not very necessary for the ''South Carolina'' due to her low-tier nature. The XP "grind" does not set in until Tier V or VI, so save your 100% bonus XP camos for later. If you want to paint your ship, choose Type 2 camouflage, which decreases the accuracy of incoming enemy fire. Camos that offer -3% detectability are not helpful, as ''South Carolina'' has very poor concealment. | |||
| |Signals=<!-- write text about best set of signals below --> | |Signals=<!-- write text about best set of signals below --> | |||
Revision as of 14:05, 12 August 2017
[[File:<value_unset_error>_icon_small.png|<value_unset_error>|link=Ship:<value_unset_error>]] [[File:<value_unset_error>_icon_small.png|<value_unset_error>|link=Ship:<value_unset_error>]] [[File:<value_unset_error>_icon_small.png|<value_unset_error>|link=Ship:<value_unset_error>]] |
| File:icon small.png |
[[File:<value_unset_error>_icon_small.png|<value_unset_error>|link=Ship:<value_unset_error>]] [[File:<value_unset_error>_icon_small.png|<value_unset_error>|link=Ship:<value_unset_error>]] [[File:<value_unset_error>_icon_small.png|<value_unset_error>|link=Ship:<value_unset_error>]] |
| Research pricelevel;mark_id;mark;shortmark_id;shortMark;description_id;description;price_credit;price_gold;nation;icon;name;aa_caliber_0;aa_caliber_1;aa_caliber_2;aa_caliber_3;aa_damage;aa_defense;aa_maxDist;aaMaxdist;aa_maxDist_0;aaMaxdist0;aa_maxDist_1;aaMaxdist1;aa_maxDist_2;aaMaxdist2;aa_maxDist_3;aaMaxdist3;aa_name_0;aaName0;aa_name_1;aaName1;aa_name_2;aaName2;aa_name_3;aaName3;aa_numBarrels_0;aaNumbarrels0;aa_numBarrels_1;aaNumbarrels1;aa_numBarrels_2;aaNumbarrels2;aa_numBarrels_3;aaNumbarrels3;aa_numGuns_0;aaNumguns0;aa_numGuns_1;aaNumguns1;aa_numGuns_2;aaNumguns2;aa_numGuns_3;aaNumguns3;air_support;air_support_bombDamage_depthcharge;air_support_bombName_depthcharge;air_support_maxDist_depthcharge;air_support_numBombsOnPlane_depthcharge;air_support_numPlanesInCharge_depthcharge;air_support_numSquadrons_depthcharge;air_support_planeMaxHealth_depthcharge;air_support_planeName_depthcharge;air_support_reloadTime_depthcharge;armour_casMax;armourCasmax;armour_casMin;armourCasmin;armour_citMax;armourCitmax;armour_citMin;armourCitmin;armour_deckMax;armourDeckmax;armour_deckMin;armourDeckmin;armour_extremitiesMax;armourExtremitiesmax;armour_extremitiesMin;armourExtremitiesmin;armour_rangeMax;armourRangemax;armour_rangeMin;armourRangemin;artillery_weaponry;atba_bulletMassHE_0;atba_bulletMassHE_1;atba_bulletSpeedHE_0;atba_bulletSpeedHE_1;atba_burnProbHE_0;atba_burnProbHE_1;atba_caliber_0;atba_caliber_1;atba_damageHE_0;atba_damageHE_1;atba_maxDist;atbaMaxdist;atba_nameHE_0;atba_nameHE_1;atba_name_0;atbaName0;atba_name_1;atbaName1;atba_numBarrels_0;atba_numBarrels_1;atba_numGuns_0;atba_numGuns_1;atba_piercingHE_0;atba_piercingHE_1;atba_shotDelay_0;atba_shotDelay_1;atba_shotSpeed;atba_shotSpeed_0;atba_shotSpeed_1;battleLevelRangeMax;battleLevelRangeMin;durability;floodDamage;health;mobility;mobility_maxSpeed;mobilityMaxspeed;mobility_rudderTime;mobilityRuddertime;mobility_turningRadius;mobilityTurningradius;planes_aviation;planes_bomber_forsageRestore;planes_bomber_forsageTime;planes_bomber_hangarVolume;planes_bomber_level;planes_bomber_maxSpeed;planes_bomber_name;planes_bomber_numAttackers;planes_bomber_numInSquadron;planes_bomber_numSquadrons;planesBomberNumsquadrons;planes_bomber_planesRestoreTime;planes_bomber_speed;planes_bomber_torpedo_maxDamage;planes_bomber_torpedo_maxDist;planes_bomber_torpedo_name;planes_bomber_torpedo_speed;planes_bomber_visibility;planes_bomber_vitality;planes_dive_bomb_bulletMassHE_alt;planes_dive_bomb_bulletMass_alt;planes_dive_bomb_bulletSpeedHE_alt;planes_dive_bomb_bulletSpeed_alt;planes_dive_bomb_burnProbHE_alt;planes_dive_bomb_burnProb_alt;planes_dive_bomb_damageHE_alt;planes_dive_bomb_nameHE_alt;planes_dive_bomb_numBombsHE_alt;planes_dive_forsageRestore_alt;planes_dive_forsageTime_alt;planes_dive_hangarVolume_alt;planes_dive_level_alt;planes_dive_maxSpeed_alt;planes_dive_name_alt;planes_dive_numAttackers_alt;planes_dive_numInSquadron_alt;planes_dive_numSquadrons_alt;planes_dive_planesRestoreTime_alt;planes_dive_speed_alt;planes_dive_visibility_alt;planes_dive_vitality_alt;planes_fighter_forsageRestore_alt;planes_fighter_forsageTime_alt;planes_fighter_hangarVolume_alt;planes_fighter_level_alt;planes_fighter_maxSpeed_alt;planes_fighter_name_alt;planes_fighter_numAttackers_alt;planes_fighter_numInSquadron_alt;planes_fighter_numSquadrons_alt;planes_fighter_planesRestoreTime_alt;planes_fighter_rocket_bulletMassHE_alt;planes_fighter_rocket_bulletSpeedHE_alt;planes_fighter_rocket_burnProbHE_alt;planes_fighter_rocket_damageHE_alt;planes_fighter_rocket_nameHE_alt;planes_fighter_rocket_numBombsHE_alt;planes_fighter_speed_alt;planes_fighter_visibility_alt;planes_fighter_vitality_alt;slotsNum;visibility_detection;visibility_distByPlane;visibilityDistbyplane;visibility_distByPlane_fire;visibility_distByPlane_mg;visibility_distByShip;visibilityDistbyship;visibility_distByShip_fire;visibility_distByShip_mg;visibility_distByShip_smoke;visibility_distBySubmarine exp |
| Purchase priceSpecial |
| Maximum SpeedExpression error: Unexpected * operator. knot |
[[Ship:|]] — N/A special premium Tier N/A.
IDS__descr
Modules
Compatible Upgrades
| Slot 1 |
||||||||||||||||||||||||||||
|---|---|---|---|---|---|---|---|---|---|---|---|---|---|---|---|---|---|---|---|---|---|---|---|---|---|---|---|---|
| Slot 2 |
Damage Control System Modification 3 | |||||||||||||||||||||||||||
| Slot 3 |
||||||||||||||||||||||||||||
| Slot 4 |
||||||||||||||||||||||||||||
| Slot 5 |
Torpedo Tubes Modification 3 |
Reinforced Bulkheads | ||||||||||||||||||||||||||
| Slot 6 |
Player Opinion
Performance
The first Battleship in the American tech tree, the South Carolina is a fairly decent ship. For its tier, she has quite good armor and range, which prove to only be a problem when she faces higher tier ships. The South Carolina is one of the first ships in the game to feature superfiring main turrets which allows for maximum firepower when maintaining a small silhouette. She does have severe limitations however when it comes to speed (a pattern that is repeated with the succeeding U.S. Battleships until North Carolina), and maintains a top speed when upgraded of only 18kts.
Players who want to do well with her will utilize her strengths. She is not a long-range sniper; she is a brawler. Make sure that South Carolina is always headed towards the fight. Load AP shells and citadel cruisers and battleships at close range. Turn away and kite once the enemy begins to chase you. Don't be afraid of destroyers; blast them with a broadside and turn away in anticipation of their torpedoes. Just like any other ship, it's generally best to remain with the fleet and always angle her from enemy battleships.Pros:
- Decent guns for tier: receives eight 305mm guns with a greater range and better handling than her Japanese tier counterpart Kawachi.
- Superfiring turrets: can train at least half her guns in any direction, and bring all eight guns to bear on most aspects for a broadside.
- Good armor for tier.
- Good turning radius.
- Good accuracy and penetration against broadside cruisers and battleships.
Cons:
- Completely outmatched by higher tiers: tier IV battleships completely outrange and outpace her, and carry more or heavier armament.
- Poor secondary armament: extremely weak AA armament though unlikely to encounter aircraft at her tier, and ineffective 76.2mm secondary guns leave her vulnerable to destroyers.
- Abysmally slow top speed: she can make only 15.8kts stock, and not much better upgraded, making her one of the slowest ships in the game.
- High detection range: with a more than 2km detection gap between her detection and firing range, she can be left helpless when facing opponents that outrange her.
- Short range on guns is a poisonous combination with low speed.
- General sluggishness can be frustrating to new players who have never experienced piloting battleships.
Research
Optimal Configuration
Upgrades
- Slot 1 - Main Armaments Modification 1.
- Slot 2 - Damage Control System Modification 1.
Commander Skills
| Recommended Commander Skills | ||||||||
|---|---|---|---|---|---|---|---|---|
| Cost (points) |
Endurance | Attack | Support | Versatility | ||||
| 1 |
★★★ |
★ |
★ |
|
|
|
★ |
|
| 2 |
★★ |
★★ |
★★★ |
|
|
|
★★★ |
|
| 3 |
★★★ |
★ |
|
|
★★ |
★★★ |
|
★★ |
| 4 |
|
★★★ |
|
|
★★ |
|
|
★★★ |
| Key: ★★★ - Extremely Useful ★★ - Frequently Useful ★ - Occasionally Useful No stars - Meh Χ - Not recommended | ||||||||
Consumables
Premium Damage Control Party and Repair Party consumables are incredibly helpful for low-tier ships like the South Carolina. She'll be able to stay afloat and therefore influence the battle longer.
Camouflage
camouflage is not very necessary for the South Carolina due to her low-tier nature. The XP "grind" does not set in until Tier V or VI, so save your 100% bonus XP camos for later. If you want to paint your ship, choose Type 2 camouflage, which decreases the accuracy of incoming enemy fire. Camos that offer -3% detectability are not helpful, as South Carolina has very poor concealment.
Signals
Recommended Signal Flags 
| |||||
|---|---|---|---|---|---|
| Combat | |||||
 ★ |

|
 ★★★ |
 ★★ |
 ★ |
 ★ |
 ★★★ |
 ★ |
 ★ |
 ★ |
 ★★★ |
 ★★★ |

|

| ||||
Note: Use of the Juliet Charlie signal makes detonation impossible.
Gallery
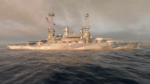
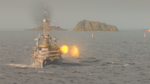
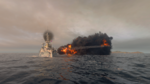
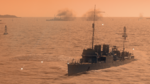
An enemy Clemson maneuvers to avoid South Carolina's salvo.


Historical Info
Historical Gallery


_title.jpg)


| Destroyers | |
| Cruisers | |
| Battleships | |
| Aircraft Carriers |
| Japan | |
| U.K. | |
| France | |
| U.S.S.R. | |
| U.S.A. | |
| Germany | |
| Pan-Asia | |
| Spain | |
| Europe | |
| Netherlands | |
| Italy | |
| Commonwealth | |
| Pan-America |