Tashkent

| Research price160000 exp |
| Purchase price13,200,000 |
| Hit Points16,700 |
| 130 mm/50 Model 1936 on a B-2LM mount3 х 2 pcs. |
| Rate of Fire12 shots/min. |
| Reload Time5 sec. |
| Rotation Speed9.7 deg./sec. |
| 180 Degree Turn Time18.56 sec. |
| Firing Range11.53 km. |
| Maximum Dispersion110 m. |
| HE ShellHE-46 |
| Maximum HE Shell Damage1,900 |
| Chance of Fire on Target Caused by HE Shell8 % |
| Initial HE Shell Velocity870 m./s. |
| HE Shell Weight33.4 kg. |
| AP ShellSAP-46 |
| Maximum AP Shell Damage2,500 |
| Initial AP Shell Velocity870 m./s. |
| AP Shell Weight33.5 kg. |
| 533 mm Triple 1-N3 х 3 pcs. |
| Rate of Fire0.86 shots/min. |
| Reload Time70 sec. |
| Rotation Speed25 deg./sec. |
| 180 Degree Turn Time7.2 sec. |
| Torpedo53-36 mod. 2 |
| Maximum Damage14,400 |
| Torpedo Speed55 knot |
| Torpedo Range8.01 km. |
| 130 mm/55 on a B-2-U mount3 х 2 pcs. |
| . . . Average Damage per Second36.9 |
| . . . Firing Range5.19 km. |
| 12.7 mm DShK6 х 1 pcs. |
| . . . Average Damage per Second21.6 |
| . . . Firing Range1.2 km. |
| 37 mm 70-K mount5 х 1 pcs. |
| . . . Average Damage per Second28.5 |
| . . . Firing Range3.21 km. |
| 76 mm Model 1935 on a 39-K mount1 х 2 pcs. |
| . . . Average Damage per Second3.1 |
| . . . Firing Range3.51 km. |
| Maximum Speed42.5 knot |
| Turning Circle Radius730 m. |
| Rudder Shift Time8.5 sec. |
| Surface Detectability Range8.92 km. |
| Air Detectability Range4.3 km. |

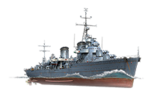
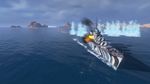
Tashkent — Soviet Tier IX destroyer.
A destroyer flotilla leader intended to perform long-range reconnaissance duties within squadrons and support destroyers' torpedo attacks. She was built in Italy for the U.S.S.R. Navy (Project 20I). During World War II, she was one of the fastest warships in the world and the largest ship of this type.
Modules
 |
Rate of Fire (shots/min) | 180° Turn Time (sec) | Maximum Dispersion (m) | Maximum HE Shell Damage (HP) | Chance of Fire on Target Caused by HE Shell (%) | Maximum AP Shell Damage (HP) |
Research price (exp) |
Purchase price ( | |
|---|---|---|---|---|---|---|---|---|---|
| 130 mm/50 Model 1936 on a B-2LM mount | 12 | 18.6 | 110 | 1,900 | 8 | 2,500 | 0 | 1,000,000 | |
| 130 mm/55 on a B-2-U mount | 12 | 9 | 110 | 1,900 | 8 | 2,600 | 23,500 | 1,800,000 |
 |
Hit Points (HP) | Armor (mm) | Armor (mm) | Main Turrets (pcs.) | Secondary Gun Turrets (pcs.) | AA Mounts (pcs.) | Torpedo Tubes (pcs.) | Hangar Capacity (pcs.) |
Research price (exp) |
Purchase price ( | |
|---|---|---|---|---|---|---|---|---|---|---|---|
| Tashkent (A) | 16,700 | 6 | 20 | 3 | 6/5/1 | 3 | 0 | 1,400,000 | |||
| Tashkent (B) | 21,800 | 6 | 20 | 3 | 6 | 3 | 40,000 | 3,200,000 |
 |
Rate of Fire (shots/min) | Torpedo Tubes Reload Time (sec) | 180° Turn Time (sec) | Maximum Damage (HP) | Torpedo Speed (knot) | Torpedo Range (km) |
Research price (exp) |
Purchase price ( | |
|---|---|---|---|---|---|---|---|---|---|
| 53-36 mod. 2 | 0.9 | 70 | 7.2 | 14,400 | 55 | 8 | 0 | 1,300,000 | |
| 53-39 mod.2 | 0.9 | 69 | 7.2 | 15,100 | 60 | 8 | 20,000 | 1,500,000 |
 |
IDS_SHIP_PARAM_SUO_INCREASE_DIST (%) | Maximum Firing Range (km) |
Research price (exp) |
Purchase price ( | |
|---|---|---|---|---|---|
| GFCS IX mod. 1 | 0 | 0 | 900,000 | ||
| GFCS IX mod. 2 | 0 | 25,000 | 1,900,000 |
 |
Maximum Speed (knot) |
Research price (exp) |
Purchase price ( | |
|---|---|---|---|---|
| Propulsion: 125,500 hp | 42.5 | 0 | 1,100,000 |
Compatible Upgrades
| Slot 1 |
|||||
|---|---|---|---|---|---|
| Slot 2 |
|||||
| Slot 3 |
|||||
| Slot 4 |
|||||
| Slot 5 |
|||||
| Slot 6 |
Player Opinion
Performance
Nicknamed "The Blue Cruiser" despite being a destroyer due to her being larger than a contemporary destroyer and alluding to her historical paint being Cobalt Blue, the Tashkent was much maligned in her previous Tier VIII incarnation. Fortunately, the Tashkent received a package of buffs resulting in a quite serviceable ship even at her new home at Tier IX.
Tashkent retains the excellent guns and speed of Kiev, and, while significantly larger and less maneuverable than Kiev, her generous hit point pool and edge in range (up to 15.2 km with module and Advanced Firing Training) goes a long way towards making up for it. On the offensive side, fast-reloading torpedoes and access to the last upgrade slot are welcome advantages.
Finally, the Tashkent also introduces the intriguing option of replacing her Smoke Generator ![]() consumable with Repair Party
consumable with Repair Party ![]() . Both are viable; while the value of smoke in getting out of bad situations and supporting the team is obvious, the sheer longevity provided by Repair Party cannot be denied either.
. Both are viable; while the value of smoke in getting out of bad situations and supporting the team is obvious, the sheer longevity provided by Repair Party cannot be denied either.
Pros:
- Has lethal HE shells that can burn accompanied by capable AP shells.
- Very fast speed.
- Large amount of hit points for a destroyer.
- Torpedoes reload quickly compared to other high-tier destroyers.
- Gains access to the Repair Party
 consumable (by giving up Smoke Generator
  ).
).
Cons:
- Terrible camouflage values for a destroyer, making scouting a risky proposition.
- Large size, almost the same size as a light cruiser, making you easier to hit and as a result take increased damage from all sources.
- Torpedoes have the same range as the Kiev torpedoes, and have better damage and speed, but with 1 less torpedo per salvo.
- Main battery-wise, the only upgrade from the Kiev to the Tashkent is marginally better firing range.
Research
Optimal Configuration
Upgrades
The recommended upgrades for Tashkent are as follows:
- Slot 1: Main Armaments Modification 1
 as keeping the guns firing is a huge part of the ship's play style.
- Slot 2: Propulsion Modification 1
 as it relies heavily on its speed as a secondary defense to incoming enemy shells.
- Slot 3: Aiming Systems Modification 1
 for better accuracy on long range targets.
- Slot 4: Steering Gears Modification 2
 when stacked with Steering Gears Modification 3 (seen below), allows for having rudder shift much like a USN destroyer.
- Slot 5: Steering Gears Modification 2 (
 ) as the concealment is already poor even without firing and as aforementioned, this allows you to evade shells even better by having rudder shift similar to a USN destroyer.
- Slot 6: Main Battery Modification 3
 as it relies heavily on its main batteries, increasing the reload time on the guns allows for more DPM out of the guns. (Though the hit to the turret traverse should be taken into consideration.)
Captains who have one of the rare Engine Boost Modification 1 ![]() upgrades and have the Sierra Mike (
upgrades and have the Sierra Mike (![]() ) signal equipped are encouraged to replace the Propulsion Modification 1 upgrade, as it extends the Engine Boost
) signal equipped are encouraged to replace the Propulsion Modification 1 upgrade, as it extends the Engine Boost ![]() consumable duration by 50%, thereby allowing her to maintain a max speed of 48.2 knots for three minutes.
consumable duration by 50%, thereby allowing her to maintain a max speed of 48.2 knots for three minutes.
Commander Skills
Tashkent is a gunboat destroyer through and through. Therefore, skills boosting her gunnery are much appreciated. At her core a captain should spec for Priority Target, Last Stand, the captain's choice of either Basic Firing Training, or Superintendent, and finally Advanced Firing Training.
Level 3 of the skill tree is where choices need to be made in her skill selection, as there are four skills are extremely useful and viable forTashkent. Captains have the option of taking Survivability Expert, Basic Firing Training, Demolition Expert, and Superintendent. Generally, the recommended route is to take Basic Firing Training, Demolition Expert, and Surviability Expert.
| Recommended Commander Skills | ||||||||
|---|---|---|---|---|---|---|---|---|
| Cost (points) |
Endurance | Attack | Support | Versatility | ||||
| 1 |
★★★ |
★★ |
|
|
|
|
|
|
| 2 |
★ |
★ |
★ |
|
|
|
★★ |
★★★ |
| 3 |
★ |
★★ |
|
|
★★ |
★★★ |
★★ |
|
| 4 |
|
|
★★ |
|
★★★ |
|
★ |
★ |
| Key: ★★★ - Extremely Useful ★★ - Frequently Useful ★ - Occasionally Useful No stars - Meh Χ - Not recommended | ||||||||
Consumables
Tashkent can equip the following consumables:
- Slot 1: Damage Control Party

- Slot 2: Smoke Generator or Repair Party
- Slot 3: Engine Boost

The second slot will really define how the captain plays this ship. The smoke provides the standard utility of team cover, retreating, and smoke firing. However repair offers a unique playstyle giving captains a survivability increase to assist their gun-fighting capabilities.
Camouflage
Type 1, 2, or 5 camouflage can be equipped for credits; Types 2 or 5 are recommended at a minimum to reduce the accuracy of incoming shells.
Players who wish to spend doubloons can equip Tashkent with Type 19 camouflage that lowers her detection radius, reduces the accuracy of incoming shells, reduces her repair costs, and increases the amount of experience she earns.
Signals
Since Tashkent is a gunboat destroyer with excellent fire starting guns, flags such as Victor Lima (![]() ) and India X-Ray (
) and India X-Ray (![]() ) are great for boosting the fire starting capabilities of the ship. Alongside them, the Juliet Charlie flag (
) are great for boosting the fire starting capabilities of the ship. Alongside them, the Juliet Charlie flag (![]() ) is great for keeping the ship from having a quick trip back to port due to a detonation. Sierra Mike (
) is great for keeping the ship from having a quick trip back to port due to a detonation. Sierra Mike (![]() ) is a great choice for assisting the ship in dodging incoming shells, as this increases her speed.
) is a great choice for assisting the ship in dodging incoming shells, as this increases her speed.
Recommended Signal Flags 
| |||||
|---|---|---|---|---|---|
| Combat | |||||
 ★★★ |

|

|

|
 ★★ |
 ★★ |

|

|

|
 ★★★ |
 ★★ |

|

|

| ||||
Note: Use of the Juliet Charlie signal makes detonation impossible.
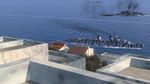
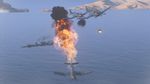
Gallery
Torpedo beats intensify.


Historical Info
Historical Gallery


