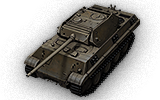
Panther/M10
| |
This article requires additional modification. The design and/or content of this article do not conform to wiki standards.
|
 Panther/M10

Mouse over "
[Client Values; Actual values in
| 5,100 |
| 1300260 HP Hit Points |
| 45.96/4923.7/49 t Weight Limit |
- Commander
- Gunner
- Driver
- Radio Operator
- Loader
| 700700 hp Engine Power |
| 55/20 km/h Speed Limit |
| 3838 deg/s Traverse |
| 15.2329.54 hp/t Power/Wt Ratio |
| YesYes Pivot |
| // mm Hull Armor |
| 100/45/45100/45/45 mm Turret Armor |
AP/APCR/HE
AP/APCR/HE Shells |
109/2800/98
109/2800/98 Shell Cost |
| 135/135/175135/135/175 HP Damage |
| 150/194/38150/194/38 mm Penetration |
|
15 r/m ▲
15 r/m Standard Gun ▲ Rate of Fire Standard Gun |
|
2025 ▲
Standard Gun
▼
Standard Gun
▲
2025 Standard Gun ▲
Standard Gun
▼
Standard Gun
▲ Damage Per Minute Standard Gun |
|
0.32 m ▲
0.32 m With 50% Crew: 0.396 m ▲ Accuracy With 50% Crew: 0.396 m |
| 2.3 s 2.3 s Aim time |
| 3838 deg/s Turret Traverse |
| 360° Gun Arc |
| -8°/+20°-8°/+20° Elevation Arc |
| 8282 rounds Ammo Capacity |
| 2020 % Chance of Fire |
| 365 m 365 m View Range |
| 710 m 710 m Signal Range |
VII
5100
The Panther/M10 is a German tier 7 premium medium tank.
During the preparation of Otto Skorzeny's Panzerbrigade 150 for the Ardennes offensive, four Panther tanks were disguised as M10 tank destroyers. The tank brigade was to carry out diversions deep behind the allied lines. All vehicles were lost during the battle with the 120th U.S. Infantry Regiment on February 21, 1945.
Contrary to what the ingame description says, the Panther/M10 actually saw action on 21 December 1944, not February 1945.
Anyone that has driven a Pz.Kpfw. V Panther will feel right at home. The Panther-M10 is basically a Panther without the magnificent 75mm L/100 gun, 50 less horsepower (which is barely noticeable), and a larger turret. No less of a good tank, the Panther-M10 has an improved aim and reload time with the well proven 75mm L/70 gun and it is still able to put its weight into fights. The tank's low repair costs and high credit income makes it more cost-effective compared to the regular Panther.
The Panther/M10 is the first tank to sport a different color from the rest of the tanks of its nation. Instead of German grey, it is American olive drab.
Modules / Available Equipment and Consumables
Modules

Guns
| Tier | Gun | Penetration (mm) |
Damage (HP) |
Rate of fire (rounds/minute) |
Dispersion (m/100m) |
Aiming time (s) |
Weight (kg) |
Price (
| |
|---|---|---|---|---|---|---|---|---|---|
| VI | 7,5 cm Kw.K. 42 L/70 | 150/194/38 | 135/135/175 | 15 | 0.32 | 2.3 | 955 | 53000 |

Engines
| Tier | Engine | Engine Power (hp) |
Chance of Fire on Impact (%) |
Weight (kg) |
Price (
| |
|---|---|---|---|---|---|---|
| VIII | Maybach HL 230 P30 | 700 | 20 | 1400 | 55000 |

Suspensions
| Tier | Suspension | Load Limit (т) |
Traverse Speed (gr/sec) |
Rmin | Weight (kg) |
Price (
| |
|---|---|---|---|---|---|---|---|
| VII | Panther/M10 | 49 | 38 | 0 | 12500 | 18200 |

Radios
| Tier | Radio | Signal Range (m) |
Weight (kg) |
Price (
| |
|---|---|---|---|---|---|
| VI | FuG 7 Ausf. F | 710 | 70 | 8160 |
Compatible Equipment

![]()


![]()
![]()
![]()
![]()
![]()


![]()

![]()

Compatible Consumables
![]()
![]()
![]()
![]()
![]()
![]()
![]()
![]()
![]()
![]()
![]()
![]()
![]()
![]()
![]()
![]()
![]()
![]()
![]()
![]()
![]()
![]()
![]()
Player Opinion
Pros and Cons
Pros:
- Good rate of fire
- Great accuracy for its tier, and decent accuracy on the move - even without the benefit of a Vertical Stabilizer
- Excellent speed and traverse
- Excellent turret traverse
- Low repair cost and high credit income
Cons:
- Mediocre thickness on the armor
- Retains the thin lower glacis weakpoint from the Panther. When penetrated, the tanks tends to light on fire
- Lowest damage per shot compared to other tier 7 medium tanks, excluding the regular Panther
- Barely sufficient penetration against tier 8 tanks
- Inferior to a fully upgraded Panther in some aspects
Performance
The performance of this tank is highly variable. Even though this tank can feel really bad at times, it has some amazing features such as its fire rate and accuracy. These can make this tank play very well in games where other tier 7 mediums would not play well, and can even fight tier 8's with support from teammates.
With this tanks strengths and weaknesses it can take on most tier 7's and under with minimal help, but only a teammate or two will help you do a bit more damage or prevent them from circling around. A big problem for this tank is its low damage potential, making this tank very weak against most tier 8 heavy's with their large health pools and high powered weaponry. Even though this tank has only an average of 140 damage per shot, you can still deal a good amount of damage even to tanks such as the T29 or Tiger II if you aim for their weak spots and disable critical modules allowing you to gain control of the situation.
You must always keep in mind that with this tank you are a support unit, with your role being to assist your teammates in battle. As a result, always aim for the enemies tracks, engine, or any other vulnerable parts of the vehicle that can disabled to make it easier to allow your team to finish the job. With its fire rate and accuracy, you are guaranteed to be able to continually disable them. Also, as a support unit, you should always be watching the flanks and trying to keep up with the movements of your enemies if possible, since you do not want to be the person that misses the scouts breaking through your lines of defense. Here, the good turret traverse, RoF, and accuracy make it excellent at tracking and killing scouts.
The M10 should not be driven head on against heavy tanks as the damage it inflicts can be rather low. This tank excels as a sniper or support unit, and it is very maneuverable, being able to assist tanks quickly on separate fronts, and can lay waste to any tier 7 (or lower) medium and light tanks with little effort. Keep in mind that heavy tanks are frequently encountered in tier 7 and 8 battles, so putting the M10 on the front lines can result in almost certain death.
This tank excels especially when played in a wolfpack of 2 or more in a platoon. A wolfpack is able to deal considerable damage to enemy tanks that have been separated from their allies.
Do not judge its armor too harshly - it is able to bounce shots from many vehicles in a similar fashion to the original Panther in game. The Panther M10 also lacks a cupola; or any at all. This makes it good in hull-down locations. The gun mantlet has a habit of taking 0 damage from shots, but don't trust it too much. Due to its high profile, hiding from behind a bush will still reveal the tank's position even when sniping from long range (depending on an enemy tank's view range). Unless you're a dedicated sniper, training the Camouflage skill as early as possible is a must.
Suggested Equipment
![]()
![]()
![]()
![]()
![]()
![]()
![]()
Gallery
Historical Info

In late 1944, Hitler was planning one last desperate offensive to attempt to obtain a separate peace from the Western Allies. The Wacht am Rhein plan was designed to split the British and American armies as well as capture Antwerp. This battle, of course, became known as the Battle of the Bulge in the West. As a part of the Wacht am Rhein plan was Operation Greif under the command of Otto Skorzeny. English speaking German commandos in American uniforms and using as much American equipment as possible would infiltrate American positions to seize bridges across the Meuse. This unit, innoculously entitled Panzer Brigade 150 was supposed to consist of 3,300 men, 15 Sherman tanks, 32 armored cars (U.S.), 198 trucks, and 147 jeeps which had been requisition from OB West. Unfortunately for the brigade, the required equipment never materialized. Panzer Brigade 150 went into battle with only about 2,500 men and a dozen tanks and assault guns. Several of the tanks were Panther usf. 's extensively modified to look like U.S. M-10 tank destroyers.
Vehicle modifications
Turret

The turret was disguised by using five pieces of sheet metal, two of which were cut to resemble the distinctive sides of the M10 turret and then were flanged on the edges, bent to shape, and stiffened with small angle iron. The gun shield was carefully formed from another sheet to the exact shape of the M10 shield, and a hole was made to the right of the gun hole in the shield for the co-axial M.G. 34, a hole which does not exist in the M10 shield. Two pieces of sheet metal made up the rear of the turret, one representing the bottom slant surface of the rear and one representing the counterweight. The pieces representing the sides and rear were joined together and braced with angle iron, and the whole was attached to the turret. The false gun shield was attached to the Panther gun shield, and all the lifting rings, brackets, extra-armor studs, etc., found on the M10 turret were carefully duplicated and welded to the false turret.
False Bow
Approximately four pieces of sheet metal, shaped to imitate as closely as possible the contours of the M10 bow, made up the false bow, necessary because the Panther bow is bulkier than the M10. The false bottom was shaped to give the characteristic appearance of the front drive sprocket housing of the M10, and the top was shaped carefully and various component pieces attached to the front of the tank. All the brackets, lifting rings, towing devises, etc., of the M10 bow were also imitated. A square opening was cut in the false bow to permit the use of the bow M.G. 34, but a removable cover attached with a small chain was made for this opening.
False Rear and Sides

Historical Gallery


