Charioteer
| Revision as of 05:59, 6 June 2017 | Revision as of 06:03, 6 June 2017 | |||
| Line 38: | Line 38: | |||
| Unlock the tracks first. It's not needed to equip the 105 L7 top gun, as it weighs the same as the Type B, but the remaining load on the stock tracks won't give enough room to install much equipment. You can equip Coated Optics, but not Ventilation unless you stick with the Type A barrel (it's 40kg lighter then the Type B). | Unlock the tracks first. It's not needed to equip the 105 L7 top gun, as it weighs the same as the Type B, but the remaining load on the stock tracks won't give enough room to install much equipment. You can equip Coated Optics, but not Ventilation unless you stick with the Type A barrel (it's 40kg lighter then the Type B). | |||
| |InTheGame_equipment= | |InTheGame_equipment= | |||
| ? | Large-Caliber Tank Gun Rammer, Improved Ventilation Class 3, Enhanced Gun Laying Drive, Coated Optics, Camouflage Net | + | Large-Caliber Tank Gun Rammer, Improved Ventilation Class 3, Enhanced Gun Laying Drive, Coated Optics, Camouflage Net, binoculars | |
| |InTheGame_Equipment_Builds= | |InTheGame_Equipment_Builds= | |||
Revision as of 06:03, 6 June 2017
| |
This article requires additional modification. The design and/or content of this article do not conform to wiki standards.
|
Charioteer

Mouse over "
[Client Values; Actual values in
| 2,470,000 |
| 1050210 HP Hit Points |
| 30.23/30.5512.82/32.5 t Weight Limit |
- Commander (Gunner)
- Gunner
- Driver
- Loader (Radio Operator)
| 600650 hp Engine Power |
| 52/20 km/h Speed Limit |
| 3436 deg/s Traverse |
| 19.8550.7 hp/t Power/Wt Ratio |
| YesYes Pivot |
| // mm Hull Armor |
AP/APCR/HE
APCR/HE/HE Shells |
680/4400/170
1200/5200/950 Shell Cost |
| 230/230/280390/480/480 HP Damage |
| 226/258/42268/210/105 mm Penetration |
|
9.09 r/m ▲
5.94 r/m Standard Gun ▲ Rate of Fire Standard Gun |
|
2090.7 ▲
Standard Gun
▼
Standard Gun
▲
2316.6 Standard Gun ▲
Standard Gun
▼
Standard Gun ▲ Damage Per Minute Standard Gun |
|
0.37 m ▲
0.35 m With 50% Crew: 0.471 m ▲ Accuracy With 50% Crew: 0.445 m |
| 2.5 s 2.4 s Aim time |
| 1818 deg/s Gun Traverse Speed |
| 360° Gun Arc |
| -9°/+12°-10°/+12° Elevation Arc |
| 3530 rounds Ammo Capacity |
| 2020 % Chance of Fire |
| 370 m 370 m View Range |
| 450 m 700 m Signal Range |
VIII
2470000
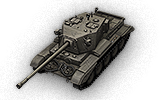
The Charioteer is a British tier 8 tank destroyer.
The upgraded version of the Cromwell tank. A new turret and a 20-pounder 83.4-mm caliber gun made this tank a potent adversary. According to different sources, between 200 and 442 Cromwell tanks were converted to the new Charioteer standards.
The Charioteer leads to the FV4004 Conway.
Modules / Available Equipment and Consumables
Modules

Guns
| Tier | Gun | Penetration (mm) |
Damage (HP) |
Rate of fire (rounds/minute) |
Dispersion (m/100m) |
Aiming time (s) |
Weight (kg) |
Price (
| |
|---|---|---|---|---|---|---|---|---|---|
| IX | OQF 20-pdr AT Gun Type B Barrel | 226/258/42 | 230/230/280 | 9.52 | 0.35 | 2.3 | 1282 | 180000 | |
| VIII | OQF 20-pdr AT Gun Type A Barrel | 226/258/42 | 230/230/280 | 9.09 | 0.37 | 2.5 | 1242 | 120000 | |
| X | 105 mm AT Gun L7 | 268/210/105 | 390/480/480 | 5.94 | 0.35 | 2.4 | 1282 | 290000 |

Engines
| Tier | Engine | Engine Power (hp) |
Chance of Fire on Impact (%) |
Weight (kg) |
Price (
| |
|---|---|---|---|---|---|---|
| V | Rolls-Royce Meteor | 600 | 20 | 744 | 14000 | |
| V | Rolls-Royce Meteor Mk. IVB | 650 | 20 | 744 | 16000 |

Suspensions
| Tier | Suspension | Load Limit (т) |
Traverse Speed (gr/sec) |
Rmin | Weight (kg) |
Price (
| |
|---|---|---|---|---|---|---|---|
| VII | Charioteer Mk. 6 | 30.55 | 34 | 0 | 6500 | 22000 | |
| VIII | Charioteer Mk. 8 | 32.5 | 36 | 0 | 6500 | 32500 |

Radios
| Tier | Radio | Signal Range (m) |
Weight (kg) |
Price (
| |
|---|---|---|---|---|---|
| VII | WS No. 19 Mk. II | 450 | 40 | 21000 | |
| VIII | WS No. 22 | 700 | 40 | 25000 | |
| VIII | WS No. 19 Mk. III | 550 | 40 | 22000 |
Compatible Equipment

![]()


![]()
![]()
![]()
![]()
![]()


![]()

![]()

Compatible Consumables
![]()
![]()
![]()
![]()
![]()
![]()
![]()
![]()
![]()
![]()
![]()
![]()
![]()
![]()
![]()
![]()
![]()
![]()
![]()
![]()
![]()
![]()
![]()
Player Opinion
Pros and Cons
Pros:
- Has turret, low profile and excellent camo values
- Good top speed, fast and highly mobile; good power-to-weight ratio
- Fearsome top gun for its tier: accurate, high penetrating, firerate makes up for the low alpha
- HESH premium rounds with awesome penetration (210 mm); massive DPM increase (480 alpha)
- Above average penetration on normal HE rounds (105 mm)
Cons:
- Poor gun depression and lousy gun dispersion values
- Paper-thin armor, low HP pool and very fragile engine; often gets set on fire
- Slow turret traverse; however, the hull is also turns a bit slowly
- Low ammo capacity (35 rounds with a high rate of fire will go quickly)
- Mediocre view range
Performance
The Charioteer is a difficult to play but rewarding mix of a light tank and tank destroyer, akin to the Tier 6 M18 Hellcat and Tier 9 Leopard Prototyp A. Good Charioteer gameplay is built around leveraging its 3 main strengths: its gun, mobility, and vision capabilities. The Charioteer is equipped with one of the best TD guns of its tier, basically a Centurion Mk. 7/1 gun (AT-version L7A1 gun) with much better rate-of-fire, excellent penetration (268 mm), accuracy, aiming time and dispersion values, but with realtively low alpha damage (average 390 HP). The gun has no premium APCR or HEAT, instead HESH rounds, which are high-explosive rounds with slightly better penetration (210 mm in the Charioteer's case). The normal HE shells also have above average pen (105 mm) The second pro is its mobility. It has a very good power-to weight ratio (about 22 HP/t) and top speed, which are somewhat encumbered by relatively high terrain resistance, which evens out to acceptable acceleration and turning speed. The third and last pro is its low profile (and consequently excellent camouflage values) coupled with very nice view range for a TD (although paltry by the standards of sniper mediums to which it can be best likened). With Coated Optics, a fully trained camo crew, BiA, and Improved Ventilation, it can out-spot most of its peers in a vision-centric engagement.
However, it has 3 serious cons, poor gun depression, paper-thin armor, and a tendency to receive heavy module damage (especially the engine). It's very important to keep an eye (figuratively!) glued to the minimap and watch for changes on both flanks, as the downsides will readily manifest themselves if the Charioteer is caught in point-blank firefights. That's not to say that it's entirely helpless in close-combat situations if fought on its terms, though. With the speed and alpha damage, it can be a very effective flanker and damage thief on city maps, waiting until enemies have fired to put a shot through a cupola or rushing around their sides to put in 2-3 potshots before they even get a chance to react.
An ideal role on an open map is to use the mobility to fire from afar with soft cover and quickly relocate before opponents can close the distance (a tactic known as "kiting"). The Charioteer is not for close range combat ideally; It's a medium and long range killer. The preferred role of this TD is to deal as much damage as possible before being lit. However, the camo is not as good as the Rhm's or some of the other contemporary TDs, in exchange for the combination of speed and a turret. It's still possible to hide in decently small bushes and provide long-range fire support with a gun that can quickly deal with most enemies from the front. The HESH rounds are can be handy in end-game cleanup if only soft tanks (light tanks, artillery, etc.) are left, or for early game side shots.
Early Research
The top Radio and Engine will be unlocked if you elited the Challenger, or through most of the other tank lines at tier 6, so equip them right away. The Type B barrel will be unlocked if you researched the AT 15. Unlock the tracks first. It's not needed to equip the 105 L7 top gun, as it weighs the same as the Type B, but the remaining load on the stock tracks won't give enough room to install much equipment. You can equip Coated Optics, but not Ventilation unless you stick with the Type A barrel (it's 40kg lighter then the Type B).
Suggested Equipment
![]()
![]()
![]()
![]()
![]() binoculars
binoculars
Gallery


Historical Info
In the early 1950s, plans to combat a potential invasion from Soviet forces during the Cold War called for a Royal Armoured Corps formation to be equipped with the Cromwell tank while Centurion tank numbers were still low. This required an up-gunning of Cromwell to incorporate the same 20 pounder (84 mm) gun as used in the Centurion Mk 3.
Mounting the gun required a new two-man turret to be developed,.[2] The resulting vehicle was initially named FV4101 Cromwell Heavy AT Gun,[3] but renamed "Charioteer" before entering service.
The new turret used the larger Ordnance QF 20 pounder gun. This was mounted with a co-axial 0.30 in M1919 Browning machine gun. Smoke dischargers were fitted to both sides of the turret. A flap to the turret rear allowed spent shell casings from the gun to be ejected from the vehicle.[2]
Hulls were based on the later Cromwell VII standard, modified with Comet Model B style fishtail exhausts and no hull-mounted machine gun. Most hulls were reworked to Type F standard, and fire extinguisher pulls were re-routed to the two track-side bins. A large armoured telephone box was fitted to the vehicle rear for communication with infantry. Additional defensive armour was welded to the Cromwell hull, but the upgrade focused on offensive capability and the new turret used much lighter armour (20–30 mm).
The turret ring was slightly increased in size to accommodate the larger gun, but the size limitation of the Cromwell hull meant that the new turret would need to be much larger and taller around it. This gave the vehicle a much higher profile.
Even with this size increase, stowage for the larger ammunition rounds was severely limited. The hull machine gunner's position was removed to provide additional stowage space for ammunition, but the vehicle still carried only 25 rounds. Some conventional High Explosive (HE) shells were carried, but the primary ammunition was Armour-Piercing Discarding Sabot projectiles (APDS)[2]
A mixed collection of Cromwell's were upgraded, resulting in a number of variations based on the vehicle's previous format.
Production[edit] See also: Cromwell tank § Production Building on the remaining Cromwell tanks as a basis, the tanks were converted by Robinson and Kershaw Ltd at their works in Dukinfield, Cheshire. While an expected production run of 630 was indicated in 1951, the production was cut short and the exact number produced is unclear. The first 200 were expected by March 1953 with a further 200 following in 1954. The actual number produced is believed to be 442.[2][4]
Service[edit] During development and manufacture the British Army went through two re-organisations, resulting in the tanks being reassigned to Royal Armoured Corps units of the British Territorial Army. These tanks replaced tank destroyers and self-propelled guns transferred from the Royal Artillery to the RAC during the re-organisation.[2]
The number of vehicles required was cut, and only a small number entered service. Manufacturing of the modification was halted with around 440 of 630 vehicles completed. Surplus vehicles were sold to Austria, Finland, Jordan and Lebanon. The tanks were used by a number of forces in the Middle East through instability in the region, such as the Six-Day War.
While the vehicle was originally intended to operate with a 3-man crew, the commander's visibility from the turret was restricted during firing. This meant a 4th crew member was added as an external observer. The large size of the turret meant the vehicle was best used in a hull down position, firing over cover.[2]
Charioteer saw limited use with the British army, but saw more extensive use with overseas users in Europe and the Middle East. Charioteers saw action in conflicts in the Middle-East.
Production was based on a mixed fleet of Cromwell VI, VII, VIIw and VIII vehicles of mixed hull types. While all were upgraded to VII standard, some hull differences remained based on the vehicle's past. As a result, the vehicle continued to be known as Charioteer, Mks. 6, 7, 7w and 8 with hull types D, E and F.
The Ordnance QF 20 pounder was upgraded during production and service, and many vehicles were fitted with the later 20 pounder featuring a symmetrical fume extractor mid-barrel. Those without the fume extractor were dubbed Charioteer VIIA or Model A while those with the upgrade were named Charioteer VIIB or Model B.
In Jordanian Army use the vehicle was altered with upgraded electrically-driven turret traverse motors, and a larger commander's cupola mounting a .50 calibre machine gun. These traverse-motors were driven from a separate electrical supply. Different radio equipment was also fitted.
Beyond the original requirement, further up-gunning was attempted. A single vehicle was upgraded with the Royal Ordnance L7 105mm gun for trials in 1969. It was intended for export, and did not enter service.[2] The gun is similar in appearance and based on the original, but can be distinguished by an offset fume extractor (larger at the top). This vehicle survives at the East of England Tank Museum.