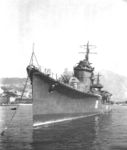
Akizuki
| 100 mm/65 Type984 х 2 pcs. |
| Rate of Fire20 shots/min. |
| Reload Time3 sec. |
| Rotation Speed16 deg./sec. |
| 180 Degree Turn Time11.25 sec. |
| Firing Range11.33 km. |
| Maximum Dispersion99 m. |
| HE Shell100 mm HE Type98 |
| Maximum HE Shell Damage1200 |
| Chance of Fire on Target Caused by HE Shell5 % |
| Initial HE Shell Velocity1000 m./s. |
| HE Shell Weight13 kg. |
| AP Shell100 mm AP Type98 |
| Maximum AP Shell Damage1700 |
| Initial AP Shell Velocity1000 m./s. |
| AP Shell Weight13 kg. |
| 610 mm Quad1 х 4 pcs. |
| Rate of Fire0.59 shots/min. |
| Reload Time101 sec. |
| Rotation Speed25 deg./sec. |
| 180 Degree Turn Time7.2 sec. |
| TorpedoType90 mod. 1 |
| Maximum Damage17 233 |
| Torpedo Speed62 knot |
| Torpedo Range9.99 km. |
| 100 mm/65 Type984 х 2 pcs. |
| . . . Average Damage per Second83.2 |
| . . . Firing Range5.01 km. |
| 25 mm/60 Type96 Twin mod. 16 х 2 pcs. |
| . . . Average Damage per Second30 |
| . . . Firing Range3.09 km. |
| 25 mm/60 Type96 Triple mod. 11 х 3 pcs. |
| . . . Average Damage per Second6.1 |
| . . . Firing Range3.09 km. |
| Maximum Speed33 knot |
| Turning Circle Radius730 m. |
| Rudder Shift Time6.5 sec. |
| Surface Detectability Range7.56 km. |
| Air Detectability Range4.44 km. |
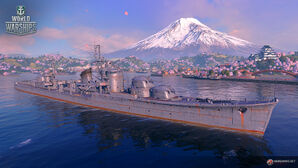
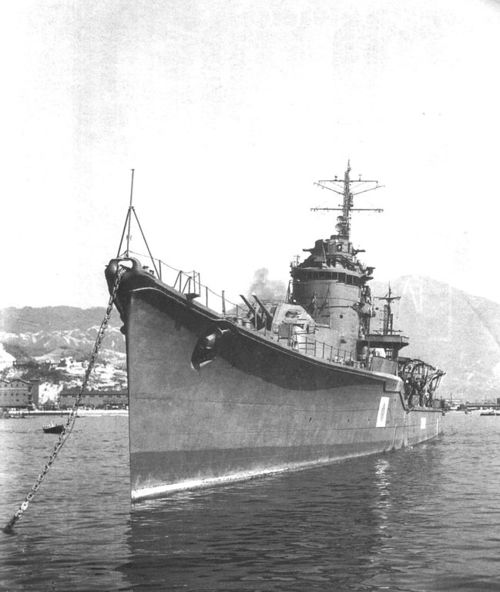
Akizuki — Japanese Tier VIII destroyer.
Los destructores de clase Akizuki se diseñaron como barcos de defensa antiaérea para escoltar formaciones de portaaviones rápidos. Su batería principal estaba formada por ocho cañones de 100 mm/65. Se encargaron un total de 13 destructores de esta clase y se construyeron 12. Tras entrar en servicio en junio de 1942, el Akizuki participó en la batalla de las Salomón orientales y la campaña de Guadalcanal, la batalla del mar de Filipinas y la batalla del golfo de Leyte. El destructor fue hundido durante la batalla del cabo Engaño.
Modules
Compatible Upgrades
| Slot 1 |
|||||
|---|---|---|---|---|---|
| Slot 2 |
|||||
| Slot 3 |
|||||
| Slot 4 |
|||||
| Slot 5 |
Player Opinion
Performance
Tier VIII's Akizuki is a major departure from the rest of the Japanese destroyer line. She packs both more guns and fewer torpedoes than any of her cousins that surround her on the tech tree, giving her a very different playstyle than any ship before or after. She is a unique ship that requires a completely different approach to the typical ninja-like playstyle of other Japanese destroyers that attempt to overwhelm their enemies with torpedoes fired from stealth. She shares a number of similarities with high-tier Russian destroyers Udaloi and Khabarovsk; captains familiar with how those ships play will likely feel right at home in Akizuki.
Akizuki’s main battery is comprised of four (4) double 100mm turrets. Unlike most Japanese destroyer gun turrets, these turn quickly, roughly on par with those found in the middle tiers of the American destroyer line aboard Nicholas, Farragut, and Mahan. She can get all of her guns on target even while maneuvering, and their rate of fire rivals that of Tier X American destroyer Gearing (although Akizuki’s shells do far less damage than Gearing’s). Also notable is the initial velocity of those shells: 1000 meters per second. This gives Akizuki’s guns a relatively flat arc at close range; they are comfortable to fire and fairly easy to guide on to target. However, her shells lose velocity quickly, and beginning around 10 km they will have a very high ballistic arc similar to those of Atlanta. This is not necessarily a bad thing, as it enables her to fire over islands when needed. Her main battery is equally capable of chewing up battleship and cruiser superstructure with armor-piercing rounds or dueling enemy destroyers with high explosive ones.
While her guns are excellent, her torpedo armament is lacking. She mounts only a single quadruple launcher — compared to the double quadruple launchers of Kagero, Shiratsuyu, and Yūgumo — on a relatively long reload of 112 seconds. Akizuki has access to an improved version of the Torpedo Reload Booster consumable without having to give up access to Smoke Generator, so she is capable of doing significant damage with her torpedo armament against unsuspecting captains by virtue of mounting the same Type 93 mod. 2 torpedoes that Kagero carries. She is the only ship able to mount both consumables at the same time. Like the "Shiratsuyu", her Torpedo Reload Booster consumable reloads faster than the one found on other ships.
Her handling takes some getting used to — she is far slower to respond to helm commands than Japanese destroyer captains will be accustomed to — and her slow top speed is a notable handicap. Still, her anti-aircraft suite beats out every other Japanese destroyer in the game, and she has the customarily low detection radius typical of her sisters. Akizuki requires some adaptation in play, but she's more than capable of dishing out copious amounts of punishment in the hands of a captain who has taken the time to decipher how to play her well.
When facing American and Soviet destroyers her tier or higher, captains are advised to use armor-piercing rounds as Akizuki’s 100mm HE shells lack sufficient penetration to deal consistent damage.
Pros:
- Quick-turning, fast-firing main battery guns.
- Armor-piercing rounds are punishing against broadside ships thanks to her rate of fire.
- Above-average anti-aircraft suite for a Japanese destroyer due to her dual-purpose main battery guns.
- Can equip the improved version of the Torpedo Reload Booster consumable that reduces torpedo reload time to 5 seconds, and doesn't have to give up Smoke Generator to do so. Additionally, the consumable reloads faster than the standard versions.
Cons:
- Slow to accelerate and low top speed for a destroyer.
- Handles more like a cruiser than a destroyer; large turning circle and slow rudder shift make Akizuki feel sluggish.
- High explosive shells have very low damage and fire chance.
- Only one torpedo launcher (on a long reload) means she is almost totally reliant on her guns for damage.
- Her 100mm shells are hard pressed to damage certain targets; hits for zero damage against cruisers and battleships are not uncommon.
Research
Optimal Configuration
Upgrades
Akizuki’s gunboat playstyle means that her upgrade modules will look very similar to that of similarly-tiered cruisers and Russian destroyers. Main Armaments Modification 1 in Upgrade Slot 1 and Aiming Systems Modification 1 in Upgrade Slot 2 are the best options. A case can be made for AA Guns Modification 2 in that second slot, but lacking access to the Defensive AA Fire consumable, it isn't recommended. Propulsion Modification 1 is the top choice in Upgrade Slot 4. Either Steering Gears Modification 2 or Propulsion Modification 2 should be slotted into Upgrade Slot 5. Like all Tier VIII+ destroyers, Concealment System Module 1 is a must-have in Upgrade Slot 6.
Commander Skills
| Recommended Commander Skills | ||||||||
|---|---|---|---|---|---|---|---|---|
| Cost (points) |
Endurance | Attack | Support | Versatility | ||||
| 1 |
★★ |
★★ |
|
|
|
|
|
|
| 2 |
|
★ |
|
|
★ |
|
★★ |
★★★ |
| 3 |
|
★★ |
|
|
★★ |
★★ |
★★★ |
★ |
| 4 |
|
|
★★★ |
|
★ |
★★ |
★ |
★★★ |
| Key: ★★★ - Extremely Useful ★★ - Frequently Useful ★ - Occasionally Useful No stars - Not Useful | ||||||||
Consumables
A gunboat destroyer like Akizuki is inevitably going to come under heavy fire; the abbreviated cooldown on Damage Control Party II will eventually pay for itself. Shelling out the doubloons or credits here is highly recommended. Her low speed also makes the shortened cooldown on Engine Boost II highly attractive. Paying for Smoke Generator II is captain's choice, but there are times that the shortened cooldown on smoke is the difference between sneaking away and going to the bottom.
Camouflage
Type 1, 2, or 5 camouflage can be equipped for credits; Types 1 or 5 are recommended at a minimum to reduce detectibility range.
Players who wish to spend doubloons can equip Akizuki with Type 18 camouflage that lowers her detection radius, reduces the accuracy of incoming shells, reduces her repair costs, and increases the amount of experience she earns.
Signals
Victor Lima and India X-Ray signal flags will help boost Akizuki’s meager fire chance, especially when combined with Demolition Expert. Juliet Charlie should also go along with those flags in order to prevent detonations. Sierra Mike will help make up some of her deficiency in top speed.Gallery
Akizuki engages an enemy Izumo class battleship with torpedoes and gunfire.
Historical Info
Historical Gallery
