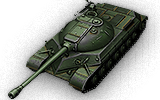
WZ-111 model 1-4

|
Article requires additional modification The design and/or content of this article do not conform to wiki standards. Missing Content
|
WZ-111 model 1-4

Mouse over "
| 3,500,000 |
| 1750450 HP Hit Points |
| 44/44.726.18/48 t Weight Limit |
- 전차장 (무전수)
- 포수
- 조종수
- 장전수
| 520600 hp Engine Power |
| 50/15 km/h Speed Limit |
| 2628 deg/s Traverse |
| 11.8222.92 hp/t Power/Wt Ratio |
| NoNo Pivot |
| // mm Hull Armor |
| 249/172/100230/120/60 mm Turret Armor |
AP/HEAT/HE
AP/HEAT/HE Shells |
| 390/390/530490/490/640 HP Damage |
| 175/250/61244/340/65 mm Penetration |
|
5.08 r/m ▲
4.29 r/m Standard Gun ▲ Rate of Fire Standard Gun |
|
1981.2 ▲
Standard Gun
▼
Standard Gun
▲
2102.1 Standard Gun ▲
Standard Gun
▼
Standard Gun
▲ Damage Per Minute Standard Gun |
|
0.46 m ▲
0.4 m With 50% Crew: 0.57 m ▲ Accuracy With 50% Crew: 0.496 m |
| 3.4 s 2.9 s Aim time |
| 2426 deg/s Turret Traverse |
| 360° Gun Arc |
| -5°/+19°-5°/+23° Elevation Arc |
| 4540 rounds Ammo Capacity |
| 1212 % Chance of Fire |
| 380 m 400 m View Range |
| 600 m 750 m Signal Range |
Additional Statistics
(Top Configuration)
IX
3500000
The WZ-111 model 1-4 is a Chinese tier 9 heavy tank.
1960년대 초 개발된 중(重)전차의 시제 차량이다. 111 기획안은 소련의 IS-3와 T-10을 기반으로 개발되었다. 1964년 새로운 중형전차 개발에 밀려 개발이 중단되었다.
The WZ-111 model 1-4 leads to the WZ-111 model 5A.
Modules / Available Equipment and Consumables
Modules

주포
| 단계 | 주포 | 평균 관통력 (mm) | 연사력 | 100m에서의 분산도 | 조준 시간 | 일반 경험치 | 중량 (톤) | 가격, | |
|---|---|---|---|---|---|---|---|---|---|
| X | 130 mm 59-130T | 244/340/65 | 490/490/640 | 4.29 | 0.4 | 2.9 | 66000 | 3090 | 330000 |
| VIII | 122 mm D-25T | 175/250/61 | 390/390/530 | 5.08 | 0.46 | 3.4 | 0 | 2590 | 135000 |
| IX | 100 mm 62-100T | 215/265/50 | 320/320/420 | 6.67 | 0.38 | 2.9 | 59000 | 2557 | 221000 |

엔진
| 단계 | 엔진 | 엔진 출력 (마력) | 충돌 시 화재 발생 확률 | 일반 경험치 | 중량 (톤) | 가격, |
|---|---|---|---|---|---|---|
| X | 12150LT | 600 | 12 | 46000 | 750 | 120000 |
| VIII | 12150L | 520 | 12 | 0 | 750 | 48000 |
| IX | 12150LS | 580 | 12 | 33000 | 750 | 99500 |

현가장치
| 단계 | 현가장치 | 한계 중량 | 회전 속도 (도/초) | 일반 경험치 | 중량 (톤) | 가격, |
|---|---|---|---|---|---|---|
| VIII | WZ-111 | 44.7 | 26 | 0 | 10000 | 27920 |
| IX | WZ-111 model 4 | 48 | 28 | 24200 | 10000 | 61000 |

무전기
| 단계 | 무전기 | 통신 범위 (m) | 일반 경험치 | 중량 (톤) | 가격, |
|---|---|---|---|---|---|
| X | A-220A | 750 | 9500 | 40 | 54000 |
| IX | A-220 | 600 | 0 | 40 | 38000 |
Compatible Equipment
Compatible Consumables
Player Opinion
Pros and Cons
Pros:
- Strong, bouncy turret armor
- Well-sloped hull armor
- Top gun is a copy of the IS-7's, possibly even better, despite being a tier lower
- Has the most alpha out of all tier 9 heavies, along with the E-75
- Decent accuracy, aim time, and penetration
Cons:
- Poor gun depression
- Large, weak lower glacis plate
- Somewhat slow reload
- Slow acceleration
- Frequent ammo rack damage and crew loss, as often as 2-3 times per battle
Performance
This tank plays very much like an IS-8, but it trades more alpha damage in exchange for slightly worse accuracy, penetration, and rate of fire, with similar aim time.
When playing the WZ-111 model 1-4, you should be very careful of being near ridges, as the gun depression is quite horrible. Combined with the long length of the vehicle, you will be at a significant disadvantage in hilly terrain or on downwards slopes. You should try to look for ways to make your tank travel on as flat ground as possible, as to ensure you won't be fired at by enemy tanks while being unable to return fire. With only 5 degrees of gun depression, you might be limited by some maps. However, thanks to the moderate accuracy and decent penetration, sniping should not be too difficult with this tank.
Another thing to be careful of is making sure the enemy does not fire into your lower frontal plate, which will not withstand hits from same-tier tanks. The turret front and upper frontal plate are both well armored and will bounce shots with moderate frequency. Another thing to note about its armor is that it has spaced, sloped side armor. Though not as bouncy, thick, or big as that of the IS-3's, it can still soak up a shell with some luck.
Care should be taken as to always make sure your pike nose is pointing at the enemy, as angling will expose your weak sides, as well as making one side of the pike much weaker than when pointing forwards. Angling will, however, make one corner of the pike much stronger, though this should not be done unless you have some form of cover to make sure your weaker pike won't be damaged easily.
Last to mention is this tank's mobility, which is really excellent. With a top speed of 50 km/h, you can quickly gain A LOT of speed and get into position very fast, especially when going down a slope. While the top speed is outstanding for this tank, the acceleration and track traverse speed leave something to be desired, and the 1-4 requires a fair bit of time to reach its top speed, and will lose a lot of it when climbing hills.
Early Research
- You should already have the engine, 100mm 62-100T, and top radio from the 110; equip them right away
- First research the turret, as it gives you more health and does not have a weak spot like the IS-3 turret
- Then research the suspension, which will increase the load limit so you can mount the top gun as well as give you better mobility
- Next research the 130mm 59-130T, which gives a significant boost in penetration and alpha damage
- Finally you can research the last engine which adds 20 horsepower
Suggested Equipment
![]()
![]()
![]()
![]()
Gallery


Historical Info
Design features
Flaws that were found during initial tests were including heavy and very cramped turret interior, insufficient armor on the hull and weak, and unreliable engine that was struggling with the overall mass of the vehicle. Most of the technology used in WZ-111 were copies of earlier, then already close to obsolete Soviet solutions . Turret design was cast steel with welds on the roof area fitted with two crew hatches a and a commander periscope. Suspension was consisted of seven road wheels with internal shock absorbers, three support rollers, drive wheel position at the rear with removable ring gear and guide wheel. Transmission was similar to the one of the IS series, and featured multi-disc main clutch dry friction, eight gear transmission with dual, planetary rotation mechanism, and final drive. Engine was a Chinese made unlicensed copy of B11 diesel, with the maximum power output at 520 horse powers. Maximum speed achieved during tests was 35 km/h. The body was made from welded plates, with thickness of 13, 120, 90 and 60 mm. Test prototype was preserved, and today is placed on permanent display in the Chinese Tank Museum located near Beijing.
Historical Gallery


| Light Tanks |
Vickers Mk. E Type B • Type 2597 Chi-Ha • M5A1 Stuart • 59-16 • Type 64 • Type 62 • WZ-131 • WZ-132 • M41D • WZ-132A • WZ-132-1 |
| Medium Tanks |
Type T-34 • Type 58 • T-34-1 • Type 59 • T-34-2 • T-34-3 • 59-Patton • 122 TM • Type 59 G • WZ-120 • 121 • 121B |
| Heavy Tanks |
IS-2 • WZ-111 • WZ-111 Alpine Tiger • 110 • 112 • WZ-111 model 1-4 • WZ-114 • 113 • 113 Beijing Opera • WZ-111 model 5A • WZ-111 Qilin |
| Tank Destroyers |
T-26G FT • M3G FT • SU-76G FT • 60G FT • WZ-131G FT • T-34-2G FT • WZ-111-1G FT • WZ-120-1G FT • WZ-111G FT • WZ-120G FT • WZ-113G FT • 114 SP2 |
| Self-Propelled Guns |