Wargaming.net 위키에 오신 것을 환영합니다!
변수

121

사용자의 2014년 10월 11일 (토) 07:13 판
(비교) ← 이전 판 | 최신판 (비교) | 다음 판 → (비교)
이동: 둘러보기, 검색


newfile.png Article requires additional modification
The design and/or content of this article do not conform to wiki standards.
Missing Content
  • Historical Gallery


,


121

Icon
China | Medium Tank | Tier X
Battle Tier
1234567891011
Overview
Mouse over "
Well, the ones further down, of course.
" for more information
6,100,000  Credits Cost
2050410 HP Hit Points
39/4221.78/42 t Weight Limit
Crew
  1. 전차장
  2. 포수
  3. 조종수
  4. 장전수 (무전수)
Mobility
650650 hp Engine Power
56/20 km/h Speed Limit
5050 deg/s Traverse
16.6729.84 hp/t Power/Wt Ratio
NoNo Pivot
Armor
// mm Hull Armor
240/130/60240/130/60 mm Turret Armor
Armament


{{#ifeq:HOLLOW_CHARGE|ARMOR_PIERCING||


{{#ifeq:HIGH_EXPLOSIVE|ARMOR_PIERCING||


AP/HEAT/HE


{{#ifeq:HOLLOW_CHARGE|ARMOR_PIERCING||


{{#ifeq:HIGH_EXPLOSIVE|ARMOR_PIERCING||


AP/HEAT/HE
Shells
440/440/530440/440/530 HP Damage
262/340/68262/340/68 mm Penetration


|


|}}

|


|}}


6.25 r/m 

Standard Gun

Reload Times
Nominal: 9.6 s
50% Crew: 11.89 s
75% Crew: 10.38 s
100% Crew: 9.2 s
Rammer: 8.28 s
Vents: 9 s
Both: 8.1 s
Both and BiA: 7.92 s
Both and Max Crew %: 7.59 s

See Crew, Consumables, or Equipment for more information.


|


|}}

|


|}}


6.25 r/m 

Standard Gun

Reload Times
Nominal: 9.6 s
50% Crew: 11.89 s
75% Crew: 10.38 s
100% Crew: 9.2 s
Rammer: 8.28 s
Vents: 9 s
Both: 8.1 s
Both and BiA: 7.92 s
Both and Max Crew %: 7.59 s

See Crew, Consumables, or Equipment for more information.
Rate of Fire


|


|}}

|


|}}


2750

Standard Gun

Using Shell Type 1 (440 Damage):


Theoretical Damage Per Minute
Nominal DPM: 2750
50% Crew: 2222
75% Crew: 2543.2
100% Crew: 2868.8
100% Crew
Vents: 2934.8
Rammer: 3185.6
Both: 3260.4
Both and BiA: 3330.8
Both and Max Crew %: 3476

Advantageous Damage Per Minute
First-shot DPM: 3190
50% Crew: 2662
75% Crew: 2983.2
100% Crew: 3308.8
100% Crew
Rammer: 3625.6
Vents: 3374.8
Both: 3700.4
Both and BiA: 3770.8
Both and Max Crew %: 3916

See here, here, or here for more information.

Standard Gun

Using Shell Type 2 (440 Damage):


Theoretical Damage Per Minute
Nominal DPM: 2750
50% Crew: 2222
75% Crew: 2543.2
100% Crew: 2868.8
100% Crew
Vents: 2934.8
Rammer: 3185.6
Both: 3260.4
Both and BiA: 3330.8
Both and Max Crew %: 3476

Advantageous Damage Per Minute
First-shot DPM: 3190
50% Crew: 2662
75% Crew: 2983.2
100% Crew: 3308.8
100% Crew
Rammer: 3625.6
Vents: 3374.8
Both: 3700.4
Both and BiA: 3770.8
Both and Max Crew %: 3916

See here, here, or here for more information.

Standard Gun

Using Shell Type 3 (530 Damage):
With wholly penetrating hits

Theoretical Damage Per Minute
Nominal DPM: 3312.5
50% Crew: 2676.5
75% Crew: 3063.4
100% Crew: 3455.6
100% Crew
Vents: 3535.1
Rammer: 3837.2
Both: 3927.3
Both and BiA: 4012.1
Both and Max Crew %: 4187

Advantageous Damage Per Minute
First-shot DPM: 3842.5
50% Crew: 3206.5
75% Crew: 3593.4
100% Crew: 3985.6
100% Crew
Rammer: 4367.2
Vents: 4065.1
Both: 4457.3
Both and BiA: 4542.1
Both and Max Crew %: 4717

See here, here, or here for more information.


|


|}}

|


|}}


2750

Standard Gun

Using Shell Type 1 (440 Damage):


Theoretical Damage Per Minute
Nominal DPM: 2750
50% Crew: 2222
75% Crew: 2543.2
100% Crew: 2868.8
100% Crew
Vents: 2934.8
Rammer: 3185.6
Both: 3260.4
Both and BiA: 3330.8
Both and Max Crew %: 3476

Advantageous Damage Per Minute
First-shot DPM: 3190
50% Crew: 2662
75% Crew: 2983.2
100% Crew: 3308.8
100% Crew
Rammer: 3625.6
Vents: 3374.8
Both: 3700.4
Both and BiA: 3770.8
Both and Max Crew %: 3916

See here, here, or here for more information.

Standard Gun

Using Shell Type 2 (440 Damage):


Theoretical Damage Per Minute
Nominal DPM: 2750
50% Crew: 2222
75% Crew: 2543.2
100% Crew: 2868.8
100% Crew
Vents: 2934.8
Rammer: 3185.6
Both: 3260.4
Both and BiA: 3330.8
Both and Max Crew %: 3476

Advantageous Damage Per Minute
First-shot DPM: 3190
50% Crew: 2662
75% Crew: 2983.2
100% Crew: 3308.8
100% Crew
Rammer: 3625.6
Vents: 3374.8
Both: 3700.4
Both and BiA: 3770.8
Both and Max Crew %: 3916

See here, here, or here for more information.

Standard Gun

Using Shell Type 3 (530 Damage):
With wholly penetrating hits

Theoretical Damage Per Minute
Nominal DPM: 3312.5
50% Crew: 2676.5
75% Crew: 3063.4
100% Crew: 3455.6
100% Crew
Vents: 3535.1
Rammer: 3837.2
Both: 3927.3
Both and BiA: 4012.1
Both and Max Crew %: 4187

Advantageous Damage Per Minute
First-shot DPM: 3842.5
50% Crew: 3206.5
75% Crew: 3593.4
100% Crew: 3985.6
100% Crew
Rammer: 4367.2
Vents: 4065.1
Both: 4457.3
Both and BiA: 4542.1
Both and Max Crew %: 4717

See here, here, or here for more information.
Damage Per Minute


|


|}}


0.35 m 

With 50% Crew: 0.434 m
With 75% Crew: 0.379 m
With 100% Crew: 0.336 m
With BiA: 0.328 m
With BiA and Vents: 0.321 m
Maximum possible: 0.308 m

For more details, see Crew


|


|}}


0.35 m 

With 50% Crew: 0.434 m
With 75% Crew: 0.379 m
With 100% Crew: 0.336 m
With BiA: 0.328 m
With BiA and Vents: 0.321 m
Maximum possible: 0.308 m

For more details, see Crew
Accuracy


|


|}}


2.5 s 

With 50% Crew: 3.097 s
With 75% Crew: 2.704 s
With 100% Crew: 2.397 s
With GLD: 2.179 s
With BiA: 2.344 s
With BiA and Vents: 2.293 s
With both and GLD: 2.085 s
Maximum possible: 1.998 s

For more details, see Crew or Equipment


|


|}}


2.5 s 

With 50% Crew: 3.097 s
With 75% Crew: 2.704 s
With 100% Crew: 2.397 s
With GLD: 2.179 s
With BiA: 2.344 s
With BiA and Vents: 2.293 s
With both and GLD: 2.085 s
Maximum possible: 1.998 s

For more details, see Crew or Equipment
Aim time
4040 deg/s Turret Traverse
360° Gun Arc
-5°/+15°-5°/+15° Elevation Arc
4040 rounds Ammo Capacity
General
1212 % Chance of Fire


400 m 

With 50% Crew: 314.3 m
With 75% Crew: 357.2 m
With 100% Crew: 400 m
With Recon and Situational Awareness: 420.2 m
With Coated Optics: 440 m
With Binocular Telescope: 500 m
Maximum possible: 572.6 m

For more details, see Skills or Equipment


400 m 

With 50% Crew: 314.3 m
With 75% Crew: 357.2 m
With 100% Crew: 400 m
With Recon and Situational Awareness: 420.2 m
With Coated Optics: 440 m
With Binocular Telescope: 500 m
Maximum possible: 572.6 m

For more details, see Skills or Equipment
View Range


|


|}}


750 m 

With 50% Crew: 605.4 m
With 75% Crew: 693.4 m
With 100% Crew: 782.2 m
With 100% Signal Boost: 900 m
When affected by 100% Relaying: 825 m
Maximum possible: 1125.9 m

For more details, see Skills or Equipment


|


|}}


750 m 

With 50% Crew: 605.4 m
With 75% Crew: 693.4 m
With 100% Crew: 782.2 m
With 100% Signal Boost: 900 m
When affected by 100% Relaying: 825 m
Maximum possible: 1125.9 m

For more details, see Skills or Equipment
Signal Range
Values are Stock - click for Top

Additional Statistics
(Top Configuration)

X

annoCh19_121.png

6100000

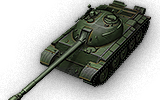
The 121 is a Chinese tier 10 medium tank.

1962년에 Type 59를 기반으로 신형 중형전차 개발을 시작하였다. 강화된 장갑과 강력한 화력이 특징이었지만, 개발 시작 직후 기획안이 취소되었다. 일부 기술이 이후 Type 69 전차 개발에 적용되었다. 모든 121 시제 전차는 중국의 핵무기 실험 중 파괴되었다.

A heavy tank gun on a medium tank chassis, the 121 is a tank that allows the traditionally low-damage mediums to suddenly cause chaos and fear in opposing battle lines by removing large chunks of health unexpectedly. A tank incapable of swift response at range, the 121 is a consummate brawler and is found in the front and center of any major tussle. Packing firepower but not sacrificing the mobility other mediums possess, the 121 allows for relocation from one fight to another as a match drags on. By quickly adding more damage to tanks focused by the rest of the pack, the 121 eliminates threats, creates overmatch in an area, and with that carves the path to conquest.

The 121 marks the end of its Chinese medium line.

Modules / Available Equipment and Consumables

Modules

주포

주포

단계 주포 평균 관통력 (mm) 연사력 100m에서의 분산도 조준 시간 일반 경험치 중량 (톤) 가격,
X 122 mm 60-122TG 262/340/68 440/440/530 6.25 0.35 2.5 0 2800 185140
엔진

엔진

단계 엔진 엔진 출력 (마력) 충돌 시 화재 발생 확률 일반 경험치 중량 (톤) 가격,
X 12150L7 650 12 0 935 25000
현가장치

현가장치

단계 현가장치 한계 중량 회전 속도 (도/초) 일반 경험치 중량 (톤) 가격,
X 121 42 50 0 7700 82500
무전기

무전기

단계 무전기 통신 범위 (m) 일반 경험치 중량 (톤) 가격,
X A-220B 750 0 40 54000

Compatible Equipment

Compatible Consumables

Player Opinion

Pros and Cons

Pros:


  • Very good raw gun values: high damage-per-shell and -per-minute both, high penetration
  • Great traverse and turret traverse speed
  • Excellent camouflage values
  • Excellent dispersion values (on the move/turning accuracy) make it an excellent brawler


Cons:


  • Poor acceleration
  • Cumbersome gun handling: No functional depression, relatively long aim time (though not unmanageable), and relatively slow shell velocity


Performance

The 121 is superficially similar to the T-62A, being one of the many tanks descended from the T-54. It has near identical camo values, which are excellent, similar hull geometry, and similar hard stats (engine power, front turret armor). However, the lower gun depression and hella derpy 122mm make it a completely different vehicle. It's ideal for those who wished they had a T-62A configured for brawling. Close to mid-range is where the 121 outperforms the T-62A. In comparison, the T-62A's shell velocity is much higher (due to lower caliber and standard APCR ammo) and the tank is more agile. The 121's slower-moving shells, longer aim time, and non-existent gun depression make it sub-par at long-distance sniping. However, the 121's accuracy is nothing to scoff at, especially in comparison to its preceding tanks.

Boasting the highest alpha damage and second highest DPM among the tier X mediums, the 121 is well-stocked in firepower. It's widely unknown that the 121 wields the same gun as the IS-4, a tier 10 heavy tank. The Chinese version, however, is vastly improved... namely the 25% faster reload speed. This reload can be shaved down to ~8 seconds with a rammer and BIA. It's a huge advantage in brawling; the 121 can easily fire two shots before most heavies get a chance to reload, among the tier 10 heavies, only the FV215b and T110E5 can compete in reload speed.

The 121's 120mm front hull is pretty much the same that of the infamous T-54, superior to that of the T-62A. A basic corner maneuver, (see here), that takes advantage of the no-shoulders hull design almost triples the armor effectiveness, allowing the upper front plate to deflect an IS-7's gold shells (300 pen) with ease. Furthermore, when done successfully, this maneuver opens up the opportunity for the aforementioned double-tap, tricking the enemy into reloading. Head-on and not angled, the hull is effective to around 200 pen; substantial protection against lower tiers. However, your lower glacis is a large deterence and is easily penetrated, unlike the T-54 where the lower glacis retains 120mm of armor.

The 121 is not for everyone. The lack of gun depression can be a huge deterrence; skilled driving and experienced knowledge of the terrain is essential. Hull-down positions can be accomplished by using uneven terrain to take advantage of the strong turret. The 121 can be exceptionally devastating in an aggressive, yet not-reckless, playstyle. It finds itself at home alongside heavy tanks by taking advantage of reloading enemies, friendly heavy armor, and exposed flanks. Although deadly in an one-on-one brawl, the 121 still remains a medium tank. It doesn't have the hitpoints nor armor the to spare. Think like an autoloader. Keep in mind that the excellent camo values provide the 121 great flexibility on the battlefield, the maps where it can go full beast mode can be quite limited.

Players who sought a medium tank that devastates in close combat and flanking, yet offers flexibility with great camo, will find vast potential in the 121. However, the 121 can be quite difficult to master. But in the right hands, no other tank can wreck things quite like the 121 does.


Early Research

None Required.


Suggested Equipment


Tank Gun Rammer Vertical Stabilizer Enhanced Gun Laying Drive 


Gallery

Historical Info

Development began in 1962 on a new medium tank based on the Type 59. The new tank was expected to feature improvements in firepower and armor protection. However, the project was canceled shortly after. Some technical innovations were applied later, in the development of the Type 69 tank. All 121 tank prototypes were destroyed during Chinese nuclear weapon testing.


Sources and External Links

China
Light Tanks


Vickers Mk. E Type B • Type 2597 Chi-Ha • M5A1 Stuart • 59-16 • Type 64 • Type 62 • WZ-131 • WZ-132 • M41D • WZ-132A • WZ-132-1

Medium Tanks


Type T-34 • Type 58 • T-34-1 • Type 59 • T-34-2 • T-34-3 • 59-Patton • 122 TM • Type 59 G • WZ-120 • 121 • 121B

Heavy Tanks


IS-2 • WZ-111 • WZ-111 Alpine Tiger • 110 • 112 • WZ-111 model 1-4 • WZ-114 • 113 • 113 Beijing Opera • WZ-111 model 5A • WZ-111 Qilin

Tank Destroyers


T-26G FT • M3G FT • SU-76G FT • 60G FT • WZ-131G FT • T-34-2G FT • WZ-111-1G FT • WZ-120-1G FT • WZ-111G FT • WZ-120G FT • WZ-113G FT • 114 SP2

Self-Propelled Guns


Medium Tanks
USA


T2 Medium Tank • Convert. Medium Tank T3 • M2 Medium Tank • T6 Medium • M3 Lee • M4 Improved • M4A2E4 Sherman • M4A1 Sherman • Ram II • M4A3E8 Fury • M4A3E8 Thunderbolt VII • M4A3E8 Sherman • M4A3E2 Sherman Jumbo • T26E3 Eagle 7 • T20 • T23E3 • T25 Pilot Number 1 • TL-1 LPC • T42 • ASTRON Rex 105 mm • AMBT • M46 Patton KR • M26 Pershing • T26E4 SuperPershing • T69 • T95E2 • M46 Patton • M48A5 Patton • M60 • T95E6

UK


Vickers Medium Mk. I • Vickers Medium Mk. II • Vickers Medium Mk. III • Matilda • Matilda LVT • Grant • AC 1 Sentinel • Cavalier • Valiant • Sherman III • Matilda Black Prince • Sherman Firefly • Cromwell • AC 4 Experimental • Cromwell B • Sherman VC Firefly • Comet • Centurion Mk. I • FV4202 • Chieftain/T95 • Centurion Mk. 5/1 RAAC • Chimera • Cobra • Centurion Mk. 7/1 • Centurion Action X

Germany


Großtraktor - Krupp • Pz.Kpfw. IV Ausf. A • Pz.Kpfw. S35 739 (f) • Pz.Kpfw. III Ausf. J • Pz.Kpfw. IV Ausf. D • VK 20.01 (D) • Pz.Kpfw. III Ausf. K • Turán III prototípus • Pz.Kpfw. IV Ausf. H Ankou • Pz.Kpfw. III/IV • Pz.Kpfw. IV hydrostat. • Pz.Kpfw. V/IV • Pz.Kpfw. V/IV Alpha • Pz.Kpfw. IV Ausf. H • Pz.Kpfw. T 25 • VK 30.01 (H) • Pz.Kpfw. IV Schmalturm • VK 30.01 (D) • VK 30.02 (M) • Panther/M10 • Panther • VK 30.02 (D) • Panther mit 8,8 cm L/71 • Panzer 58 • Schwarzpanzer 58 • Panzer 58 Mutz • M48A2 Räumpanzer • Kampfpanzer 07 RH • Indien-Panzer • Panther II • E 50 • T 55A • Kampfpanzer 50 t • Kunze Panzer • Leopard Prototyp A • E 50 Ausf. M • Leopard 1

France


D2 • Somua S35 • SARL 42 • Renault G1 • Bretagne Panther • M4A1 FL 10 • Bat.-Châtillon Bourrasque • AltProto AMX 30 • Lorraine 40 t • AMX Chasseur de chars • M4A1 Revalorisé • AMX 30 1er prototype • Char Futur 4 • Bat.-Châtillon 25 t AP • Bat.-Châtillon 25 t • AMX 30 B

USSR


T-29 • A-32 • T-28E with F-30 • T-34 with L-11 • T-28 • Matilda IV • T-34 shielded • M4-85 • T-34 • A-43 • T-34-85M • T-34-85 Rudy • Loza's M4-A2 Sherman • T-34-85 • A-44 • KV-13 • T-43 • T-44-122 • Object 416 • T-54 first prototype • T-44-100 Igrovoy • T-44-100 (R) • STG • STG Guard • Object 274a • T-44 • Object 430 Version II • Object 430 • T-54 • Object 140 • Object 907 • T-22 medium • K-91 • Object 430U • T-62A

China


Type T-34 • Type 58 • T-34-1 • Type 59 • T-34-2 • T-34-3 • 59-Patton • 122 TM • Type 59 G • WZ-120 • 121 • 121B

Japan


Chi-Ni • Type 89 I-Go/Chi-Ro • Type 1 Chi-He • Type 3 Chi-Nu • Type 3 Chi-Nu Kai • Type 4 Chi-To • Type 5 Chi-Ri • STA-1 • STA-2 • Type 61 • STB-1