Wargaming.net 위키에 오신 것을 환영합니다!
변수

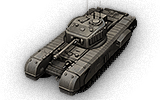
Churchill VII

사용자의 2015년 1월 18일 (일) 07:36 판
(비교) ← 이전 판 | 최신판 (비교) | 다음 판 → (비교)
이동: 둘러보기, 검색


,,


Churchill VII

Icon
UK | Heavy Tank | Tier VI
Battle Tier
1234567891011
Overview
Mouse over "
Well, the ones further down, of course.
" for more information
900,000  Credits Cost
1020216 HP Hit Points
39.19/40.1518.68/43 t Weight Limit
Crew
  1. 전차장
  2. 포수
  3. 조종수
  4. 무전수
  5. 장전수
Mobility
300350 hp Engine Power
20/12 km/h Speed Limit
1820 deg/s Traverse
7.6618.74 hp/t Power/Wt Ratio
NoNo Pivot
Armor
// mm Hull Armor
88.9/76.2/76.2152.4/95.3/95.3 mm Turret Armor
Armament


{{#ifeq:ARMOR_PIERCING_CR|ARMOR_PIERCING||


{{#ifeq:HIGH_EXPLOSIVE|ARMOR_PIERCING||


AP/APCR/HE


{{#ifeq:ARMOR_PIERCING_CR|ARMOR_PIERCING||


{{#ifeq:HIGH_EXPLOSIVE|ARMOR_PIERCING||


AP/APCR/HE
Shells
75/75/100140/140/190 HP Damage
110/180/30148/208/38 mm Penetration


|


|}}

|


|}}


27.27 r/m 

Standard Gun

Reload Times
Nominal: 2.2 s
50% Crew: 2.73 s
75% Crew: 2.38 s
100% Crew: 2.11 s
Rammer: 1.9 s
Vents: 2.06 s
Both: 1.86 s
Both and BiA: 1.82 s
Both and Max Crew %: 1.74 s

See Crew, Consumables, or Equipment for more information.


|


|}}

|


|}}


13.95 r/m 

Standard Gun

Reload Times
Nominal: 4.3 s
50% Crew: 5.33 s
75% Crew: 4.65 s
100% Crew: 4.12 s
Rammer: 3.71 s
Vents: 4.03 s
Both: 3.63 s
Both and BiA: 3.55 s
Both and Max Crew %: 3.4 s

See Crew, Consumables, or Equipment for more information.
Rate of Fire


|


|}}

|


|}}


2045.25

Standard Gun

Using Shell Type 1 (75 Damage):


Theoretical Damage Per Minute
Nominal DPM: 2045.25
50% Crew: 1650.75
75% Crew: 1890.75
100% Crew: 2133
100% Crew
Vents: 2181
Rammer: 2370
Both: 2423.25
Both and BiA: 2477.25
Both and Max Crew %: 2584.5

Advantageous Damage Per Minute
First-shot DPM: 2120.25
50% Crew: 1725.75
75% Crew: 1965.75
100% Crew: 2208
100% Crew
Rammer: 2445
Vents: 2256
Both: 2498.25
Both and BiA: 2552.25
Both and Max Crew %: 2659.5

See here, here, or here for more information.

Standard Gun

Using Shell Type 2 (75 Damage):


Theoretical Damage Per Minute
Nominal DPM: 2045.25
50% Crew: 1650.75
75% Crew: 1890.75
100% Crew: 2133
100% Crew
Vents: 2181
Rammer: 2370
Both: 2423.25
Both and BiA: 2477.25
Both and Max Crew %: 2584.5

Advantageous Damage Per Minute
First-shot DPM: 2120.25
50% Crew: 1725.75
75% Crew: 1965.75
100% Crew: 2208
100% Crew
Rammer: 2445
Vents: 2256
Both: 2498.25
Both and BiA: 2552.25
Both and Max Crew %: 2659.5

See here, here, or here for more information.

Standard Gun

Using Shell Type 3 (100 Damage):
With wholly penetrating hits

Theoretical Damage Per Minute
Nominal DPM: 2727
50% Crew: 2201
75% Crew: 2521
100% Crew: 2844
100% Crew
Vents: 2908
Rammer: 3160
Both: 3231
Both and BiA: 3303
Both and Max Crew %: 3446

Advantageous Damage Per Minute
First-shot DPM: 2827
50% Crew: 2301
75% Crew: 2621
100% Crew: 2944
100% Crew
Rammer: 3260
Vents: 3008
Both: 3331
Both and BiA: 3403
Both and Max Crew %: 3546

See here, here, or here for more information.


|


|}}

|


|}}


1953

Standard Gun

Using Shell Type 1 (140 Damage):


Theoretical Damage Per Minute
Nominal DPM: 1953
50% Crew: 1576.4
75% Crew: 1806
100% Crew: 2037
100% Crew
Vents: 2083.2
Rammer: 2263.8
Both: 2314.2
Both and BiA: 2366
Both and Max Crew %: 2468.2

Advantageous Damage Per Minute
First-shot DPM: 2093
50% Crew: 1716.4
75% Crew: 1946
100% Crew: 2177
100% Crew
Rammer: 2403.8
Vents: 2223.2
Both: 2454.2
Both and BiA: 2506
Both and Max Crew %: 2608.2

See here, here, or here for more information.

Standard Gun

Using Shell Type 2 (140 Damage):


Theoretical Damage Per Minute
Nominal DPM: 1953
50% Crew: 1576.4
75% Crew: 1806
100% Crew: 2037
100% Crew
Vents: 2083.2
Rammer: 2263.8
Both: 2314.2
Both and BiA: 2366
Both and Max Crew %: 2468.2

Advantageous Damage Per Minute
First-shot DPM: 2093
50% Crew: 1716.4
75% Crew: 1946
100% Crew: 2177
100% Crew
Rammer: 2403.8
Vents: 2223.2
Both: 2454.2
Both and BiA: 2506
Both and Max Crew %: 2608.2

See here, here, or here for more information.

Standard Gun

Using Shell Type 3 (190 Damage):
With wholly penetrating hits

Theoretical Damage Per Minute
Nominal DPM: 2650.5
50% Crew: 2139.4
75% Crew: 2451
100% Crew: 2764.5
100% Crew
Vents: 2827.2
Rammer: 3072.3
Both: 3140.7
Both and BiA: 3211
Both and Max Crew %: 3349.7

Advantageous Damage Per Minute
First-shot DPM: 2840.5
50% Crew: 2329.4
75% Crew: 2641
100% Crew: 2954.5
100% Crew
Rammer: 3262.3
Vents: 3017.2
Both: 3330.7
Both and BiA: 3401
Both and Max Crew %: 3539.7

See here, here, or here for more information.
Damage Per Minute


|


|}}


0.39 m 

With 50% Crew: 0.483 m
With 75% Crew: 0.422 m
With 100% Crew: 0.374 m
With BiA: 0.366 m
With BiA and Vents: 0.358 m
Maximum possible: 0.343 m

For more details, see Crew


|


|}}


0.36 m 

With 50% Crew: 0.446 m
With 75% Crew: 0.389 m
With 100% Crew: 0.345 m
With BiA: 0.338 m
With BiA and Vents: 0.33 m
Maximum possible: 0.317 m

For more details, see Crew
Accuracy


|


|}}


1.9 s 

With 50% Crew: 2.354 s
With 75% Crew: 2.055 s
With 100% Crew: 1.822 s
With GLD: 1.656 s
With BiA: 1.782 s
With BiA and Vents: 1.743 s
With both and GLD: 1.584 s
Maximum possible: 1.519 s

For more details, see Crew or Equipment


|


|}}


2.3 s 

With 50% Crew: 2.849 s
With 75% Crew: 2.488 s
With 100% Crew: 2.205 s
With GLD: 2.005 s
With BiA: 2.157 s
With BiA and Vents: 2.11 s
With both and GLD: 1.918 s
Maximum possible: 1.839 s

For more details, see Crew or Equipment
Aim time
3030 deg/s Turret Traverse
360° Gun Arc
-7°/+20°-4°/+12° Elevation Arc
14584 rounds Ammo Capacity
General
2020 % Chance of Fire


350 m 

With 50% Crew: 275 m
With 75% Crew: 312.5 m
With 100% Crew: 350 m
With Recon and Situational Awareness: 367.7 m
With Coated Optics: 385 m
With Binocular Telescope: 437.5 m
Maximum possible: 501.1 m

For more details, see Skills or Equipment


360 m 

With 50% Crew: 282.8 m
With 75% Crew: 321.5 m
With 100% Crew: 360 m
With Recon and Situational Awareness: 378.2 m
With Coated Optics: 396 m
With Binocular Telescope: 450 m
Maximum possible: 515.4 m

For more details, see Skills or Equipment
View Range


|


|}}


400 m 

With 50% Crew: 322.9 m
With 75% Crew: 369.8 m
With 100% Crew: 417.2 m
With 100% Signal Boost: 480 m
When affected by 100% Relaying: 440 m
Maximum possible: 600.5 m

For more details, see Skills or Equipment


|


|}}


550 m 

With 50% Crew: 444 m
With 75% Crew: 508.5 m
With 100% Crew: 573.6 m
With 100% Signal Boost: 660 m
When affected by 100% Relaying: 605 m
Maximum possible: 825.7 m

For more details, see Skills or Equipment
Signal Range
Values are Stock - click for Top


VI

annoGB09_Churchill_VII.png

900000

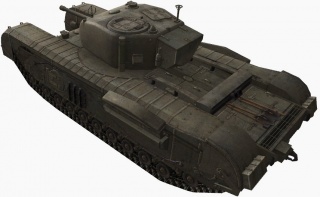
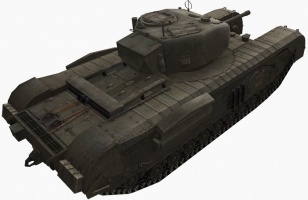
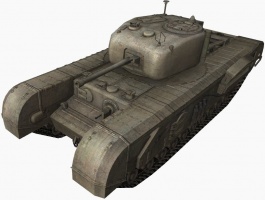
The Churchill VII is a British tier 6 heavy tank.

A22의 장갑을 강화한 개량형으로, 연합군의 노르망디 상륙 작전이 개시되기 직전 생산이 시작되었다. Churchill Crocodile 화염방사 전차의 제작에 기초가 되었다.

The Churchill VII is a huge upgrade from its predecessor, the Churchill I, with far better armor, more track protection, and a larger health pool. The armor on this tank is thicker, especially at the turret, and has extremely small weakspots. Only TD’s of the same tier will pose a problem. No tank can have it all though, and the Churchill VII trades a lot of its mobility for that impressive armor. The guns on this tank have a low damage per shot, with great penetration, accuracy and rate-of-fire, resulting in high dpm. The Churchill VII’s armor combined with that solid top gun, makes it one of the best in its tier for brawling. Just don’t show too much of your side armor.

The Churchill VII leads to the Black Prince.

Modules / Available Equipment and Consumables

Modules

주포

주포

단계 주포 평균 관통력 (mm) 연사력 100m에서의 분산도 조준 시간 일반 경험치 중량 (톤) 가격,
V QF 6-pdr Gun Mk. V 110/180/30 75/75/100 27.27 0.39 1.9 0 450 35000
V 3.7-inch Howitzer 47/110/30 370/280/100 8.57 0.51 2.3 2300 393 35000
V 75 mm Gun Mk. V 91/144/38 110/110/175 20 0.41 1.9 4000 500 45000
VI 75 mm Vickers HV 145/202/38 135/135/175 12.5 0.36 2.3 5000 591 50000
VII OQF 77 mm Gun Mk. II 148/208/38 140/140/190 13.95 0.36 2.3 14500 681 63000
엔진

엔진

단계 엔진 엔진 출력 (마력) 충돌 시 화재 발생 확률 일반 경험치 중량 (톤) 가격,
IV Meadows D.A.V. 300 20 0 724 9000
IV Bedford Twin-Six 350 20 850 1531 11000
현가장치

현가장치

단계 현가장치 한계 중량 회전 속도 (도/초) 일반 경험치 중량 (톤) 가격,
V Churchill IV 40.15 18 0 8150 8600
VI Churchill VII 43 20 4900 8150 18000
무전기

무전기

단계 무전기 통신 범위 (m) 일반 경험치 중량 (톤) 가격,
VI WS No. 19 Mk. I 400 0 40 15000
VII WS No. 19 Mk. II 450 3600 40 21000
VIII WS No. 19 Mk. III 550 4000 40 22000

Compatible Equipment

Compatible Consumables

Player Opinion

Pros and Cons

Pros:


  • Thick frontal armor and thick turret armor
  • Track links on turret act as spaced armor
  • High rate of fire
  • High hit point pool
  • Inexpensive shells


Cons:


  • Low speed and acceleration
  • Obvious frontal weak spots, although still relatively thick (139mm)
  • Large boxy projection on side armor is an unfortunate weakspot that hampers sidescraping
  • When faced frontally to an opponent, the track covers from the front become part of the hitbox
  • Poor gun depression


Performance

The upgraded version of the Churchill I has more armor than the previous heavy tank. However, the speed of this tank is even slower than its predecessor. Even the infamous Maus has more speed. When playing this tank, always angle this tank a bit to the right at about 32 degrees. This will cover the frontal weak spot for the tank and also increases the frontal armor. If you are playing stock, play like the Matilda; Use your aim time and fast reload to suppress any enemies you meet. If you are playing with the 75 mm Vickers HV, play like a Churchill I, only a bit slower. The 77 mm will slow you down more, but you need the extra penetration and damage. Focus mostly on heavy mediums and light heavies, and aim at their weakspots, because your penetration and damage will do less than expected in higher tier battles.

Generally in a game of its tier, Churchill VII drivers should try to defend or push chokepoints, streets and valleys. They should not try to get onto higher ground due to their horrible gun depression. They should be very wary of getting isolated from their friendlies. When the Churchill VII is the top tank of the game. Let her rip. Due to the heaviness of the armor, basically nothing can get through the tank and if one is careful not to be flanked by enemies, they should be able to directly affect the outcome of the battle and rip the enemy team apart.

Once a player commits this tank to a path or area it can be difficult to adapt to the changing battle because of the Churchill VII's slow speed and poor maneuverability. Instead, the player should consider the paths their allies choose and either provide support to one side or cover a weak spot in the line. Be very careful about getting isolated though.

When placed into higher tier games, the Churchill VII has to rely on placement and team support. As its speed and firepower are extremely limited against most tier 8 tanks, utilize flanking positions by covering positions from the side. Stay at a distance and use the superior accuracy of the 77mm OQF to lay down fire against enemy tanks. As the 77mm OQF will be able to penetrate the sides of most targets, it will provide high DPM support for allies. Try not to get spotted, and or be in the open as enemy tanks and artillery will have little trouble getting through the non-slopped armor. Use its armor as a final resort against higher tier heavy tanks, by side scrapping and baiting shots into your tracks. In higher tier games the Churchill VII has limited options, but in the correct position its sheer DPM can provide large amounts of damage. Like most tanks, if caught in the wrong position there is very little chance of survival against higher tier opponents due to its low speed and health compared to tier 8 tanks.

Note that when coming around corner cover, such as buildings or rocks, even taking the shortest route will expose your tracks and sides for at least several seconds before you can get gun around the corner. If you are tracked before your gun gets around the corner, you're dead. Instead, try to make large turns or angle around the turn so that the enemy sees as little of your sides as possible and your frontal armor is quickly brought to bear. Alternatively, you may drive to the corner, point your tank to the corner and back up and out, using the well armored and high angled side to defend the tank against retaliation. This also protects your tracks and weak points from damage.


Early Research

  • The 75 mm Vickers HV Gun, Bedford Twin-Six Engine, and WS No. 19 Mk. III Radio should already be researched from the Churchill I, and can be mounted immediately.
  • With these modules mounted, the tank's weight is just short of capacity, so the Churchill VII Suspension must be researched next.
  • Next comes the Churchill VII Turret.
  • Finally research the OQF 77 mm Gun Mk. II Gun.


Suggested Equipment


Improved VentilationTank Gun Rammer Enhanced Gun Laying Drive Toolbox 


Gallery

Historical Info

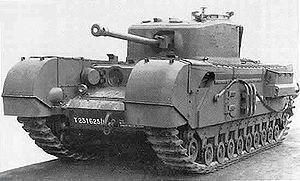
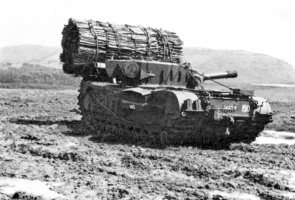
In the Mark VII, the driver had two periscopes as well as a vision port in the hull front that could be opened. The hull gunner had a single periscope as well as the sighting telescope on the BESA mounting. In the turret the gunner and loader each had single periscope and the commander had two fitted in his hatch cupola.

The armour on the Churchill, often considered its most important feature, was originally specified to a minimum of 16 millimetres (0.63 in) and a maximum of 102 millimetres (4.0 in); this was increased with the Mk VII to a range from 25 millimetres (0.98 in) to 152 millimetres (6.0 in). Though this armour was considerably thicker than its rivals (including the German Tiger I tank, but not the Tiger II) it was not sloped, reducing its effectiveness. Earlier models were given extra armour by the expedient of welding extra plates on.

On the Mark VII, the hull front armour was made up of a lower angled piece of 5.5 in (140 mm), a nearly flat 2.25 in (57 mm) plate and a vertical 6 inch plate. The hull sides, were for the most part, 3.75 in (95 mm). The rear was 2 in (51 mm) and the hull top 0.525 in (13.3 mm). The turret of the Mark VII was 6 in (150 mm) to the front and 3.75 in (95 mm) for the other sides. The turret roof was 0.79 (20 mm) thick. Plate was specified as IT 80, the cast sections as IT 90.


Historical Gallery

Sources and External Links
UK
Light Tanks


Cruiser Mk. I • M2 • Cruiser Mk. II • Light Mk. VIC • Valentine • Stuart I-IV • Cruiser Mk. III • Cruiser Mk. IV • Covenanter • A46 • Crusader • GSR 3301 Setter • FV1066 Senlac • LHMTV • GSOR3301 AVR FS • Manticore

Medium Tanks


Vickers Medium Mk. I • Vickers Medium Mk. II • Vickers Medium Mk. III • Matilda • Matilda LVT • Grant • AC 1 Sentinel • Cavalier • Valiant • Sherman III • Matilda Black Prince • Sherman Firefly • Cromwell • AC 4 Experimental • Cromwell B • Sherman VC Firefly • Comet • Centurion Mk. I • FV4202 • Chieftain/T95 • Centurion Mk. 5/1 RAAC • Chimera • Cobra • Centurion Mk. 7/1 • Centurion Action X

Heavy Tanks


Churchill I • Excelsior • Churchill VII • TOG II* • Black Prince • FV201 (A45) • Charlemagne • Caliban • Gonsalo • Caernarvon • Caernarvon Action X • FV4201 Chieftain Proto • Conqueror • FV215b • Super Conqueror • T95/FV4201 Chieftain

Tank Destroyers


Universal Carrier 2-pdr • Valentine AT • Alecto • Archer • AT 2 • Churchill Gun Carrier • Achilles • AT 8 • Excalibur • Challenger • AT 15A • AT 7 • GSOR 1008 • AT 15 • Charioteer • Turtle Mk. I • Tortoise • FV4004 Conway • FV215b (183) • FV4005 Stage II • FV217 Badger

Self-Propelled Guns


Loyd Gun Carriage • Sexton II • Sexton I • Birch Gun • Bishop • FV304 • Crusader 5.5-in. SP • FV207 • FV3805 • Conqueror Gun Carriage

Heavy Tanks
USA


T14 • T1 Heavy Tank • Pawlack Tank • M6 • King Tiger (Captured) • M-II-Y • T29 • Chrysler K • Chrysler K GF • T26E5 • T26E5 Patriot • M54 Renegade • T77 • M-III-Y • M-IV-Y • M6A2E1 • T32 • T34 • T34 B • AE Phase I • Concept 1B • M-VI-Y • M103 • T54E1 • M-V-Y • T110E5 • T57 Heavy Tank

UK


Churchill I • Excelsior • Churchill VII • TOG II* • Black Prince • FV201 (A45) • Charlemagne • Caliban • Gonsalo • Caernarvon • Caernarvon Action X • FV4201 Chieftain Proto • Conqueror • FV215b • Super Conqueror • T95/FV4201 Chieftain

Germany


Pz.Kpfw. B2 740 (f) • Durchbruchswagen 2 • Tiger 131 • VK 30.01 (P) • VK 36.01 (H) • VK 45.03 • Tiger I • Tiger (P) • VK 100.01 (P) • VK 168.01 (P) • VK 168.01 Mauerbrecher • VK 75.01 (K) • E 75 TS • Löwe • Tiger II • VK 45.02 (P) Ausf. A • E 75 • Mäuschen • VK 45.02 (P) Ausf. B • E 100 • Pz.Kpfw. VII • Maus • VK 72.01 (K)

France


B1 • BDR G1 B • ARL 44 • AMX M4 mle. 45 • AMX 50 100 • AMX M4 mle. 49 • AMX M4 mle. 49 Liberté • AMX 65 t • Somua SM • FCM 50 t • AMX 50 120 • Lorraine 50 t • AMX M4 mle. 51 • AMX 50 B • AMX M4 mle. 54

USSR


Churchill III • KV-220-2 • KV-220-2 Beta Test • KV-1 • KV-1 shielded • KV-1S • KV-2 • KV-2 (R) • KV-85 • Object 244 • T-150 • IS • KV-3 • KV-122 • IS-2M • IS-2 shielded • IS-2 • IS-3 • IS-6 • IS-6 B • KV-5 • KV-4 • IS-5 (Object 730) • IS-3A • IS-3A Peregrine • Kirovets-1 • KV-4 by Kreslavskiy • Object 252U Defender • Object 252U • IS-M • Object 703 Version II • IS-2-II • T-10 • Object 777 Version II • Object 257 • Object 705 • IS-3-II • ST-I • IS-4 • IS-7 • Object 260 • Object 705A • Object 277 • Object 279 early • ST-II • Object 780

China


IS-2 • WZ-111 • WZ-111 Alpine Tiger • 110 • 112 • WZ-111 model 1-4 • WZ-114 • 113 • 113 Beijing Opera • WZ-111 model 5A • WZ-111 Qilin

Japan


Type 91 Heavy • Type 95 Heavy • O-I Experimental • Heavy Tank No. VI • O-I • O-Ni • O-Ho • Type 4 Heavy • Type 5 Heavy