Wargaming.net 위키에 오신 것을 환영합니다!
변수

AT 8

사용자의 2014년 9월 4일 (목) 16:12 판
(비교) ← 이전 판 | 최신판 (비교) | 다음 판 → (비교)
이동: 둘러보기, 검색


newfile.png Article requires additional modification
The design and/or content of this article do not conform to wiki standards.
Missing Content
  • Sources and External Links


,,


AT 8

Icon
UK | TD | Tier VI
Battle Tier
1234567891011
Overview
Mouse over "
Well, the ones further down, of course.
" for more information
940,000  Credits Cost
900180 HP Hit Points
41/41.512.69/44.5 t Weight Limit
Crew
  1. 전차장
  2. 포수
  3. 조종수
  4. 무전수
  5. 장전수
  6. 장전수
Mobility
340410 hp Engine Power
20/10 km/h Speed Limit
1820 deg/s Traverse
8.2932.31 hp/t Power/Wt Ratio
YesYes Pivot
Armor
// mm Hull Armor
Armament


{{#ifeq:ARMOR_PIERCING_CR|ARMOR_PIERCING||


{{#ifeq:HIGH_EXPLOSIVE|ARMOR_PIERCING||


AP/APCR/HE


{{#ifeq:ARMOR_PIERCING_CR|ARMOR_PIERCING||


{{#ifeq:HIGH_EXPLOSIVE|ARMOR_PIERCING||


AP/APCR/HE
Shells
75/75/100150/150/190 HP Damage
110/180/30171/239/38 mm Penetration


|


|}}

|


|}}


26.09 r/m 

Standard Gun

Reload Times
Nominal: 2.3 s
50% Crew: 2.85 s
75% Crew: 2.49 s
100% Crew: 2.21 s
Rammer: 1.99 s
Vents: 2.16 s
Both: 1.95 s
Both and BiA: 1.9 s
Both and Max Crew %: 1.82 s

See Crew, Consumables, or Equipment for more information.


|


|}}

|


|}}


13.95 r/m 

Standard Gun

Reload Times
Nominal: 4.3 s
50% Crew: 5.33 s
75% Crew: 4.65 s
100% Crew: 4.12 s
Rammer: 3.71 s
Vents: 4.03 s
Both: 3.63 s
Both and BiA: 3.55 s
Both and Max Crew %: 3.4 s

See Crew, Consumables, or Equipment for more information.
Rate of Fire


|


|}}

|


|}}


1956.75

Standard Gun

Using Shell Type 1 (75 Damage):


Theoretical Damage Per Minute
Nominal DPM: 1956.75
50% Crew: 1579.5
75% Crew: 1809
100% Crew: 2040.75
100% Crew
Vents: 2086.5
Rammer: 2267.25
Both: 2318.25
Both and BiA: 2370
Both and Max Crew %: 2472.75

Advantageous Damage Per Minute
First-shot DPM: 2031.75
50% Crew: 1654.5
75% Crew: 1884
100% Crew: 2115.75
100% Crew
Rammer: 2342.25
Vents: 2161.5
Both: 2393.25
Both and BiA: 2445
Both and Max Crew %: 2547.75

See here, here, or here for more information.

Standard Gun

Using Shell Type 2 (75 Damage):


Theoretical Damage Per Minute
Nominal DPM: 1956.75
50% Crew: 1579.5
75% Crew: 1809
100% Crew: 2040.75
100% Crew
Vents: 2086.5
Rammer: 2267.25
Both: 2318.25
Both and BiA: 2370
Both and Max Crew %: 2472.75

Advantageous Damage Per Minute
First-shot DPM: 2031.75
50% Crew: 1654.5
75% Crew: 1884
100% Crew: 2115.75
100% Crew
Rammer: 2342.25
Vents: 2161.5
Both: 2393.25
Both and BiA: 2445
Both and Max Crew %: 2547.75

See here, here, or here for more information.

Standard Gun

Using Shell Type 3 (100 Damage):
With wholly penetrating hits

Theoretical Damage Per Minute
Nominal DPM: 2609
50% Crew: 2106
75% Crew: 2412
100% Crew: 2721
100% Crew
Vents: 2782
Rammer: 3023
Both: 3091
Both and BiA: 3160
Both and Max Crew %: 3297

Advantageous Damage Per Minute
First-shot DPM: 2709
50% Crew: 2206
75% Crew: 2512
100% Crew: 2821
100% Crew
Rammer: 3123
Vents: 2882
Both: 3191
Both and BiA: 3260
Both and Max Crew %: 3397

See here, here, or here for more information.


|


|}}

|


|}}


2092.5

Standard Gun

Using Shell Type 1 (150 Damage):


Theoretical Damage Per Minute
Nominal DPM: 2092.5
50% Crew: 1689
75% Crew: 1935
100% Crew: 2182.5
100% Crew
Vents: 2232
Rammer: 2425.5
Both: 2479.5
Both and BiA: 2535
Both and Max Crew %: 2644.5

Advantageous Damage Per Minute
First-shot DPM: 2242.5
50% Crew: 1839
75% Crew: 2085
100% Crew: 2332.5
100% Crew
Rammer: 2575.5
Vents: 2382
Both: 2629.5
Both and BiA: 2685
Both and Max Crew %: 2794.5

See here, here, or here for more information.

Standard Gun

Using Shell Type 2 (150 Damage):


Theoretical Damage Per Minute
Nominal DPM: 2092.5
50% Crew: 1689
75% Crew: 1935
100% Crew: 2182.5
100% Crew
Vents: 2232
Rammer: 2425.5
Both: 2479.5
Both and BiA: 2535
Both and Max Crew %: 2644.5

Advantageous Damage Per Minute
First-shot DPM: 2242.5
50% Crew: 1839
75% Crew: 2085
100% Crew: 2332.5
100% Crew
Rammer: 2575.5
Vents: 2382
Both: 2629.5
Both and BiA: 2685
Both and Max Crew %: 2794.5

See here, here, or here for more information.

Standard Gun

Using Shell Type 3 (190 Damage):
With wholly penetrating hits

Theoretical Damage Per Minute
Nominal DPM: 2650.5
50% Crew: 2139.4
75% Crew: 2451
100% Crew: 2764.5
100% Crew
Vents: 2827.2
Rammer: 3072.3
Both: 3140.7
Both and BiA: 3211
Both and Max Crew %: 3349.7

Advantageous Damage Per Minute
First-shot DPM: 2840.5
50% Crew: 2329.4
75% Crew: 2641
100% Crew: 2954.5
100% Crew
Rammer: 3262.3
Vents: 3017.2
Both: 3330.7
Both and BiA: 3401
Both and Max Crew %: 3539.7

See here, here, or here for more information.
Damage Per Minute


|


|}}


0.37 m 

With 50% Crew: 0.458 m
With 75% Crew: 0.4 m
With 100% Crew: 0.355 m
With BiA: 0.347 m
With BiA and Vents: 0.339 m
Maximum possible: 0.325 m

For more details, see Crew


|


|}}


0.32 m 

With 50% Crew: 0.396 m
With 75% Crew: 0.346 m
With 100% Crew: 0.307 m
With BiA: 0.3 m
With BiA and Vents: 0.294 m
Maximum possible: 0.281 m

For more details, see Crew
Accuracy


|


|}}


1.7 s 

With 50% Crew: 2.106 s
With 75% Crew: 1.839 s
With 100% Crew: 1.63 s
With GLD: 1.482 s
With BiA: 1.594 s
With BiA and Vents: 1.559 s
With both and GLD: 1.418 s
Maximum possible: 1.359 s

For more details, see Crew or Equipment


|


|}}


1.7 s 

With 50% Crew: 2.106 s
With 75% Crew: 1.839 s
With 100% Crew: 1.63 s
With GLD: 1.482 s
With BiA: 1.594 s
With BiA and Vents: 1.559 s
With both and GLD: 1.418 s
Maximum possible: 1.359 s

For more details, see Crew or Equipment
Aim time
1820 deg/s Gun Traverse Speed
14° Gun Arc
-5°/+7°-5°/+7° Elevation Arc
14570 rounds Ammo Capacity
General
2020 % Chance of Fire


330 m 

With 50% Crew: 259.3 m
With 75% Crew: 294.7 m
With 100% Crew: 330 m
With Recon and Situational Awareness: 346.7 m
With Coated Optics: 363 m
With Binocular Telescope: 412.5 m
Maximum possible: 472.4 m

For more details, see Skills or Equipment


330 m 

With 50% Crew: 259.3 m
With 75% Crew: 294.7 m
With 100% Crew: 330 m
With Recon and Situational Awareness: 346.7 m
With Coated Optics: 363 m
With Binocular Telescope: 412.5 m
Maximum possible: 472.4 m

For more details, see Skills or Equipment
View Range


|


|}}


400 m 

With 50% Crew: 322.9 m
With 75% Crew: 369.8 m
With 100% Crew: 417.2 m
With 100% Signal Boost: 480 m
When affected by 100% Relaying: 440 m
Maximum possible: 600.5 m

For more details, see Skills or Equipment


|


|}}


550 m 

With 50% Crew: 444 m
With 75% Crew: 508.5 m
With 100% Crew: 573.6 m
With 100% Signal Boost: 660 m
When affected by 100% Relaying: 605 m
Maximum possible: 825.7 m

For more details, see Skills or Equipment
Signal Range
Values are Stock - click for Top


VI

annoGB74_AT8.png

940000

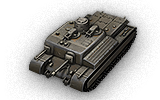
The AT 8 is a British tier 6 tank destroyer.

돌파 전차로 구상된 전차이다. 1943년 5월 29일 설계 기획이 준비되었으나 너필드(Nuffield)가 다른 전차 기획을 제안하여 시제 전차는 제작되지 않았다. 이후 너필드의 기획은 A39 Tortoise로 개발되었다.

The AT 8 is a natural progression from its predecessor, the AT 2. Unfortunately, many of its stats are near identical such as armor values, traverse speed, and engine power. The main feature of the AT 8 is an improved cannon with twice the alpha damage, improved penetration, and good damage per minute. The AT 8 has many flaws, including poor mobility and top speed, a large commanders cupola, and very poor gun depression and gun arc. Nonetheless the accurate high DPM gun, the large HP pool, and armour that will still bounce its share of shots of range make the AT 8 a dangerous defender.

The AT 8 leads to the AT 7.

Modules / Available Equipment and Consumables

Modules

주포

주포

단계 주포 평균 관통력 (mm) 연사력 100m에서의 분산도 조준 시간 일반 경험치 중량 (톤) 가격,
V QF 6-pdr AT Gun Mk. V 110/180/30 75/75/100 26.09 0.37 1.7 0 450 35000
V 75 mm AT Gun Mk. V 91/144/38 110/110/175 26.09 0.39 1.7 4000 500 45000
VII OQF 77 mm AT Gun Mk. II 148/208/38 140/140/190 15.79 0.32 1.7 14500 681 62000
VII OQF 17-pdr AT Gun Mk. VII 171/239/38 150/150/190 13.95 0.32 1.7 15000 826 65000
엔진

엔진

단계 엔진 엔진 출력 (마력) 충돌 시 화재 발생 확률 일반 경험치 중량 (톤) 가격,
III Nuffield Liberty Mk. II 340 20 0 383 500
IV Nuffield Liberty Mk. III 395 20 1100 383 11500
V Nuffield Liberty Mk. V 410 20 1000 383 12500
현가장치

현가장치

단계 현가장치 한계 중량 회전 속도 (도/초) 일반 경험치 중량 (톤) 가격,
VI AT 8 41.5 18 0 11000 13000
VI AT 8 Mk. II 44.5 20 5000 11000 16000
무전기

무전기

단계 무전기 통신 범위 (m) 일반 경험치 중량 (톤) 가격,
VI WS No. 19 Mk. I 400 0 40 15000
VII WS No. 19 Mk. II 450 3600 40 21000
VIII WS No. 19 Mk. III 550 4000 40 22000

Compatible Equipment

Compatible Consumables

Player Opinion

Pros and Cons

Pros:


  • Very accurate and quick-aiming guns
  • Great rate of fire
  • Good damage per minute
  • Very large hitpoints pool (comparable to heavies of the same tier)
  • Good all-around armor


Cons:


  • Asymmetrical and poorly-angled armor
  • Relatively large commanders cupola
  • Very low top speed and poor turning speed
  • Difficult to hide
  • Easy target for artillery


Performance

The AT 8 is very similar to its predecessor in being big, slow, and cumbersome. It retains the 203mm armor but at a very poor flat angle. Thus, its armor cannot be relied upon against higher tiers. As with the AT 2, the AT 8 is very difficult to penetrate while top tier and even its sides and rear are hard to break when angled. However, the very poor gun arc prevents any angling if the AT 8 wants to continue firing. The main weakspot of the AT 8 is the huge commander's copula. The At 8 is very bouncy at a distance but up-close enemies will aim at the big copula and quickly dispatch the AT 8 through it. Do note, however, that there are two well-protected machine gun blocks around the copula. These blocks are very tough and can potentially cover half of the copula, thus, protecting it. Keep in mind that the right side of the tank with the secondary has a large area of poor armour. Experienced players can easily pen you even with some tier IV tanks, so try to keep this half of the tank hidden whenever possible.

The 17-pdr gun is exceedingly accurate and aims very quickly. Thus, using a Toolbox or Vents instead of a Gun Laying Drive is highly recommended. The 17-pdr has decent penetration and alpha damage coupled with good damage per minute and penetration. The 17-pdr can also fire APCR rounds with enough penetration to be effective against Tier 8s. You have better camo than you'd think for such a TD, playing the tank as a sniper makes it harder for opponents to aim at weakspots while your DPM can shred anything that does not dive for cover. Your HP, armour, and accurate high DPM gun allow you to excel at long range and mitigate the tank's weaknesses. The 17-pdr cannon is the main upgrade of the AT 8.

Do note that the grind up to the 17-pdr gun will hurt a lot. The 6-pounder will simply not cut it most of the time without APCR, while the 75mm is actually worse. Only with the 2nd best gun will the tank start to feel like an upgrade from the previous tier.

Speed and mobility are the main weaknesses of the British tank destroyers. An AT 8 should always keep moving forward whenever possible to prevent being left behind by its team. Also, the poor top speed makes being pushed by teammates ineffective. The poor engine power means that running over trees or stone fences will have a serious impact on speed, coupled with poor acceleration. Once the AT 8 chooses a route it is committed to that route for the rest of the game. There is potential in base defense but enemy artillery and poor view range will severely hinder its effectiveness.

While the AT 2 could be used as an assault gun more often, the armour from the AT 8 on is no longer quite as reliable due to massive weakpots. The AT 8 sets the playstyle for the AT 7 and beyond, which should be medium-long range sniping to increase the odds shots will miss weakspots.


Early Research

  • The Nuffield Liberty Mk. III Engine and WS No. 19 Mk. III Radio carry over from the AT 2. Mount them immediately.
  • All modules can be mounted without upgrading the suspension. However, adding equipment can start to bring you to close to the limit. You may be able to save the suspension until after the 77mm gun, but waiting until after the 17 pdr will leave you no room with equipment.
  • The Nuffield Liberty Mk. V Engine requires very little experience, but provides little improvement from the previous engine. It would probably be best to research most or all of the guns before taking the time to research it. If you have already unlocked the engine through the British medium line, immediately mount this engine.


Suggested Equipment


Tank Gun Rammer Improved VentilationBinocular Telescope Toolbox Spall Liner 


Gallery

Historical Info

AT-8 was a slight modification of the AT-7 project. Despite its designation, AT-8 wasn't a descendant of AT-7, but more of a spin off, as they were developed roughly at the same time. Main armament was to be the same 6pdr gun, but this time mounted in the center of the vehicle. The 20mm Polsten autocannon moved from the left sponson to the right sponson. Roof of the vehicle had four machine guns mounted into two mini turrets. The armor remained the same maximum of 203 mm on the front, and 100 mm on the sides and back of the vehicle. The weight was estimated at 41 tons. No prototype was ever built.


Historical Gallery


UK
Light Tanks


Cruiser Mk. I • M2 • Cruiser Mk. II • Light Mk. VIC • Valentine • Stuart I-IV • Cruiser Mk. III • Cruiser Mk. IV • Covenanter • A46 • Crusader • GSR 3301 Setter • FV1066 Senlac • LHMTV • GSOR3301 AVR FS • Manticore

Medium Tanks


Vickers Medium Mk. I • Vickers Medium Mk. II • Vickers Medium Mk. III • Matilda • Matilda LVT • Grant • AC 1 Sentinel • Cavalier • Valiant • Sherman III • Matilda Black Prince • Sherman Firefly • Cromwell • AC 4 Experimental • Cromwell B • Sherman VC Firefly • Comet • Centurion Mk. I • FV4202 • Chieftain/T95 • Centurion Mk. 5/1 RAAC • Chimera • Cobra • Centurion Mk. 7/1 • Centurion Action X

Heavy Tanks


Churchill I • Excelsior • Churchill VII • TOG II* • Black Prince • FV201 (A45) • Charlemagne • Caliban • Gonsalo • Caernarvon • Caernarvon Action X • FV4201 Chieftain Proto • Conqueror • FV215b • Super Conqueror • T95/FV4201 Chieftain

Tank Destroyers


Universal Carrier 2-pdr • Valentine AT • Alecto • Archer • AT 2 • Churchill Gun Carrier • Achilles • AT 8 • Excalibur • Challenger • AT 15A • AT 7 • GSOR 1008 • AT 15 • Charioteer • Turtle Mk. I • Tortoise • FV4004 Conway • FV215b (183) • FV4005 Stage II • FV217 Badger

Self-Propelled Guns


Loyd Gun Carriage • Sexton II • Sexton I • Birch Gun • Bishop • FV304 • Crusader 5.5-in. SP • FV207 • FV3805 • Conqueror Gun Carriage

Tank Destroyers
USA


T3 HMC • T56 GMC • M8A1 • T40 • M10 Wolverine • T67 • T78 • M18 Hellcat • M36 Jackson • M56 Scorpion • T28 Concept • Super Hellcat • T25/2 • T25 AT • TS-5 • T28 • T28 Prototype • T30 • T95 • T110E3 • T110E4

UK


Universal Carrier 2-pdr • Valentine AT • Alecto • Archer • AT 2 • Churchill Gun Carrier • Achilles • AT 8 • Excalibur • Challenger • AT 15A • AT 7 • GSOR 1008 • AT 15 • Charioteer • Turtle Mk. I • Tortoise • FV4004 Conway • FV215b (183) • FV4005 Stage II • FV217 Badger

Germany


Panzerjäger I • Marder II • StuG III Ausf. B • Pz.Sfl. IC • Jagdpanzer 38(t) Hetzer • Marder 38T • StuG IV • Pz.Sfl. IVc • StuG III Ausf. G • Dicker Max • Jagdpanzer IV • Nashorn • E 25 • Krupp-Steyr Waffenträger • Jagdpanther • Sturer Emil • Ferdinand • Kanonenjagdpanzer 105 • Rheinmetall Skorpion G • Rheinmetall Skorpion • Jagdpanther II • 8,8 cm Pak 43 Jagdtiger • Rhm.-Borsig Waffenträger • Jagdtiger • Waffenträger auf Pz. IV • Grille 15 • Jagdpanzer E 100 • Waffenträger auf E 100

France


Renault FT AC • FCM 36 Pak 40 • Renault UE 57 • Somua SAu 40 • M10 RBFM • S35 CA • ARL V39 • AMX AC mle. 46 • AMX AC mle. 48 • AMX Canon d'assaut 105 • AMX 50 Foch • AMX 50 Foch (155) • AMX 50 Foch B

USSR


AT-1 • SU-76I • SU-85B • SU-76M • SU-85 • SU-85I • SU-100 • SU-100Y • ISU-122S • SU-152 • SU-100M1 • SU-122-44 • ISU-152 • ISU-130 • KV-4 KTTS • T-103 • SU-130PM • ISU-152K • SU-101 • K-91-PT • Object 704 • Object 263 • Object 268 • Object 268 Version V • Object 268 Version 4

China


T-26G FT • M3G FT • SU-76G FT • 60G FT • WZ-131G FT • T-34-2G FT • WZ-111-1G FT • WZ-120-1G FT • WZ-111G FT • WZ-120G FT • WZ-113G FT • 114 SP2

Japan