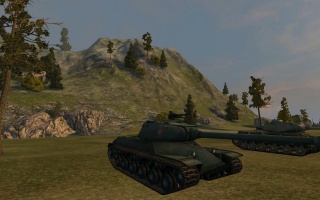
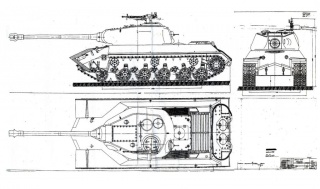
歡迎來到 Wargaming.net Wiki!
變換

110

在2014年11月29日 (六) 19:44由所做的修訂版本
(差異) ←上個修訂 | 最新修訂 (差異) | 下一修訂→ (差異)
跳轉到: 導覽搜尋


newfile.png Article requires additional modification
The design and/or content of this article do not conform to wiki standards.
Missing Content
  • History
  • Sources and External Links


,,


110

Icon
nation | Heavy Tank | Tier VIII
Battle Tier
1234567891011
Overview
Mouse over "
Well, the ones further down, of course.
" for more information
2,600,000  Credits Cost
1450390 HP Hit Points
46.35/4726.12/54 t Weight Limit
Crew
  1. 車長 (通訊員)
  2. 炮手
  3. 駕駛
  4. 裝填手
Mobility
520580 hp Engine Power
40/15 km/h Speed Limit
2830 deg/s Traverse
11.2222.21 hp/t Power/Wt Ratio
NoNo Pivot
Armor
// mm Hull Armor
130/90/90201/148/50 mm Turret Armor
Armament


{{#ifeq:HOLLOW_CHARGE|ARMOR_PIERCING||


{{#ifeq:HIGH_EXPLOSIVE|ARMOR_PIERCING||


AP/HEAT/HE


{{#ifeq:ARMOR_PIERCING_CR|ARMOR_PIERCING||


{{#ifeq:HIGH_EXPLOSIVE|ARMOR_PIERCING||


AP/APCR/HE
Shells
390/390/530320/320/420 HP Damage
175/250/61215/265/50 mm Penetration


|


|}}

|


|}}


4.29 r/m 

Standard Gun

Reload Times
Nominal: 14 s
50% Crew: 17.34 s
75% Crew: 15.14 s
100% Crew: 13.42 s
Rammer: 12.08 s
Vents: 13.12 s
Both: 11.81 s
Both and BiA: 11.56 s
Both and Max Crew %: 11.08 s

See Crew, Consumables, or Equipment for more information.


|


|}}

|


|}}


6 r/m 

Standard Gun

Reload Times
Nominal: 10 s
50% Crew: 12.39 s
75% Crew: 10.82 s
100% Crew: 9.59 s
Rammer: 8.63 s
Vents: 9.38 s
Both: 8.44 s
Both and BiA: 8.26 s
Both and Max Crew %: 7.91 s

See Crew, Consumables, or Equipment for more information.
Rate of Fire


|


|}}

|


|}}


1673.1

Standard Gun

Using Shell Type 1 (390 Damage):


Theoretical Damage Per Minute
Nominal DPM: 1673.1
50% Crew: 1349.4
75% Crew: 1548.3
100% Crew: 1743.3
100% Crew
Vents: 1782.3
Rammer: 1938.3
Both: 1981.2
Both and BiA: 2024.1
Both and Max Crew %: 2113.8

Advantageous Damage Per Minute
First-shot DPM: 2063.1
50% Crew: 1739.4
75% Crew: 1938.3
100% Crew: 2133.3
100% Crew
Rammer: 2328.3
Vents: 2172.3
Both: 2371.2
Both and BiA: 2414.1
Both and Max Crew %: 2503.8

See here, here, or here for more information.

Standard Gun

Using Shell Type 2 (390 Damage):


Theoretical Damage Per Minute
Nominal DPM: 1673.1
50% Crew: 1349.4
75% Crew: 1548.3
100% Crew: 1743.3
100% Crew
Vents: 1782.3
Rammer: 1938.3
Both: 1981.2
Both and BiA: 2024.1
Both and Max Crew %: 2113.8

Advantageous Damage Per Minute
First-shot DPM: 2063.1
50% Crew: 1739.4
75% Crew: 1938.3
100% Crew: 2133.3
100% Crew
Rammer: 2328.3
Vents: 2172.3
Both: 2371.2
Both and BiA: 2414.1
Both and Max Crew %: 2503.8

See here, here, or here for more information.

Standard Gun

Using Shell Type 3 (530 Damage):
With wholly penetrating hits

Theoretical Damage Per Minute
Nominal DPM: 2273.7
50% Crew: 1833.8
75% Crew: 2104.1
100% Crew: 2369.1
100% Crew
Vents: 2422.1
Rammer: 2634.1
Both: 2692.4
Both and BiA: 2750.7
Both and Max Crew %: 2872.6

Advantageous Damage Per Minute
First-shot DPM: 2803.7
50% Crew: 2363.8
75% Crew: 2634.1
100% Crew: 2899.1
100% Crew
Rammer: 3164.1
Vents: 2952.1
Both: 3222.4
Both and BiA: 3280.7
Both and Max Crew %: 3402.6

See here, here, or here for more information.


|


|}}

|


|}}


1920

Standard Gun

Using Shell Type 1 (320 Damage):


Theoretical Damage Per Minute
Nominal DPM: 1920
50% Crew: 1548.8
75% Crew: 1776
100% Crew: 2003.2
100% Crew
Vents: 2048
Rammer: 2227.2
Both: 2275.2
Both and BiA: 2326.4
Both and Max Crew %: 2425.6

Advantageous Damage Per Minute
First-shot DPM: 2240
50% Crew: 1868.8
75% Crew: 2096
100% Crew: 2323.2
100% Crew
Rammer: 2547.2
Vents: 2368
Both: 2595.2
Both and BiA: 2646.4
Both and Max Crew %: 2745.6

See here, here, or here for more information.

Standard Gun

Using Shell Type 2 (320 Damage):


Theoretical Damage Per Minute
Nominal DPM: 1920
50% Crew: 1548.8
75% Crew: 1776
100% Crew: 2003.2
100% Crew
Vents: 2048
Rammer: 2227.2
Both: 2275.2
Both and BiA: 2326.4
Both and Max Crew %: 2425.6

Advantageous Damage Per Minute
First-shot DPM: 2240
50% Crew: 1868.8
75% Crew: 2096
100% Crew: 2323.2
100% Crew
Rammer: 2547.2
Vents: 2368
Both: 2595.2
Both and BiA: 2646.4
Both and Max Crew %: 2745.6

See here, here, or here for more information.

Standard Gun

Using Shell Type 3 (420 Damage):
With wholly penetrating hits

Theoretical Damage Per Minute
Nominal DPM: 2520
50% Crew: 2032.8
75% Crew: 2331
100% Crew: 2629.2
100% Crew
Vents: 2688
Rammer: 2923.2
Both: 2986.2
Both and BiA: 3053.4
Both and Max Crew %: 3183.6

Advantageous Damage Per Minute
First-shot DPM: 2940
50% Crew: 2452.8
75% Crew: 2751
100% Crew: 3049.2
100% Crew
Rammer: 3343.2
Vents: 3108
Both: 3406.2
Both and BiA: 3473.4
Both and Max Crew %: 3603.6

See here, here, or here for more information.
Damage Per Minute


|


|}}


0.48 m 

With 50% Crew: 0.595 m
With 75% Crew: 0.519 m
With 100% Crew: 0.46 m
With BiA: 0.45 m
With BiA and Vents: 0.44 m
Maximum possible: 0.422 m

For more details, see Crew


|


|}}


0.36 m 

With 50% Crew: 0.446 m
With 75% Crew: 0.389 m
With 100% Crew: 0.345 m
With BiA: 0.338 m
With BiA and Vents: 0.33 m
Maximum possible: 0.317 m

For more details, see Crew
Accuracy


|


|}}


3.4 s 

With 50% Crew: 4.212 s
With 75% Crew: 3.678 s
With 100% Crew: 3.26 s
With GLD: 2.964 s
With BiA: 3.188 s
With BiA and Vents: 3.119 s
With both and GLD: 2.835 s
Maximum possible: 2.718 s

For more details, see Crew or Equipment


|


|}}


2.5 s 

With 50% Crew: 3.097 s
With 75% Crew: 2.704 s
With 100% Crew: 2.397 s
With GLD: 2.179 s
With BiA: 2.344 s
With BiA and Vents: 2.293 s
With both and GLD: 2.085 s
Maximum possible: 1.998 s

For more details, see Crew or Equipment
Aim time
2826 deg/s Turret Traverse
360° Gun Arc
-5°/+12°-6°/+15° Elevation Arc
3540 rounds Ammo Capacity
General
1212 % Chance of Fire


350 m 

With 50% Crew: 275 m
With 75% Crew: 312.5 m
With 100% Crew: 350 m
With Recon and Situational Awareness: 367.7 m
With Coated Optics: 385 m
With Binocular Telescope: 437.5 m
Maximum possible: 501.1 m

For more details, see Skills or Equipment


380 m 

With 50% Crew: 298.6 m
With 75% Crew: 339.3 m
With 100% Crew: 380 m
With Recon and Situational Awareness: 399.2 m
With Coated Optics: 418 m
With Binocular Telescope: 475 m
Maximum possible: 544 m

For more details, see Skills or Equipment
View Range


|


|}}


600 m 

With 50% Crew: 484.3 m
With 75% Crew: 554.7 m
With 100% Crew: 625.8 m
With 100% Signal Boost: 720 m
When affected by 100% Relaying: 660 m
Maximum possible: 900.7 m

For more details, see Skills or Equipment


|


|}}


750 m 

With 50% Crew: 605.4 m
With 75% Crew: 693.4 m
With 100% Crew: 782.2 m
With 100% Signal Boost: 900 m
When affected by 100% Relaying: 825 m
Maximum possible: 1125.9 m

For more details, see Skills or Equipment
Signal Range
Values are Stock - click for Top

Additional Statistics
(Top Configuration)

VIII
annoCh11_110.png

2600000

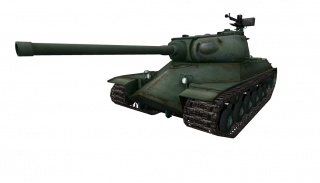
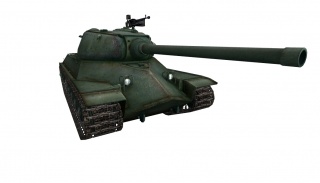
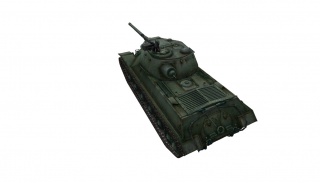
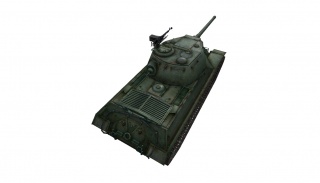
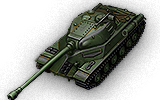
The 110 is a [[中國|]] tier 8 重型戰車.

於四零年代中期到五零年代間,蘇聯工程師曾試著為 IS-2 戰車進行現代化升級。IS-2U 型,於 1944 年 11 月研發,擁有強化過的正面車身,其裝甲板配置和 IS-3 類似。到了五零年代中期,此開發計畫移轉給了中國軍隊,成為之後中國戰車的發展基礎。

The 110 leads to the WZ-111 model 1-4.

Modules / Available Equipment and Consumables

Modules

炮管

炮管

等級 炮管 平均穿透力(毫米) 射擊速率 100 公尺處擴散度 瞄準時間 經驗 重量 (噸) 價格,
VIII 122 mm 37-122JT 175/250/61 390/390/530 4.29 0.48 3.4 0 2440 120000
VIII 122 mm D-25T 175/250/61 390/390/530 4.8 0.46 3.4 19500 2590 135000
IX 100 mm 62-100T 215/265/50 320/320/420 6 0.36 2.5 59000 2557 221000
引擎

引擎

等級 引擎 引擎功率(匹馬力) 碰撞時火災發生機率 經驗 重量 (噸) 價格,
VIII 12150L 520 12 0 750 48000
IX 12150LS 580 12 33000 750 99500
懸吊

懸吊

等級 懸吊 負載限制 迴轉速度(度/秒) 經驗 重量 (噸) 價格,
VII 110 47 28 0 11500 17780
VIII 110-1 54 30 15800 11500 35000
通訊設備

通訊設備

等級 通訊設備 通訊範圍(公尺) 經驗 重量 (噸) 價格,
X A-220A 750 9500 40 54000
IX A-220 600 0 40 38000

Compatible Equipment

Compatible Consumables

Player Opinion

Pros and Cons

Pros:


  • Very bouncy front hull and upgraded turret
  • Strong pike nose armor has good ramming quality against medium or light tanks
  • Good top speed for a heavy
  • Above average accuracy and rate of fire
  • Does not have a turret top weak spot like the IS-3


Cons:


  • Front pre-angled hull becomes very weak if you angle it
  • Weak side armor; does not have spaced side armor like the IS-3
  • Very brittle fuel tanks that easily catch fire
  • Poor gun depression
  • Expensive shell for a 100mm gun


Performance

The 110 excels as both a front-line brawler that will bounce many enemy shells and as a flanker. The top gun's high rate of fire dishes out generous amounts of damage to its victims. Though the 110 is potential devastating while hull-down, a proper position may be difficult to achieve due to its low gun depression. The 110 is stiff competition for other Tier VIII tanks that would normally dominate the battlefield. The 110 also fares pretty well in a Tier IX/X battle due to its powerful gun and potential for flanking maneuvers; however, as with any other tank, care must be taken.

The 110 is definitely a keeper amongst fans of the soviet IS line. Some players might be frightened by the gun's seeming lack of damage. However, compared to the BL-9 on the IS-3, this tank is a definite improvement - the top gun has relatively good accuracy, better aim time, great rate of fire, decent damage and an additional 10mm of frontal armor to the 110. However, the BL-9 on the IS-3 does have an additional 10mm penetration, which might or might not be meaningful to the player. Otherwise, the tanks play very similarly.

While lacking side armor, the 110 has better sloped frontal armor as well as better turret armor. Unlike the IS-3, however, it does not have spaced side armor, and the all-around turret armor is worse.


Early Research

  • The engine, radio, and 122mm D-25T should already be researched from the IS-2 and should be equipped
  • The suspension should be your first goal as it is required to mount the turret
  • Next research the turret, which gives the 110 significantly improved armor and more health, as well as 30 meters additional view range
  • Finally get the 100mm gun, which gives a much needed boost in accuracy, aim time, and penetration, at the cost of some alpha damage


Suggested Equipment


Tank Gun Rammer Enhanced Gun Laying Drive Vertical Stabilizer 


Gallery

History for this tank not found

Historical Gallery


中國
輕型戰車


Vickers Mk. E Type B • Type 2597 Chi-Ha • M5A1 Stuart • 59-16 • Type 64 • Type 62 • WZ-131 • WZ-132 • M41D • WZ-132A • WZ-132-1

中型戰車


Type T-34 • Type 58 • T-34-1 • Type 59 • T-34-2 • T-34-3 • 59-Patton • 122 TM • Type 59 G • WZ-120 • 121 • 121B

重型戰車


IS-2 • WZ-111 • WZ-111 Alpine Tiger • 110 • 112 • WZ-111 model 1-4 • WZ-114 • 113 • 113 Beijing Opera • WZ-111 model 5A • WZ-111 Qilin

驅逐戰車


T-26G FT • M3G FT • SU-76G FT • 60G FT • WZ-131G FT • T-34-2G FT • WZ-111-1G FT • WZ-120-1G FT • WZ-111G FT • WZ-120G FT • WZ-113G FT • 114 SP2

Self-Propelled Guns


重型戰車
美國


T14 • T1 Heavy Tank • Pawlack Tank • M6 • King Tiger (Captured) • M-II-Y • T29 • Chrysler K • Chrysler K GF • T26E5 • T26E5 Patriot • M54 Renegade • T77 • M-III-Y • M-IV-Y • M6A2E1 • T32 • T34 • T34 B • AE Phase I • Concept 1B • M-VI-Y • M103 • T54E1 • M-V-Y • T110E5 • T57 Heavy Tank

英國


Churchill I • Excelsior • Churchill VII • TOG II* • Black Prince • FV201 (A45) • Charlemagne • Caliban • Gonsalo • Caernarvon • Caernarvon Action X • FV4201 Chieftain Proto • Conqueror • FV215b • Super Conqueror • T95/FV4201 Chieftain

德國


Pz.Kpfw. B2 740 (f) • Durchbruchswagen 2 • Tiger 131 • VK 30.01 (P) • VK 36.01 (H) • VK 45.03 • Tiger I • Tiger (P) • VK 100.01 (P) • VK 168.01 (P) • VK 168.01 Mauerbrecher • VK 75.01 (K) • E 75 TS • Löwe • Tiger II • VK 45.02 (P) Ausf. A • E 75 • Mäuschen • VK 45.02 (P) Ausf. B • E 100 • Pz.Kpfw. VII • Maus • VK 72.01 (K)

法國


B1 • BDR G1 B • ARL 44 • AMX M4 mle. 45 • AMX 50 100 • AMX M4 mle. 49 • AMX M4 mle. 49 Liberté • AMX 65 t • Somua SM • FCM 50 t • AMX 50 120 • Lorraine 50 t • AMX M4 mle. 51 • AMX 50 B • AMX M4 mle. 54

蘇聯


Churchill III • KV-220-2 • KV-220-2 Beta Test • KV-1 • KV-1 shielded • KV-1S • KV-2 • KV-2 (R) • KV-85 • Object 244 • T-150 • IS • KV-3 • KV-122 • IS-2M • IS-2 shielded • IS-2 • IS-3 • IS-6 • IS-6 B • KV-5 • KV-4 • IS-5 (Object 730) • IS-3A • IS-3A Peregrine • Kirovets-1 • KV-4 Kreslavskiy • Object 252U Defender • Object 252U • IS-M • Object 703 Version II • IS-2-II • T-10 • Object 777 Version II • Object 257 • Object 705 • IS-3-II • ST-I • IS-4 • IS-7 • Object 260 • Object 705A • Object 277 • Object 279 early • ST-II • Object 780

中國


IS-2 • WZ-111 • WZ-111 Alpine Tiger • 110 • 112 • WZ-111 model 1-4 • WZ-114 • 113 • 113 Beijing Opera • WZ-111 model 5A • WZ-111 Qilin

日本


Type 91 Heavy • Type 95 Heavy • O-I Experimental • Heavy Tank No. VI • O-I • O-Ni • O-Ho • Type 4 Heavy • Type 5 Heavy