Tank Destroyers:修訂版本之間的差異
| 2015年1月18日 (日) 06:20的修訂版本 | 2017年1月30日 (一) 15:55的最新修訂版本 | |||
| 第 1 行: | 第 1 行: | |||
| [[image:Td S.png|left|link=|]] | [[image:Td S.png|left|link=|]] | |||
| ? | + | 驅逐戰車是設計來摧毀敵方戰車的車輛,它們的火炮往往是同階級中火力最強大、裝甲穿透能力也最強的。它們的類型多元,有些有良好的移動速度,有些裝甲厚重,但一般來說驅逐戰車都擁有壓倒性的力量。驅逐戰車在小地圖上以綠色或紅色的倒三角形圖案顯示。 | ||
| ? | + | 大部分的驅逐戰車都是採無砲塔設計,它們時常需要變換位置或是轉動車身來找到最佳的射擊角度,即便如此,這項設計還是讓驅逐戰車的車體較為低矮,可以有效的躲避敵人的偵查。不過,在德國、英國與美國的科技樹上都可以找到例外:具備砲塔的驅逐戰車。這些有砲塔的驅逐戰車雖然隱蔽不如無砲塔設計一般優異,但旋轉砲塔時並不會受到隱蔽值懲罰。 | ||
| ? | + | 驅逐戰車善於埋伏,它們良好的隱蔽可以在戰鬥中搶得先機給敵人一個意外的一擊,然而缺乏砲塔的缺點使它們受到側面襲擊時幾乎沒有還手的能力。因此,除非重型戰車或中型戰車在一旁支援,驅逐戰車並不適合在近距離與敵人搏鬥。 | ||
| ? | + | 如果找不到一個適當的地點埋伏,驅逐戰車可以在隊友的掩護下提供極佳的火力,有些正面裝甲較為堅固的驅逐戰車則可以堅守一些狹窄的區域,例如城鎮的街道。像是T95和AT 2這種重裝甲的驅逐戰車可以帶領隊伍突擊推進,讓它們結實的裝甲成為隊友最可靠的盾牌,不過它們火力仍比不上重型戰車。還有一些移動速度快的驅逐戰車,如M18 Hellcat和E 25可以衝鋒陷陣騷擾對手,並繞到敵人側面或後方襲擊。 | ||
| ? | + | 對大部分的驅逐戰車來說,自走砲恐怕是它們的夢魘,由於開闊的車頂設計和脆弱的裝甲,讓它們很容易命喪自走砲的攻擊下,最好的應對方式就是被發現時趕緊加速離開當前的位置,否則的話必然會得到報應。 | ||
| ? | + | |||
| ? | + | |||
| {{:{{PAGENAME}}/Data}} | {{:{{PAGENAME}}/Data}} | |||
2017年1月30日 (一) 15:55的最新修訂版本
驅逐戰車是設計來摧毀敵方戰車的車輛,它們的火炮往往是同階級中火力最強大、裝甲穿透能力也最強的。它們的類型多元,有些有良好的移動速度,有些裝甲厚重,但一般來說驅逐戰車都擁有壓倒性的力量。驅逐戰車在小地圖上以綠色或紅色的倒三角形圖案顯示。
大部分的驅逐戰車都是採無砲塔設計,它們時常需要變換位置或是轉動車身來找到最佳的射擊角度,即便如此,這項設計還是讓驅逐戰車的車體較為低矮,可以有效的躲避敵人的偵查。不過,在德國、英國與美國的科技樹上都可以找到例外:具備砲塔的驅逐戰車。這些有砲塔的驅逐戰車雖然隱蔽不如無砲塔設計一般優異,但旋轉砲塔時並不會受到隱蔽值懲罰。
驅逐戰車善於埋伏,它們良好的隱蔽可以在戰鬥中搶得先機給敵人一個意外的一擊,然而缺乏砲塔的缺點使它們受到側面襲擊時幾乎沒有還手的能力。因此,除非重型戰車或中型戰車在一旁支援,驅逐戰車並不適合在近距離與敵人搏鬥。
如果找不到一個適當的地點埋伏,驅逐戰車可以在隊友的掩護下提供極佳的火力,有些正面裝甲較為堅固的驅逐戰車則可以堅守一些狹窄的區域,例如城鎮的街道。像是T95和AT 2這種重裝甲的驅逐戰車可以帶領隊伍突擊推進,讓它們結實的裝甲成為隊友最可靠的盾牌,不過它們火力仍比不上重型戰車。還有一些移動速度快的驅逐戰車,如M18 Hellcat和E 25可以衝鋒陷陣騷擾對手,並繞到敵人側面或後方襲擊。
對大部分的驅逐戰車來說,自走砲恐怕是它們的夢魘,由於開闊的車頂設計和脆弱的裝甲,讓它們很容易命喪自走砲的攻擊下,最好的應對方式就是被發現時趕緊加速離開當前的位置,否則的話必然會得到報應。
American
 T3 HMC
 T56 GMC
 M8A1
M8A1 T40
T40
 M10 Wolverine
 T67
T67
 T78
T78 
 M18 Hellcat
 M36 Jackson
 M56 Scorpion
 T28 Concept
  Super Hellcat
  T25/2
T25/2 T25 AT
 TS-5
TS-5  T28
T28 T28 Prototype
 T30
T30 T95
T95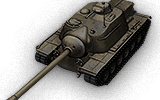
 T110E3
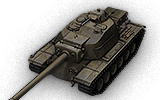 T110E4
British
 Universal Carrier 2-pdr
 Valentine AT
 Alecto
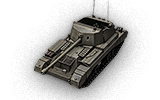 Archer
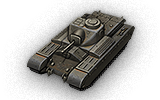 AT 2
AT 2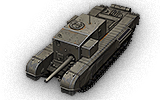 Churchill Gun Carrier
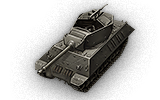 Achilles
 AT 8
AT 8 Excalibur
  Challenger
 AT 15A
  AT 7
AT 7 GSOR 1008
  AT 15
AT 15 Charioteer
 Turtle Mk. I
  Tortoise
 FV4004 Conway
 FV215b (183)
  FV4005 Stage II
 FV217 Badger
German
 Panzerjäger I
 Marder II
 StuG III Ausf. B
 Pz.Sfl. IC
  Jagdpanzer 38(t) Hetzer
 Marder 38T
 StuG IV
  Pz.Sfl. IVc
 StuG III Ausf. G
 Dicker Max
  Jagdpanzer IV
 Nashorn
 E 25
E 25  Krupp-Steyr Waffenträger
  Jagdpanther
 Sturer Emil
 Ferdinand
 Kanonenjagdpanzer 105
  Rheinmetall Skorpion G
  Rheinmetall Skorpion
  Jagdpanther II
 8,8 cm Pak 43 Jagdtiger
  Rhm.-Borsig Waffenträger
 Jagdtiger
 Waffenträger auf Pz. IV
 Grille 15
 Jagdpanzer E 100
 Waffenträger auf E 100
French
 Renault FT AC
 FCM 36 Pak 40
  Renault UE 57
 Somua SAu 40
 M10 RBFM
  S35 CA
 ARL V39
 AMX AC mle. 46
 AMX AC mle. 48
 AMX Canon d'assaut 105
  AMX 50 Foch
 AMX 50 Foch (155)
  AMX 50 Foch B
Soviet
 AT-1
AT-1 SU-76I
  SU-85B
 SU-76M
 SU-85
SU-85 SU-85I
  SU-100
 SU-100Y
  ISU-122S
  SU-152
 SU-100M1
 SU-122-44
  ISU-152
 ISU-130
  KV-4 KTTS
  T-103
T-103  SU-130PM
  ISU-152K
  SU-101
 K-91-PT
  Object 704
 Object 263
 Object 268
 Object 268 Version V
  Object 268 Version 4
分類: