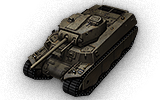
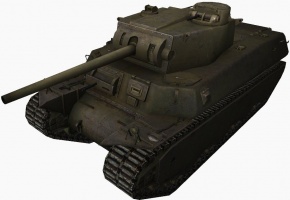
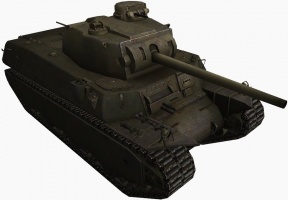
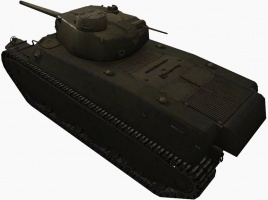
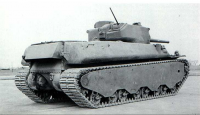
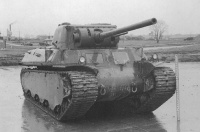
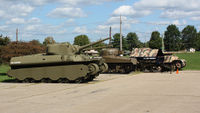
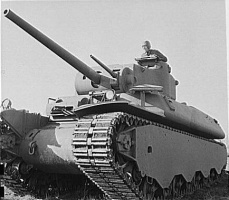
T1 Heavy Tank
T1 Heavy Tank
Mouse over "
| 435.000 |
| 860182 HP Struktur |
| 57.5/57.8821.15/61.5 t Höchstgewicht |
- Kommandant
- Richtschütze
- Richtschütze
- Fahrer
- Funker
- Ladeschütze
| 700960 hp Motorleistung |
| 35.4/14 km/h Höchstgeschwindigkeit |
| 2025 deg/s Wendegeschwindigkeit |
| 12.1745.39 hp/t Leistungsgewicht |
| NoNo Pivot |
| // mm Wannenpanzerung |
| 101.6/82.6/82.6177.8/82.6/82.6 mm Turmpanzerung |
AP/APCR/HE
AP/APCR/HE Granaten |
| 110/110/175115/115/185 HP Schaden |
| 101/157/38128/177/38 mm Durchschlag |
|
13.95 r/m ▲
16.67 r/m Standard Gun ▲ Feuerrate Standard Gun |
|
1534.5 ▲
Standard Gun
▼
Standard Gun
▲
1917.05 Standard Gun ▲
Standard Gun
▼
Standard Gun
▲ Schaden pro Minute Standard Gun |
|
0.46 m ▲
0.43 m With 50% Crew: 0.57 m ▲ Genauigkeit With 50% Crew: 0.533 m |
| 2 s 2 s Einzielzeit |
| 3130 deg/s Turmdrehgeschwindigkeit |
| 360° Waffenwinkel |
| -10°/+30°-10°/+30° Richtwinkel |
| 9090 rounds Munitionskapazität |
| 2020 % Brandwahrscheinlichkeit |
| 320 m 350 m Sichtweite |
| 395 m 480 m Funkreichweite |
Additional Statistics
(Top Configuration)
V
435000
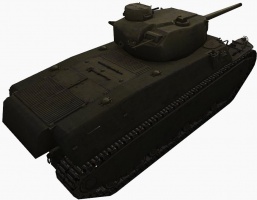
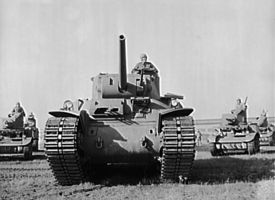
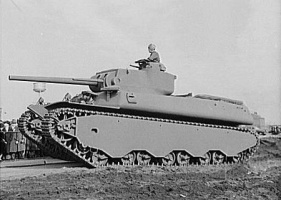
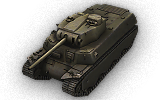
Der T1 Heavy Tank ist ein amerikanischer schwerer Panzer der Stufe 5.
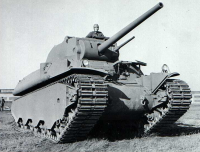
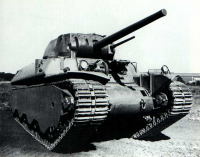
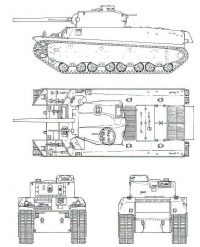
Die Entwicklung des T1E2 wurde im Mai 1940 in den USA aufgenommen. Das Fahrzeug wurde als schwerer Panzer entwickelt. Besonderheiten des Fahrzeugs umfassten eine Gusswanne und ein hydromechanisches Getriebe mit einem Doppelscheiben-Hydraulikwandler. Später wurde der Panzer in M6 umbenannt. Neun Fahrzeuge (eines davon zur Erprobung) wurden gebaut. Kein Einsatz.
It plays very differently compared to Soviet counterpart, the KV-1, as most players do not consider the armour on the T1 very strong. Although it lacks the KV-1's extended armament options, the upgraded M1A1 cannon sports great penetration and rate of fire, taking the T1 Heavy's firepower up to par with the KV-1's 85mm. In addition, the T1 has a very powerful engine available as an upgrade, making the T1 a more mobile tank than its Soviet and British counterparts. It has good frontal armor and very thick turret armor. However, its long sides are very thinly protected, so keep your flanks hidden and expose only your front armor and turret to minimize incoming damage. Keep in mind that the T1 is best played as a medium tank with the speed of a heavy tank, and not as a real heavy like the KV-1. Alternatively, you can hold chokepoints and use your fast firing cannon to deter others from attacking.
Do be aware that the T1 Heavy Tank requires more skill to play than the KV-1. That said, in the hands of a good player adept at both medium tank and Hulldown (American Heavy) tactics, they will find this vehicle to be a very good tank. With the combination of good armor, good maneuverability, high DPM and high weight this tank will prove superior to tanks at its own tier and will prove a match to even higher tiered opponents.
Der T1 Heavy Tank führt zum Pawlack Tank, und dem M6.
Module / Verfügbare Zubehörteile und Verbrauchsgegenstände
Module
| Stufe | Motor | Leistung (hp) |
Brandwahrscheinlichkeit (%) |
Gewicht (kg) |
Kosten (
| |
|---|---|---|---|---|---|---|
| V | Wright G200 M795C9GC1 | 700 | 20 | 612 | 22500 | |
| VI | Wright G2X M781C9GC1 | 825 | 20 | 612 | 30000 | |
| VII | Wright G200 M781C9GC1 | 960 | 20 | 612 | 47600 |
Verfügbare Zubehörteile
Verfügbare Verbrauchsgegenstände
Player Opinion
Pros and Cons
Pros:
- Good rate of fire combined with good penetration for its tier
- Frontal armor is quite reliable when top tier and good hull-down performance.
- Decent speed, high weight, and frontal armor for its tier make it one of the best ramming tanks in the game
- High agility and turret traverse speed allows it to quickly respond to surprise threats detected by the player
Cons:
- Very weak side and rear armor with a large silhouette. Try to avoid being flanked
- Accuracy is lacking with terrible dispersion
- Painfully sluggish when stock esp. when going backwards
- Low alpha on the gun compared to other tier 5 heavies is a serious problem in tier 7 matches
- Driver and 2nd Gunner sit behind weak spots of front armor
Performance
Armed with the same 76mm gun as the M4 Sherman, this tank does not give the typical impression of a heavy tank, yet one of the worst tier 5 heavies. Its much stronger front and turret armor improves its survivability over the M4 considerably. Keeping the front facing your target is crucial, as the side armor is nearly identical to the M4's and presents a much larger silhouette. Also, be aware that the 105mm howitzer, commonly mounted by tanks at this level, will penetrate you on the side and rear for full damage using HE shells—more incentive to show the front. However, angling the tank slightly is still possible, as long as the side armor is angled no more than 20 degrees. If angled more than such, it will be penetrated to no end. However, proper angling can make this tank a monster. Additionally, with a turret who's armor is 20mm thicker than the hull's, and with it's unusually good gun depression, a good hull-down position can keep you alive for much longer than otherwise.
This tank shines when it's in the top tier. Otherwise, it usually moves into a supporting role, making use of its speed to fire while ducking in and out of cover. This tank is very poor without its top engine, since it relies on maneuverability to stay alive. It's never speedy but can maneuver well. It's heavier and faster than most other tier 5 tanks so it gives you the option to ram if necessary. Also, unlike most tanks, the T1 has two Gunners. This allows you to take more Gunner-specific skills and perks if you decide to keep the tank and train your crew up. In combat, the loss of a gunner will not be as severe, since the use of two gunners allow more accuracy to be retained.
A good player familiar to medium tank tactics will find this to be an amazing tank—having a reasonable powerful gun (that unfortunately has sub-par accuracy) and being a fairly fast tank (utilizing its huge top engine) that has powerful armor for its tier, only bested by the KV-1. Additionally, the turret armor is thicker than the KV-1's stock turret, so keep this in mind. Top tier, this tank will easily and frequently get Steel Walls and High Calibers, and when played correctly, Top Gun and Sniper are common achievements.
Alternatively, with its relatively high speed and armor the T1 makes an excellent choice for ramming, especially with the large spall liner upgrade. Albeit choose your ramming moment wisely, in order to not end your game too suddenly.
Another way to play this tank especially in games higher than its own tier is to use it as a support tank of sorts as you will have the armor to bounce shots as you sidescrape and the top gun can penetrate most tier 6 and some tier 7 tanks with the standard AP ammunition, however if you chose to play the T1 like this keeping an eye on the minimap will be key to your success.
The T1 heavy can also be particularly effective if played as a very aggressive 'shock' medium, particularly an ideal tactic if at top tier and are outmatched in heavies, or in tier 6 and even some tier 7 matches, depending on the situation. This is done by taking routes chosen by mediums generally, if only to throw a wrench in the thinking of enemies. If done properly, not only will you have dealt an at least decent chunk of damage, you will have also hopefully achieved a large amount of spotting damage and, if all goes well, thrown the game into your teams favor, even if you do not survive. This option is better to consider if there are a considerable number of enemy mediums in play.
Early Research
- Unfortunately there are no modules that carry over from the M3 Lee. However, the Gun 76mm M1A1 carries over if you played the M4 Sherman before. This requires the upgraded turret, though. The top radio also carries over if you played the M7 before, and can be mounted immediately.
- Stock, the suspension's weight capacity is nearly maxed out, so you have to upgrade the suspension first if you want anything that is not the first engine upgrade.
- Next you may want to unlock the first engine, or else focus on the next step.
- Unlock the turret and then the gun so you can equip the much improved 76 mm M1A1.
- Finish up with the SCR 538 radio and the second engine, both of which are used on the M6.
Suggested Equipment
Galerie
Historical Info
The initial concept described in OCM 15842 was a multi-turreted vehicle. Two primary turrets, each armed with a low velocity T6 75mm gun, were to be equipped with power traverse to cover approximately 250 degrees. Two secondary turrets, also equipped with power traverse, were intended to cover a full 360 degrees. One secondary turret was to be armed with a 37mm gun and a .30 caliber machine gun in a combination mount while the other was to be fitted with a 20mm gun and a .30 caliber machine gun, also in a combination mount. In addition, the tank was to carry four .30 caliber machine guns in ball mounts. Two of these were to be located in diagonal plates at the rear corners of the hull and the remaining two were to be fitted in the slightly sloping front plate. The latter were to have electric firing mechanisms to permit their use by the driver as fixed sponson guns.
History
The project was approved on 11 July 1940 and the proposed vehicle was designated as the heavy tank T1. However, the military characteristics soon were revised and a full scale wooden mock-up was constructed incorporating the changes. The multiple turrets were eliminated and the main armament was mounted in a single large turret with a 69 inch diameter ring. The new arrangement was outlined in OCM 16200, dated 24 October 1940, and the changes were approved on 22 November. The new single turret was armed with a modified version of the 3 inch T9 antiaircraft gun in a combination mount with a 37mm gun V15E1. The turret was traversed 360 degrees either manually or by the electric system developed by Westinghouse. At this time, power elevation also was specified for the combination mount with a gyro- stabilizer. Later, the power elevation feature was dropped, but the elevation stabilizer was retained. The turret crew arrangement differed from that in later medium and heavy tanks with the tank commander located on the left side of the 3 inch gun. A.30 caliber machine gun in a cupola identical to that on the medium tank M3 was provided for the tank commander. The gunner's station in the right front of the turret was equipped with a periscopic sight and a direct sight telescope. A .50 caliber machine gun in a rotor mount was located in the right rear of the turret roof. Operated by the loader, its elevation ranged from -5 to + 60 degrees for use against both air and ground targets. A pistol port with a protect scope was installed in the rear wall of the turret.
Crew
At the time that OCM 16200 was published, a crew of six or seven men was proposed for the new heavy tank. Later, this was specified as six, when the tank was standardized. They consisted of the commander, gunner, loader, ammunition passer, driver, and assistant driver. The latter three rode in the hull with the driver in the left front. Two .30 caliber machine guns were mounted in the front armor, one on each side of the hull. Fixed in traverse, these weapons had an elevation range of 15 degrees and were fired electrically by the driver. A door in the front plate could be opened to give the driver a wide field of view and a smaller direct vision port was located just below the door. A protect scope in the driver's door provided vision when the tank was under fire. Two .50 caliber machine guns in a flexible mount were installed in the right front hull for use by the assistant driver (bow gunner). These guns could be traversed 15 degrees to the left or right of center and elevated from -10 to +60 degrees. In the original design, the two .50 caliber machine guns were installed in the mount, one above the other with the top gun to the left of the lower weapon. Metal sights or rods were attached to the guns to permit aiming through the coupled indirect sighting device. Two escape hatches were provided, one in each top front corner of the hull. An additional escape hatch was located in the hull floor. Two pistol ports with protector scopes were installed with one in the front side wall of each sponson.
Engine & Transmission
Because of the many problems expected during the development of the new vehicle, the Society of Automotive Engineers (SAE) was requested to form a committee to advise the Ordnance Department on the program. One major problem was the design of a satisfactory power train. The expected weight of 50 tons required an engine of approximately 1000 hp for adequate mobility. The SAE committee considered several engines and the chairman of the engine subcommittee recommended the Wright Cyclone air- cooled radial as the best choice. Other engines considered were the General Motors diesel and the Allison V-1710 aircraft power plant. However, the latter was eliminated because all manufacturing facilities were fully occupied meeting the requirements of the aircraft production program. Also, it was decided not to use the General Motors diesel at that time and the Wright G-200 was selected as the first choice power plant. Developing 960 gross horsepower at 2300 rpm, it weighed 1350 pounds dry. Unfortunately, no automotive transmission was available for such a high power level and the development of a suitable transmission became a critical part of the project.Early in the program, the SAE subcommittee on transmissions considered several proposals. These included torque converters designed by the Schneider Hydraulic Corporation, the Twin Disc Clutch Company, and Borg Warner Corporation as well as a new Hydromantic transmission proposed by the Olds Mobile Division of General Motors. Designs for gas- electric drives also were submitted by the Electromotive Division of General Motors and the General Electric Company. However, the gas-electric drive was considered too heavy and it was estimated at that time to weigh about five tons more than the other systems. A conventional synchromesh transmission also was discussed, but it was not considered feasible in such a heavy tank and it would require the development of a clutch since none was available for this power level. After review of the various proposals, the committee voted to select the Hydromantic transmission, but also to study the torque converters as a possible alternate system.
In August 1940, a contract had been signed with the Baldwin Locomotive Works for the design and construction of a pilot heavy tank to be followed by the manufacture of 50 production models. As mentioned earlier, the new vehicle had been designated as the heavy tank T1 by OCM 15946 on II July 1940. This was the designation assigned to the vehicle for which the Hydromantic transmission was proposed. However, further studies by the General Electric Company indicated that a gas-electric drive could be developed that would not increase the weight of the tank by more than two tons. Since such a drive would have numerous advantages, it was recommended by OCM 16477 that an electric drive and steering mechanism be developed for installation in the pilot T1. When this equipment was installed, the vehicle was to be redesignated as the heavy tank T1E1.
Fallowing the demonstration, the tank was torn down and numerous changes were made as a result of the initial tests. The four torque converter radiators were combined into two units and the two engine oil cooling radiators were combined into a single unit greatly simplifying the plumbing in the engine compartment. The exhaust manifold was moved from the front to the rear of the Wright G-200 engine and mufflers of a new type were installed. These were located inside the engine compartment and exhausted into the slip stream of the engine cooling fan. The rear end of the hull was rebuilt to simulate the proposed production configuration.
Armament
The T1 was designed parallel with the medium tank M3 and shared many early design features with that vehicle such as the fixed machine guns for use by the driver and the cupola with a .30 caliber machine gun for the lank commander. Troop testing, combined with the British battle experience, resulted in the elimination or modification of many of these items and these changes were reflected in the late production M3 and early M4 medium tanks. Similar changes were applied to the production version of the heavy tank. It was recommended that both of the driver's fixed machine guns be deleted. However, the gun on the right side was retained and only the left machine gun was removed and its port covered by a steel plug. Although it was considered desirable to redesign the front hull eliminating the door in front of the driver, such a change was rejected because of delays in production and the modifications were limited to reducing the size of the door and the installation of periscopes for the driver and bow gunner. At first, each had one, but the final design provided two periscopes for the driver and one for the bow gunner. In addition, the driver had a direct vision port in-stalled in the smaller front hull door. At this time, the bow mount for the twin .50 caliber machine guns was redesigned so that the two guns were side by side on the same level.The production turret replaced the cupola for the tank commander with a flat double door hatch as on the medium tank M4. The rotating ring on this hatch was fitted with either a .30 caliber or .50 caliber antiaircraft machine gun, depending upon the Armored Force policy at the time. The rotor mounted .50 caliber machine gun in the rear of the pilot tank turret was eliminated. The pistol port in the rear turret wall was retained, but it was shifted toward the right side.
Models
With the United States at war, the pressure increased to get the new heavy lank into production. Following the precedent set with the medium tank M3, it was decided to release the T1E2 for production prior to the completion of the test program. Such an early release was expected to produce tanks undesirable features. Any necessary changes resulting from the test program could be introduced later without severely disrupting the production program. Such a policy was already producing M3 medium tanks to meet the critical needs of the British in addition to the American training program. To meet the expected quantity requirements, it was considered necessary to use welded as well as cast hulls and the combination of the General Motors diesel engine and the Hydramatic transmission was proposed as an alternate power train.
On 14February 1942, OCM 17812 sorted out the designations for the different versions of the heavy tank. These were as follow:
- Heavy tank T1 - Cast hull. Wright G-200 engine. Hydramatic transmission
- Heavy tank T1KI - Cast hull, Wright G-200 engine, GE electric drive
- Heavy tank T1E2 - Cast hull, Wright G-200 engine, Twin Disc torque converter
- Heavy tank T1IE3 - Welded hull, Wright G-200 engine, Twin Disc torque converter
- Heavy tank T1E4 - Welded hull, four CM 6-71 diesel engines, two Hydramatic tank transmissions
The first production M6 was accepted at the Baldwin Locomotive Works in December 1942. A production pilot M6 A1 was completed by the Fisher Body Division of General Motors, but the production contract at Fisher was cancelled. All of the 40 production tanks were assembled at Baldwin. They consisted of 8 M6 s, 12 M6 Als, and 20 T1E 1s with the last tank, a T1E1, being delivered in February 1944.
With the T1E1I and T1E2 pilots and Fisher's production pilot M6A1, the overall total for the series was 43 tanks.
