Emerald

| Research price11000 exp |
| Purchase price1,250,000 |
| Hit Points24,000 |
| 152 mm/50 BL Mk.XII on a CPXIV mount7 х 1 pcs. |
| Rate of Fire8 shots/min. |
| Reload Time7.5 sec. |
| Rotation Speed10 deg./sec. |
| 180 Degree Turn Time18 sec. |
| Firing Range12.38 km. |
| Maximum Dispersion126 m. |
| Chance of Fire on Target Caused by HE Shell0 % |
| AP Shell152 mm AP 4crh SC |
| Maximum AP Shell Damage3,000 |
| Initial AP Shell Velocity936 m./s. |
| AP Shell Weight45.36 kg. |
| 102 mm/45 QF Mk.V on an HA Mk.III mount3 х 1 pcs. |
| Firing Range4.3 km. |
| Rate of Fire15 shots/min. |
| Reload Time4 sec. |
| HE Shell102 mm HE 35 lb |
| Maximum HE Shell Damage1,500 |
| Initial HE Shell Velocity811 m./s. |
| Chance of Fire on Target Caused by HE Shell6 % |
| 533 mm TR Mk IV4 х 3 pcs. |
| Rate of Fire0.85 shots/min. |
| Reload Time71 sec. |
| Rotation Speed25 deg./sec. |
| 180 Degree Turn Time7.2 sec. |
| Torpedo533 mm Mk V |
| Maximum Damage11,967 |
| Torpedo Speed59 knot |
| Torpedo Range6 km. |
| 102 mm/45 QF Mk.V on an HA Mk.III mount3 х 1 pcs. |
| . . . Average Damage per Second8.4 |
| . . . Firing Range3.51 km. |
| 12.7 mm Mk.III6 х 4 pcs. |
| . . . Average Damage per Second12.6 |
| . . . Firing Range1.2 km. |
| 40 mm/39 Vickers QF Mk.II on a single mount2 х 1 pcs. |
| . . . Average Damage per Second11.2 |
| . . . Firing Range2.01 km. |
| Maximum Speed33 knot |
| Turning Circle Radius730 m. |
| Rudder Shift Time10.9 sec. |
| Surface Detectability Range9.87 km. |
| Air Detectability Range5.4 km. |

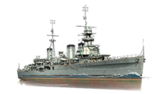
Emerald — British Tier V cruiser.
The most advanced British light cruiser among those designed during World War I. The ship's powerful propulsion allowed for high speeds. Her larger displacement helped strengthen the cruiser's artillery and torpedo armament as well as equip her with aircraft-handling gear.
Modules
 |
Rate of Fire (shots/min) | 180° Turn Time (sec) | Maximum Dispersion (m) | Maximum HE Shell Damage (HP) | Chance of Fire on Target Caused by HE Shell (%) | Maximum AP Shell Damage (HP) |
Research price (exp) |
Purchase price ( | |
|---|---|---|---|---|---|---|---|---|---|
| 152 mm/50 BL Mk.XII on a CPXIV mount | 8 | 18 | 126 | 3,000 | 0 | 100,000 |
 |
Hit Points (HP) | Armor (mm) | Armor (mm) | Main Turrets (pcs.) | Secondary Gun Turrets (pcs.) | AA Mounts (pcs.) | Torpedo Tubes (pcs.) | Hangar Capacity (pcs.) |
Research price (exp) |
Purchase price ( | |
|---|---|---|---|---|---|---|---|---|---|---|---|
| Emerald (A) | 24,000 | 10 | 76 | 7 | 3 | 6/2/3 | 4 | 0 | 140,000 | ||
| Emerald (B) | 27,100 | 10 | 76 | 7 | 3 | 6/2/3 | 4 | 6,100 | 340,000 |
 |
Rate of Fire (shots/min) | Torpedo Tubes Reload Time (sec) | 180° Turn Time (sec) | Maximum Damage (HP) | Torpedo Speed (knot) | Torpedo Range (km) |
Research price (exp) |
Purchase price ( | |
|---|---|---|---|---|---|---|---|---|---|
| 533 mm Mk V | 0.6 | 95 | 7.2 | 11,966 | 59 | 6 | 0 | 150,000 | |
| 533 mm Mk VII | 0.6 | 106 | 7.2 | 15,733 | 59 | 7 | 3,600 | 400,000 |
 |
IDS_SHIP_PARAM_SUO_INCREASE_DIST (%) | Maximum Firing Range (km) |
Research price (exp) |
Purchase price ( | |
|---|---|---|---|---|---|
| Mk V mod. 1 | 0 | 0 | 110,000 | ||
| Mk V mod. 2 | 0 | 4,200 | 460,000 |
 |
Maximum Speed (knot) |
Research price (exp) |
Purchase price ( | |
|---|---|---|---|---|
| Propulsion: 80,000 hp | 33 | 0 | 85,000 |
Compatible Upgrades
| Slot 1 |
||||||
|---|---|---|---|---|---|---|
| Slot 2 |
||||||
| Slot 3 |
Player Opinion
Performance
Refer to the in-game Port screens for more useful data.
The Ship
Tier V Emerald continues the evolution of the UK light cruisers. Her overall layout with single guns mounted along the centreline will be familiar to players, but Emerald also introduces the Smoke Generator ![]() consumable to the line.
consumable to the line.
Emerald mounts a standard cruiser Damage Control Party ![]() , which is active for 5 seconds with a 60-second cool down time, and a Hydroacoustic Search
, which is active for 5 seconds with a 60-second cool down time, and a Hydroacoustic Search ![]() with three charges. Her Hydroacoustic Search has an active time of 100 seconds, and will detect ships at 4 km and torpedoes at 3 km. Emerald also mounts a Repair Party
with three charges. Her Hydroacoustic Search has an active time of 100 seconds, and will detect ships at 4 km and torpedoes at 3 km. Emerald also mounts a Repair Party ![]() with 3 charges. She can repair up to 14% of received damage and 10% of citadel damage, for a total of 3,780 HP per charge (11,340 HP in total, if all of her charges are used to the maximum possible effect). She also has the choice of three consumable options in her third slot; a Smoke Generator
with 3 charges. She can repair up to 14% of received damage and 10% of citadel damage, for a total of 3,780 HP per charge (11,340 HP in total, if all of her charges are used to the maximum possible effect). She also has the choice of three consumable options in her third slot; a Smoke Generator ![]() , Spotting Aircraft
, Spotting Aircraft ![]() , or Catapult Fighter
, or Catapult Fighter ![]() . The Smoke Generator consumable has 3 charges, creating a series of smoke clouds for 15 seconds. These clouds have a 600-meter radius, and take 96 seconds to disperse. Alternatively, her Fighter consumable has 3 charges, and will launch a pair of aircraft which will patrol around the ship for up to 60 seconds. Finally, her Spotting Aircraft provides a 20% increase to her range for 100 seconds, with 4 charges as standard.
. The Smoke Generator consumable has 3 charges, creating a series of smoke clouds for 15 seconds. These clouds have a 600-meter radius, and take 96 seconds to disperse. Alternatively, her Fighter consumable has 3 charges, and will launch a pair of aircraft which will patrol around the ship for up to 60 seconds. Finally, her Spotting Aircraft provides a 20% increase to her range for 100 seconds, with 4 charges as standard.
Her top speed of 33 knots is on the slow side for a Tier V cruiser, although she has improved acceleration and energy retention, which means she can feel more nimble than the numbers would suggest. She has a fairly leisurely rudder shift time of 7.8 seconds, and a wide 730 meter turning circle; dodging and changing direction will require plenty of space. Her concealment of 9.87 km, which can be reduced to 8.9 km, makes her one of the stealthiest cruisers at her tier.
Armor and Survivability
Emerald has better protection than might be expected. Although her bow and stern plating are only 13 mm thick and can be overmatched by 203 mm AP shells (and penetrated by any HE rounds she will face), she has a thicker belt of 38 mm along her waterline at the bow. Although it cannot be relied on, this belt can bounce any poorly aimed AP rounds that come her way. Her citadel abuts the side of the ship and extends for much of her length. The main section runs from the bridge to her catapult, and extends above the waterline. For much of its length, the citadel roof is also the main deck armor, and although 40 mm thick plating will bounce any shells fired at short range, it can be easily penetrated at longer ranges by shells hitting at an angle. Finally, the interior citadel bulkheads have stepped sections at the fore and aft ends. These have fairly thin plating of 13 mm to 25 mm, which can be easily penetrated by large caliber weapons. Emerald has a fairly large health pool of 27,100 hit points. This is further boosted by her repair party. Whilst she can be deleted with careless play, her health pool, Smoke Generator and Repair Party can also provide an ample safety net for minor mistakes.
Armament
Emerald has a main battery of seven 152 mm guns in single mounts, with the ability to bring six guns to bear on a broadside. These guns fire only AP shells with fairly poor penetration, although they have improved ricochet angles and reduced fusing when compared to other nations. This means that she is less likely to suffer over penetrations on lightly armored targets, and her shells do not automatically ricochet until they hit a steep 80° angle.
Her lack of HE shells means that Emerald cannot start fires with her main battery, and thus she has few options for dealing with heavily armored targets apart from a lucky (and incredibly unlikely) salvo from her secondary guns. This problem is compounded by her small main battery size, leaving players able to do little more than slowly chip away at these targets.
Emerald has a heavy torpedo armament of four quad launchers with a 7 km range when upgraded, in two launchers on each side. Eight torpedoes present a heavy punch, which can prove devastating to any enemy ship. These can be launched in either a narrow spread, or individually, providing extra tactical options when compared to other nations. Although they cannot be launched from stealth, they can act as a deterrent to ships trying to push an Emerald in her smoke, or as an unwelcome surprise to ships coming around island cover.
Anti-Aircraft
In common with most Tier V cruisers, Emerald has fairly weak anti-aircraft defenses. Her flak only reaches out to 4 km with a single cloud. Her long-range DPS is also rather low. Most of her AA firepower is concentrated in her medium- and short-range batteries; by the time Emerald is effectively engaging aircraft, they will already be striking her.
Anti-Submarine
Emerald can drop a pattern of two depth charges, meaning she needs to be almost above a submarine to damage it. Although she drops a small number of charges, they are more powerful than those of other nations, with a good chance of causing a fire or flood. She can have two uses of her depth charges stored and ready to use, with a 40-second reload time.
Battle Performance
Players will need to be cautious when playing Emerald, effective use of cover and consumables is required to seriously impact a battle. When played to her strengths, she can be an effective support for friendly destroyers; her low detection and smoke allow her to reach positions other cruisers cannot. Her characteristic ammunition means she can cause serious damage to destroyers who are caught unaware.
If there are no destroyers, then effective target selection or flanking enemies is a requirement, due to her lack of fire-starting potential. She is unlikely to win many DPM races against other cruisers, and bringing her full broadside to bear will involve exposing her citadel.
Her smokescreens can be used as cover for sustained firing, but players should be aware that a smokescreen will often attract any torpedoes in range, so they should use their hydroacoustic search if possible. Although she is often a challenging ship to play, Emerald introduces players to the full toolkit of the British cruisers, and sets them up for Leander (and beyond).Pros:
- Improved ricochet angles on her AP rounds
- Short fuse timers are less likely to over penetrate small targets
- Heavy torpedo armament
- Smoke Generator and Repair Party consumables
- Decent health pool
Cons:
- Small main battery in single gun mounts
- No HE shells for main battery
- Thin armor and vulnerable citadel
- Torpedoes are rather short ranged
Research
Optimal Configuration
Upgrades
The recommended upgrades for Emerald are as follows:
- Slot 1: Main Armaments Modification 1

- Slot 2: Engine Room Protection

- Slot 3: Aiming Systems Modification 1

Commander Skills
As she lacks HE ammunition and her torpedoes are not a primary weapon, an Emerald captain does need many skills to maximize her effectiveness. Last Stand, Priority Target, Superintendent, and Concealment Expert should be considered as the core build. If there are sufficient points available then Adrenaline Rush should be the next choice.
| Recommended Commander Skills | ||||||
|---|---|---|---|---|---|---|
| Cost (points) |
Attack | Defense | ||||
| 1 |
|
|
|
|
|
★★★ |
| 2 |
|
|
★ |
|
★★★ |
|
| 3 |
|
|
★★ |
|
★★★ |
★ |
| 4 |
|
|
★ |
|
★★★ |
|
| Key: ★★★ - Extremely Useful ★★ - Frequently Useful ★ - Occasionally Useful No stars - Not Useful | ||||||
Consumables
Emerald can equip the following consumables:
- Slot 1: Damage Control Party

- Slot 2: Repair Party
 – 3 charges
- Slot 3: Hydroacoustic Search
 – 3 charges
- Slot 4: Smoke Generator
 – 3 charges or Spotting Aircraft
  – 4 charges or Catapult Fighter
  – 3 charges
As a Royal Navy light cruiser, Emerald can be deadly to enemy destroyers, but also rather frail against them. This makes it advisable to equip Smoke Generator ![]() . Catapult Fighter
. Catapult Fighter ![]() is not recommended due to the little protection it provides and Spotting Aircraft
is not recommended due to the little protection it provides and Spotting Aircraft ![]() is not recommended due to potential difficulty in reaching out to your targets. However, some players may find Spotting Aircraft
is not recommended due to potential difficulty in reaching out to your targets. However, some players may find Spotting Aircraft ![]() more useful than Smoke Generator
more useful than Smoke Generator ![]() due to the rather abysmal range of the main battery. But Smoke Generator
due to the rather abysmal range of the main battery. But Smoke Generator ![]() can work very well in conjunction with Hydroacoustic Search
can work very well in conjunction with Hydroacoustic Search ![]() , as smoke clouds are infamous torpedo magnets.
, as smoke clouds are infamous torpedo magnets.
Signals
India Delta (![]() ) and November Foxtrot (
) and November Foxtrot (![]() ) are highly recommended to optimize the ship’s Repair Party
) are highly recommended to optimize the ship’s Repair Party ![]() consumable.
consumable.
Recommended Signal Flags 
| |||||
|---|---|---|---|---|---|
| Combat | |||||

|
 ★ |

|
 ★ |

|

|
 ★★★ |

|

|
 ★★★ |
 ★★★ |
 ★★★ |
 ★★ |
 ★★ | ||||
Gallery

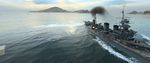
Emerald analyzes the tactical situation.
Fish in the water.
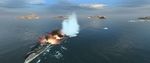
Emerald takes a big hit from an enemy battleship. Meanwhile, Emerald's torpedoes are about to return the favor.
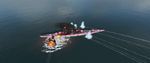
Armor piercing shells from the Emerald impact the superstructure of an ARP Hieiclass battleship.


Historical Info
Historical Gallery


References
Ship Change Log
See here for links to Update notes.
- Available to supertesters in the game starting from Update 0.5.11.
- Introduced into the game as a researchable ship in Update 0.5.13.
- Update 0.5.16:
- Fixed a bug with different operating times for the base and premium Spotting Aircraft consumables.
- Update 0.6.3:
- Experience earnings increased by 5%.
- Update 0.6.6:
- The thickness of the hull plating was changed from 10 to 13 mm.
- Update 0.6.12:
- Detectability when firing main guns in smoke changed to 5.4 km.
- Update 0.6.13:
- Fire extinguishing time now 30 s instead of 60 s.
- The Smoke Generator active time was increased from 7 to 15 s.
- Improved display of thin elements.
- Update 0.6.15:
- Added a bonus to the Lá Fhéile Pádraig 2017 permanent camouflage - a 10% discount to the post-battle service cost.
- Update 0.7.7:
- The range of the MK VII torpedo was increased from 6 to 7 km.
- detectability from ships decreased from 11.52 to 10.18 km.
- Detectability after firing main guns in smoke decreased from 5.4 to 4.56 km.
- Update 0.7.10:
- The range of the Hydroacoustic Search consumable was unified - 4 km for detecting ships, 3 km for detecting torpedoes.
- Update 0.8.0.1:
- The characteristics of the base consumable "Fighter" for the cruiser Emerald were brought to the same value as the improved version of the consumable.
- Update 0.8.5:
- Credits earnings increased by +5%.
- Update 0.8.6:
- Citadel deck armor increased from 25 to 40 mm.
- Update 0.9.6:
- The value of the in-game turning circle radius was changed to 730 m to correct prior discrepancy.
- Update 0.10.10:
- Secondary battery maximum firing range reduced from 4.5 to 4.3 km.