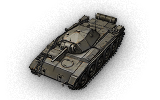
Crusader
Crusader

Mouse over "
[Client Values; Actual values in
| 880,000 |
| 650136 HP Hit Points |
| 19/19.310.71/21 t Weight Limit |
- Commander (Radio Operator)
- Gunner (Loader)
- Driver
| 395410 hp Engine Power |
| 58/22 km/h Speed Limit |
| 4045 deg/s Traverse |
| 20.7938.28 hp/t Power/Wt Ratio |
| NoNo Pivot |
| // mm Hull Armor |
| 39.1/19.5/24.750.8/23.5/29.7 mm Turret Armor |
AP/APCR/HE
AP/APCR/HE Shells |
30/1200/15
45/2400/32 Shell Cost |
| 50/50/6075/75/100 HP Damage |
| 78/121/23110/180/30 mm Penetration |
|
28.57 r/m ▲
27.27 r/m Standard Gun ▲ Rate of Fire Standard Gun |
|
1428.5 ▲
Standard Gun
▼
Standard Gun
▲
2045.25 Standard Gun ▲
Standard Gun
▼
Standard Gun
▲ Damage Per Minute Standard Gun |
|
0.35 m ▲
0.37 m With 50% Crew: 0.434 m ▲ Accuracy With 50% Crew: 0.458 m |
| 1.7 s 2 s Aim time |
| 4846 deg/s Turret Traverse |
| 360° Gun Arc |
| -15°/+20°-12°/+20° Elevation Arc |
| 260130 rounds Ammo Capacity |
| 2020 % Chance of Fire |
| 360 m 370 m View Range |
| 375 m 550 m Signal Range |
VI
880000
The Crusader is a British tier 6 light tank.
The Crusader was developed by Nuffield Mechanizations Ltd. from 1938 through 1940. More than 5,300 vehicles were mass-produced from 1941 through 1943. They were most extensively used in the North African campaign in 1941–1942.
NOTE: In update 1.9 the Crusader was reclassified as a light tank and was moved up to tier 6. As such, it once again receives the light tank concealment on the move bonus.
The Crusader is commonly regarded as a difficult tank to play effectively, requiring a high skill level and punishing your mistakes at every opportunity. Its mobility is similar to the Covenanter (which had its mobility increased however in 1.9.1), meaning that the Crusader is not the quickest or most agile of tanks and is only just able to escape from danger. The low standard penetration means it is critical that you learn enemy weak points. The Crusader is most capable when played like a jackal, assisting other tanks in dealing with distracted enemies.
The Crusader leads to the GSR 3301 Setter.
Modules / Available Equipment and Consumables
Modules

Guns
| Tier | Gun | Penetration (mm) |
Damage (HP) |
Rate of fire (rounds/minute) |
Dispersion (m/100m) |
Aiming time (s) |
Weight (kg) |
Price (
| |
|---|---|---|---|---|---|---|---|---|---|
| IV | OQF 3-inch Howitzer Mk. I | 38/100/23 | 175/110/60 | 15 | 0.49 | 1.9 | 116 | 30000 | |
| IV | QF 6-pdr Mk. III | 105/170/30 | 75/75/100 | 27.27 | 0.43 | 2.3 | 400 | 27000 | |
| V | QF 6-pdr Gun Mk. V | 110/180/30 | 75/75/100 | 27.27 | 0.37 | 2 | 450 | 35000 | |
| IV | QF 2-pdr Mk. X | 78/121/23 | 50/50/60 | 28.57 | 0.35 | 1.5 | 130 | 6000 |

Engines
| Tier | Engine | Engine Power (hp) |
Chance of Fire on Impact (%) |
Weight (kg) |
Price (
| |
|---|---|---|---|---|---|---|
| IV | Nuffield Liberty Mk. III | 395 | 20 | 383 | 11500 | |
| V | Nuffield Liberty Mk. V | 410 | 20 | 383 | 12500 |

Suspensions
| Tier | Suspension | Load Limit (т) |
Traverse Speed (gr/sec) |
Rmin | Weight (kg) |
Price (
| |
|---|---|---|---|---|---|---|---|
| V | Crusader Mk. I | 19.3 | 40 | B/2 | 6200 | 4000 | |
| VI | Crusader Mk. III | 21 | 45 | B/2 | 6200 | 18500 |

Radios
| Tier | Radio | Signal Range (m) |
Weight (kg) |
Price (
| |
|---|---|---|---|---|---|
| VII | WS No. 19 Mk. II | 450 | 40 | 21000 | |
| VI | WS No. 19 Mk. I | 400 | 40 | 15000 | |
| V | WS No. 9 | 375 | 40 | 3600 | |
| VIII | WS No. 19 Mk. III | 550 | 40 | 22000 |
Compatible Equipment


![]()


![]()
![]()
![]()
![]()
![]()
![]()


![]()

![]()

Compatible Consumables
![]()
![]()
![]()
![]()
![]()
![]()
![]()
![]()
![]()
![]()
![]()
![]()
![]()
![]()
![]()
![]()
![]()
![]()
![]()
![]()
![]()
![]()
![]()
![]()
Player Opinion
Pros and Cons
Pros:
- Incredible fire rate with top gun. DPM is the best of the Tier 6 light tanks, and even rivals some Tier 8 mediums
- Low profile and good camo values make hiding in bushes easy
- Decent view range of 360, 370 as of Update 1.9.1
- Tied with T37 and VK 28.01 for highest health pool (680) among tier 6 light tanks
Cons:
- Slowest of the Tier 6 light tanks, albeit it now goes 58 km/h as of 1.9.1 (power/weight is still lacking, though)
- Gun depression is misleading - 7 gun depression at the front; the maximum of 12 applies to the sides only
- Poor armor, completely ineffective at tier 6
- Lowest standard penetration (about MT-25 with 57mm) and alpha on its top gun of all tier 6 lights, though APCR is good
Performance
The Crusader is meant for combat and is less geared towards scouting. However, if played carefully, it can be a capable mobile spotter in the early stages of the game. In the late game it can be useful for finding and destroying enemy artillery. At no point should you try to cross wide open spaces - you lack the horsepower and you have virtually no armour, although with correct angling it is sometimes possible to make miraculous bounces.
The high DPM is fantastic if you have a comprehensive knowledge of enemy weak spots, but newer players or those who are still learning the higher tiers are likely to struggle. In fact, the Crusader's top gun is its only saving grace. It is weak, but its ROF makes up for the lack of damage provided you are able to penetrate. The Crusader is somewhat awkward during tight maneuvers such as circle-strafing due to unimpressive traverse speed, but if you can pull it off, you can tear enemy heavies to pieces - just beware that the slightest stumble on your part will result in your death.
You should avoid cresting hills frontally, as you can only depress your gun 7 degrees over the front, somewhat low for such a low armored vehicle. The frontal view port blocks it from going down to the maximum of 12 degrees. Instead, to shoot safely over a hill, you have to try a tricky maneuver of angling your tank like a jackknife with the turret perpendicular to the hull (or forming a V-shape to the hull) to get any shots off. However, your side armour is thin and your ammo rack extremely brittle, so unless you particularly enjoy reduced DPM or exploding, protect your sides at all costs. Now you are starting to see why this tank requires skill to use effectively. It is your choice whether to bother with Safe Stowage or a Wet Ammo Rack, although if you are playing the Crusader like you should (as a sneaky damage thief with occasional spotting duties) then these won't be required.
The ammo capacity of the QF 6-pdr Gun Mk. V was doubled to 130 in Update 1.9, meaning it's much less likely you'll run out of shells in the middle of the battle; however, you should still use as little HE as possible, as the damage increase is not worth the penetration loss.
As previously stated, this can be a very challenging tank to play and it is difficult to define a true role for it beyond scavenger. Swallow your pride, keep your head down and prepare for the grind towards the Setter.
- NOTE: As of Update 1.9.1 the Crusader has received buffs. The top speed was increased further from the original 44 km/h to 50 km/h to now 58 km/h. The Crusader also now has 370 view range (+10 from previous 360) and has significantly less bloom after firing, to the point of where with a 100% crew (even with a rammer) it can be fully aimed right as it loads, letting it use DPM reliably at range, something it horribly lacked until the update. Lastly, the dispersion (with a 100% crew) has been buffed from 0.39 to 0.35, the aim time from 2.21 to 1.92, and has less bloom upon movement/tank traverse (from 0.22/0.22 to 0.18/0.18). Overall, the gun is much more usable now, especially at range, while also improving the very lacking top speed to an acceptable amount, and the view range is decent now as well.
Crew Skills:
Commander (Radio Operator): Camo (Retrain to Sixth Sense and then begin camo again); Recon
Gunner (Loader): Camo, Snap Shot
Driver: Smooth Ride, Camo
Early Research
- The WS No. 19 Mk. III carries over from the Covenanter and should be installed immediately. The 6-pdr guns are also available if you previously played the Churchill I or Cavalier.
- Start by researching the upgraded suspension or purchasing Enhanced Christie Suspension.
- Next, research the Crusader Mk. III turret, followed by the QF 6-pdr Mk. III for an amazing boost to firepower.
- Research the Nuffield Liberty Mk. V engine for a slight boost to engine power.
- Research the QF 6-pdr Gun Mk. V.
- Finally, research the Crusader Mk. III suspension if you did not previously.
Suggested Equipment
![]()
![]()
![]()
![]()
![]()
Gallery


Historical Info
Crusader tank
Cruiser Mk VI or A15 Crusader was one of the primary British cruiser tanks of the early part Second World War and perhaps the most important British tank of the North African Campaign. The Crusader's mobility made it a favourite of British tank crews and its Ordnance QF 6 pounder main gun made it more than a match for the early Panzer III and Panzer IV tanks it faced in combat. Retained in service because of delays with its replacement, by late 1942 the lack of armament upgrade combined with the presence of Tiger I Tanks among the Afrika Korps and overheating problems caused by the high temperatures of the desert, led to the design being phased out in favour of the new US-supplied Sherman medium tank. The next British cruiser in combat would be the Cromwell heavy cruiser.
Development history
In 1938, Nuffield Mechanization & Aero Limited produced their A16 design for a heavy cruiser tank based on Christie suspension. Looking for a lighter and cheaper tank to build, the General Staff requested alternatives. To this end the A13 Mk III cruiser tank design which would enter service as the "Tank, Cruiser Mk V" and known in service as "Covenanter" was designed. Nuffield were, in 1939, offered the opportunity to take part in the production of Covenanter. Nuffield, however, preferred to work on its own version of the A13—though they still provided design work for the Covenanter's turret. This new tank was adopted as "Tank, Cruiser, Mk VI Crusader", under General Staff specification A15. Although Crusader is often referred to as an improved version of the Covenanter, in fact it was a parallel design.Both tanks were ordered "off the drawing board" without building prototypes first. Despite a later start, the pilot model of the Crusader was ready six weeks before the first Covenanter.
Unlike earlier "Christie cruisers"( A13, Marks III and IV and the Mark V Covenanter ) that were built with 4 road wheels, Crusader had five road wheels each side to improve weight distribution in a tank that weighed almost 20 tons instead of the 14 tons of the previous cruisers. The 32 in (810 mm)-diameter wheels were of pressed steel with solid rubber tyres. The hull sides were built up of two separated plates with the suspension arms between them.It had a different engine from the Covenanter, different steering system and a conventional cooling system with radiators in the engine compartment. At the left hand side of the front hull—a place occupied by the engine radiator in the Covenanter—was mounted a small hand-traversed auxiliary turret armed with a Besa machine gun. The auxiliary turret was awkward to use and was often removed in the field or remained unoccupied.
Both the A13 Mk III and the A15 designs used the same main turret. The turret was polygonal—with sides that sloped out then in again—to give maximum turret space on the limited turret diameter. Early production vehicles had a "semi-internal" cast gun mantlet, which was quickly replaced in production by a better protected big cast mantlet with three vertical slits—for the main gun, for a coaxial Besa machine gun and for the sighting telescope. There was no cupola for the commander who had instead a flat hatch with the periscope mounted through it. The main armament, as in other British tanks of the period, was balanced so the gunner could control its elevation through a padded shaft against his right shoulder rather than using a geared mechanism. This fitted well with the British doctrine of firing accurately on the move. When it was understood that there would be delays in the introduction of successor heavy cruiser tanks—what would become the Cavalier, Centaur and Cromwell—the Crusader was adapted to use the 6 pounder gun.
Combat history
North Africa
With the Axis forces in North Africa having pushed the British back to the Egyptian border and the remaining British armour being a mixed force of older tanks with a few Matildas, tanks were hurriedly shipped via the Mediterranean arriving on 12 May 1941. There were sufficient Crusaders to equip the 6th Royal Tank Regiment which with the 2nd RTR (with older cruiser tanks) formed the 7th Armoured Brigade. The rest of the tanks were Matildas for the 4th Armoured Brigade giving the 7th Armoured division only four tank regiments. Although there was pressure from London for the reconstituted Desert Rats to go into action, outfitting for the desert and training delayed their first use until Operation Battleaxe, an attempt to relieve the siege of Tobruk in June. As the brigade swept round the flank, the Crusaders were caught by concealed anti-tank guns and lost 11 tanks. The 6th RTR lost more tanks, to action and defects, in the fighting withdrawal of the next two days. The 7th Brigade was re-equipped with further Crusaders, but as the brigade had been expanded by the addition of 7th Hussars there were not sufficient to replace the older cruiser tanks. The 22nd Armoured Brigade, effectively an advance force of the 1st Armoured Division, which was three inexperienced Yeomanry units equipped with Crusaders transferred to North Africa to bring the 7th Armoured up to three-brigade strength. The 8th Hussars was added to the 4th Armoured Brigade but these had to be equipped with M3 Stuart light tanks as there were still insufficient cruisers. The 22nd was able to take part in Operation Crusader of November 1941 which was named after it.
In Operation Crusader the two British Corps were disposed such that they could not support each other, but it was expected that as the British outnumbered the German and Italian forces in tanks, the tank against tank battles would be decided in their favour. However in the resulting encounters, Rommel did not put his tanks en masse into action against the British ones and the large numbers of German anti-tank guns working offensively with the tanks and infantry proved effective.The Germans had a few 88 mm guns but were mostly equipped with the Pak 38, a long-barreled 50 mm gun, with a range of 1,000 yards. This superiority in quality and tactical deployment of AT guns was to be a feature of the Afrika Korps throughout the Desert War. The Crusader's 2 pdr (40 mm) gun was as effective as the short-barreled 50 mm of the Panzer III although it was outranged by the short-barreled 75 mm of the Panzer IV. Although the Crusader was faster than any tanks it opposed, its potential was limited by a relatively light QF 2-pounder gun, thin armour and mechanical problems. A particular tactical limitation was the lack of a high explosive shell for the main armament—these existed but were never supplied. Axis tank forces developed an extremely effective method of dealing with attacking tank forces by retiring behind a screen of concealed anti-tank guns. The pursuing tanks could then be engaged by the artillery. With the German anti-tank guns out of range of the tanks' machine guns and without a high explosive shell to return fire, the tanks were left with the equally unpalatable options of withdrawing under fire or trying to overrun the gun screen.
The Crusader proved prone to catch fire when hit, a problem that was identified as due to the ammunition being ignited by hot metal penetrating the unprotected racks. The angled underside of the turret created "shell pockets" that acted as a lever for lifting the turret from its mounting when struck by a shell. The Crusader proved unreliable in the desert due to a number of issues. These started with their transport from the UK to North Africa. Poor preparation and handling caused problems that had to be rectified before they could be passed to the regiments, and ate into the supply of spare parts. Once in use the sand caused erosion in the cooling system and the stresses of hard cross-country travel caused oil leaks in the engine blocks. Since there were few tank transporters or railways in the desert, the tanks had to travel long distances on their tracks causing further wear.
By the end of 1941, there was only one brigade, the 2nd, which was operating only Crusaders. In March 1942, US-built Grant medium tanks arrived: these replaced one in three Crusader squadrons. While the inclusion of the Grant with its effective 75 mm gun gave better firepower against anti-tank guns and infantry they were slower, limiting the Crusaders when they had to operate together. From May 1942, the Mark III were delivered. Of the 840 tanks available to the British, 260 were Crusaders. The German tanks they were facing were improved types with improved frontal armour which caused the Crusaders' 2-pounder shot to shatter rather than penetrate.
As part of British deception operations, Crusaders could be issued with "Sunshade" which was a metal framework with canvas covering that disguised the tank as a lorry to German aerial reconnaissance. Similarly dummy tanks were deployed. Later in the campaign shipping was improved, Nuffields had put an engineering team in Egypt, and crews were better at preventing problems, but the reputation of the Crusader could not recover. After Montgomery took over command, the imbalance between British armour and German was redressed by better control and the addition of more American-supplied Grant andSherman tanks. The Crusader was replaced in the main line of battle and used for "light squadrons" trying to flank the enemy when it engaged the heavier units. The Australian 9th Infantry Division operated Crusaders for reconnaissance and liaison. The British 1st Army landed as part of the Allied operations in Tunisia; some of its units were using the Crusader and these saw action from 24 November. These were not solely Crusader regiments but mixed Crusader and Valentine tanks; within each squadron two troops were Crusader IIIs and there were Crusader II CS attached to the Squadron HQ. These units of the 26th Armoured Brigade were used as an independent armoured column, "Blade Force", with the 78th Infantry Division. The operations of Blade Force were on terrain different from the desert of the earlier campaigns and the fighting took place with smaller numbers of vehicles. These actions were similar to what would be seen later in Europe. The 1st Army converted to Shermans during Tunisia, but Crusaders remained in use with the 8th for longer. The last major action for Crusaders was the Battle of Mareth. The North Africa campaign finished shortly after.
Other use After the completion of the North African Campaign, the availability of better tanks such as the Sherman and Cromwell relegated the Crusader to secondary duties such as anti-aircraft mounts or gun tractors. In these roles it served for the remainder of the war. The Crusader, along with the Covenanter, equipped regiments at home particularly those of the 11th Armoured Division.
A Crusader bulldozer was developed but not used operationally. One of these bulldozer tanks was converted for removing munitions following a fire at Royal Ordnance Factory Kirkby.
The Crusader anti-aircraft guns were designed for use in North West Europe. However with the Allied domination of the air they were largely unneeded and the AA troops were disbanded. The Crusader gun tractors operated with the Armoured Divisions, but were supplanted in part by the 17 pdr Archer self-propelled gun.
Operators
- Argentina - converted gun tractors
- Canada
- Free French
- United Kingdom
- Kingdom of Italy - Littorio Armoured Division
- Nazi Germany - 15th Panzer Division
- Netherlands
- South Africa
Surviving vehicles
Around 21 tanks survive in various degrees of preservation, ranging from running-condition museum vehicles to wrecks. Eight survive in various collections in South Africa.
Notable examples include the Crusader III in running condition at the Bovington Tank Museum in the United Kingdom. The Musée des Blindés in France preserves a Mk III anti-aircraft Crusader and the Overloon War Museum in the Netherlands owns a gun-tractor variant.
Historical Gallery


Historical Accuracy Errata
Crusader Mk I variants had four crew members, of whom the radio operator/loader is missing. In addition, the Mk I had an auxiliary turret armed with a Besa machine gun, though it was often removed in the field.
- The Nuffield Liberty Mk III engine is considerably more powerful than in reality, with 395 hp compared to the historical 340.
- The Nuffield Liberty Mk V engine was only mounted on the Centaur tank.
- Historical Rolls-Royce Meteor engine with 600 hp is missing. One Crusader was experimented with this engine in September 1941, reaching speeds of up to 80 km/h.
- The Crusader was replaced by the M3 Grant and M4 Sherman. In World of Tanks, however, the Crusader leads to neither tank.