Difference between revisions of "Maps"
| Revision as of 02:19, 16 August 2015 | Revision as of 02:20, 16 August 2015 | |||
| Line 129: | Line 129: | |||
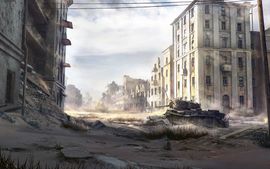
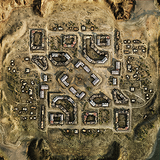
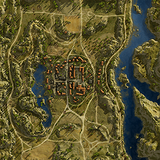
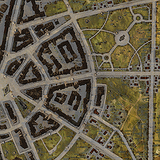
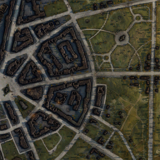
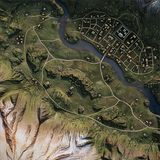
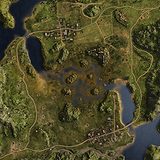
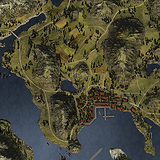
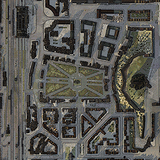
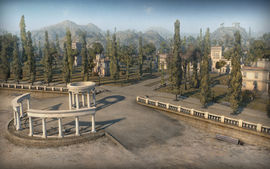
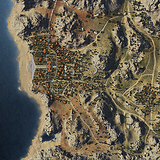
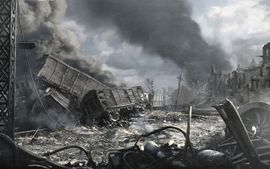
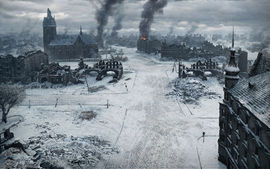
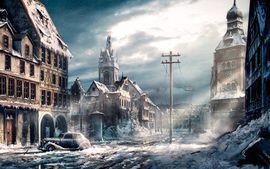
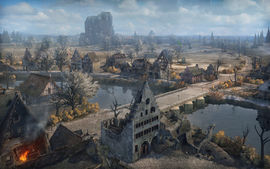
| ? | Berlin: The capital of Germany being assaulted by Soviet Russia. | + | Berlin: The capital of Germany being assaulted by Soviet Russia.[[File:WoT Berlin Map.jpg|200px|thumb|left|Berlin Minimap (WIP)]] | |
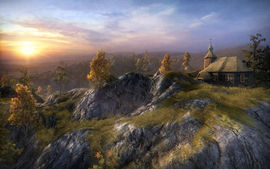
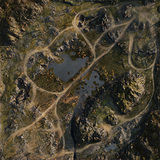
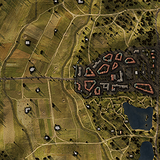
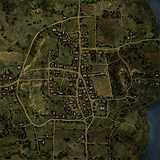
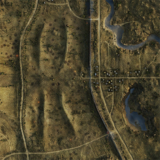
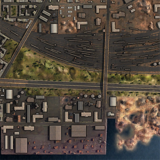
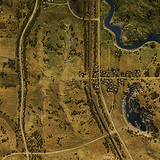
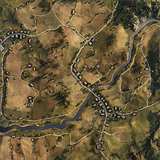
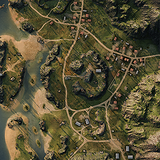
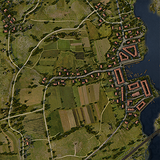
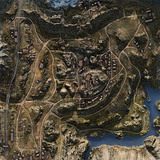
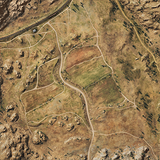
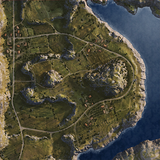
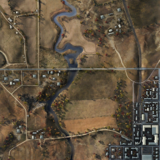
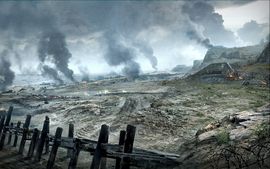
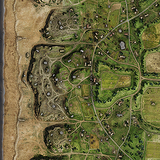
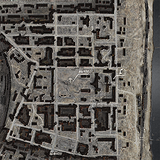
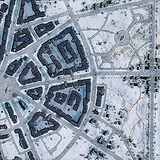
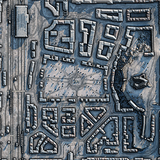
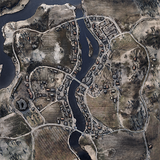
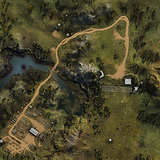
| ? | + | Studyanka: Seems to be in the middle of Poland[[File:WoT Poland Map2.jpg|200px|thumb|left|Studyanka Minimap (WIP)]] | ||
| ? | + | |||
| ? | + | |||
| ? | + | |||
| ? | + | |||
| ? | + | |||
| ? | Studyanka: Seems to be in the middle of Poland | + | ||
| ? | + | |||
| ? | + | |||
| ? | + | |||
| ? | [[File:WoT Poland Map2.jpg|200px|thumb|left|Studyanka Minimap (WIP)]] | + | ||
Revision as of 02:20, 16 August 2015
Maps vary in size, design, terrain, location, weather and land leveling. Each map offers different tactics to different tanks. Use these tactics to your advantage and you will master the battlefields. However, in the special section, most were only released for a limited time so tactics won't be included in those certain maps. Most of the otherswill have tactics so listen up.
Contents
- 1 Summer Maps
- 1.1 Westfield
- 1.2 Pearl River
- 1.3 Ghost Town
- 1.4 Karelia
- 1.5 Komarin
- 1.6 Live Oaks
- 1.7 Siegfried Line
- 1.8 Lakeville
- 1.9 Malinovka
- 1.10 Mittengard
- 1.11 Abbey
- 1.12 Murovanka
- 1.13 Fiery Salient
- 1.14 Mountain Pass
- 1.15 Port
- 1.16 Province
- 1.17 Prokhorovka
- 1.18 Redshire
- 1.19 Mines
- 1.20 Ruinberg
- 1.21 Ruinberg on fire
- 1.22 Fisherman's Bay
- 1.23 Northwest
- 1.24 Hidden Village
- 1.25 Steppes
- 1.26 Serene Coast
- 1.27 Swamp
- 1.28 Tundra
- 1.29 Widepark
- 1.30 Cliff
- 1.31 Fjords
- 1.32 Highway
- 1.33 Himmelsdorf
- 1.34 Dragon Ridge
- 1.35 Ensk
- 1.36 South Coast
- 1.37 Overlord
- 1.38 Stalingrad
- 2 Winter Maps
- 3 Desert Maps
- 4 Special
- 5 Upcoming Maps
Summer Maps
Westfield
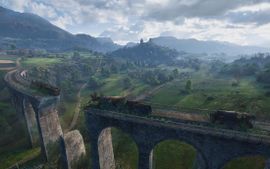
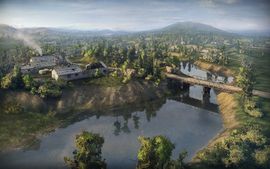
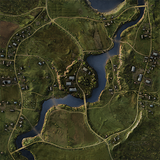
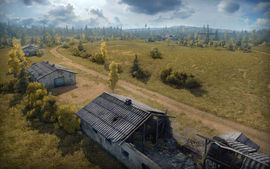
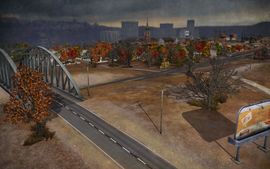
A wonderfully lush area, Westfield features forests, fields, farmland, and multiple villages throughout the map. Included is a large war-damaged bridge crossing the eastern valley. Plentiful ridges give ambush positions along nearly every route, and large fields can leave a tank vulnerable when moving between positions.
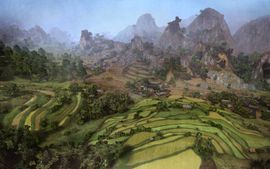
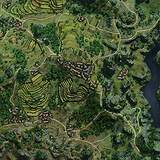
Pearl River
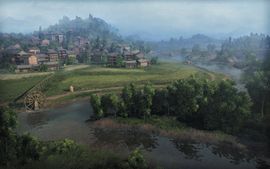
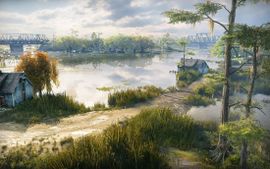
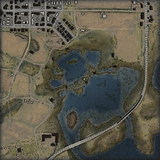
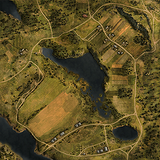
Rugged terrain is favorable for various battle tactics; ambushes, unexpected flanking maneuvers, and close encounters. Moving along the riverbed allows you to swiftly approach the enemy base and get into action. Go threw the middle will let you the possibility to flank the north and south. However, do not leave your rear undefended!
Ghost Town
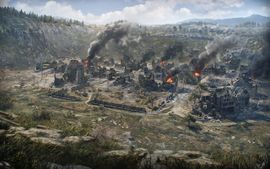
This presidio located in the desert sands is an ideal setting for head-on heavy vehicle encounters, while the more maneuvrable vehicles can launch surprise attacks by flanking the enemy.This map stands out in being almost completely symmetrical and was designed for clan-wars. It is not available in random battles.
Karelia
Swamps, rocks, and cliffs determine major avenues of approach on this map. This map, with sparse protection and no buildings, gives the combat advantage to artillery. Concentrate your attacks along the path of your main advance, while conducting delaying and defensive actions along the rest of your front lines.
Komarin
A more or less unique map in that the teams do not start near the flags, Komarin offers multiple tactical options. The teams start in the north and south, divided by rivers offering three routes. The rivers itself are mostly impassable. The middle bridge is also only accessible once a heavy tank clears the obstacles by driving over them or if someone clears them with HE ammo. The center route is a large, elevated, and wooded island connected by bridge to the south, and offers firing positions to nearly the entire map, but at the cost of being exposed if spotted. A small village on both the west and east side of the map offer attackers valuable cover en route to the flag, but leave any tank passing the village exposed to covered and concealed defenders once they leave the village.
Live Oaks
In the center of the map there is a large bog lake. A railway bridge and a fording side on the one flank allow to defend the area using scarce forces, and to concentrate main forces on the other flank.
Siegfried Line
A wonderful map combining the best of both worlds. The west side is open fields with little cover, excellent for quick flanks around the side for those looking for an early victory. To the east, the town offers concealment and cover for those brave enough to enter its confines.
Lakeville
An isolated mountain valley on one flank and city blocks on the other allow you to thrust close to the enemy. A large lake in the middle gives long-range weapons a clear field of fire.
Malinovka
Initial staging areas are separated by a wide open field, ideal for artillery and defensive operations. Make use of flanking maneuvers and natural defenses like woods, hills, and farmhouses, as these can be decisive. Another option is a well-coordinated high-speed combined arms attack across the field which could bring victory, but at the risk of a bloody loss. Colloquially also known as "Campinovka" for the tendency of most players to just sit behind cover on their side of the starting field and snipe each other.
Abbey
A large abbey and town fill the center of the map with three roads allowing passage from the north and south, and includes an elevated firing position in the abbey's courtyard at the highest point on the hill. West of the town is an elongated hill with several positions allowing fire down into the town. Further west and past the hill, a valley offers significant protection against artillery fire. East of the town lies a curved cliff road which affords shielding from most tank and artillery fire, but forces attackers to travel in a single path.
Murovanka
A small town dominates the center of the map, with a large forest providing concealment in the east and high ground to the west. The forest provides effective concealment, but lacks cover from fire; whereas the town has plentiful cover, but lacks concealment.
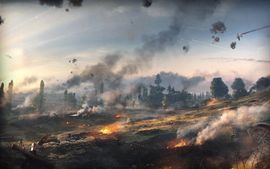
Fiery Salient
The same as Prokhorovka but with a more war-torn appearance. Fighters fly overhead and there are sound effects for machine gun fire.

Mountain Pass
A large map with many turns and rough ground. The bridge near the center features natural choke points on both sides, and provides a good sniping position against opponents in the north passes if held. There are small positions for artillery near the bases, though artillery may have difficulty due to the terrain.
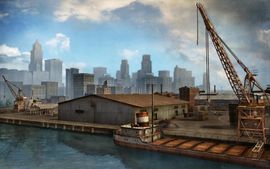
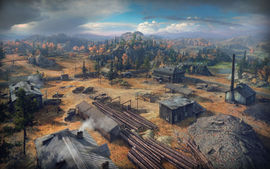
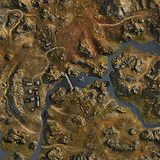
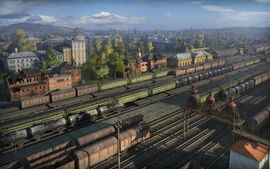
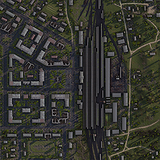
Port
The setting is an industrial area of a port city. Teams begin the battle surrounded by factory buildings, warehouses, and docks. An open space in the center of the map consists of a hilly, open area and railroad tracks. Train cars can provide cover during combat. The most direct route to the enemy base is along the two highway bridges above the railway tracks. Common tactics on this map might include ambush and firing from defilade positions. Surprise attacks to the enemy's rear can break a deadlock. This map was completely removed in patch 8.11.
Province
Hills on the periphery of the map are covered with numerous houses and winding streets advantageous for surprise attacks. An open area between the bases is favorable for daring strikes. Except for clan wars, this map is only available to tiers 3 and below.
Prokhorovka
Generally open, but hilly, terrain around a vital railroad, with groups of trees providing shelter for tank destroyers. On the offensive, watch your own flanks while striking against the enemy flanks. Artillery has free reign, with the only real hindrance being the train cars themselves, but the open terrain makes them very vulnerable to raids by light vehicles.
Redshire
A rolling area, dominated by a couple of hills. The village of Redshire gives places to hide from hill to its northeast. Artillery will play a powerful role on this map.
Mines
A flat hilltop in the center of this map provides an excellent firing position, but the short drive from either starting position makes climbing the hill a dangerous endeavor. Nestled in the canyon northeast of the hill is the small village of Pagorki; offering a tempting route with plenty of cover, but one that is exposed if the enemy controls the hill. West of the hill, surrounded by shallow water, is a small island which offers good cover while providing a large fire zone. While the island is protected from the hill, it is, for the most part, vulnerable to flanking attacks or fire from multiple angles. The island cover is solid, but not particularly large.
Ruinberg
Concentric city streets, along with dense forests and bushes in the overgrown park allow for hidden maneuvers and redeployment of your troops. Although artillery fire is of limited use in the city, the debris provides effective cover for your troops.
Ruinberg on fire
This map is completely identical to Ruinberg but has improved graphics. It is no longer available in the game as it has been replaced by Winterberg.
Fisherman's Bay
The map is a combination of open spaces and irregular terrain. Meandering narrow streets of the seaport on the flank can be surprisingly advantageous. Sloping hills covered with bushes offer excellent ambush opportunities.
Steppes
A seemingly endless open expanse of fields and hills, scattered through this farmland-esque map. Open fields, varying ditches, and small hills and rises litter this map, allowing for some prime spots to lay ambushes. Long, open fields are great for those who prefer long-distance combat, with little cover available to your target. Just remember; This works both ways.

Serene Coast
This coastal area is bounded by ocean and mountains. A railroad crosses the territory from north to south. Small hills on the western flank are favorable for a swift attack. A straight road connecting the bases passes through a small town, which often becomes a contested piece of terrain. There is also a low ground beside the town, witch could use for flanking the west and the middle. The bases are protected by the hills from direct attacks. However, the flanks of the bases are insecure and must be protected.
Swamp
Flank routes offer great opportunities for surprise attacks and diversionary operations. A mire in the center is not only an obstacle, but also an important tactical location.
Tundra
A mountain in the east offers the possibility of dominating from the high ground, while the central part of the map offers a wide range of tactical advantages. The village in the west could offer some linear combat for heavy tanks.
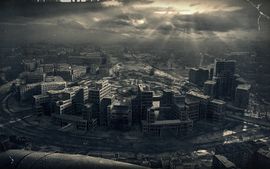
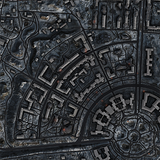
Widepark
This map depicts an industrial city devastated by war. A railway embankment divides the map in two, making it possible to concentrate forces for an attack or counterattack.
Cliff
Starting in the north and south, both teams are connected through a valley on the extreme west of the map. Large boulders offer cover south of the valley, and a small town provides cover to the north. The eastern portion of the map is elevated, with two large jutting hills providing cover from enemy fire. An overlooking position near the center of the map allows tanks to fire into the valley from above. Plentiful cover throughout the area allow for multiple attack routes, with careful coordination and flanking playing a significant role.
Fjords
Huge mountains and narrow valleys offer great advantages in a battle. You can engage in a fire duel across the gulf or enter a close quarter battle at the nearest port town or flank and capture enemy base.
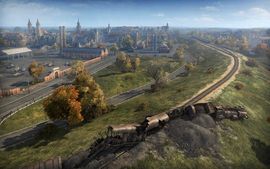
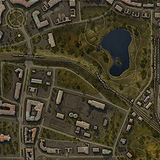
Highway
The diverse landscape of this map makes it peculiar and complex, and also encourages a wide range of tactics. Multiple defilades are favorable for surprise attacks, while the city blocks are advantageous for close combat.
Himmelsdorf
Literally translated as "sky village" from German, this labyrinth of streets and squares are a large hindrance for artillery and tank destroyers, but ideal for speedy breakthrough and bypass by medium and light vehicles. With the castle dominating the area, access roads running by the hill and along the railway lines to help you out of the impasse.
Ensk
A mixture of city outskirts and suburban areas with railroad tracks spanning and dividing this map. Plan your tactics to take advantage of defensive choke points and cover open areas with your vehicles. Artillery is great for deterring enemy breakthroughs, but remains almost defenseless when exposed to enemy vehicles attacking from cover.
South Coast
On this rugged-terrain map, make use of various battlefield tactics: flank or ambush the enemy, or attack straight ahead. Also use numerous hollows between the rocks for a busting attack with concentrated forces.
Overlord
New map as of patch 9.7. Appears to be limited to tiers 7-10. A relatively flat beachhead leads up to fields surrounded by hedgerows. Teams start up by the hedgerows, so the beach is only a corridor for flanking.
Winter Maps
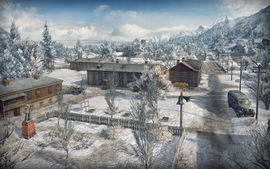
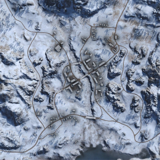
Arctic Region
A large ice-and-snow covered area stretches through this map. Steep hills, rock encampments, twists and turns, and plenty of places to stay and wait will have you on your toes as you battle through this icy deathtrap. Ridge, hills, and lots of rocky outcrops give you many places to hide and ambush your enemy as they come about. Turns and twists could have you stuck if your not on your toes, so watch out.
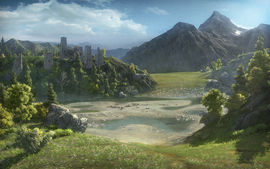
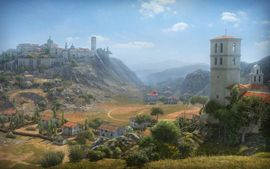
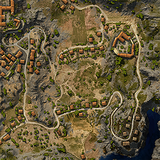
Sacred Valley
Frosty peaks and muted hues bring the landscape to life, wide roads and low buildings will not afford you cover for very long during the pitched battles fated to transpire here!
Severogorsk
The mountain trails on the sides allow snipers to lay waste to enemies in the town below. Only after campers from given side have been pushed back the offensive through the town can truly progress. This map was removed from the game in patch 9.5.
Erlenberg
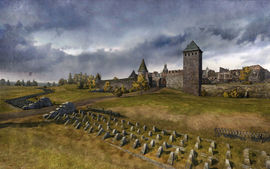
A large river splits this map in half, with three bridges acting as choke points between the halves. A small town surrounds the center bridge, while the north and south bridges have fewer buildings providing cover. A large castle overlooks the west half of the map on a large hilltop, offering cover and supporting fire positions. Hills overlook the city in the east, with sufficient vegetation to provide some concealment for tanks.
Desert Maps
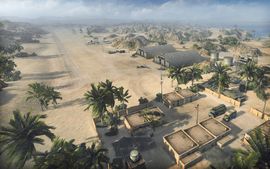
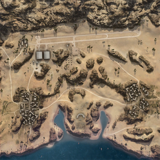
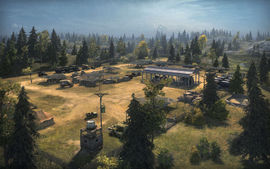
Airfield
This map offers many great ambush spots, as well as possibilities for maneuvers and breakthroughs. A large airfield in the upper part of the map and a rocky highland in the center offer a major tactical challenge. Occupy the highland to get a perfect view of the surrounding terrain and dominate routes to the enemy base.
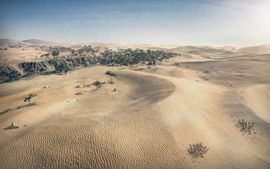

Sand River
A mostly open map offering little concealment, but providing plentiful cover due to the large number of sand dunes. Three small villages provide temporary cover at best, but are easily destroyed, so they must be used cautiously. Each flag is well protected with a ridge offering defenders cover, concealment, and excellent firing positions. Plentiful cover allows an excellent arena for run and gun tactics while offering many routes for tanks to engage the enemy and make use of their mobility.
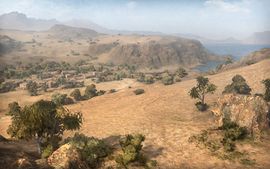
El Halluf
A large valley filled with rocks, vegetation, and a small village surrounding a dried out river bed separate the two teams. The large hills on either side of the valley offer many firing positions, and very little cover in the valley will protect a large tank completely against all positions. Regardless of approach, attackers will face a long climb into the enemy's camp, and effective use of the cover en route is essential. The northern approach offers plentiful protection to attack either hill, but the southern approach makes up for lack of protection with shorter distances and better concealment.
Special
Training ground
This was the first map you have been on as this was the tutorial where everything started. You were given an M4 Sherman and learned the basics of the game.

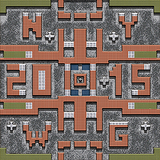
Karl
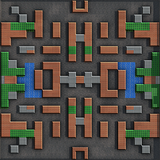
This was a map where Wargaming had an experiment with 8-bit graphics. As the name vaguely suggests, the tank used was the Karl, a German tier 1 SPG. The blocks around you were all destroyable and traversed in the game mode that was optimized for this map. This map as well as the game mode was removed at April 7,2014.
Himmelsdorf Championship
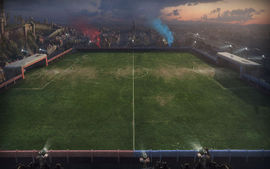
It's the same as Himmeldorf but with one major difference. As the 2014 FIFA World Cup arrived, Wargaming created a giant soccer/football field in the middle of Himmeldorf optimized for a limited time game mode called "Football" which included the T-62A Sport. They removed this mode at July 15, 2014 and as of patch 9.9 it hasn't been added back.
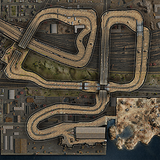
Tank Racing
It wasn't exactly what players wanted, but nevertheless Wargaming delivered. This map was modified from Port which was removed in patch 8.11, but had a race track that Chaffee Sports would race on the game mode "Tank Rally". The missions associated with this game mode were removed October 13, 2014 but, the mode itself wasn't removed until November 6 of the same year and Port is still missing.
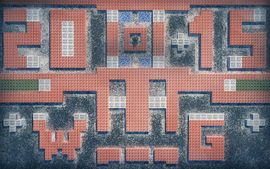
2015 New Year
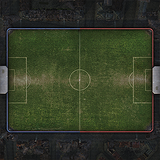
Due to the popularity of the last 8-bit game mode WoT had, Wargaming made another game mode called "Winter Showdown" on January 26 which included 3 new tanks, mega platoons of 5, and this map. It has the same properties as the last one, but has a winter look to it. However, this game mode was removed on Febuary 9,2015.
Upcoming Maps


Maps list
| Summer Maps | Abbey • Cliff • Ensk • Fjords • Highway • Himmelsdorf • Karelia • Lakeville • Live Oaks • Malinovka • Mines • Mittengard • Murovanka • Fiery Salient • Mountain Pass • Prokhorovka • Redshire • Ruinberg • Fisherman's Bay • Siegfried Line • Steppes • Serene Coast • Swamp • Tundra • Westfield • Widepark • Paris • Berlin • Ghost Town • Pilsen |
| Winter Maps | Windstorm • Winterberg • Arctic Region • Winter Himmelsdorf • Kharkov • Erlenberg |
| Desert Maps | Airfield • Sand River • El Halluf |
| Special | Training ground • Karl • Himmelsdorf Championship • Tank Racing • 2015 New Year |
| Removed Maps | Port • Province • Komarin • Northwest • Sacred Valley • Severogorsk • Stalingrad • • Hidden Village • South Coast • Overlord • Pearl River • Dragon Ridge • Ruinberg on fire |
Category: