Maps (Blitz)
Maps have different characteristics of size, design, terrain, location, weather and land leveling. Each map offers different tactics to different tanks. Use these tactics as an advantage for you to conquer the maps.
General Tactic- NEVER GO ALONE, you will die almost instantly and really annoy your team. Capturing the Base (caping) is useful in certain situations, for example when the enemy is turtling or camping somewhere, the base capture is a perfect tool to make the enemy come to you. You will get more XP by winning by killing the enemy team rather than base capping the win, so dont try to troll that person you see with six kills and is one shot away from getting the seventh?
Contents
Black Goldville
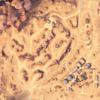
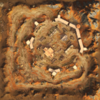
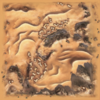
Black Goldville is a desert map with a hilly cave system in the northwest, and town in the southeast. Heavies with good gun depression can fight at the caves, while heavies without good gun depression can fight it out in the town. Mediums can either flank through the town, push the large stone column in the caves, or go hull down near the middle of the map in the hilly section. TDs should either snipe and support the heavies in the caves or town, or play to their specific strengths.
Castilla
Castilla is an interesting new map that sports a larger area and cover for many tanks. As well there are many positions that tanks can sit and lay in ambush. For strategic game play both with and with out a platoon member there are many specialties that apply to different tanks. There are two positions on the north end of the map that Tank Destroyers can play a vital role in deciding the out come of a battle. Along with certain heavy tanks they are what keeps the flank strong and able to resist a counter attack. Now in reference to the other recent map Winter Malinovka there is the high ground which has a windmill there. As well on Castilla there is a windmill with a large hill. That hill plays a vital role in sweeping through the enemy lines. On the other side there is the major hill with the church and buildings, this also plays another vital role in combatting the enemy team. To be able to win both sides makes a battle favor the "King of the Hills." For a team to split up makes a difference for the fire power of the tanks and the playing ability. For a top tier tank you should always flank with at the very least the lowest tier tank and if everything goes right then have a three person group take one side. The other four play a crucial role in over powering the other side. Or holding them back until reinforcements arrive. For what ever team pushes one side you always take the hill as quickly and efficiently as you can. Then send support shells to the other enemy teammates holding back the other flank.
Copperfield
Copperfield is a desert type map, consisting of a high ring around the edge, with a valley in the middle. The heavies usually engage at the top hill, near the spawn, while mediums usually fight at the lower edge of the map. Tank Destroyers do not excel at this map, the well armored ones can join the heavies (ex. T95), while the quick, agile ones can join the mediums (ex. Hellcat).
Dead Rail
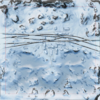
Dead rail is a winter map that includes a raised hill to the east, a town in the center, and a low-lying hilly section to the west. The capture circle is in the middle of a large grouping of trains just to the west of the town, and has several trains protruding into it, providing cover. The trains to provide an interesting combat environment, as shells can travel under them to hit the tracks or lower hulls of enemy tanks, and some trains have gaps in their sides that allow tanks to fire through them. On the west, both teams have hills that provide hull-down opportunities to tanks with 9-10%+ of gun depression, or for tall tanks with less depression.
Desert Sands
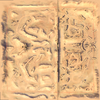
Desert Sands in a desert map, with a town on one side of the railroad tracks and dunes on the other. The heavies generally do battle in the town, while the mediums prowl the dunes. There are a couple of good sniping/ camping positions for TDs on this map, in the hills around and above each spawn.
Falls Creek
Falls creek is a town map, with a factory town on the top and some water and a bridge on the bottom. The heavies usually square off at the bridge between the two spawns and occasionally at the town. Mediums sometimes fight at the bridge, but mostly at the town. There are no good sniping/ camping locations on this map, so well armored TDs stay with the heavies and the agile ones go with the mediums.
Fort Despair
Fort Despair is a fun map to play, especially if you like using different strategies depending on your team make up. There is a definite choke point for heavies to brawl in the upper right hand corner of the map, conveniently placed in between the two spawn areas. There are also elevated spotting locations just to the inside of the choke point for quick mediums to get a shot off and see how many enemy tanks are headed to the choke point. If your team has a lot of mediums, this map offers a quick flank around the capture area, but be warned, there is a camouflaged sniping location for each team that overlooks this open flank area.
Lost Temple
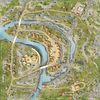
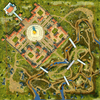
Do not get distracted and try to figure out what the whispers are saying on this map, because sitting around your open spawn area will make you an easy target. This map is completely different than any of the other maps produced so far. There are no reliable sniping locations and the maps make it hard to employ a quick flank maneuver. The map is divided into the hill country and a raised Pagoda village, with the capture circle in between them. There is a small river that dissects through the hill country and a large central elevated monument in the middle of the village that offers a good spotting location for the fast tank with nerves of steel. It is very difficult for a tank on any side of the map connecting with a shot to the other side of the map, so tank destroyers have a hard time making a consistent impact on this map.
Mines
Mines is a country map with water and an island in the west, a hill in the middle and a small town in the east. The heavies can either fight near the capture circle at the base of the large, central hill, or on the right side in the small town. Mediums can rush the hill at the beginning of the battle to gain a good shot into the enemy spawn from either side, or flank using the island or the town. Many tank destroyer drivers camp near the spawn on either side, but this is largely ineffective, as the only people they can shoot are flanking mediums or tanks on one side of the hill. Not only this, but they will often be spotted by mediums who rush the hill and take up positions in the bushes on either side. Other TD drivers camp on the island, this has a shot into part of the base and part of the hill, so it is not too effective. If a TD can excess the hill, in a rush with the mediums, they hill gain a clear shot the most of the map. However, this position is hard to obtain after the initial rush as anyone attempting to make it onto the hill will be annihilated by the stand off of heavies around the base. Well armored TDs should push with the heavies, while fast TDs should ascend the hill with the mediums or flank with mediums.
Middleburg
Middleburg is a town map with some hills in the east and a large town in the west. The heavies engage in street warfare in the town, ducking around corners to reload, while mediums flank or engage other mediums in the hills. Some TD drivers camp on the top of the hills, but this does you no good as all of the tanks in the town are blocked by buildings and the mediums will annihilate anyone in this exposed position. Generally the well armored TDs prowl the streets with the heavies and the agile ones flank with the mediums.
Oasis Palms
Oasis Palms is a desert map, encompassed with sandy dunes and two small villages separated by an oasis. The cliffs near the northern village can serve a sniping area for tank destroyers. In general, you’ll notice that you will be able shoot from one side of the map to the other, so scouting can play a huge role in earning that victory. Be careful when engaging the enemy, the map is open for players to get shot down easily. Although the dunes present a safe area to travel from, it can also be problematic for those that have poor gun depression.
Rockfield
Rockfield is filled with small, elevating terrain where snipers/TD’s can take advantage of and use them to flank the opposing team from advancing past the center divide. Heading towards the cap, you’ll find campers near the spawn point. If you decide to take the high ground, you engage in a peek a boom strategy, while trading damage. Moving towards the middle can be fun, but risky. You can earn a decent amount of XP just by spotting the spawn campers in the valley.
Winter Malinovka
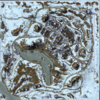
Winter Malinovka is a snow map filled with a variety of terrain levels. The northern portion of the map (where the town is located) is a main point of contention. TD’s have the option to snipe near the windmill or even on the ridge located in the north east corner. Additionally, players can pick each other off in the middle (near the lake that separates the lower and middle ground). Scouting could prove difficult since there are only 2 areas where players must commit to, in order to enter each team’s side.
