Maps (Blitz)
Each map in Blitz possesses different characteristics of size, terrain, weather, and tactics. Each map offers different opportunities for each different tank type to use their strength's to their teams advantage, and thus players should be aware of the different optimal locations on each map and understand the role their tank is best suited to be in at the beginning of each battle.
It is recommended that tanks NEVER GO ALONE, as this often means meeting multiple tanks on the enemy team and being rewarded with a very quick death. This is frustrating for the player and their team, so following in the rough general direction as the rest of the team at all times is recommended. There are opportunities for a team to split themselves into two, with slow tanks moving in one direction and fast tanks in another, but make sure you always have a buddy! Capturing the base (capping) is useful in certain situations, for example when the enemy is camping and needs to be drawn out of their locations, however, you will get more XP by winning and killing all of the enemy teams over capturing the base. Moreover, capping can often result in a team finding themselves locked down in a vulnerable cap location and surrounded on all sides by the enemy team, so the decision to cap is one that always must be carefully considered.
Contents
Black Goldville
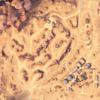
Black Goldville is a desert map with a hilly cave system in the northwest, and town in the southeast. In the center of the map are shallow hills and several large rocks. There are several varied tactical opportunities on this map. Heavy tanks and occasionally mediums with solid turrets can push into the caves at the top of the map and engage the enemy team for the highest ground on the map. Meanwhile mediums can push through the middle of the map to find side and rear shots on the enemy team fighting in the caves. Beware of Tank Destroyers however, as they can find several locations to snipe from near each respective spawn. Heavies can alternatively push through the town on the bottom of the map, but this frequently gives the initiative to the enemy team as they now hold the high ground, and thus pushing to the low ground near the cap circle is a risky tactic. Mediums can generally always find room to maneuver in the centre areas of the map and support their heavies on either flank. Tank Destroyers can find strong sniping locations near their spawn if their team heads to the caves, or well armoured TD's can join their heaves in the frontline push.
Canal
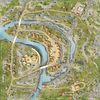
Canal is the newest map in Blitz that came in update 2.3. The best strategy on this map is to hug the edges of the map. Failure to do so may result in death! The Northwest and Southeast corners are the typical Points of engagement, and an overmatch at either of these zones generally results in a win. Avoid going to the center, it is extremely risky and has many firing lanes into the map. Do your best to take the edges and move inward. This map is excellent for mediums and tank destroyers.
Castilla
Castilla is an interesting new map that sports a larger area and cover for many tanks. As well there are many positions that tanks can sit and lay in ambush. For strategic game play both with and with out a platoon member there are many specialties that apply to different tanks. There are two positions on the north end of the map that Tank Destroyers can play a vital role in deciding the out come of a battle. Along with certain heavy tanks they are what keeps the flank strong and able to resist a counter attack. Now in reference to the other recent map Winter Malinovka there is the high ground which has a windmill there. As well on Castilla there is a windmill with a large hill. That hill plays a vital role in sweeping through the enemy lines. On the other side there is the major hill with the church and buildings, this also plays another vital role in combatting the enemy team. To be able to win both sides makes a battle favor the "King of the Hills." For a team to split up makes a difference for the fire power of the tanks and the playing ability. For a top tier tank you should always flank with at the very least the lowest tier tank and if everything goes right then have a three person group take one side. The other four play a crucial role in over powering the other side. Or holding them back until reinforcements arrive. For what ever team pushes one side you always take the hill as quickly and efficiently as you can. Then send support shells to the other enemy teammates holding back the other flank.
Copperfield
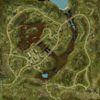
Copperfield is one of the smallest maps in the game, and thus provides issues for faster vehicles with little armour. Heavy tanks and well armoured TD's generally push up the slopes of the hill nearest to their spawn, where they can find several hull down and side-scraping opportunities to engage the enemy team and respectively use their turret armour / side armour to their advantage. Mediums flank around the opposite high ring on the other side of the map, where they can either completely flank the enemy or take side shots across the map into the enemy team. Faster and less well armoured TD's would do well to provide supporting firepower in this attempt. Tanks should be aware of the possibility of shots from the opposite side of the map at all times, and thus should be conscious of not just cover from the tanks on the enemy team directly in front of them, but cover on their exposed flank. The low valley and the cap circle generally provide no tactical value and should see little action until the end of the battle when one team has decisively won and is 'cleaning up' the enemy.
Dead Rail
Dead rail is a winter map that includes a raised hill to the east, a town in the center, and a low-lying hilly section to the west. The capture circle is in the middle of a large grouping of trains just to the west of the town, and has several trains protruding into it, providing cover. The trains to provide an interesting combat environment, as shells can travel under them to hit the tracks or lower hulls of enemy tanks, and some trains have gaps in their sides that allow tanks to fire through them. On the west, both teams have hills that provide hull-down opportunities to tanks with 9-10%+ of gun depression, or for tall tanks with less depression.
Desert Sands
Desert Sands in a desert map, with a town on one side of the railroad tracks and dunes on the other. Heavies spawn in the town, while mediums spawn in the dunes. Tank Destroyers have little opportunity to snipe from high ground on this map as there is little high ground that provide solid cover or concealment. Thus heavily TD's can either play a close supporting role in the town among their heavies. While faster TD's can support their mediums in the open desert. Common tactics on this map can involve teams with a composition of faster tanks all making a push through the dunes together, while slower teams can use their armor and firepower to bully their way through the tightly packed confines of the town buildings. If a team of heavily armored tanks finds the enemy team went all to the dunes. It is best to have a tank capture the base to lure the enemy mediums into the city to eliminate them one by one. The only sniping position that allows for TD's to cover both sides of the map is found while sitting on the rails back against the map's edge. This position is highly exposed once the enemy push up and there are not a lot of good firing lines from here.
Falls Creek
Falls creek is a countryside map, with a factory complex to the south(bottom) and a low lying river and a bridge to the north(top) the heavily armored tanks usually square off at the bridge between the two spawns on the south side. Mediums will almost always fight at the factory. There are a few positions on each side of the map that are suitable for longer distance engagements these can be found within the factory as well as positions on the east and west sides with shots into the factory area. One area of the base is completely covered from the east and west sniping positions. Often times one adventuresome tanker will attempt to win by capturing the base before the enemy team can get to base for a reset. Heavily armored tanks who go over the bridge are liable to lose the battle even though they defeated the heavies across the river. Players may try and cross the river to get to base, a well placed tank can frustrate any enemy advance to reset the timer on the base capture. On this map it is prudent to have more than half the team head to base in order to frustrate the enemy and stop them from capping. If the majority of the enemy team heads across the bridge you can easily capture the base and win the battle with nary a shot fired.
Fort Despair
Fort Despair is a fun map to play, especially if you like using different strategies depending on your team make up. There is a definite choke point for heavies to brawl in the upper right hand corner of the map, conveniently placed in between the two spawn areas. There are also elevated spotting locations just to the inside of the choke point for quick mediums to get a shot off and see how many enemy tanks are headed to the choke point. If your team has a lot of mediums, this map offers a quick flank around the capture area, but be warned, there is a camouflaged sniping location for each team that overlooks this open flank area.
Lost Temple
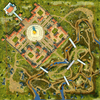
Do not get distracted and try to figure out what the whispers are saying on this map, because sitting around your open spawn area will make you an easy target. This map is completely different than any of the other maps produced so far. There are no reliable sniping locations and the maps make it hard to employ a quick flank maneuver. The map is divided into the hill country and a raised Pagoda village, with the capture circle in between them. There is a small river that dissects through the hill country and a large central elevated monument in the middle of the village that offers a good spotting location for the fast tank with nerves of steel. It is very difficult for a tank on any side of the map connecting with a shot to the other side of the map, so tank destroyers have a hard time making a consistent impact on this map. Secrets:
- As said before, strange ghost-like whispers seem to pervade the map. One can hear these by keeping the volume up higher, and sitting motionless for a moment.
- Seemingly connected to the whispers, a strange ghost-like figure can be seen lurking near one of the temple buildings at the back of the map (I will not say which one, you must find it yourself). It can only be seen by driving a short distance away and using scoped aiming to look at the front of the building.
Mines
Mines is a country map with water and an island in the west, a hill in the middle and a small town in the east. The heavies can either fight near the capture circle at the base of the large, central hill, or on the right side in the small town. Mediums can rush the hill at the beginning of the battle to gain a good shot into the enemy spawn from either side, or flank using the island or the town. Many tank destroyer drivers camp near the spawn on either side, but this is largely ineffective, as the only people they can shoot are flanking mediums or tanks on one side of the hill. Not only this, but they will often be spotted by mediums who rush the hill and take up positions in the bushes on either side. Other TD drivers camp on the island, this has a shot into part of the base and part of the hill, so it is not too effective. If a TD can excess the hill, in a rush with the mediums, they hill gain a clear shot the most of the map. However, this position is hard to obtain after the initial rush as anyone attempting to make it onto the hill will be annihilated by the stand off of heavies around the base. Well armored TDs should push with the heavies, while fast TDs should ascend the hill with the mediums or flank with mediums.
Middleburg
Middleburg is a town map with some hills in the east and a large town in the west. The heavies engage in street warfare in the town, ducking around corners to reload, while mediums flank or engage other mediums in the hills. Some TD drivers camp on the top of the hills, but this does you no good as all of the tanks in the town are blocked by buildings and the mediums will annihilate anyone in this exposed position. Generally the well armored TDs prowl the streets with the heavies and the agile ones flank with the mediums.
Oasis Palms
Oasis Palms is a map that recently underwent serious change, completely altering the gameplay on the map. In the north-eastern section of the maps are large dunes, providing opportunities for medium tanks to roam and engage enemy mediums or to flank. In the middle of the map is a large gully that stretches from one end to the other, essentially splitting the map into two sections. On the north western side of the map are two large buildings and along the entire ridgeline on this side of the map, directly overlooking the gully, tanks can gain commanding positions of the town on the opposite side of the gully and the cap position inside it. In this town, heavy tanks can use their armour to push through the buildings, but they must be very aware of the risk of tanks gaining the ridgeline on the other side of the gully and trapping them behind cover. On the other side of the town, in the south western sector, is another series of dunes, but the terrain here is lower than the dunes on the north-eastern side of the map and thus is easier for slow tanks to reach, as they do not have to climb. Heavy tanks, supported by TD's, will often engage each other here and in the town area. The mediums and fast heavies will duke it out on the higher north-eastern dunes. If a stalemate develops in town the winning mediums from the dunes will often be the deciding force to win the battle.
Port
Port presents an industrial environment filled with mountainous hills, bridges and a harbor full of surprises. The hills in the north can be utilized for teams to snipe and pick off activity around town, and even as far back as the harbor. The south focuses more on controlling the city and harbor, keeping enemies at bay. Look to town, where most of the activity will occur as a popular point of contention. Finding the ideal area to flank can be the key to achieving victory in the battlefield.
Rockfield
Rockfield is filled with elevated terrain where snipers can take advantage of good firing lanes to halt the enemy advance. There are also a few avenues of approach. It is best use these avenues to flank the opposing team if fighting gets bogged down at the major choke points. There are many ways to stop the enemy from advancing past the center divide. If you are heading towards the cap, you’ll find campers are often times near the enemy spawn point. If you decide to take the high ground, you will often engage in a peek a boom contest while holding in cover at the bunkers and behind small hillocks. Moving towards the middle alley can be fun, but risky. Often times the battle will be decided by who holds the top bunkers. If a stalemate is in progress the next deciding factor is the middle most bunker. Who ever holds the middle bunker is most likly able to win if they can stay alive. Mediums will often skirmish over this bunker in the early stages of the battle. If both the top ridge and the middle bunker are in a stalemate the next deciding factor is the middle alley. A quick flank through the middle alley can lead to victory. However, if the enemy have blocked the choke point or there are tds in the back you may quickly become a flaming wreak. You can earn a decent amount of XP just by spotting the enemy for your team while you are at the second bunker.
Halloween Rockfield
This is the Halloween-themed variant of Rockfield.
Halloween Rockfield is filled with elevated terrain where snipers can take advantage of good firing lanes to halt the enemy advance. There are also a few avenues of approach. It is best use these avenues to flank the opposing team if fighting gets bogged down at the major choke points. There are many ways to stop the enemy from advancing past the center divide. If you are heading towards the cap, you’ll find campers are often times near the enemy spawn point. If you decide to take the high ground, you will often engage in a peek a boom contest while holding in cover at the bunkers and behind small hillocks. Moving towards the middle alley can be fun, but risky. Often times the battle will be decided by who holds the top bunkers. If a stalemate is in progress the next deciding factor is the middle most bunker. Who ever holds the middle bunker is most likly able to win if they can stay alive. Mediums will often skirmish over this bunker in the early stages of the battle. If both the top ridge and the middle bunker are in a stalemate the next deciding factor is the middle alley. A quick flank through the middle alley can lead to victory. However, if the enemy have blocked the choke point or there are tds in the back you may quickly become a flaming wreak.
Winter Malinovka
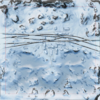
Winter Malinovka is a snow map filled with a variety of terrain levels. The northern portion of the map (where the town is located) is a main point of contention. TD’s have the option to snipe near the windmill or even on the ridge located in the north east corner. Additionally, players can pick each other off in the middle (near the lake that separates the lower and middle ground). Scouting could prove difficult since there are only 2 areas where players must commit to, in order to enter each team’s side.
