Maps (Blitz)
Each map in Blitz possesses different characteristics of size, terrain, weather, and tactics. Each map offers different opportunities for each different tank type to use their strengths to their team's advantage, and thus players should be aware of the different optimal locations on each map and understand the role their tank is best suited to be in at the beginning of each battle.
It is recommended that tanks never go alone, as this often results in encountering multiple tanks on the enemy team and being rewarded with a very quick death. This is frustrating for the player and their team, so moving as a team at all times is recommended. There are opportunities for a team to split themselves into two, with slow tanks moving in one direction and fast tanks in another, but make sure you always have support.
Capturing the base (capping) is useful in certain situations, for example when the enemy is camping and needs to be drawn out of their locations. However, you will earn more experience by killing all of the enemy tanks compared to capturing the base to score a victory. Moreover, capping can often result in a team finding themselves locked down in a vulnerable cap location and surrounded on all sides by the enemy team, so the decision to cap is one that always must be carefully considered.
Contents
Black Goldville
Introduced in Update 1.3, this desert map depicts the American West with a canyon and an oil refinery. In the center of the map are shallow hills and several large rocks.
There are several varied tactical opportunities on this map. Heavy tanks, and occasionally mediums with solid turrets, can push into the caves and engage the enemy team for the highest ground on the map. Alternatively, heavies can push through the town at the bottom of the map, but this frequently gives the initiative to the enemy team as they now hold the high ground, and thus pushing to the low ground near the capture point is a risky tactic. Mediums can often find room to maneuver in the central areas of the map to support their heavies on either flank. Tank destroyers can find strong sniping locations near their spawn if their team advances to the caves, and well-armored TD's can join their heaves in the frontline push.
Canal
Introduced as part of Update 2.3, Canal is a mixed-terrain map in a northern Russian wilderness setting. Featuring atmospheric weather conditions, tundra-like nature surrounds an industrial complex. The map is divided by a water-filled trench that gives Canal its name.
The northwest and southeast corners are the typical points of engagement, and seizing control of these flanks with a rapid push by medium tanks provides a team with the opportunity to surround any enemies located in the central areas of the map. Alternatively, heavies can advance into the industrial complex while using the large buildings as cover. However, tank destroyers can find positions on the outskirts of the complex to pin down any enemies located within. The many ambush positions overlooking the canal, combined with sections of mud that decrease the mobility of a vehicle, means that moving through the canal is a risky tactic. It is best to take the edges of the map and move inward. This map is excellent for mediums and tank destroyers.
Castilla
Introduced in Update 1.6, Castilla features a Spanish hilltop town surrounded by hills and streams. It is a diverse map with both urban and rural terrain.
Teams will often find themselves pushing for the two sections of high ground on this map. The first section of high ground features a windmill on top of a hill. Seizing the windmill provides control of the eastern side of the map, limiting the capabilities of flanking medium tanks. The second, featuring a tower on the largest hill on the map, provides control of the western side of the map and many sections of the town. Both hills offer vantage points that can be used to cover the capture zone. Teams can split into two even groups and advance towards each of the previously mentioned hills. In this situation, it is best to push simultaneously to catch the enemy forces in a pincer movement. Alternatively, teams can advance together to seize control of one of the hills before moving towards the capture zone. In this situation, the team that gets bogged down while taking control of a hill will find themselves engaging enemies from the front while being flanked by mediums from the rear.
Copperfield
A small copper mine located in the mountains, Copperfield is one of the original, and one of the smallest maps of Blitz.
Heavy tanks usually push up the slopes of the hill nearest to their spawn, where they can find several positions to side-scrape or go hull-down to engage the enemy team. Heavily-armored and less mobile tank destroyers will find themselves most effective on this side of the map. Medium tanks can push through the far side of the map where they can either flank the enemy or take shots across the map at the rear and sides of the enemy tanks. Faster and lightly-armored TD's can provide effective supporting fire from this side of the map. Tanks on each side of the map are at risk from taking fire from the opposing side of the map, so it is important to stay in cover from enemies from the front and the flank. Due to the small size of the map, the central valley and the capture zone generally provide no tactical value until the end of the battle when one team has decisively won and is 'cleaning up' the last few enemy vehicles.
Dead Rail
One of the original maps of Blitz, Dead Rail is a winter map that features a hill to the east, a town in the center, and a low-lying hilly section to the west.
Just to the side of the town, the capture zone is located in a large grouping of train carriages which can provide cover from enemy defenders. The trains can create a diverse range of combat situations, as shells can travel under the carriages to hit the tracks or lower hulls of enemy tanks. Some trains have gaps in their sides that allow tanks to fire through them, while flatbed carriages allow tanks with strong turrets to engage the enemy while keeping their hull relatively protected. Tanks with good gun depression can take advantage of the hilly terrain throughout the map. Heavy tanks can use the buildings or the hills as cover while they advance, and tank destroyers will be able to find various sniping positions near their spawns which can be used to cover the heavies in their advance. Medium tanks usually fight in the lower-lying areas of the map because of the open terrain, but can also move over the hill on the other side of the train line to catch any enemies still near their spawn off-guard.
Desert Sands
Reworked with improvements to various sections of the map in Update 2.2, this map based on El Alamein features a small town and rolling sand dunes separated by an elevated train line.
Heavies spawn in the town, while mediums spawn in the dunes. Heavily-armored and slow tank destroyers can play a close support role in the town with their heavies. Faster TD's can support their mediums in the dunes. There are two common tactics on this map that involve teams with varying speed compositions. A team of faster tanks can all make a push through the dunes together before entering the town through the many entrances from the dunes. Teams with slower vehicles can use their armor and firepower to brawl their way through the tightly packed confines of the buildings before capturing the base to lure the enemy from the dunes into the town. The only sniping positions that allow for TD's to cover both sides of the map are found at either end of the rails against the edge of the map. However, the lack of cover on these positions means that getting spotted by the enemy will result in taking fire from the dunes and from the town.
Falls Creek
One of the original maps of Blitz, Falls Creek is a countryside map featuring a factory complex partially surrounded by a low-lying river and a bridge connecting two hills.
Located on high ground, heavy tanks and heavily-armored tank destroyers often find themselves fighting for control over the bridge connecting the two spawns. Mediums will almost always fight at areas surrounding the factory. Various positions within the factory, as well as positions on the hills near the spawns are suitable for long distance engagements. A portion of the capture zone is completely covered from the sniping positions near each spawn, and this allows for the possibility to win by having a single tank capture the base while the rest of the team engages the enemy to prevent them from resetting. Sections of the river surrounding the factory complex are still filled with water, slowing down any tank that tries to cross it and allowing for snipers to take shots at easy targets. If a team of slow and heavily-armored vehicles takes control of the bridge and the high ground, it is still possible for the other team to win by capturing the base. Therefore, it is important to have a balance of vehicles fighting for control of the bridge and the factory complex.
Fort Despair
One of the original maps of Blitz, Fort Despair is situated within the ruins of an abandoned fortress surrounded by sections of open terrain.
Success on this map is highly dependent on team composition. With teams spawning on either side of the fortress, heavy tanks and heavily-armored tank destroyers usually advance into the fort, with a major choke point situated directly between the two spawns. Various ruins and mounds within the fort allow for tanks to side-scrape or go hull down. Mediums and other fast vehicles can circle around the outskirts of the fort before pushing inwards. Alternatively, tanks can position themselves on two opposing sections of high ground, providing an opportunity to locate direction of the enemy advance. For teams that are slow and suited to brawling, it is best to advance into the fort, while teams of agile and lightly-armored tanks should take control of the areas surrounding the fort to flank the more heavily-armored enemy. As the capture zone is situated on an elevated position, it provides little strategic value until the later stages of the battle after a majority of the surrounding areas have been secured.
Lost Temple
Introduced in Update 1.3, this map showcases the misty conditions of the Chinese mountains during the Summer, featuring a large temple overlooking a lower-lying river area.
Each spawn is located at opposing ends of the temple grounds. With a lack of solid cover, it is important to move from the spawn areas as soon as possible. Heavy tanks tend to advance into the temple while using the buildings as cover. The structural design of the structures allow for tanks to side-scrape or keep their hull protected while providing clear lines of fire at enemy vehicles. A large multi-layered monument located in the center of the temple provides an opportunity for a small and fast tank to spot any enemies advancing into the temple grounds. Medium tanks can also push towards the river where the hills provide a line of sight onto the capture zone. However, once again, the lack of solid cover on these hills means that sniping TD's cannot stay on the hills after being spotted. After taking control of the lower-lying areas, mediums can then flank into the temple to catch the sides and rear of the enemy advance.
Mines
A small mining village based on a Polish coastal town, Mines features a flat mining hilltop located in the center of the map, and a lighthouse situated on a small island surrounded by sand and shallow water.
As the battle begins, medium tanks can make a rapid push to take control of the central hill which is of major strategic value as it overlooks all sections of the mainland, including the capture zone located at the base of the hill. Following the medium tanks, heavies should provide close quarters support for their mediums to ensure that the hill remains in their control. The spawns, positioned at opposite ends of the central hill, also features elevated ground which tank destroyers can make good use of. TD's in these positions can cover the flanking route around the central hill while the heavies are engaging enemies from the front. Alternatively, fast and lightly-armored TD's can advance towards the lighthouse island. It provides some firing lines at enemies on the hill and a flanking route to the elevated positions near the spawns. In most cases, the team that secures the central hill will be the victors of the battle.
Middleburg
One of the original maps of Blitz, this seaside town nestled on a gentle mountain slope features an urban environment as well as a small valley situated further up a hill.
On this map, heavies and tank destroyers spawn at the outskirts of the town while mediums spawn on the top of the hill. The heavies, supported by slow and heavily-armored TD's, tend to advance into the town while using the various street angles to engage the enemy. The urban environment allows for side-scraping and 'peek-a-boom' tactics. Mediums, supported by fast TD's, flank or engage other mediums in the hills. Alternatively, the entire team can push to the hill and take control of it before advancing into the town. The location of the capture zone, being positioned at the bottom of the hill, means that those on the hill can quickly rush down to reset the base.
Oasis Palms
Introduced in Update 1.2, Oasis Palms was slightly edited in Update 1.4 before receiving a major rework in Update 2.0. This desert map features rolling sand dunes and a small town separated by a gully in between.
The spawns on this map are located at opposite ends of the gully. The large sand dunes make it an idea environment for medium tanks to engage enemy mediums or to flank. Meanwhile, heavy tanks can advance directly into the town or push to the dunes behind it. Not far from the town is a position in the corner of the map that tank destroyers can position themselves to cover the town's flanking route. Towards the center of the map, tanks can gain control of the two large buildings to secure the capture zone and the nearby gully area. Additionally, the ridgeline can be used to engage enemies within the town and trap them behind cover. Heavy tanks, supported by TD's, will often engage each other here and in the town area. If a stalemate develops in town, the winning mediums from the dunes will often be the deciding factor that wins the battle.
Port Bay
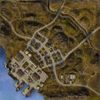
Based on a North American coal and cargo port, Port Bay was introduced in Update 1.10. It is a map of mixed terrain featuring open spaces, valleys and hills, residential areas and a dock area.
The hills and valleys are excellent for medium tanks and tank destroyers to engage. The open spaces allow for maneuvering freely and the valleys can be used my mediums to hide or flank the enemy. Towards the center of the map is the residential area with the capture zone positioned in the town square. This is where heavy tanks will engage. The dock area can be used by all vehicle classes, and taking control of this area provides access to flanking routes and the capture zone. Various routes connect the valley to the residential area, and tank destroyers can position themselves nearby in the elevated positions overlooking some of the streets.
Rockfield
One of the original maps of Blitz, Rockfield was reworked in terms of aesthetics in Update 2.0, featuring a string of concrete bunkers surrounding the entrance of an underground facility, all situated on a hill. At the bottom of the hill in the lower-lying areas is a wide valley littered with stone formations.
On this map, a majority of the fighting will occur on top of the hill. Teams will fight for control over the high ground while using the concrete bunkers as cover. Tanks with strong turrets/superstructure and good gun depression can make use of the hilly terrain, while heavies can use the bunker to side-scrape. Tanks can also advance through the valley at the very edge of the hill. If the enemy team is entirely engaged on the hill, mediums can take this route to flank around to the rear of the enemy, or to cut up to the hill to the middle bunker. However, there are various positions along the hilltop and further in the valley that can be used to cover this route. Therefore, it is important to determine the position of the enemy before making an attempt to flank. The capture zone, located at the far side of the valley opposite to the hill, offers almost no protection. However, capturing the base can be of varying levels of strategic value. If the enemy controls a majority of the hill, they will be able to reset the base without exposing themselves. However, if a stalemate has occurred on the hill, capturing the base can force the enemy to split their forces in order to reset. This can provide your team-mates on the hill with an opportunity to advance and break the stalemate.
Halloween Rockfield
This Halloween-themed variant of Rockfield was introduced in Update 2.2. It is essentially the same as the original Rockfield, but set during the evening, and littered with jack-o-lanterns, glowing mushrooms and other spooky decorations.
Winter Malinovka
Introduced in Update 1.5, Winter Malinovka offers varied fighting terrain. A small town is situated on a hillside, with a windmill located at the top of a hill and wide open fields in the lower-lying areas.
With the spawns located at the opposite corners of the map, teams will generally find themselves fighting for control over the windmill, positioned on high ground. Mediums often move rapidly to the windmill in order to secure a foothold for the slower heavies and tank destroyers. The lower-lying field offers a flanking route for mediums to get behind the enemy fighting at the windmill, but otherwise, it offers little strategic value. Heavy tanks can either advance towards the windmill or move through the town while using the buildings for cover. However, the many hills and ridges overlooking the town and the capture zone can be used by tank destroyers as sniping positions. Generally, the team that seizes control of the high ground will be the victors of the battle.
