Admiral Nakhimov
| Revision as of 23:23, 10 November 2021 | Revision as of 23:32, 10 November 2021 | |||
| Line 23: | Line 23: | |||
| '''Skip Bombers''' | '''Skip Bombers''' | |||
| ? | ''Nakhimov's'' skip bomber squadrons are greatly improved over those of ''[[Pobeda]]'', dealing a whopping 8700 damage per bomb instead of 6800 and dropping 8 instead of 6 at a time. These aircraft are the go-to for attacking destroyers and light cruisers, as the bombs can be dropped very close to the target and do not require a long preparation time. If the other more specialized squadrons are unavailable or the captain is unsure of their target at the time of takeoff, the versatility of the skip bombers comes in handy because they are capable of dealing serious damage to almost any target. However, it is important to note that some vessels such as ''[[Kremlin]]'' feature belt or deck armor in excess of | + | ''Nakhimov's'' skip bomber squadrons are greatly improved over those of ''[[Pobeda]]'', dealing a whopping 8700 damage per bomb instead of 6800 and dropping 8 instead of 6 at a time. These aircraft are the go-to for attacking destroyers and light cruisers, as the bombs can be dropped very far or very close to the target and do not require a long preparation time. If the other more specialized squadrons are unavailable or the captain is unsure of their target at the time of takeoff, the versatility of the skip bombers comes in handy because they are capable of dealing serious damage to almost any target from the edge of their AA range. However, it is important to note that some vessels such as ''[[Kremlin]]'' and ''[[Friedrich der Große]]'' feature belt or deck armor in excess of the bombs' 54mm penetration, so captains are still advised to stick to torpedo bombers against such ships with strong external protection. | |
| '''Ship''' | '''Ship''' | |||
Revision as of 23:32, 10 November 2021

| Research price355000 exp |
| Purchase price28,000,000 |
| Hit Points67,100 |
| 130 mm/58 on a BL-132 mount6 х 4 pcs. |
| Firing Range7.3 km. |
| Rate of Fire12 shots/min. |
| Reload Time5 sec. |
| HE ShellHE-42 |
| Maximum HE Shell Damage1,800 |
| Initial HE Shell Velocity950 m./s. |
| Chance of Fire on Target Caused by HE Shell8 % |
| 130 mm/58 on a BL-132 mount6 х 4 pcs. |
| . . . Average Damage per Second237 |
| . . . Firing Range5.19 km. |
| 57 mm ZIF-75 mount8 х 4 pcs. |
| . . . Average Damage per Second200 |
| . . . Firing Range3.99 km. |
| Maximum Speed31 knot |
| Turning Circle Radius1 160 m. |
| Rudder Shift Time17.1 sec. |
| Surface Detectability Range14.67 km. |
| Air Detectability Range13.36 km. |

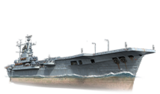
Admiral Nakhimov — Soviet Tier X aircraft сarrier.
After World War II ended, the Soviets were left with the hulls of unfinished Sovetsky Soyuz-class battleships of Project 23 and didn't know what to do with them, as building the ships under the initial project had already been deemed pointless. One possible solution was to finish the ships as aircraft carriers—the suggested project was codenamed 23AV. That solution could have been implemented in the U.S.S.R. between the end of the 1940s and the beginning of the 1950s. However, the top leadership of the U.S.S.R. didn't find the project compelling, so the hulls of the Project 23 battleships were eventually scrapped for metal.
Modules
 |
Hit Points (HP) | Armor (mm) | Armor (mm) | Main Turrets (pcs.) | Secondary Gun Turrets (pcs.) | AA Mounts (pcs.) | Torpedo Tubes (pcs.) | Hangar Capacity (pcs.) |
Research price (exp) |
Purchase price ( | |
|---|---|---|---|---|---|---|---|---|---|---|---|
| Admiral Nakhimov | 67,100 | 13 | 365 | 6 | 8/6 | 0 | 3,000,000 |
 |
Speed (knot) | IDS_SHIP_PARAM_SQUADRON_MED_DAMAGE (HP/min) | IDS_SHIP_PARAM_SQUADRON_AMMO_AMOUNT | Hit Points (HP) |
Research price (exp) |
Purchase price ( | |
|---|---|---|---|---|---|---|---|
| Lavochkin La-5FN | 161 | 1,050 | 0 | 1,000,000 | |||
| Lavochkin La-9 | 168 | 1,090 | 38,000 | 2,500,000 |
 |
Maximum Torpedo Damage (HP) | Speed (knot) | Hit Points (HP) |
Research price (exp) |
Purchase price ( | |
|---|---|---|---|---|---|---|
| Chyetverikov PT-1 (M-82) | 4,533 | 122 | 1,410 | 0 | 1,000,000 | |
| Polikarpov VIT-2 (VK-107) | 5,200 | 124 | 1,470 | 38,000 | 2,500,000 |
 |
Maximum Bomb Damage (HP) | Speed (knot) | Hit Points (HP) |
Research price (exp) |
Purchase price ( |
|---|
 |
Maximum Speed (knot) |
Research price (exp) |
Purchase price ( | |
|---|---|---|---|---|
| Propulsion: 231,000 hp | 31 | 0 | 900,000 |
Compatible Upgrades
| Slot 1 |
|||||
|---|---|---|---|---|---|
| Slot 2 |
|||||
| Slot 3 |
|||||
| Slot 4 |
|||||
| Slot 5 |
|||||
| Slot 6 |
Player Opinion
Performance
Warning. The data presented in the AA Defense sidebar section may be incorrect.
Nakhimov serves as the pinnacle of the all-or-nothing gameplay philosophy of the Soviet carrier line, maximizing the strengths of Pobeda while retaining its characteristic weaknesses. With smart positioning and well-executed strikes, her squadrons can terrorize the opposing team with their ridiculous damage output and nigh-uninterruptible attack runs; yet, if the carrier is stranded far from the action or blockaded by powerful AA vessels, they will struggle to impact the match due to their poor speed. Captains of Nakhimov must carefully balance its squadrons' unorthodox combination of jet boosters, singular attack runs, and low durability to reach the carrier's staggering potential damage contribution.
Nakhimov's general aircraft characteristics echo the trade-offs that define the rest of the line. Their jet boosters and large reserves allows them to engage ships that are close to the carrier with great efficiency, but their poor normal cruising speed puts a dent in their DPM at longer distances. Their all-at-once attack runs deal massive damage from the very edge of AA range, but also prevent them from engaging multiple targets or lingering for extended spotting. Above all, avoiding flak is critical to success due to their poor survivability and the sharp increase in power of tier X AA defenses.
Attack Aircraft
After a long strafing period, Nakhimov's attack aircraft squadrons launch a large quantity of powerful HE rockets over a very long and thin ellipse, being more reliant on attacking the target's broadside than other squadrons of its kind. Their large attack range is a double edged sword; it allows the squadron to spend barely any time exposed to AA, but also prevents them from reactively engaging ships with low air detectability. These squadrons are thus best suited for dealing heavy damage to cruisers and battleships with less than 40mm of deck armor. They are also Nakhimov's best tool for engaging targets behind island cover thanks to their steep attack angle.
Torpedo Bombers
Nakhimov's torpedo bombers are highly specialized towards deleting stationary battleships and aircraft carriers. They deal a ridiculous amount of damage between 7 torpedoes with a high flooding chance to boot, but suffer heavily from their poor cruising speed, exceedingly long torpedo arm distance, and lack of a repair consumable. Captains are advised to use these squadrons opportunistically against large vessels that are locked down by crossfires or are otherwise unable to maneuver quickly, as a well-placed drop will cripple the target or at least prompt immediate evasive action. In niche situations where many enemy vessels are tightly grouped, an attack run in their general direction can also be a valuable disruptive tool thanks to the exceptional range of the torpedoes.
Skip Bombers
Nakhimov's skip bomber squadrons are greatly improved over those of Pobeda, dealing a whopping 8700 damage per bomb instead of 6800 and dropping 8 instead of 6 at a time. These aircraft are the go-to for attacking destroyers and light cruisers, as the bombs can be dropped very far or very close to the target and do not require a long preparation time. If the other more specialized squadrons are unavailable or the captain is unsure of their target at the time of takeoff, the versatility of the skip bombers comes in handy because they are capable of dealing serious damage to almost any target from the edge of their AA range. However, it is important to note that some vessels such as Kremlin and Friedrich der Große feature belt or deck armor in excess of the bombs' 54mm penetration, so captains are still advised to stick to torpedo bombers against such ships with strong external protection.
Ship
At first glance, Nakhimov's high ship HP and similar hull to Sovetsky Soyuz may seems like an advantage in terms of armor. Unfortunately, the exact opposite is the case; by tier X carrier standards, Nakhimov is a very poorly protected vessel. Her citadel is utterly enormous and is only protected by 125mm of armor, allowing even some destroyer-caliber guns to farm easy citadels off of her exposed broadside. Moreover, her flight deck does not exceed 50mm in thickness, affording many aircraft armaments and certain HE shells an ample flat surface to farm damage off of. Coupled with her enormous turning circle and unimpressive top speed and concealment, captains must constantly weigh the risks of positioning Nakhimov closer to the enemy to capitalize on her jet boosters and mitigate the slow speed of her aircraft. Although her secondary and AA armaments are surprisingly effective, Nakhimov should be kept out of harm's way unless it is determined that the benefit of more frequent attack runs outweighs the risk of a sudden and explosive end.
Overall, Nakhimov offers an incredibly high performance ceiling that is tempered by the awkward and cumbersome requirements of both its squadrons and the vessel itself. Captains who are willing to master the carrier's unorthodox squadron parameters and centralize their gameplan around careful positioning will be rewarded with an unmatched damage output that can capsize even the most well-defended of opposing fleets.
Pros:
- Extreme alpha strike potential; all squadrons can deal over 20,000 damage per strike under ideal conditions.
- Stacks DoT very well if allowed to close the distance and mitigate aircraft transit times.
- Versatile skip bombers can set multiple fires per run and deal massive damage to destroyers.
- Largest hangar capacity of all tech tree carriers.
- Has access to rocket boosters.
- Strong AA suite, rivaling Hakuryu and Midway.
- High ship HP, second only to the Midway-class carriers.
Cons:
- Poor aircraft speed and maneuverability necessitates aggressive ship positioning to compensate.
- Worst aircraft durability in-tier.
- Restrictive angle of approach; all squadrons require flat broadsides to deal effective damage.
- Attack planes and torpedo bombers have very long attack preparation times and arming distances.
- Inefficient at spotting and other teamplay tasks due to a lack of aircraft staying power.
- Enormous and poorly armored citadel punishes Admiral Nakhimov if visible and showing broadside.
- No access to In-flight Repair
 .
.
Research
Optimal Configuration
Upgrades
The recommended upgrades for Admiral Nakhimov are:
- Slot 1:
- Slot 2:
- Slot 3:
- Slot 4:
- Slot 5:
- Slot 6:
Commander Skills
| Recommended Commander Skills | ||||||
|---|---|---|---|---|---|---|
| Cost (points) |
Attack | Defense | Support | |||
| 1 |
|
|
|
|
|
|
| 2 |
|
|
|
|
|
|
| 3 |
|
|
|
|
|
|
| 4 |
|
|
|
|
|
|
| Key: ★★★ - Extremely Useful ★★ - Frequently Useful ★ - Occasionally Useful No stars - Not Useful | ||||||
Consumables
Admiral Nakhimov equips:
- Slot 1: Damage Control Party

- Slot 2: CAP Fighter

Camouflage
Type 1, 2, or 5 camouflage can be equipped for credits. However, a permanent camouflage, available for Doubloons, is strongly recommended to keep her service cost manageable.
Signals
Recommended Signal Flags 
| |||||
|---|---|---|---|---|---|
| Combat | |||||

|

|

|

|

|

|

|

|

|

|

|

|

|

| ||||
Note: Use of the Juliet Charlie signal makes detonation impossible.
Gallery
Historical Info
Historical Gallery
References
Ship Change Log
See here for links to Update notes.
- Available for testing by supertesters in the game starting from Update 0.10.6.
- Introduced into the game as a researchable ship in Update 0.10.10.
| Japan | IV Hōshō • VI Ryūjō • VIII Shōkaku • VIII Kaga |
| U.K. | IV Hermes • VI Furious • VI Ark Royal |
| France | VI Béarn |
| U.S.S.R. | IV Komsomolets • VI Serov • VIII Pobeda • VIII Chkalov |
| U.S.A. | IV Langley • VI Independence • VI Ranger • VIII Yorktown • VIII Lexington • VIII Enterprise |
| Germany | IV Rhein • VI Weser • VI Erich Loewenhardt |
| Pan-Asia | VIII Sanzang |
| Spain | |
| Europe | |
| Netherlands | |
| Italy | VIII Aquila |
| Commonwealth | |
| Pan-America |