Akizuki
| Revision as of 20:24, 13 January 2017 added video | Revision as of 03:05, 14 January 2017 Cleaned up various grammatical and formatting errors. | |||
| Line 5: | Line 5: | |||
| |Performance=<!-- write text about performance in battles below --> | |Performance=<!-- write text about performance in battles below --> | |||
| ? | ||||
| Tier VIII's ''Akizuki'' is a major departure from the rest of the Japanese destroyer line. She packs both more guns and fewer torpedoes than any of her cousins that surround her on the tech tree, giving her a very different playstyle than any ship before or after. She is a unique ship that requires a completely different approach to the typical ninja-like playstyle of other Japanese destroyers that attempt to overwhelm their enemies with torpedoes fired from stealth. She shares a number of similarities with high-tier Russian destroyers ''[[Udaloi]]'' and ''[[Khabarovsk]]''; captains familiar with how those ships play will likely feel right at home in ''Akizuki''. | Tier VIII's ''Akizuki'' is a major departure from the rest of the Japanese destroyer line. She packs both more guns and fewer torpedoes than any of her cousins that surround her on the tech tree, giving her a very different playstyle than any ship before or after. She is a unique ship that requires a completely different approach to the typical ninja-like playstyle of other Japanese destroyers that attempt to overwhelm their enemies with torpedoes fired from stealth. She shares a number of similarities with high-tier Russian destroyers ''[[Udaloi]]'' and ''[[Khabarovsk]]''; captains familiar with how those ships play will likely feel right at home in ''Akizuki''. | |||
| ? | ''Akizuki''’s main battery is comprised of four (4) double 100mm turrets. Unlike most Japanese destroyer gun turrets, these turn quickly, roughly on par with those found in the middle tiers of the American destroyer line aboard ''[[Nicholas]], [[Farragut]]'', and ''[[Mahan]]''. She can get all of her guns on target even while maneuvering, and their rate of fire rivals that of Tier X American destroyer ''[[Gearing]]'' (although ''Akizuki''’s shells do far less damage than ''Gearing''’s). Also notable is the initial velocity of those shells: 1000 meters per second. This gives ''Akizuki''’s guns a relatively flat arc at close range | + | ''Akizuki''’s main battery is comprised of four (4) double 100mm turrets. Unlike most Japanese destroyer gun turrets, these turn quickly, roughly on par with those found in the middle tiers of the American destroyer line aboard ''[[Nicholas]], [[Farragut]]'', and ''[[Mahan]]''. She can get all of her guns on target even while maneuvering, and their rate of fire rivals that of Tier X American destroyer ''[[Gearing]]'' (although ''Akizuki''’s shells do far less damage than ''Gearing''’s). Also notable is the initial velocity of those shells: 1000 meters per second. This gives ''Akizuki''’s guns a relatively flat arc at close range; they are comfortable to fire and fairly easy to guide on to target. However, her shells lose velocity quickly, and beginning around 10 km they will have a very high ballistic arc similar to those of ''[[Atlanta]]''. This is not necessarily a bad thing, as it enables her to fire over islands when needed. Her main battery is equally capable of chewing up battleship and cruiser superstructure with armor-piercing rounds or dueling enemy destroyers with high explosive ones. | |
| ? | While her guns are excellent, her torpedo armament is lacking. She mounts only a single quadruple launcher — compared to the double quadruple launchers of ''[[Kagero]]'', ''[[Shiratsuyu]]'', and ''[[Yūgumo]]'' — on a relatively long reload of 112 seconds. ''Akizuki'' | + | While her guns are excellent, her torpedo armament is lacking. She mounts only a single quadruple launcher — compared to the double quadruple launchers of ''[[Kagero]]'', ''[[Shiratsuyu]]'', and ''[[Yūgumo]]'' — on a relatively long reload of 112 seconds. ''Akizuki'' shares ''Shiratsuyu''’s access to the improved version of the [[Ship:Consumables#Torpedo Reload Booster|Torpedo Reload Booster]] consumable without having to give up access to [[Ship:Consumables#Smoke Generator|Smoke Generator]], so she is capable of doing significant damage with her torpedo armament against unsuspecting captains by virtue of mounting the same Type 93 mod. 2 torpedoes that ''Kagero'' carries. | |
| Her handling takes some getting used to — she is far slower to respond to helm commands than Japanese destroyer captains will be accustomed to — and her slow top speed is a notable handicap. Still, her anti-aircraft suite beats out every other Japanese destroyer in the game, and she has the customarily low detection radius typical of her brethren. ''Akizuki'' requires some adaptation in play, but she's more than capable of dishing out copious amounts of punishment in the hands of a captain who has taken the time to decipher how to play her well. | Her handling takes some getting used to — she is far slower to respond to helm commands than Japanese destroyer captains will be accustomed to — and her slow top speed is a notable handicap. Still, her anti-aircraft suite beats out every other Japanese destroyer in the game, and she has the customarily low detection radius typical of her brethren. ''Akizuki'' requires some adaptation in play, but she's more than capable of dishing out copious amounts of punishment in the hands of a captain who has taken the time to decipher how to play her well. | |||
| + | ||||
| + | {{block|!|content=When facing American and Soviet destroyers her tier or higher, captains are advised to use armor-piercing rounds as ''Akizuki''’s 100mm HE shells lack sufficient penetration to deal consistent damage.}} | |||
| + | ||||
| + | {{VideoYT|Y8xzicz9knA|320}} | |||
| |Pros=<!-- write list of positive points below. use * as in ordinary wiki-list. --> | |Pros=<!-- write list of positive points below. use * as in ordinary wiki-list. --> | |||
| Line 38: | Line 41: | |||
| Captains have some obvious choices to make with their ''Akizuki'' commander, and some that will be much tougher. | Captains have some obvious choices to make with their ''Akizuki'' commander, and some that will be much tougher. | |||
| ? | Tier 1's Basic Firing Training is the obvious choice, as it improves the rate of fire of her main battery guns. Similarly, Tier 2's Last Stand is the obvious front-runner given how likely she is to find herself under fire by enemy cruisers and destroyers. While a case can be made for the various other Tier 2 skills, they are all highly situational and best suited as a place to invest points after the first 15 have been spent. At Tier 3, Superintendent is probably the strongest choice, though Vigilance and High Alert are also solid picks. As a destroyer, Concealment Expert at Tier 5 is clearly the best option | + | Tier 1's Basic Firing Training is the obvious choice, as it improves the rate of fire of her main battery guns. Similarly, Tier 2's Last Stand is the obvious front-runner given how likely she is to find herself under fire by enemy cruisers and destroyers. While a case can be made for the various other Tier 2 skills, they are all highly situational and best suited as a place to invest points after the first 15 have been spent. At Tier 3, Superintendent is probably the strongest choice, though Vigilance and High Alert are also solid picks. As a destroyer, Concealment Expert at Tier 5 is clearly the best option; when rigged for full concealment, she can fire her main battery without being detected starting around 9.0 km. | |
| Tier 4 is where ''Akizuki'' captains must make tough decisions. The low fire chance on her shells makes Demolition Expert attractive for captains who intend to focus her in as a fire-breather; Advanced Firing Training increases her main battery range past 12 km, giving her a very comfortable window — almost 4.0 km — from which she can fire her main battery without being detected; Survivability Expert increases her health pool by more than 15%, making her that much more difficult to remove from play; and Manual Fire Control for AA Armament gives her more punch against enemy aircraft than any other Japanese destroyer in the game. Advanced Firing Training likely offers the most utility, but all of these choices are worth considering and none of them are bad. | Tier 4 is where ''Akizuki'' captains must make tough decisions. The low fire chance on her shells makes Demolition Expert attractive for captains who intend to focus her in as a fire-breather; Advanced Firing Training increases her main battery range past 12 km, giving her a very comfortable window — almost 4.0 km — from which she can fire her main battery without being detected; Survivability Expert increases her health pool by more than 15%, making her that much more difficult to remove from play; and Manual Fire Control for AA Armament gives her more punch against enemy aircraft than any other Japanese destroyer in the game. Advanced Firing Training likely offers the most utility, but all of these choices are worth considering and none of them are bad. | |||
| Line 136: | Line 139: | |||
| ====Service==== | ====Service==== | |||
| ? | ''Akizuki'' was commissioned in June | + | ''Akizuki'' was commissioned in June 1942. Immediately deployed, she set out with ''Zuikaku'' in expectation of an encounter with the US Navy in the Aleutians, though no such engagement was forthcoming. By August, she had arrived in Rabaul and participated in the Battle of the Eastern Solomons. From August to November, ''Akizuki'' was subjected to numerous air attacks as she conducted escort and bombardment operations to Guadalcanal, all successfully repulsed. She returns to Japan that month for trials and repairs. Having completed her refit, ''Akizuki'' returned to the Solomons but was severely damaged by submarine torpedo in January 1943, necessitating a return to Japan and a lengthy repair. | |
| ? | ''Akizuki'' did not return to full duty until November | + | ''Akizuki'' did not return to full duty until November 1943, and was ordered back to Truk. She spent the remainder of 1943 and the first half of 1944 in training with the fleet before participating in the Battle of the Philippine Sea in June. ''Akizuki'' then returned to Japan for refit until October, participating in the Battle of Leyte Gulf with Admiral Ozawa's Northern Force. On 25 October 1944, during the first attack on the Northern Force, ''Akizuki'' was hit, whether by bomb or torpedo is not known. ''Akizuki'' suffered a catastrophic explosion and sank in minutes. | |
| ? | ''Teruzuki'' was commissioned in August of 1942 and spent the next two months in trials before being assigned to the South Pacific in October. Shortly after arrival, ''Teruzuki'' participated in both Naval Battles of Guadalcanal. After a brief assignment to Truk, ''Teruzuki'' returned to the Shortlands Islands to support a supply mission to Guadalcanal. On | + | ''Teruzuki'' was commissioned in August of 1942 and spent the next two months in trials before being assigned to the South Pacific in October. Shortly after arrival, ''Teruzuki'' participated in both Naval Battles of Guadalcanal. After a brief assignment to Truk, ''Teruzuki'' returned to the Shortlands Islands to support a supply mission to Guadalcanal. On 11 December, ''Teruzuki'' was torpedoed by a PT boat. ''Teruzuki'' lost power and fires progressively spread, leading to catastrophic explosions. ''Teruzuki'' sank on 12 December 1942. | |
| ? | ''Suzutsuki'' was commissioned in December | + | ''Suzutsuki'' was commissioned in December 1942 and spent the entirety of her career performing escort duties. Torpedoed twice, ''Suzutsuki'' survived but was again heavily damaged by air attack while providing cover for ''[[Yamato]]'' on her final mission. ''Suzutsuki'' managed to return to Japan, but was not repaired, and she was surrendered in her damaged state at the end of the war. | |
| ? | ''Hatsuzuki'' was commissioned in | + | ''Hatsuzuki'' was commissioned in December1942 and also spent her wartime service in escort duties. In June of 1944, she participated in the Battle of the Philippine Sea. In October she was assigned to the Northern Force for the Battle of Leyte Gulf. ''Hatsuzuki'' was sunk by surface gunfire on 25 October 1944. | |
| ? | ''Niizuki'' was commissioned in March | + | ''Niizuki'' was commissioned in March 1943 and was assigned to duties in the South Pacific. She arrived at the end of June, and on July 4th she led a transport mission to Kolombangara. On the night of 5-6 July 1943, ''Niizuki'' was sunk by surface gunfire during the Battle of Kula Gulf. | |
| ? | ''Wakatsuki'' was commissioned in May of 1943 and, after several months spent training, was assigned to fleet escort duties. She participated in the Battle of the Philippine Sea and the Battle of Leyte Gulf before being assigned to escort troop convoys to Leyte in November of 1944. On | + | ''Wakatsuki'' was commissioned in May of 1943 and, after several months spent training, was assigned to fleet escort duties. She participated in the Battle of the Philippine Sea and the Battle of Leyte Gulf before being assigned to escort troop convoys to Leyte in November of 1944. On 11 November 1944, ''Wakatsuki'' was sunk by air attack. | |
| ? | ''Shimotsuki'' was commissioned in March of 1944 and finished training in time to participate in the Battle of the Philippine Sea in June. She then engaged in fleet escort duties up to, during, and after the Battle of Leyte Gulf before being sent to the Southwestern Area. On | + | ''Shimotsuki'' was commissioned in March of 1944 and finished training in time to participate in the Battle of the Philippine Sea in June. She then engaged in fleet escort duties up to, during, and after the Battle of Leyte Gulf before being sent to the Southwestern Area. On 25 November 1944, ''Shimotsuki'' was torpedoed and sunk by submarine. | |
| ? | ''Fuyuzuki'' was commissioned in May | + | ''Fuyuzuki'' was commissioned in May 1944 and was engaged in convoy escort duties until she was torpedoed by submarine in October. Returned to Japan for repairs, ''Fuyuzuki'' returned to duty in November, but was assigned to training in the Inland Sea. She escorted ''Yamato'' on her final mission in April 1945 and sustained moderate damage. After returning to Japan, ''Fuyuzuki'' was assigned to escort duties, during which she struck a mine in late August. She was surrendered damaged and never repaired before eventually being broken up and sold for scrap. | |
| ? | ''Hanazuki'' was commissioned in late December | + | ''Hanazuki'' was commissioned in late December 1944 and spent her entire career in the Inland Sea. She was surrendered undamaged and later awarded to the United States in 1947. | |
| ? | ''Yoizuki'' was commissioned at the end of January | + | ''Yoizuki'' was commissioned at the end of January 1945. She engaged against aircraft once in February, then was assigned to training in the Inland Sea before suffering minor damage after striking a mine in June. She was surrendered damaged and awarded to China in 1947. | |
| ? | ''Haruzuki'' was commissioned in late December | + | ''Haruzuki'' was commissioned in late December 1945 and assigned escort duties in the Inland Sea. She was surrendered intact at the end of the war and awarded to the Soviet Union in 1947. | |
| ? | ''Natsuzuki'' was commissioned in April | + | ''Natsuzuki'' was commissioned in April 1945. Assigned to escort duties, she struck a mine in June and suffered heavy damage. She was surrendered and repaired, then awarded to Great Britain in 1947. | |
| |HistoricalGallery=<!-- write below list of files with description (if necessary) separated with | --><gallery> | |HistoricalGallery=<!-- write below list of files with description (if necessary) separated with | --><gallery> | |||
Revision as of 03:05, 14 January 2017

| Research price115000 exp |
| Purchase price9,000,000 |
| Hit Points15,900 |
| 100 mm/65 Type 98 on a Model A mount4 х 2 pcs. |
| Rate of Fire20 shots/min. |
| Reload Time3 sec. |
| Rotation Speed16 deg./sec. |
| 180 Degree Turn Time11.25 sec. |
| Firing Range11.33 km. |
| Maximum Dispersion99 m. |
| HE Shell100 mm HE Type98 |
| Maximum HE Shell Damage1,200 |
| Chance of Fire on Target Caused by HE Shell5 % |
| Initial HE Shell Velocity1000 m./s. |
| HE Shell Weight13 kg. |
| AP Shell100 mm AP Type98 |
| Maximum AP Shell Damage1,700 |
| Initial AP Shell Velocity1000 m./s. |
| AP Shell Weight13 kg. |
| 610 mm Quad1 х 4 pcs. |
| Rate of Fire0.59 shots/min. |
| Reload Time101 sec. |
| Rotation Speed25 deg./sec. |
| 180 Degree Turn Time7.2 sec. |
| TorpedoType90 mod. 1 |
| Maximum Damage17,233 |
| Torpedo Speed62 knot |
| Torpedo Range9.99 km. |
| 100 mm/65 Type 98 on a Model A mount4 х 2 pcs. |
| . . . Average Damage per Second83.2 |
| . . . Firing Range5.01 km. |
| 25 mm/60 Type 96 on a triple mount1 х 3 pcs. |
| . . . Average Damage per Second3.3 |
| . . . Firing Range2.49 km. |
| 25 mm/60 Type 96 on a twin mount6 х 2 pcs. |
| . . . Average Damage per Second16.2 |
| . . . Firing Range2.49 km. |
| Maximum Speed33 knot |
| Turning Circle Radius730 m. |
| Rudder Shift Time7.8 sec. |
| Surface Detectability Range7.53 km. |
| Air Detectability Range3.56 km. |

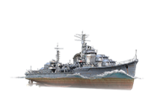
Akizuki — Japanese Tier VIII destroyer.
Akizuki-class destroyers were designed as air defense ships to escort swift carrier formations. Their main battery was represented by eight 100 mm/65 guns. A total of 13 destroyers of this class were ordered, and 12 were built. After entering service in June 1942, Akizuki participated in the Battle of the Eastern Solomons and the Guadalcanal Campaign, the Battle of the Philippine Sea, and the Battle of Leyte Gulf. The destroyer was sunk during the Battle of Cape Engaño.
Modules
 |
Rate of Fire (shots/min) | 180° Turn Time (sec) | Maximum Dispersion (m) | Maximum HE Shell Damage (HP) | Chance of Fire on Target Caused by HE Shell (%) | Maximum AP Shell Damage (HP) |
Research price (exp) |
Purchase price ( | |
|---|---|---|---|---|---|---|---|---|---|
| 100 mm/65 Type 98 on a Model A mount | 20 | 11.3 | 99 | 1,200 | 5 | 1,700 | 0 | 570,000 |
 |
Hit Points (HP) | Armor (mm) | Armor (mm) | Main Turrets (pcs.) | Secondary Gun Turrets (pcs.) | AA Mounts (pcs.) | Torpedo Tubes (pcs.) | Hangar Capacity (pcs.) |
Research price (exp) |
Purchase price ( | |
|---|---|---|---|---|---|---|---|---|---|---|---|
| Akizuki (A) | 15,900 | 13 | 20 | 4 | 6/1/4 | 1 | 0 | 610,000 | |||
| Akizuki (B) | 20,400 | 13 | 20 | 4 | 18/7 | 1 | 16,500 | 1,400,000 |
 |
Rate of Fire (shots/min) | Torpedo Tubes Reload Time (sec) | 180° Turn Time (sec) | Maximum Damage (HP) | Torpedo Speed (knot) | Torpedo Range (km) |
Research price (exp) |
Purchase price ( | |
|---|---|---|---|---|---|---|---|---|---|
| Type90 mod. 1 | 0.6 | 101 | 7.2 | 17,233 | 62 | 10 | 0 | 1,300,000 | |
| Type93 mod. 2 | 0.5 | 112 | 7.2 | 20,966 | 67 | 10 | 20,000 | 1,800,000 |
 |
IDS_SHIP_PARAM_SUO_INCREASE_DIST (%) | Maximum Firing Range (km) |
Research price (exp) |
Purchase price ( | |
|---|---|---|---|---|---|
| Type8 mod. 1 | 0 | 0 | 370,000 | ||
| Type8 mod. 2 | 0 | 8,000 | 780,000 |
 |
Maximum Speed (knot) |
Research price (exp) |
Purchase price ( | |
|---|---|---|---|---|
| Propulsion: 52,000 hp | 33 | 0 | 600,000 |
Compatible Upgrades
| Slot 1 |
|||||
|---|---|---|---|---|---|
| Slot 2 |
|||||
| Slot 3 |
|||||
| Slot 4 |
|||||
| Slot 5 |
Player Opinion
Performance
Tier VIII's Akizuki is a major departure from the rest of the Japanese destroyer line. She packs both more guns and fewer torpedoes than any of her cousins that surround her on the tech tree, giving her a very different playstyle than any ship before or after. She is a unique ship that requires a completely different approach to the typical ninja-like playstyle of other Japanese destroyers that attempt to overwhelm their enemies with torpedoes fired from stealth. She shares a number of similarities with high-tier Russian destroyers Udaloi and Khabarovsk; captains familiar with how those ships play will likely feel right at home in Akizuki.
Akizuki’s main battery is comprised of four (4) double 100mm turrets. Unlike most Japanese destroyer gun turrets, these turn quickly, roughly on par with those found in the middle tiers of the American destroyer line aboard Nicholas, Farragut, and Mahan. She can get all of her guns on target even while maneuvering, and their rate of fire rivals that of Tier X American destroyer Gearing (although Akizuki’s shells do far less damage than Gearing’s). Also notable is the initial velocity of those shells: 1000 meters per second. This gives Akizuki’s guns a relatively flat arc at close range; they are comfortable to fire and fairly easy to guide on to target. However, her shells lose velocity quickly, and beginning around 10 km they will have a very high ballistic arc similar to those of Atlanta. This is not necessarily a bad thing, as it enables her to fire over islands when needed. Her main battery is equally capable of chewing up battleship and cruiser superstructure with armor-piercing rounds or dueling enemy destroyers with high explosive ones.
While her guns are excellent, her torpedo armament is lacking. She mounts only a single quadruple launcher — compared to the double quadruple launchers of Kagero, Shiratsuyu, and Yūgumo — on a relatively long reload of 112 seconds. Akizuki shares Shiratsuyu’s access to the improved version of the Torpedo Reload Booster consumable without having to give up access to Smoke Generator, so she is capable of doing significant damage with her torpedo armament against unsuspecting captains by virtue of mounting the same Type 93 mod. 2 torpedoes that Kagero carries.
Her handling takes some getting used to — she is far slower to respond to helm commands than Japanese destroyer captains will be accustomed to — and her slow top speed is a notable handicap. Still, her anti-aircraft suite beats out every other Japanese destroyer in the game, and she has the customarily low detection radius typical of her brethren. Akizuki requires some adaptation in play, but she's more than capable of dishing out copious amounts of punishment in the hands of a captain who has taken the time to decipher how to play her well.
When facing American and Soviet destroyers her tier or higher, captains are advised to use armor-piercing rounds as Akizuki’s 100mm HE shells lack sufficient penetration to deal consistent damage.
Pros:
- Quick-turning, fast-firing main battery guns.
- Armor-piercing rounds are punishing against broadside ships thanks to her rate of fire.
- Above-average anti-aircraft suite for a Japanese destroyer due to her dual-purpose main battery guns.
- Can equip the improved version of the Torpedo Reload Booster consumable that reduces torpedo reload time to 5 seconds, and doesn't have to give up Smoke Generator to do so.
Cons:
- Slow to accelerate and low top speed for a destroyer.
- Handles more like a cruiser than a destroyer; large turning circle and slow rudder shift make Akizuki feel sluggish.
- High explosive shells have very low damage and fire chance.
- Only one torpedo launcher (on a long reload) means she is almost totally reliant on her guns for damage.
- Her 100mm shells are hard pressed to damage certain targets; hits for zero damage against cruisers and battleships are not uncommon.
Research
Optimal Configuration
Upgrades
Akizuki’s gunboat playstyle means that her upgrade modules will look very similar to that of similarly-tiered cruisers and Russian destroyers. Main Armaments Modification 1 in Upgrade Slot 1 and Aiming Systems Modification 1 in Upgrade Slot 2 are the best options. A case can be made for AA Guns Modification 2 in that second slot, but lacking access to the Defensive AA Fire consumable, it isn't recommended. Propulsion Modification 1 is the top choice in Upgrade Slot 4. Either Steering Gears Modification 2 or Propulsion Modification 2 should be slotted into Upgrade Slot 5. Like all Tier VIII+ destroyers, Concealment System Module 1 is a must-have in Upgrade Slot 6.
Commander Skills
Captains have some obvious choices to make with their Akizuki commander, and some that will be much tougher.
Tier 1's Basic Firing Training is the obvious choice, as it improves the rate of fire of her main battery guns. Similarly, Tier 2's Last Stand is the obvious front-runner given how likely she is to find herself under fire by enemy cruisers and destroyers. While a case can be made for the various other Tier 2 skills, they are all highly situational and best suited as a place to invest points after the first 15 have been spent. At Tier 3, Superintendent is probably the strongest choice, though Vigilance and High Alert are also solid picks. As a destroyer, Concealment Expert at Tier 5 is clearly the best option; when rigged for full concealment, she can fire her main battery without being detected starting around 9.0 km.
Tier 4 is where Akizuki captains must make tough decisions. The low fire chance on her shells makes Demolition Expert attractive for captains who intend to focus her in as a fire-breather; Advanced Firing Training increases her main battery range past 12 km, giving her a very comfortable window — almost 4.0 km — from which she can fire her main battery without being detected; Survivability Expert increases her health pool by more than 15%, making her that much more difficult to remove from play; and Manual Fire Control for AA Armament gives her more punch against enemy aircraft than any other Japanese destroyer in the game. Advanced Firing Training likely offers the most utility, but all of these choices are worth considering and none of them are bad.
| Recommended Commander Skills | ||||||||
|---|---|---|---|---|---|---|---|---|
| Cost (points) |
Endurance | Attack | Support | Versatility | ||||
| 1 |
|
★★ |
|
|
|
|
★ |
|
| 2 |
★★ |
★★ |
★ |
|
|
|
|
★★★ |
| 3 |
★ |
★★★ |
★ |
|
★★★ |
★★★ |
★★ |
★★ |
| 4 |
|
★ |
|
|
★★★ |
|
|
★★★ |
| Key: ★★★ - Extremely Useful ★★ - Frequently Useful ★ - Occasionally Useful No stars - Meh Χ - Not recommended | ||||||||
Consumables
A gunboat destroyer like Akizuki is inevitably going to come under heavy fire; the abbreviated cooldown on Damage Control Party II will eventually pay for itself. Shelling out the doubloons or credits here is highly recommended. Her low speed also makes the shortened cooldown on Engine Boost II highly attractive. Paying for Smoke Generator II is captain's choice, but there are times that the shortened cooldown on smoke is the difference between sneaking away and going to the bottom.
Camouflage
Type 1, 2, or 5 camouflage can be equipped for credits; Types 1 or 5 are recommended at a minimum to reduce detectibility range.
Players who wish to spend doubloons can equip Akizuki with Type 18 camouflage that lowers her detection radius, reduces the accuracy of incoming shells, reduces her repair costs, and increases the amount of experience she earns.
Signals
Victor Lima and India X-Ray signal flags will help boost Akizuki’s meager fire chance, especially when combined with Demolition Expert. Juliet Charlie should also go along with those flags in order to prevent detonations. Sierra Mike will help make up some of her deficiency in top speed.Gallery
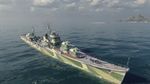
Akizuki ready for battle.
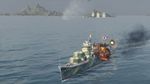
Akizuki supports the fleet while concealed behind an island.
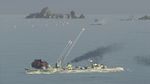
Akizuki engages an enemy destroyer.

Akizuki engages an enemy Izumo class battleship with torpedoes and gunfire.


Historical Info
Historical Gallery
.jpeg)


