Bismarck
| Revision as of 14:20, 18 May 2017 Updated historical section to include more detail about the battle of the Denmark Strait | Revision as of 14:35, 18 May 2017 Polish and clean-up of historical section. | |||
| Line 182: | Line 182: | |||
| ====Service==== | ====Service==== | |||
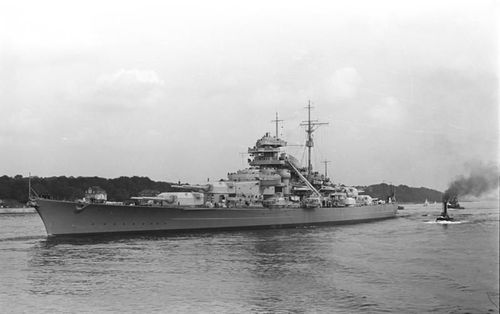
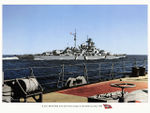
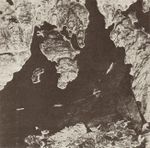
| ? | In the course of the warship's eight-month career under its sole commanding officer, Capt. Ernst Lindemann, | + | In the course of the warship's eight-month career under its sole commanding officer, Capt. Ernst Lindemann, ''Bismarck'' conducted only one offensive operation, in May 1941, code named Operation Rheinübung. The ship, along with the heavy cruiser ''[[Prinz Eugen]]'', was to break into the Atlantic Ocean and raid Allied shipping from North America to Great Britain. The British Admiralty learning of the sortie, ordered several ships to patrol the three possible break-out points into the Atlantic. The two ships were detected moving into the Denmark Strait by the HMS ''Suffolk'' and ''Norfolk'' on 23 May at 19:22. ''Bismarck'', the lead ship, went to action stations and Captain Lindemann announced at 20:30 to the crew “''Feind in Sicht an Backbord, Schiff nimmt Gefecht auf!'' (Enemy sighted to port. Engage!)”. ''Bismarck'' fired several salvos but failed to score a direct hit. Heavily outgunned, the British cruisers retired to a safe distance and shadowed the ''Bismarck'' until reinforcements could arrive. Due to heavy vibration from the main guns firing, Bismarck’s forward radar failed. Admiral Lütjens ordered ''Prinz Eugen'' to take the lead position and provide radar coverage. | |
| ? | At the Battle of the Denmark Strait on 24 May 1941, | + | At the Battle of the Denmark Strait on 24 May 1941, ''Prinz Eugen'' detected a ship by hydrophone, and at 05:45 sighted two ships which were initially misidentified as cruisers. The two ships were the battlecruiser HMS ''[[Hood]]'', pride of the Royal Navy, and the HMS ''Prince of Wales'', the newest battleship in the British arsenal. She was so new that she still had the various civilian techs on board testing and maintaining the various machinery of the British battleship. At 05:53 the British battleships opened fire on the two German ships. The British admiral on board ''Hood'' had intended on targeting ''Bismarck'' first, but due to the change in the German battle line ''Hood'' targeted ''Prinz Eugen'' instead. The German force — on the orders of Admiral Lütjens — did not open fire. After roughly two minutes of fire, Captain Lindemann grew tired of not being given the order to open fire and issued the following directive: "''Ich lasse mir doch nicht mein Schiff unter dem Arsch wegschießen. Feuererlaubnis!'' (I'm not letting my ship get shot out from under my arse. Open fire!)". At 06:01, the fifth salvo fired by ''Bismarck'' fired at a range of 18,000 meters (20,000 yards) struck ''Hood'' near her mainmast. The 380mm (15-inch) shell plunged through her decks and caused a magazine detonation. The resulting explosion broke ''Hood'' into three sections; she sank in a mere three minutes, taking all but three of her crew with her. | |
| ? | ''Bismarck'' and ''Prinz Eugen'' now turned their attention to the bewildered ''Prince of Wales''. During this part of the engagement ''Bismarck'' landed seven hits and took three damaging hits in return. ''Prince of Wales'' disengaged from the battle and the ''Bismarck'' and ''Prinz Eugen'' continued their mission. The damage caused to | + | ''Bismarck'' and ''Prinz Eugen'' now turned their attention to the bewildered ''Prince of Wales''. During this part of the engagement, ''Bismarck'' landed seven hits and took three damaging hits in return. ''Prince of Wales'' disengaged from the battle and the ''Bismarck'' and ''Prinz Eugen'' continued their mission. The damage caused to ''Bismarck'' dictated that she return for repairs and that ''Prinz Eugen'' continue on into the open Atlantic to commence commerce raiding. It has been reported that Admiral Lütjens and Captain Lindemann argued about which port to return to, with Lindeman advocating a return through the Denmark Strait and returning to Bergen, Norway. Lütjens overruled him and ordered a course be set for Saint Nazaire, France. | |
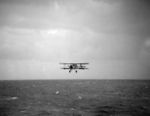
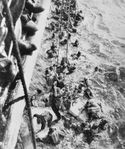
| ? | The destruction of ''Hood'' spurred a relentless pursuit by the Royal Navy involving dozens of warships, with Prime Minister Churchill demanding that the ''Bismarck'' be sunk. Two days later, heading for the relative safety of occupied France, ''Bismarck'' was attacked by obsolescent Fairey Swordfish biplane torpedo bombers from the aircraft carrier HMS ''Ark Royal''; one scored a hit that rendered the battleship's steering gear inoperable. In her final battle the following morning, ''Bismarck'' was neutralized by a sustained bombardment from a British fleet led by the British | + | The destruction of ''Hood'' spurred a relentless pursuit by the Royal Navy involving dozens of warships, with Prime Minister Winston Churchill demanding that the ''Bismarck'' be sunk. Two days later, heading for the relative safety of occupied France, ''Bismarck'' was attacked by obsolescent Fairey Swordfish biplane torpedo bombers from the aircraft carrier HMS ''Ark Royal''; one scored a hit that rendered the battleship's steering gear inoperable. In her final battle the following morning, ''Bismarck'' was neutralized by a sustained bombardment from a British fleet led by the British battleships HMS ''King George V'' and HMS ''Rodney''. ''Bismarck'' was eventually scuttled by her crew, and sank with heavy loss of life. Most experts agree that the battle damage would have caused her to sink eventually, regardless. | |
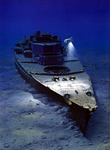
| The wreck was located in June 1989 by Robert Ballard, and has since been further surveyed by several other expeditions. | The wreck was located in June 1989 by Robert Ballard, and has since been further surveyed by several other expeditions. | |||
Revision as of 14:35, 18 May 2017
| 380 mm/52 SK C/34 on a Drh LC/34 mount4 х 2 pcs. |
| Rate of Fire2.31 shots/min. |
| Reload Time26 sec. |
| Rotation Speed5 deg./sec. |
| 180 Degree Turn Time36 sec. |
| Firing Range19.28 km. |
| Maximum Dispersion272 m. |
| HE Shell380 mm Spr.Gr. L/4.6 |
| Maximum HE Shell Damage4,400 |
| Chance of Fire on Target Caused by HE Shell34 % |
| Initial HE Shell Velocity820 m./s. |
| HE Shell Weight800 kg. |
| AP Shell380 mm P.Spr.Gr. L/4.4 |
| Maximum AP Shell Damage11,600 |
| Initial AP Shell Velocity820 m./s. |
| AP Shell Weight800 kg. |
| 105 mm/65 SK C/33 on a Dop. L. C/31 mount4 х 2 pcs. |
| Firing Range7.6 km. |
| Rate of Fire17.91 shots/min. |
| Reload Time3.35 sec. |
| HE Shell105 mm Spr.Gr. Kz. |
| Maximum HE Shell Damage1,200 |
| Initial HE Shell Velocity900 m./s. |
| Chance of Fire on Target Caused by HE Shell5 % |
| 105 mm/65 SK C/33 on a Dop. L. C/37 mount4 х 2 pcs. |
| Firing Range7.6 km. |
| Rate of Fire17.91 shots/min. |
| Reload Time3.35 sec. |
| HE Shell105 mm Spr.Gr. Kz. |
| Maximum HE Shell Damage1,200 |
| Initial HE Shell Velocity900 m./s. |
| Chance of Fire on Target Caused by HE Shell5 % |
| 150 mm/55 SK C/28 on a Dop. L. C/34 mount2 х 2 pcs. |
| Firing Range7.6 km. |
| Rate of Fire8 shots/min. |
| Reload Time7.5 sec. |
| HE Shell150 mm Spr.Gr. L/4.5 |
| Maximum HE Shell Damage1,700 |
| Initial HE Shell Velocity875 m./s. |
| Chance of Fire on Target Caused by HE Shell8 % |
| 150 mm/55 SK C/28 on a Dop. L. C/34 mount4 х 2 pcs. |
| Firing Range7.6 km. |
| Rate of Fire8 shots/min. |
| Reload Time7.5 sec. |
| HE Shell150 mm Spr.Gr. L/4.5 |
| Maximum HE Shell Damage1,700 |
| Initial HE Shell Velocity875 m./s. |
| Chance of Fire on Target Caused by HE Shell8 % |
| 105 mm/65 SK C/33 on a Dop. L. C/31 mount4 х 2 pcs. |
| . . . Average Damage per Second66.4 |
| . . . Firing Range4.5 km. |
| 105 mm/65 SK C/33 on a Dop. L. C/37 mount4 х 2 pcs. |
| . . . Average Damage per Second66.8 |
| . . . Firing Range4.5 km. |
| 37 mm/83 SK C/30 on a Dopp LC/30 mount8 х 2 pcs. |
| . . . Average Damage per Second20.8 |
| . . . Firing Range3.51 km. |
| 20 mm/65 C/38 on a Flak 35 Vierling L/38 mount2 х 4 pcs. |
| . . . Average Damage per Second12 |
| . . . Firing Range2.01 km. |
| 20 mm/65 C/38 on an L/30 single mount12 х 1 pcs. |
| . . . Average Damage per Second36 |
| . . . Firing Range2.01 km. |
| Maximum Speed28.52 knot |
| Turning Circle Radius850 m. |
| Rudder Shift Time22.4 sec. |
| Surface Detectability Range15.89 km. |
| Air Detectability Range11.74 km. |
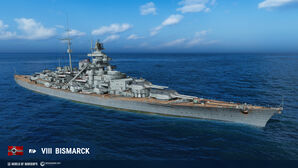
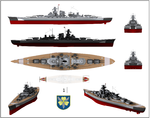
Bismarck — German Tier VIII battleship.
By the start of World War II, Bismarck was one of the mightiest battleships in the world, owing to her advanced gun fire control system and powerful artillery. Rugged construction — coupled with elaborate subdivision into compartments and a vast expanse of armor — ensured a high level of endurance.
Modules
Compatible Upgrades
| Slot 1 |
|||||
|---|---|---|---|---|---|
| Slot 2 |
|||||
| Slot 3 |
|||||
| Slot 4 |
|||||
| Slot 5 |
Player Opinion
Performance
The historical pinnacle of German battleship construction, Bismarck stands as one of the heartiest battleships at Tier VIII. While her main battery may not look as impressive of that of Amagi and she doesn't have North Carolina’s range — or even her sister Tirpitz’s torpedoes — Bismarck has the perfect mix of ingredients to make her an excellent brawler.
For starters, her secondary battery is the most impressive of all the Tier VIII battleships. It comes with a stock range of 7km, and with the right mix of modules and commander skills can be pushed to a range of over 10.5km, almost equivalent to the range of a similarly-equipped Yamato. This creates a large radius around her which enemy units must respect or pay a hefty price. Additionally, her handling is superb for a ship her size; she's quick to respond to rudder commands, and her turning circle is better than that of Amagi. Easily the most impressive thing about Bismarck is her survivability. Like her sister Tirpitz, she is exceptionally difficult to land citadel hits against; only long-range plunging fire has a good chance of doing so. The closer she gets, the better her armor scheme protects her from incoming fire. She will take more than her fair share of regular penetration damage from enemy armor-piercing rounds, but that damage repairs better than citadel damage.
Bismarck has another trick up her sleeve that sets her apart from Tirpitz: access to the Hydroacoustic Search consumable. This provides her with large windows of time where she is functionally immune to long range torpedoes, and also provides detection of enemy ships hidden in Smoke Screens when pushing into capture zones.
When all of that is paired with an above-average anti-aircraft suite, Bismarck is a very well-rounded, highly survivable battleship that is friendly to players of all skill levels.
Ship Review: Mouse in the Bismarck from the NA forums. Tested in patch 0.5.10
Pros:
- Outstanding secondary battery. With the right upgrades and commander skills, her secondary battery range can be extended past 10.5km, allowing Bismarck to whittle down enemy ships before closing in for the kill.
- Has access to the Hydroacoustic Search consumable, making her very difficult to torpedo from long range.
- Reminiscent of earlier battleship gameplay: the closer she gets, the more dangerous she becomes to her enemies.
- Above average anti-aircraft suite.
- Surprisingly nimble for a battleship of her size, with an excellent top speed (30 knots).
- Exceptionally durable with a good armor layout; has the vaunted "turtleback" armor.
Cons:
- No torpedoes like those found on her sister Tirpitz.
- Only has eight (8) barrels, while every other ship at this tier has nine (9) or more of a higher caliber.
- Weak deck armor makes the battleship susceptible to citadel hits if rounds punch through the deck.
- Hydroacoustic Search only has a 3.8km guaranteed detection range for enemy torpedoes and can only be up for two minutes out of every four; she will have gaps where she is vulnerable to long-range torpedoes.
- 15-inch guns have trouble with angled enemy battleships (use HE against the superstructure or choose a different target).
- Her anti-aircraft and secondary batteries are easily destroyed when being pummeled by high explosive rounds.
- Extremely vulnerable to fires. Superstructures can be set on fire by calibers of any size quite easily.
- The only true armor is her hull and her turrets. The enormous superstructures/deck have virtually no armor at all.
- Vulnerability of citadel shows itself during full rudder turns; the red painted lower hull is practically the citadel itself.
Research
Optimal Configuration
Upgrades
Secondary Battery Build: The most common build for Bismarck will maximize her secondary battery by equipping Secondary Battery Mod 2, along with the usual suspects for battleships: Main Armaments Mod 1 and Damage Control Mod 1. Upgrade Slot 5 offers an interesting choice between Steering Gears Mod 2 and Damage Control Mod 2 that is left to individual captains; Upgrade Slot 6 is likewise captain's choice.
Despite the heavy focus on secondaries, Auxiliary Armaments Mod 1 is not recommended; improving the survivability of Bismarck’s main battery with Main Armaments Mod 1 is still a better choice.
Anti-Aircraft Build: Another possible build is to maximize Bismarck’s AA suite; it is similar to the Secondary Battery Build above, but uses AA Mod 2 in Upgrade Slot 2. Players wishing to minimize their vulnerability to enemy aircraft should equip Concealment System Mod 1 in Upgrade Slot 6.
Commander Skills
Secondary Battery Build: Following along with the theme of maximizing the punishment dished out by Bismarck’s secondaries, captains should invest in Basic Firing Training, Expert Marskman, Superintendent, and Advanced Firing Training. Manual Control for Secondary Armament is a debatable skill in this build given that it only allows the ship's secondaries to fire at a single target at a time. Some captains will prefer this skill; others will not. Extra skill points should be invested in either Basics of Survivability, High Alert, or Vigilance, as desired.
Anti-Aircraft Build: Similar to the secondary-focused build, Basic Firing Training, Expert Marskman, Superintendent, and Advanced Firing Training form the core of the commander skills. Instead of a Tier 5 skill, though, players double up on Tier 4 skills and pick up Manual Fire Control for AA Armament. German long-range AA batteries are all in excess of 85mm, allowing them to make good use of the skill and dish out extreme punishment to enemy aircraft.
| Recommended Commander Skills | ||||||||
|---|---|---|---|---|---|---|---|---|
| Cost (points) |
Endurance | Attack | Support | Versatility | ||||
| 1 |
★★ |
★★ |
★ |
|
|
|
★ |
|
| 2 |
★ |
★★ |
★★★ |
|
|
|
★ |
|
| 3 |
★★ |
★ |
|
|
★★ |
★★★ |
★ |
★★ |
| 4 |
★★★ |
★★ |
★ |
|
★★★ |
|
★ |
★★ |
| Key: ★★★ - Extremely Useful ★★ - Frequently Useful ★ - Occasionally Useful No stars - Meh Χ - Not recommended | ||||||||
Consumables
Hydroacoustic Search is one of her true strengths and makes her unique in her tier; the premium version is highly recommended for the reduced cooldown. Repair Party II is also recommended for the quicker cooldown; a well-played Bismarck is likely to find herself under intense enemy fire and captains will want to have access to Repair Party as quickly as possible.
Camouflage
Type 1, 2, or 5 camouflage can be equipped for credits; Types 2 or 5 are recommended at a minimum to reduce the accuracy of incoming shells.
Players who wish to spend doubloons can equip Bismarck with Type 18 camouflage that lowers her detection radius, reduces the accuracy of incoming shells, reduces her repair costs, and increases the amount of experience she earns.
Signals
Players who have followed the Secondary Battery Build above will want to equip Mike Yankee Soxisix and India Delta signals in order to further boost the effectiveness of their secondaries and Repair Party consumable, respectively.
Players following the Anti-Aircraft Build may wish to equip November Echo Setteseven for the bonus to AA gun damage.
Recommended Signal Flags 
| |||||
|---|---|---|---|---|---|
| Combat | |||||

|
 ★★ |
 ★★ |
 ★ |
 ★ |
 ★ |

|
 ★★★ |
 ★★ |
 ★★★ |
 ★★ |
 ★★★ |

|

| ||||
Note: Use of the Juliet Charlie signal makes detonation impossible.
Gallery
Historical Info
Historical Gallery
References
https://en.wikipedia.org/wiki/Ernst_Lindemann
https://en.wikipedia.org/wiki/G%C3%BCnther_L%C3%BCtjens
