Conqueror
| Revision as of 04:37, 1 June 2021 rip Dead Eye | Revision as of 22:03, 22 March 2023 | |||
16 intermediate revisions by 9 users not shown | ||||
| Line 4: | Line 4: | |||
| |Anno=<!-- you can write below short description for the ship. it will replace default once. --> | |Anno=<!-- you can write below short description for the ship. it will replace default once. --> | |||
| ? | This ship was designed as a battleship with increased firepower on the basis of the British experience in ship construction gained during World War II. The project featured twelve 419 mm main guns, the strongest broadside of any Royal Navy vessel. | + | This ship was designed as a battleship with increased firepower on the basis of the British experience in ship construction gained during World War II. The project featured twelve 419 mm main guns, the strongest broadside of any Royal Navy vessel. | |
| |Performance=<!-- write text about performance in battles below --> | |Performance=<!-- write text about performance in battles below --> | |||
| + | {{AA Sidebar Warning Insert}} | |||
| Perched atop the British battleship tech tree at Tier X, ''Conqueror'' is a worthy successor to ''[[Lion]]''. | Perched atop the British battleship tech tree at Tier X, ''Conqueror'' is a worthy successor to ''[[Lion]]''. | |||
| ? | Like ''Lion'', ''Conqueror'' can sneak around the map by taking advantage of her low detectability range, which is among the lowest of all Tier X battleships, even beating that of a ''[[Hindenburg]]'' fully kitted out for concealment. Her size means that she will take quite a few hits in a gunfight. As such, it is important to position properly and use concealment when faced with overwhelming odds. When this isn’t possible, ''Conqueror'' is capable of holding her own. Her high-explosive (HE) shells are extremely powerful and sport a high fire chance. This is useful when engaging multiple ships because she can burn her enemies at range and switch to armor-piercing (AP) for more devastating hits at close range. However, her HE shells are powerful enough that some captains may choose to use it exclusively. | + | Like ''Lion'', ''Conqueror'' can sneak around the map by taking advantage of her low detectability range, which is among the lowest of all Tier X battleships, even beating that of a ''[[Hindenburg]]'' fully kitted out for concealment. Her size means that she will take quite a few hits in a gunfight. As such, it is important to position properly and use concealment when faced with overwhelming odds. When this isn’t possible, ''Conqueror'' is capable of holding her own. Her high-explosive (HE) shells are extremely powerful and sport a high fire chance. This is useful when engaging multiple ships because she can burn her enemies at range and switch to armor-piercing (AP) for more devastating hits at close range. However, her HE shells are powerful enough that some captains may choose to use it exclusively. | |
| After slugging it out with the other heavy-hitting ships at Tier X, ''Conqueror'' can use a special repair party consumable that is capable of restoring tens of thousands of hit points (HP). This allows her to stay in the fight, continuing to punish her enemies, but she is still relatively fragile if she is unable to disengage and heal. ''Conqueror''’s anti-aircraft armament, while powerful for self-defense — especially the mid-range ring — is concentrated into a relatively small number of mounts, meaning it can be disabled fairly quickly. By combining her strengths and finding support from friendly ships, ''Conqueror'' becomes one of the most powerful ships in the game. | After slugging it out with the other heavy-hitting ships at Tier X, ''Conqueror'' can use a special repair party consumable that is capable of restoring tens of thousands of hit points (HP). This allows her to stay in the fight, continuing to punish her enemies, but she is still relatively fragile if she is unable to disengage and heal. ''Conqueror''’s anti-aircraft armament, while powerful for self-defense — especially the mid-range ring — is concentrated into a relatively small number of mounts, meaning it can be disabled fairly quickly. By combining her strengths and finding support from friendly ships, ''Conqueror'' becomes one of the most powerful ships in the game. | |||
| |Pros=<!-- write list of positive points below. use * as in ordinary wiki-list. --> | |Pros=<!-- write list of positive points below. use * as in ordinary wiki-list. --> | |||
| ? | * Excellent | + | * Heavy broadside, regardless of ammunition type | |
| ? | * | + | * Excellent main battery range | |
| ? | * | + | * Extremely powerful HE shells with very high damage, penetration and fire chance - effective against all targets, regardless of said targets' positioning | |
| ? | * | + | * AP shells have short fuse timers, leading to fewer overpenetrations | |
| ? | * Access to the | + | * The X and Y (rear) turrets have very good firing angles | |
| ? | * | + | * Access to the {{Specialized Repair Teams}} consumable found on high tier [[Ship:Cruisers|British cruisers]], ''Conqueror'' can recover massive amounts of health per charge | |
| ? | * | + | * Very powerful mid-range AA defenses, DPS is very high | |
| + | * Reasonable handling for a Tier 10 battleship, which can be significantly boosted with the {{UU Conqueror}} upgrade | |||
| + | * Joint best concealment among Tier 10 battleships, tied with ''[[Thunderer]]'' | |||
| |Cons=<!-- write list of negative points below. use * as in ordinary wiki-list. --> | |Cons=<!-- write list of negative points below. use * as in ordinary wiki-list. --> | |||
| ? | * | + | * Third lowest hitpoint pool among Tier 10 battleships | |
| ? | * | + | * Extensively covered in 32mm armor, very vulnerable to HE penetrations and AP overmatch | |
| ? | * | + | * Main battery dispersion can be frustratingly poor | |
| ? | * | + | * Vulnerable citadel rises high above the waterline | |
| ? | + | * Due to their short fuse timers, ''Conqueror'''s AP shells might struggle to penetrate heavily armored targets | ||
| ? | + | * Ineffective secondary armaments, combined with the exposed citadel and weak armor, make ''Conqueror'' a very poor brawler | ||
| ? | + | * Lacks access to either {{Spotting Aircraft}} or {{Catapult Fighter}} | ||
| ? | + | |||
| ? | * Lacks access to either {{Spotting Aircraft}} or {{Catapult Fighter}} | + | ||
| |Research=<!-- write text about priority sequence of research below --> | |Research=<!-- write text about priority sequence of research below --> | |||
| Line 40: | Line 41: | |||
| |Upgrades=<!-- write text about best upgrades below --> | |Upgrades=<!-- write text about best upgrades below --> | |||
| The recommended upgrades for ''{{#var:ship_name}}'' are as follows: | The recommended upgrades for ''{{#var:ship_name}}'' are as follows: | |||
| ? | * '''Slot 1''': {{Main Armaments Modification 1}} | + | * '''Slot 1''': {{Main Armaments Modification 1}} | |
| * '''Slot 2''': {{Damage Control System Modification 1}} | * '''Slot 2''': {{Damage Control System Modification 1}} | |||
| ? | * '''Slot 3''': {{Aiming Systems Modification 1}} | + | * '''Slot 3''': {{Aiming Systems Modification 1}} | |
| * '''Slot 4''': {{Damage Control System Modification 2}} | * '''Slot 4''': {{Damage Control System Modification 2}} | |||
| * '''Slot 5''': {{Concealment System Modification 1}} <nowiki>*</nowiki> | * '''Slot 5''': {{Concealment System Modification 1}} <nowiki>*</nowiki> | |||
| ? | * '''Slot 6''': {{Main Battery Modification 3}} | + | * '''Slot 6''': {{Main Battery Modification 3}} | |
| ? | + | '''Upgrade Slot 5''' If available, the {{UU Conqueror}} upgrade provides a significant rudder shift boost at the expense of some concealment. | ||
| ? | + | |||
| ? | + | |||
| ? | + | |||
| ? | '''Upgrade Slot 5''' | + | ||
| ? | + | |||
| ? | + | |||
| |CommanderSkills=<!-- write text about best set of Commander Skills below --> | |CommanderSkills=<!-- write text about best set of Commander Skills below --> | |||
| Line 60: | Line 55: | |||
| {{Commander Skills 3 BB | {{Commander Skills 3 BB | |||
| | rating11 = 2 <!-- Gun Feeder --> | | rating11 = 2 <!-- Gun Feeder --> | |||
| ? | | rating12 = | + | | rating12 = 2 <!-- Pyrotechnician --> | |
| | rating13 = <!-- Consumables Specialist --> | | rating13 = <!-- Consumables Specialist --> | |||
| ? | | rating14 = | + | | rating14 = 1 <!-- Emergency Repair Specialist --> | |
| | rating15 = <!-- Incoming Fire Alert --> | | rating15 = <!-- Incoming Fire Alert --> | |||
| ? | | rating16 = | + | | rating16 = 1 <!-- Preventive Maintenance --> | |
| | rating21 = 2 <!-- Grease the Gears --> | | rating21 = 2 <!-- Grease the Gears --> | |||
| | rating22 = <!-- Inertial Fuse for HE Shells --> | | rating22 = <!-- Inertial Fuse for HE Shells --> | |||
| ? | | rating23 = | + | | rating23 = 2 <!-- Brisk --> | |
| | rating24 = <!-- Vigilance --> | | rating24 = <!-- Vigilance --> | |||
| | rating25 = 2 <!-- Priority Target --> | | rating25 = 2 <!-- Priority Target --> | |||
| Line 75: | Line 70: | |||
| | rating31 = <!-- Super-Heavy AP Shells --> | | rating31 = <!-- Super-Heavy AP Shells --> | |||
| | rating32 = <!-- Long-Range Secondary Battery Shells --> | | rating32 = <!-- Long-Range Secondary Battery Shells --> | |||
| ? | | rating33 = | + | | rating33 = 3 <!-- Adrenaline Rush --> | |
| ? | | rating34 = | + | | rating34 = 2 <!-- Basics of Survivability --> | |
| | rating35 = <!-- Enhanced Anti-Torpedo Protection --> | | rating35 = <!-- Enhanced Anti-Torpedo Protection --> | |||
| | rating36 = <!-- Expert AA Marksman --> | | rating36 = <!-- Expert AA Marksman --> | |||
| ? | | rating41 = <!-- | + | | rating41 = <!-- Furious --> | |
| | rating42 = <!-- Improved Secondary Battery Aiming --> | | rating42 = <!-- Improved Secondary Battery Aiming --> | |||
| | rating43 = <!-- Close Quarters Combat --> | | rating43 = <!-- Close Quarters Combat --> | |||
| ? | | rating44 = | + | | rating44 = 3 <!-- Emergency Repair Expert --> | |
| ? | | rating45 = | + | | rating45 = 3 <!-- Concealment Expert --> | |
| ? | | rating46 = | + | | rating46 = 3 <!-- Fire Prevention Expert --> | |
| }} | }} | |||
| Line 91: | Line 86: | |||
| ''{{#var:ship_name}}'' equips the following consumables: | ''{{#var:ship_name}}'' equips the following consumables: | |||
| * '''Slot 1:''' {{Damage Control Party}} | * '''Slot 1:''' {{Damage Control Party}} | |||
| ? | * '''Slot 2:''' {{Specialized Repair Teams}} | + | * '''Slot 2:''' {{Specialized Repair Teams}} - 3 charges | |
| |Camouflage=<!-- write text about useful camouflage below --> | |Camouflage=<!-- write text about useful camouflage below --> | |||
| ? | ||||
| ? | + | {{TT Ship Camo Insert|shiptier=10}} | ||
| |Signals=<!-- write text about best set of signals below --> | |Signals=<!-- write text about best set of signals below --> | |||
| ? | Critically important signal flags for ''{{#var:ship_name}}'' include: India Delta ({{India Delta|Size=18px}}), India Yankee ({{India Yankee|Size=18px}}), and Juliet Yankee Bissotwo ({{Juliet Yankee Bissotwo|Size=18px}}). Players are also encouraged to equip November Echo Setteseven ({{November Echo Setteseven|Size=18px}}) to maximize ''{{#var:ship_name}}''’s AA bubble | + | Critically important signal flags for ''{{#var:ship_name}}'' include: India Delta ({{India Delta|Size=18px}}), India Yankee ({{India Yankee|Size=18px}}), and Juliet Yankee Bissotwo ({{Juliet Yankee Bissotwo|Size=18px}}). Players are also encouraged to equip November Echo Setteseven ({{November Echo Setteseven|Size=18px}}) to maximize ''{{#var:ship_name}}''’s AA bubble. | |
| {{Signal Flags | {{Signal Flags | |||
| Line 116: | Line 110: | |||
| | Juliet Charlie = 2 | | Juliet Charlie = 2 | |||
| ? | ||||
| ? | ||||
| ? | ||||
| ? | ||||
| ? | ||||
| ? | ||||
| ? | ||||
| ? | ||||
| ? | ||||
| ? | ||||
| ? | ||||
| }} | }} | |||
| Line 150: | Line 133: | |||
| |Ref= <!-- write below --> | |Ref= <!-- write below --> | |||
| <references /> | <references /> | |||
| ? | + | {{WoWS Ship Changelog Insert|1= | ||
| + | *Available to supertesters in the game starting from Update 0.6.7. | |||
| + | {{WoWS Ship Testing Changes Insert|1= | |||
| + | *<span class="plainlinks">[https://www.facebook.com/wowsdevblog/posts/pfbid0GeVtw75AqP6eYJBBuN1EpwMjx8ELogA6ws5URiZd4KC2qKR11gn2NjYjnKkM2i3zl Aug 17, 2017]</span>: | |||
| + | **Sigma parameter of the 419mm main battery guns decreased from 2.0 to 1.8. | |||
| + | }} | |||
| + | *Introduced in Update 0.6.10. | |||
| + | *Update 0.6.12: | |||
| + | **Detectability when firing main guns in smoke changed to 16.69 km. | |||
| + | **The cooldown of the Repair Party I consumable was changed from 120 to 180 s and Repair Party II consumable from 80 to 120 s. | |||
| + | **Base detectability was changed from 14.76 to 15.66 km. | |||
| + | *Update 0.7.4: | |||
| + | **Fine textures of the ship have been improved. | |||
| + | *Update 0.7.6: | |||
| + | **The turning circle radius displayed in port was changed from 940 m to 820 m. | |||
| + | *Update 0.8.5: | |||
| + | **Credit profitability decreased by 5%. | |||
| + | **XP profitability decreased by 5%. | |||
| + | *Update 0.8.6: | |||
| + | **The citadel was raised to occupy some of the casemate area. | |||
| + | **The Repair Party consumable was changed: | |||
| + | *** Casemate (non-citadel) damage restoration was increased from 60% to 75%. | |||
| + | *** Cooldown reduced from 180 to 120 s. | |||
| + | *Update 0.8.8: | |||
| + | **The 457 mm/45 Mk II gun module was removed. Players who had researched the module were compensated 35,000 Free Experience. Those who had also purchased the module were compensated an additional 2,500,000 credits. | |||
| + | *Update 0.8.10: | |||
| + | **Fixed incorrect description in the port. | |||
| + | *Update 0.9.2: | |||
| + | **Updated model and textures. | |||
| + | **Updated hull geometry. | |||
| + | *Update 0.9.3 : | |||
| + | **Fixed a bug due to which the detectability was calculated incorrectly when firing the main battery guns. | |||
| + | *Update 0.9.5: | |||
| + | **Minor changes to geometry and textures. | |||
| + | *Update 0.9.6: | |||
| + | **The turning circle radius displayed in port was changed to 940 m to correct prior discrepancy (was 820 m). This change did not affect game balance in any way. | |||
| + | *Update 0.10.0: | |||
| + | **The firing range of the secondary battery was increased to 7.3 km. | |||
| + | *Update 0.10.7: | |||
| + | **Added "Depth Charge Airstrike" armament. | |||
| + | *Update 0.11.1: | |||
| + | **Minor corrections to geometry and textures of the ship. | |||
| + | *Update 0.11.11: | |||
| + | **Fixed the geometry and textures of the Celebration permanent camouflage. | |||
| + | }} | |||
| }}<!-- DO NOT DELETE THIS LINE. DO NOT INSERT ANYTHING BELOW THIS LINE --> | }}<!-- DO NOT DELETE THIS LINE. DO NOT INSERT ANYTHING BELOW THIS LINE --> | |||
Revision as of 22:03, 22 March 2023

| Research price255000 exp |
| Purchase price20,600,000 |
| Hit Points82,900 |
| 419 mm/45 Mk.I on a Type C mount4 х 3 pcs. |
| Rate of Fire2 shots/min. |
| Reload Time30 sec. |
| Rotation Speed4 deg./sec. |
| 180 Degree Turn Time45 sec. |
| Firing Range24.25 km. |
| Maximum Dispersion302 m. |
| HE Shell419 mm HE Mk I |
| Maximum HE Shell Damage7,200 |
| Chance of Fire on Target Caused by HE Shell48 % |
| Initial HE Shell Velocity792 m./s. |
| HE Shell Weight995 kg. |
| AP Shell419 mm AP Mk II |
| Maximum AP Shell Damage13,000 |
| Initial AP Shell Velocity747 m./s. |
| AP Shell Weight1157 kg. |
| 133 mm/50 QF Mk.I on an RP10 Mk.I mount8 х 2 pcs. |
| Firing Range7.3 km. |
| Rate of Fire9 shots/min. |
| Reload Time6.67 sec. |
| HE Shell133 mm HE Mk IC |
| Maximum HE Shell Damage1,900 |
| Initial HE Shell Velocity792 m./s. |
| Chance of Fire on Target Caused by HE Shell8 % |
| 133 mm/50 QF Mk.I on an RP10 Mk.I mount8 х 2 pcs. |
| . . . Average Damage per Second68 |
| . . . Firing Range5.19 km. |
| 40 mm/56 OQF Mk.III on a Mk.VII mount12 х 1 pcs. |
| . . . Average Damage per Second104.4 |
| . . . Firing Range3.51 km. |
| 40 mm/56 OQF Mk.X on a STAAG Mk.2 mount4 х 2 pcs. |
| . . . Average Damage per Second53.6 |
| . . . Firing Range3.51 km. |
| 40 mm/56 OQF Mk.IX on a Mk.VI mount11 х 6 pcs. |
| . . . Average Damage per Second222.2 |
| . . . Firing Range3.51 km. |
| Maximum Speed29.5 knot |
| Turning Circle Radius940 m. |
| Rudder Shift Time17.4 sec. |
| Surface Detectability Range15.19 km. |
| Air Detectability Range12.53 km. |

Conqueror — British Tier X battleship.
This ship was designed as a battleship with increased firepower on the basis of the British experience in ship construction gained during World War II. The project featured twelve 419 mm main guns, the strongest broadside of any Royal Navy vessel.
Modules
 |
Rate of Fire (shots/min) | 180° Turn Time (sec) | Maximum Dispersion (m) | Maximum HE Shell Damage (HP) | Chance of Fire on Target Caused by HE Shell (%) | Maximum AP Shell Damage (HP) |
Research price (exp) |
Purchase price ( | |
|---|---|---|---|---|---|---|---|---|---|
| 419 mm/45 Mk.I on a Type C/D mount | 2 | 45 | 302 | 7,200 | 48 | 13,000 | 0 | 2,000,000 |
 |
Hit Points (HP) | Armor (mm) | Armor (mm) | Main Turrets (pcs.) | Secondary Gun Turrets (pcs.) | AA Mounts (pcs.) | Torpedo Tubes (pcs.) | Hangar Capacity (pcs.) |
Research price (exp) |
Purchase price ( | |
|---|---|---|---|---|---|---|---|---|---|---|---|
| Conqueror | 82,900 | 19 | 406 | 2/2 | 8 | 12/4/11/8 | 0 | 3,500,000 |
 |
IDS_SHIP_PARAM_SUO_INCREASE_DIST (%) | Maximum Firing Range (km) |
Research price (exp) |
Purchase price ( | |
|---|---|---|---|---|---|
| Mk X mod. 1 | 0 | 0 | 2,000,000 |
 |
Maximum Speed (knot) |
Research price (exp) |
Purchase price ( | |
|---|---|---|---|---|
| Propulsion: 135,650 hp | 29.5 | 0 | 1,500,000 |
Compatible Upgrades
| Slot 1 |
||||
|---|---|---|---|---|
| Slot 2 |
||||
| Slot 3 |
||||
| Slot 4 |
||||
| Slot 5 |
||||
| Slot 6 |
Player Opinion
Performance
Refer to the in-game Port screens for more useful data.
Perched atop the British battleship tech tree at Tier X, Conqueror is a worthy successor to Lion.
Like Lion, Conqueror can sneak around the map by taking advantage of her low detectability range, which is among the lowest of all Tier X battleships, even beating that of a Hindenburg fully kitted out for concealment. Her size means that she will take quite a few hits in a gunfight. As such, it is important to position properly and use concealment when faced with overwhelming odds. When this isn’t possible, Conqueror is capable of holding her own. Her high-explosive (HE) shells are extremely powerful and sport a high fire chance. This is useful when engaging multiple ships because she can burn her enemies at range and switch to armor-piercing (AP) for more devastating hits at close range. However, her HE shells are powerful enough that some captains may choose to use it exclusively.
After slugging it out with the other heavy-hitting ships at Tier X, Conqueror can use a special repair party consumable that is capable of restoring tens of thousands of hit points (HP). This allows her to stay in the fight, continuing to punish her enemies, but she is still relatively fragile if she is unable to disengage and heal. Conqueror’s anti-aircraft armament, while powerful for self-defense — especially the mid-range ring — is concentrated into a relatively small number of mounts, meaning it can be disabled fairly quickly. By combining her strengths and finding support from friendly ships, Conqueror becomes one of the most powerful ships in the game.Pros:
- Heavy broadside, regardless of ammunition type
- Excellent main battery range
- Extremely powerful HE shells with very high damage, penetration and fire chance - effective against all targets, regardless of said targets' positioning
- AP shells have short fuse timers, leading to fewer overpenetrations
- The X and Y (rear) turrets have very good firing angles
- Access to the Specialized Repair Teams
 consumable found on high tier British cruisers, Conqueror can recover massive amounts of health per charge
- Very powerful mid-range AA defenses, DPS is very high
- Reasonable handling for a Tier 10 battleship, which can be significantly boosted with the Enhanced Engineering Systems (
 ) upgrade
- Joint best concealment among Tier 10 battleships, tied with Thunderer
Cons:
- Third lowest hitpoint pool among Tier 10 battleships
- Extensively covered in 32mm armor, very vulnerable to HE penetrations and AP overmatch
- Main battery dispersion can be frustratingly poor
- Vulnerable citadel rises high above the waterline
- Due to their short fuse timers, Conqueror's AP shells might struggle to penetrate heavily armored targets
- Ineffective secondary armaments, combined with the exposed citadel and weak armor, make Conqueror a very poor brawler
- Lacks access to either Spotting Aircraft
 or Catapult Fighter
Research
Optimal Configuration
Upgrades
The recommended upgrades for Conqueror are as follows:
- Slot 1: Main Armaments Modification 1

- Slot 2: Damage Control System Modification 1

- Slot 3: Aiming Systems Modification 1

- Slot 4: Damage Control System Modification 2

- Slot 5: Concealment System Modification 1
 *
*
- Slot 6: Main Battery Modification 3

Upgrade Slot 5 If available, the Enhanced Engineering Systems (![]() ) upgrade provides a significant rudder shift boost at the expense of some concealment.
) upgrade provides a significant rudder shift boost at the expense of some concealment.
Commander Skills
As with most battleships, commander skill points for Conqueror are best invested into skills that will keep her alive.
| Recommended Commander Skills | ||||||
|---|---|---|---|---|---|---|
| Cost (points) |
Attack | Defense | ||||
| 1 |
★★ |
★★ |
|
★ |
|
★ |
| 2 |
★★ |
|
★★ |
|
★★ |
|
| 3 |
|
|
★★★ |
★★ |
|
|
| 4 |
|
|
|
★★★ |
★★★ |
★★★ |
| Key: ★★★ - Extremely Useful ★★ - Frequently Useful ★ - Occasionally Useful No stars - Not Useful | ||||||
Consumables
Conqueror equips the following consumables:
- Slot 1: Damage Control Party

- Slot 2: Specialized Repair Teams - 3 charges
Signals
Critically important signal flags for Conqueror include: India Delta (![]() ), India Yankee (
), India Yankee (![]() ), and Juliet Yankee Bissotwo (
), and Juliet Yankee Bissotwo (![]() ). Players are also encouraged to equip November Echo Setteseven (
). Players are also encouraged to equip November Echo Setteseven (![]() ) to maximize Conqueror’s AA bubble.
) to maximize Conqueror’s AA bubble.
Recommended Signal Flags 
| |||||
|---|---|---|---|---|---|
| Combat | |||||
 ★★ |
 ★★★ |
 ★★★ |
 ★ |
 ★ |
 ★ |

|
 ★★ |
 ★★ |
 ★★ |
 ★★ |
 ★★★ |

|

| ||||
Note: Use of the Juliet Charlie signal makes detonation impossible.
Gallery
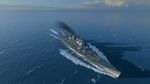
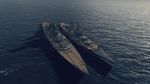
Conqueror sails the open ocean while sporting the stock gun configuration.
Conqueror aims at a new target with her upgraded guns.
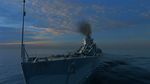
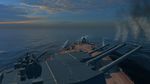
View from the bridge overlooking the bow and forward turrets.
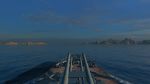
View overlooking the stern and rear turrets.
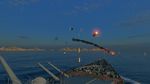
Conqueror's formidable anti-aircraft armament repels Aichi B7A2 torpedo bombers.
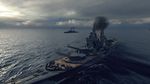
Conqueror fires a salvo at an enemy Friedrich der Große.

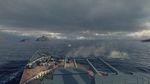
Conqueror burns Friedrich der Große with fires set by her HE shells.
Conqueror sails in formation with a friendly Neptune.
Conqueror sizes up with Großer Kurfürst.


Historical Info
References
Ship Change Log
See here for links to Update notes.
- Available to supertesters in the game starting from Update 0.6.7.
Testing Changes
- Aug 17, 2017:
- Sigma parameter of the 419mm main battery guns decreased from 2.0 to 1.8.
- Introduced in Update 0.6.10.
- Update 0.6.12:
- Detectability when firing main guns in smoke changed to 16.69 km.
- The cooldown of the Repair Party I consumable was changed from 120 to 180 s and Repair Party II consumable from 80 to 120 s.
- Base detectability was changed from 14.76 to 15.66 km.
- Update 0.7.4:
- Fine textures of the ship have been improved.
- Update 0.7.6:
- The turning circle radius displayed in port was changed from 940 m to 820 m.
- Update 0.8.5:
- Credit profitability decreased by 5%.
- XP profitability decreased by 5%.
- Update 0.8.6:
- The citadel was raised to occupy some of the casemate area.
- The Repair Party consumable was changed:
- Casemate (non-citadel) damage restoration was increased from 60% to 75%.
- Cooldown reduced from 180 to 120 s.
- Update 0.8.8:
- The 457 mm/45 Mk II gun module was removed. Players who had researched the module were compensated 35,000 Free Experience. Those who had also purchased the module were compensated an additional 2,500,000 credits.
- Update 0.8.10:
- Fixed incorrect description in the port.
- Update 0.9.2:
- Updated model and textures.
- Updated hull geometry.
- Update 0.9.3 :
- Fixed a bug due to which the detectability was calculated incorrectly when firing the main battery guns.
- Update 0.9.5:
- Minor changes to geometry and textures.
- Update 0.9.6:
- The turning circle radius displayed in port was changed to 940 m to correct prior discrepancy (was 820 m). This change did not affect game balance in any way.
- Update 0.10.0:
- The firing range of the secondary battery was increased to 7.3 km.
- Update 0.10.7:
- Added "Depth Charge Airstrike" armament.
- Update 0.11.1:
- Minor corrections to geometry and textures of the ship.
- Update 0.11.11:
- Fixed the geometry and textures of the Celebration permanent camouflage.