Edinburgh
| Revision as of 21:40, 23 October 2019 Commander Skills 2 | Revision as of 11:19, 7 June 2021 Changed my mind on the best skill order for new captains. Extra charges of heal and smoke would be friendlier to new players than faster reload.. | |||
8 intermediate revisions by 4 users not shown | ||||
| Line 3: | Line 3: | |||
| |Anno=<!-- you can write below short description for the ship. it will replace default once. --> | |Anno=<!-- you can write below short description for the ship. it will replace default once. --> | |||
| ? | The most powerful light cruiser in the Royal Navy during World War II. Outrivaled most other same-type ships in terms of armor protection. She inherited powerful main guns from her predecessors. Among other Royal Navy cruisers of the 1930s, ''Edinburgh'' carried more powerful AA weapons.<br><br>{{Model3DViewer|219d5ce21da544ec96eebd210bdce620}} | + | The most powerful light cruiser in the Royal Navy during World War II. Outrivaled most other same-type ships in terms of armor protection. She inherited powerful main guns from her predecessors. Among other Royal Navy cruisers of the 1930s, ''Edinburgh'' carried more powerful AA weapons.<!-- <br><br>{{Model3DViewer|219d5ce21da544ec96eebd210bdce620}}--> | |
| |Performance=<!-- write text about performance in battles below --> | |Performance=<!-- write text about performance in battles below --> | |||
| ''{{#var:ship_name}}'' will feel familiar to captains progressing up the British cruiser line; her four turrets of triple 152mm barrels are identical to the configuration of her immediate predecessor, ''[[Fiji]]''. In point of fact, ''{{#var:ship_name}}'' has only a few upgrades from ''Fiji'', but those upgrades make a measurable difference in her effectiveness. | ''{{#var:ship_name}}'' will feel familiar to captains progressing up the British cruiser line; her four turrets of triple 152mm barrels are identical to the configuration of her immediate predecessor, ''[[Fiji]]''. In point of fact, ''{{#var:ship_name}}'' has only a few upgrades from ''Fiji'', but those upgrades make a measurable difference in her effectiveness. | |||
| ? | By now, veterans of the branch are accustomed to having access to the | + | By now, veterans of the branch are accustomed to having access to the Repair Party consumable. ''{{#var:ship_name}}'' is no different in this regard, though she has access to a much more potent version of the consumable, one that restores as much as 40% of her health pool '''per use'''. ''[[Neptune]]'' and ''[[Minotaur]]'' have heals of similar effectiveness, meaning that ships at the high end of the Royal Navy cruiser branch can be exceedingly difficult to sink if they are allowed to escape sustained fire with any health remaining. Like her predecessors, ''{{#var:ship_name}}'' has the tools to make good that escape — should it become necessary — through her ability to equip the {{Smoke Generator}} consumable. Additionally, ''{{#var:ship_name}}'' is the first ship in the line given access to {{Surveillance Radar}}. Though she must give up her access to Smoke Generator in order to have Surveillance Radar available, the combination of radar and {{Hydroacoustic Search}} make her an incredibly potent destroyer hunter. Any destroyers that find themselves within 9.0 km of a radar-equipped ''{{#var:ship_name}}'' are in a very vulnerable position. | |
| Her armor is improved over that of ''Fiji'', and while she will stand up to heavy cruiser fire better than her predecessor, ''{{#var:ship_name}}'' will still suffer when under fire from enemy battleships. Her torpedoes gain some extra range and are now capable of reaching targets at ranges out to 10.0 km, and her anti-aircraft damage per second is nearly double that of ''Fiji''. She is a well-rounded cruiser, but one that must be played very carefully in order to maximize her ability to punish lighter enemy units while minimizing her exposure to fire from enemy capital ships. | Her armor is improved over that of ''Fiji'', and while she will stand up to heavy cruiser fire better than her predecessor, ''{{#var:ship_name}}'' will still suffer when under fire from enemy battleships. Her torpedoes gain some extra range and are now capable of reaching targets at ranges out to 10.0 km, and her anti-aircraft damage per second is nearly double that of ''Fiji''. She is a well-rounded cruiser, but one that must be played very carefully in order to maximize her ability to punish lighter enemy units while minimizing her exposure to fire from enemy capital ships. | |||
| |Pros=<!-- write list of positive points below. use * as in ordinary wiki-list. --> | |Pros=<!-- write list of positive points below. use * as in ordinary wiki-list. --> | |||
| ? | * Has access to | + | * Has access to {{Specialized Repair Teams}} that allow her to regenerate large amounts health. | |
| * Highly flexible ship; mounts {{Hydroacoustic Search}} by default, then can choose between {{Spotting Aircraft}}, {{Catapult Fighter}}, {{Smoke Generator}}, and {{Surveillance Radar}}. | * Highly flexible ship; mounts {{Hydroacoustic Search}} by default, then can choose between {{Spotting Aircraft}}, {{Catapult Fighter}}, {{Smoke Generator}}, and {{Surveillance Radar}}. | |||
| ? | * Solid anti-aircraft suite, especially | + | * Solid anti-aircraft suite, especially when bolstered by the Expert AA Marksman and AA Gunner commander skills. | |
| * Good maneuverability; above average turning circle radius and rudder shift times. | * Good maneuverability; above average turning circle radius and rudder shift times. | |||
| Line 35: | Line 35: | |||
| *'''Slot 2''': {{Damage Control System Modification 1}} | *'''Slot 2''': {{Damage Control System Modification 1}} | |||
| *'''Slot 3''': {{Aiming Systems Modification 1}}<nowiki>*</nowiki> | *'''Slot 3''': {{Aiming Systems Modification 1}}<nowiki>*</nowiki> | |||
| ? | *'''Slot 4''': {{Steering Gears Modification | + | *'''Slot 4''': {{Steering Gears Modification 1}} | |
| *'''Slot 5''': {{Concealment System Modification 1}} | *'''Slot 5''': {{Concealment System Modification 1}} | |||
| Line 43: | Line 43: | |||
| |CommanderSkills=<!-- write text about best set of Commander Skills below --> | |CommanderSkills=<!-- write text about best set of Commander Skills below --> | |||
| ? | '' | + | At Level 1, commanders are encouraged to take Last Stand to ensure ''Edinburgh'' retains at least some maneuverability even when her engines or rudder are knocked out. At Level 2, Priority Target is a key skill as it allows players to know when it is (theoretically) safe to expose their broadside in a turn without severe punishment. Other skills of interest for ''Edinburgh'' at Level 2 are Consumables Enhancements (to lengthen the duration of either her smoke screen or radar consumables) and Expert AA Marksman (a good team-play option that bolsters her AA suite). At Level 3, the key skills are Adrenaline Rush and Superintendent, both of which are highly recommended. Captains who find themselves relying heavily on her torpedo armament may also be interested in taking Enhanced Torpedo Explosive Charge. At Level 4, the key skill that captains should prioritize is Concealment Expert in order to further enhance ''Edinburgh''’s already great concealment. Captains may also be interested in taking AA Gunner (another good team-play option that gives an additional boost to an already solid AA suite) or Radio Location (to improve situational awareness, particularly against outflanking destroyers). | |
| ? | ''' | + | Suggested initial skill order for first time ''Edinburgh'' captains: Last Stand -> Priority Target -> Superintendent -> Concealment Expert -> Adrenaline Rush | |
| ? | ||||
| ? | ||||
| ? | ||||
| ? | ||||
| ? | ||||
| ? | ||||
| ? | ||||
| ? | ||||
| ? | ||||
| ? | ||||
| ? | + | <!-- CS2 Commander Skill discussion: '''Full Concealment Build:''' Level 4's Concealment Expert is the most important skill an ''{{#var:ship_name}}'' commander can possess in this style of build. Prior to that, key skills are Priority Target at Level 2 and Superintendent at Level 3. | ||
| ? | + | |||
| ? | + | |||
| ? | + | |||
| ? | + | |||
| ? | + | |||
| ? | + | |||
| ? | + | |||
| ? | + | '''Generalist Build:''' ''{{#var:ship_name}}'' captains that are less concerned with hunting enemy destroyers should invest points in their anti-aircraft suite. Priority Target is recommended at Level 1, as is Manual Fire Control for AA Armament or Advanced Firing Training for the extra range at Level 4 (though Concealment Expert should be the next skill taken). Level 2's Adrenaline Rush and Level 3's Superintendent remain important skills. Basic Firing Training could also be taken to further improve your anti-aircraft damage but Superintendent should have priority. --> | ||
| ? | + | |||
| ? | + | |||
| ? | + | |||
| ? | + | |||
| ? | + | |||
| ? | + | |||
| ? | + | |||
| ? | | | + | {{Commander Skills 3 CR | |
| ? | | | + | <!-- Ratings 1,2,3 are legit. Others are ignored.--> | |
| ? | | | + | | rating11 = 1 <!-- Grease the Gears --> | |
| ? | | | + | | rating12 = 1 <!-- Swift Fish --> | |
| ? | | | + | | rating13 = 0 <!-- Consumables Specialist --> | |
| ? | | | + | | rating14 = 0 <!-- Gun Feeder --> | |
| ? | | | + | | rating15 = 0 <!-- Incoming Fire Alert --> | |
| ? | | | + | | rating16 = 2 <!-- Last Stand --> | |
| + | ||||
| + | | rating21 = 0 <!-- Pyrotechnician --> | |||
| + | | rating22 = 1 <!-- Fill the Tubes --> | |||
| + | | rating23 = 2 <!-- Consumables Enhancements --> | |||
| + | | rating24 = 0 <!-- Eye in the Sky --> | |||
| + | | rating25 = 3 <!-- Priority Target --> | |||
| + | | rating26 = 2 <!-- Expert AA Marksman --> | |||
| + | ||||
| + | | rating31 = 0 <!-- Heavy HE and SAP Shells --> | |||
| + | | rating32 = 2 <!-- Enhanced Torpedo Explosive Charge --> | |||
| + | | rating33 = 3 <!-- Adrenaline Rush --> | |||
| + | | rating34 = 0 <!-- Heavy AP Shells --> | |||
| + | | rating35 = 3 <!-- Superintendent --> | |||
| + | | rating36 = 2 <!-- Survivability Expert --> | |||
| + | ||||
| + | | rating41 = 0 <!-- Top Grade Gunner --> | |||
| + | | rating42 = 0 <!-- Outnumbered --> | |||
| + | | rating43 = 1 <!-- Radio Location --> | |||
| + | | rating44 = 0 <!-- Inertial Fuse for HE Shells --> | |||
| + | | rating45 = 3 <!-- Concealment Expert --> | |||
| + | | rating46 = 2 <!-- AA Gunner --> | |||
| }} | }} | |||
| Line 89: | Line 86: | |||
| ''{{#var:ship_name}}'' can equip the following consumables: | ''{{#var:ship_name}}'' can equip the following consumables: | |||
| * '''Slot 1:''' {{Damage Control Party}} | * '''Slot 1:''' {{Damage Control Party}} | |||
| ? | * '''Slot 2:''' {{Repair | + | * '''Slot 2:''' {{Specialized Repair Teams}} | |
| * '''Slot 3:''' {{{Hydroacoustic Search}} | * '''Slot 3:''' {{{Hydroacoustic Search}} | |||
| * '''Slot 4:''' {{Smoke Generator}} ''or'' {{Surveillance Radar}} ''or'' {{Spotting Aircraft}} '''or''' {{Catapult Fighter}} | * '''Slot 4:''' {{Smoke Generator}} ''or'' {{Surveillance Radar}} ''or'' {{Spotting Aircraft}} '''or''' {{Catapult Fighter}} | |||
| ? | Captains who have opted for the '''Full Concealment Build''' and are focused on eradicating enemy destroyers should equip {{Surveillance Radar}}. All other builds should stick to {{Smoke Generator}} for maximum survivability. {{Catapult Fighter}} is still not recommended | + | <!-- from CS2 that may be of interest in future iterations: Captains who have opted for the '''Full Concealment Build''' and are focused on eradicating enemy destroyers should equip {{Surveillance Radar}}. --> | |
| + | Captains who wish to focused on eradicating enemy destroyers should equip {{Surveillance Radar}}. All other builds should stick to {{Smoke Generator}} for maximum survivability. {{Catapult Fighter}} is still not recommended for the same reason as for the preceding tier ships - the fighters are not particularly effect in the AA role. {{Spotting Aircraft}} is also not recommended due to the difficulty in shooting at targets at long range, as it is already fairly difficult to hit targets with ''{{#var:ship_name}}''’s existing range. | |||
| |Camouflage=<!-- write text about useful camouflage below --> | |Camouflage=<!-- write text about useful camouflage below --> | |||
| Line 101: | Line 99: | |||
| |Signals=<!-- write text about best set of signals below --> | |Signals=<!-- write text about best set of signals below --> | |||
| ? | ''{{#var:ship_name}}''’s anti-aircraft defenses need all the help they can get; November Echo Setteseven ({{November Echo Setteseven|Size=18px}}) earns an easy recommendation, as does India Delta ({{India Delta|Size=18px}}) to improve her already stellar healing capability. Sierra Mike ({{Sierra Mike|Size=18px}}) will assist in overcoming some of her deficiencies in top speed, and November Foxtrot ({{November Foxtrot|Size=18px}}) will help shorten the cooldown time of her all-important suite of consumables. | + | ''{{#var:ship_name}}''’s anti-aircraft defenses need all the help they can get; November Echo Setteseven ({{November Echo Setteseven|Size=18px}}) earns an easy recommendation, as does India Delta ({{India Delta|Size=18px}}) to improve her already stellar healing capability. Sierra Mike ({{Sierra Mike|Size=18px}}) will assist in overcoming some of her deficiencies in top speed, and November Foxtrot ({{November Foxtrot|Size=18px}}) will help shorten the cooldown time of her all-important suite of consumables. X-Ray Papa Unaone will increase the action time of her smoke allowing ''Edinburgh'' to produce longer curtains of smoke, giving her more space to move around as well as technically increasing the total time she could potentially spend hidden within her own smoke so long as she finds herself within the final puff of smoke as the first puffs start to dissipate. | |
| {{Signal Flags | {{Signal Flags | |||
| Line 117: | Line 115: | |||
| | India Yankee = | | India Yankee = | |||
| | Juliet Charlie = 1 | | Juliet Charlie = 1 | |||
| + | ||||
| + | | X-Ray Papa Unaone = 3 | |||
| + | | Sierra Bravo = 2 | |||
| | Zulu = | | Zulu = | |||
| Line 245: | Line 246: | |||
| |Ref= <!-- write below --> | |Ref= <!-- write below --> | |||
| + | # [https://en.wikipedia.org/wiki/HMS_Edinburgh_(16) HMS ''Edinburgh'' (16) - Wikipedia] | |||
| + | # [https://en.wikipedia.org/wiki/Town-class_cruiser_(1936) Town-class cruiser (1936) - Wikipedia] | |||
| + | # [https://worldofwarships.com/en/news/game-guides/ed-edin-eddy/ Armada 2.0: Edinburgh - News - World of Warships] | |||
| + | # [https://www.youtube.com/watch?v=a-mUALcKCck Armada - Edinburgh - World of Warships Official Channel - YouTube] | |||
| }}<!-- DO NOT DELETE THIS LINE. DO NOT INSERT ANYTHING BELOW THIS LINE --> | }}<!-- DO NOT DELETE THIS LINE. DO NOT INSERT ANYTHING BELOW THIS LINE --> | |||
Revision as of 11:19, 7 June 2021

| Research price108000 exp |
| Purchase price8,800,000 |
| Hit Points31,800 |
| 152 mm/50 BL Mk.XXIII on a Mk.XXIII mount4 х 3 pcs. |
| Rate of Fire7.79 shots/min. |
| Reload Time7.7 sec. |
| Rotation Speed7 deg./sec. |
| 180 Degree Turn Time25.71 sec. |
| Firing Range14.02 km. |
| Maximum Dispersion129 m. |
| Chance of Fire on Target Caused by HE Shell0 % |
| AP Shell152 mm AP 6crh Mk IV |
| Maximum AP Shell Damage3,100 |
| Initial AP Shell Velocity841 m./s. |
| AP Shell Weight50.8 kg. |
| 102 mm/45 QF Mk.XVI on a Mk.XIX mount6 х 2 pcs. |
| Firing Range6.6 km. |
| Rate of Fire20 shots/min. |
| Reload Time3 sec. |
| HE Shell102 mm HE 35 lb |
| Maximum HE Shell Damage1,500 |
| Initial HE Shell Velocity811 m./s. |
| Chance of Fire on Target Caused by HE Shell6 % |
| 533 mm TR Mk IV2 х 3 pcs. |
| Rate of Fire0.83 shots/min. |
| Reload Time72 sec. |
| Rotation Speed25 deg./sec. |
| 180 Degree Turn Time7.2 sec. |
| Torpedo533 mm Mk IX* |
| Maximum Damage15,867 |
| Torpedo Speed61 knot |
| Torpedo Range8.01 km. |
| 102 mm/45 QF Mk.XVI on a Mk.XIX mount6 х 2 pcs. |
| . . . Average Damage per Second56.4 |
| . . . Firing Range5.01 km. |
| 20 mm Oerlikon Mk.II on a Mk.V mount5 х 2 pcs. |
| . . . Average Damage per Second30.5 |
| . . . Firing Range2.01 km. |
| 40 mm/39 Vickers QF Mk.VIII on a Mk.VI mount3 х 8 pcs. |
| . . . Average Damage per Second59.4 |
| . . . Firing Range2.49 km. |
| 20 mm Oerlikon Mk.I on a Mk.IIA mount8 х 1 pcs. |
| . . . Average Damage per Second28.8 |
| . . . Firing Range2.01 km. |
| Maximum Speed32.5 knot |
| Turning Circle Radius730 m. |
| Rudder Shift Time13.4 sec. |
| Surface Detectability Range11.36 km. |
| Air Detectability Range7.16 km. |


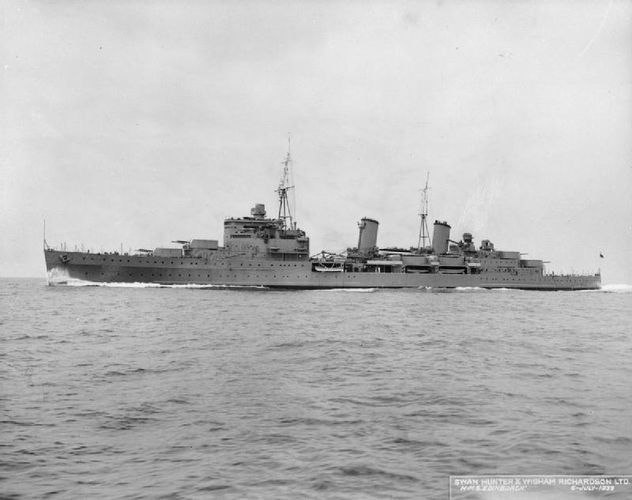
Edinburgh — British Tier VIII cruiser.
The most powerful light cruiser in the Royal Navy during World War II. Outrivaled most other same-type ships in terms of armor protection. She inherited powerful main guns from her predecessors. Among other Royal Navy cruisers of the 1930s, Edinburgh carried more powerful AA weapons.
Modules
 |
Rate of Fire (shots/min) | 180° Turn Time (sec) | Maximum Dispersion (m) | Maximum HE Shell Damage (HP) | Chance of Fire on Target Caused by HE Shell (%) | Maximum AP Shell Damage (HP) |
Research price (exp) |
Purchase price ( | |
|---|---|---|---|---|---|---|---|---|---|
| 152 mm/50 BL Mk.XXIII on a Mk.XXIII mount | 7.8 | 25.7 | 129 | 3,100 | 0 | 600,000 |
 |
Hit Points (HP) | Armor (mm) | Armor (mm) | Main Turrets (pcs.) | Secondary Gun Turrets (pcs.) | AA Mounts (pcs.) | Torpedo Tubes (pcs.) | Hangar Capacity (pcs.) |
Research price (exp) |
Purchase price ( | |
|---|---|---|---|---|---|---|---|---|---|---|---|
| Edinburgh (A) | 31,800 | 6 | 114 | 4 | 6 | 8/5/3/6 | 2 | 0 | 900,000 | ||
| Edinburgh (B) | 36,400 | 6 | 114 | 4 | 6 | 14/3/6 | 2 | 28,000 | 2,200,000 |
 |
Rate of Fire (shots/min) | Torpedo Tubes Reload Time (sec) | 180° Turn Time (sec) | Maximum Damage (HP) | Torpedo Speed (knot) | Torpedo Range (km) |
Research price (exp) |
Purchase price ( | |
|---|---|---|---|---|---|---|---|---|---|
| 533 mm Mk IX* | 0.8 | 72 | 7.2 | 15,866 | 61 | 8 | 0 | 1,000,000 | |
| 533 mm Mk IX** | 0.8 | 72 | 7.2 | 15,533 | 62 | 10 | 12,000 | 1,200,000 |
 |
IDS_SHIP_PARAM_SUO_INCREASE_DIST (%) | Maximum Firing Range (km) |
Research price (exp) |
Purchase price ( | |
|---|---|---|---|---|---|
| Mk VIII mod. 1 | 0 | 0 | 700,000 | ||
| Mk VIII mod. 2 | 0 | 15,000 | 1,500,000 |
 |
Maximum Speed (knot) |
Research price (exp) |
Purchase price ( | |
|---|---|---|---|---|
| Propulsion: 80,000 hp | 32.5 | 0 | 500,000 |
Compatible Upgrades
| Slot 1 |
||||||
|---|---|---|---|---|---|---|
| Slot 2 |
||||||
| Slot 3 |
||||||
| Slot 4 |
||||||
| Slot 5 |
Player Opinion
Performance
Edinburgh will feel familiar to captains progressing up the British cruiser line; her four turrets of triple 152mm barrels are identical to the configuration of her immediate predecessor, Fiji. In point of fact, Edinburgh has only a few upgrades from Fiji, but those upgrades make a measurable difference in her effectiveness.
By now, veterans of the branch are accustomed to having access to the Repair Party consumable. Edinburgh is no different in this regard, though she has access to a much more potent version of the consumable, one that restores as much as 40% of her health pool per use. Neptune and Minotaur have heals of similar effectiveness, meaning that ships at the high end of the Royal Navy cruiser branch can be exceedingly difficult to sink if they are allowed to escape sustained fire with any health remaining. Like her predecessors, Edinburgh has the tools to make good that escape — should it become necessary — through her ability to equip the Smoke Generator ![]() consumable. Additionally, Edinburgh is the first ship in the line given access to Surveillance Radar
consumable. Additionally, Edinburgh is the first ship in the line given access to Surveillance Radar ![]() . Though she must give up her access to Smoke Generator in order to have Surveillance Radar available, the combination of radar and Hydroacoustic Search
. Though she must give up her access to Smoke Generator in order to have Surveillance Radar available, the combination of radar and Hydroacoustic Search ![]() make her an incredibly potent destroyer hunter. Any destroyers that find themselves within 9.0 km of a radar-equipped Edinburgh are in a very vulnerable position.
make her an incredibly potent destroyer hunter. Any destroyers that find themselves within 9.0 km of a radar-equipped Edinburgh are in a very vulnerable position.
Pros:
- Has access to Specialized Repair Teams
 that allow her to regenerate large amounts health.
- Highly flexible ship; mounts Hydroacoustic Search
 by default, then can choose between Spotting Aircraft
  , Catapult Fighter
  , Smoke Generator
  , and Surveillance Radar
  .
.
- Solid anti-aircraft suite, especially when bolstered by the Expert AA Marksman and AA Gunner commander skills.
- Good maneuverability; above average turning circle radius and rudder shift times.
Cons:
- Armor is largely for show and offers little real protection; incoming rounds larger than 203mm will penetrate Edinburgh easily.
- Really only effective against lighter enemy units, such as destroyers and other cruisers. Edinburgh barely registers as a threat to enemy battleships.
- Lightly-armored turrets and fragile AA guns are incapacitated more frequently than many of her contemporaries.
- Shortest main battery range of all Tier VIII cruisers.
Research
Optimal Configuration
There are a three key choices that dictate how Edinburgh will play: the upgrades in Slots 1 and 3, and which consumable she chooses to go along with Hydroacoustic Search ![]() .
.
Upgrades
The recommended upgrades for Edinburgh are as follows:
- Slot 1: Main Armaments Modification 1
 *
*
- Slot 2: Damage Control System Modification 1

- Slot 3: Aiming Systems Modification 1
 *
*
- Slot 4: Steering Gears Modification 1

- Slot 5: Concealment System Modification 1

Upgrade Slot 1 allows players to mount one of two viable options. Main Armaments Modification 1 is a generally viable choice, but players wishing to specialize for anti-aircraft duties should mount Auxiliary Armaments Modification 1 ![]() .
.
Upgrade Slot 3 offers choices for specialization in different roles. Aiming Sytems Modification 1 should be equipped for ship to ship combat. AA Guns Modification 1 ![]() should be mounted when specializing for AA duties.
should be mounted when specializing for AA duties.
Commander Skills
At Level 1, commanders are encouraged to take Last Stand to ensure Edinburgh retains at least some maneuverability even when her engines or rudder are knocked out. At Level 2, Priority Target is a key skill as it allows players to know when it is (theoretically) safe to expose their broadside in a turn without severe punishment. Other skills of interest for Edinburgh at Level 2 are Consumables Enhancements (to lengthen the duration of either her smoke screen or radar consumables) and Expert AA Marksman (a good team-play option that bolsters her AA suite). At Level 3, the key skills are Adrenaline Rush and Superintendent, both of which are highly recommended. Captains who find themselves relying heavily on her torpedo armament may also be interested in taking Enhanced Torpedo Explosive Charge. At Level 4, the key skill that captains should prioritize is Concealment Expert in order to further enhance Edinburgh’s already great concealment. Captains may also be interested in taking AA Gunner (another good team-play option that gives an additional boost to an already solid AA suite) or Radio Location (to improve situational awareness, particularly against outflanking destroyers).
Suggested initial skill order for first time Edinburgh captains: Last Stand -> Priority Target -> Superintendent -> Concealment Expert -> Adrenaline Rush
| Recommended Commander Skills | ||||||
|---|---|---|---|---|---|---|
| Cost (points) |
Attack | Defense | ||||
| 1 |
★ |
★ |
|
|
|
★★ |
| 2 |
|
★ |
★★ |
|
★★★ |
★★ |
| 3 |
|
★★ |
★★★ |
|
★★★ |
★★ |
| 4 |
|
|
★ |
|
★★★ |
★★ |
| Key: ★★★ - Extremely Useful ★★ - Frequently Useful ★ - Occasionally Useful No stars - Not Useful | ||||||
Consumables
Edinburgh can equip the following consumables:
- Slot 1: Damage Control Party

- Slot 2: Specialized Repair Teams
- Slot 3: {Hydroacoustic Search
- Slot 4: Smoke Generator or Surveillance Radar or Spotting Aircraft or Catapult Fighter
Captains who wish to focused on eradicating enemy destroyers should equip Surveillance Radar ![]() . All other builds should stick to Smoke Generator
. All other builds should stick to Smoke Generator ![]() for maximum survivability. Catapult Fighter
for maximum survivability. Catapult Fighter ![]() is still not recommended for the same reason as for the preceding tier ships - the fighters are not particularly effect in the AA role. Spotting Aircraft
is still not recommended for the same reason as for the preceding tier ships - the fighters are not particularly effect in the AA role. Spotting Aircraft ![]() is also not recommended due to the difficulty in shooting at targets at long range, as it is already fairly difficult to hit targets with Edinburgh’s existing range.
is also not recommended due to the difficulty in shooting at targets at long range, as it is already fairly difficult to hit targets with Edinburgh’s existing range.
Camouflage
Type 1, 2, or 5 camouflage can be equipped for credits; Types 2 or 5 are recommended at a minimum to reduce the accuracy of incoming shells.
Players who wish to spend doubloons can equip Edinburgh with Type 18 camouflage that lowers her detection radius, reduces the accuracy of incoming shells, reduces her repair costs, and increases the amount of experience she earns.
Signals
Edinburgh’s anti-aircraft defenses need all the help they can get; November Echo Setteseven (![]() ) earns an easy recommendation, as does India Delta (
) earns an easy recommendation, as does India Delta (![]() ) to improve her already stellar healing capability. Sierra Mike (
) to improve her already stellar healing capability. Sierra Mike (![]() ) will assist in overcoming some of her deficiencies in top speed, and November Foxtrot (
) will assist in overcoming some of her deficiencies in top speed, and November Foxtrot (![]() ) will help shorten the cooldown time of her all-important suite of consumables. X-Ray Papa Unaone will increase the action time of her smoke allowing Edinburgh to produce longer curtains of smoke, giving her more space to move around as well as technically increasing the total time she could potentially spend hidden within her own smoke so long as she finds herself within the final puff of smoke as the first puffs start to dissipate.
) will help shorten the cooldown time of her all-important suite of consumables. X-Ray Papa Unaone will increase the action time of her smoke allowing Edinburgh to produce longer curtains of smoke, giving her more space to move around as well as technically increasing the total time she could potentially spend hidden within her own smoke so long as she finds herself within the final puff of smoke as the first puffs start to dissipate.
Recommended Signal Flags 
| |||||
|---|---|---|---|---|---|
| Combat | |||||
 ★ |

|

|

|

|

|
 ★ |

|
 ★★ |
 ★★★ |
 ★★★ |
 ★★★ |
 ★★★ |
 ★★ | ||||
Note: Use of the Juliet Charlie signal makes detonation impossible.
Gallery
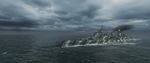
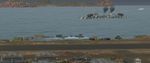
Moving into position.
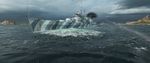
Edinburgh engages an enemy destroyer at close range, landing the killing blow.
Edinburgh fires torpedoes individually at an enemy Yamato class battleship.
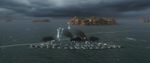
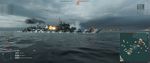
An enemy Yamato class battleship falls victim to a coordinated assault.
Edinburgh utilizes island cover to maintain concealment.

Torpedo bombers from an enemy Shokaku commit the attack.
A Shokaku torpedo attack is partially thwarted by Edinburgh's anti-air guns.
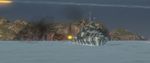
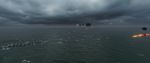
Edinburgh desperately dodges incoming fire.
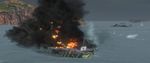
Edinburgh takes a salvo of armor penetrating shells and dies.


Historical Info
Historical Gallery
.jpeg)
.jpeg)
.png)
.jpeg)
.jpeg)


.jpeg)

.jpeg)

Video
References
- HMS Edinburgh (16) - Wikipedia
- Town-class cruiser (1936) - Wikipedia
- Armada 2.0: Edinburgh - News - World of Warships
- Armada - Edinburgh - World of Warships Official Channel - YouTube