Exeter
| Revision as of 07:57, 1 March 2019 | Revision as of 19:00, 3 July 2020 CS2 | |||
16 intermediate revisions by 12 users not shown | ||||
| Line 3: | Line 3: | |||
| {{WoWs_Ship | {{WoWs_Ship | |||
| |Promo=<!-- in case of gift or promo ship write conditions to get it. (optional)--> | |Promo=<!-- in case of gift or promo ship write conditions to get it. (optional)--> | |||
| ? | ||||
| |Anno=<!-- you can write below short description for the ship. it will replace default once. --> | |Anno=<!-- you can write below short description for the ship. it will replace default once. --> | |||
| ? | This ''York''-class ship was the last heavy cruiser to be inducted into the Royal Navy. She had relatively moderate dimensions for her type, but still featured a well-balanced combination of speed, armor protection, and armament.<!-- <br><br>{{Model3DViewer| | + | This ''York''-class ship was the last heavy cruiser to be inducted into the Royal Navy. She had relatively moderate dimensions for her type, but still featured a well-balanced combination of speed, armor protection, and armament.<br><br>''{{#var:ship_name}}'' was first released for sale worldwide on 28 February 2019. | |
| + | <!-- <br><br>{{Model3DViewer|565058d8b4724733aa438b8705d62a68}}--> | |||
| |Performance=<!-- write text about performance in battles below --> | |Performance=<!-- write text about performance in battles below --> | |||
| ? | + | ''{{#var:ship_name}}'' is a bit of an odd duck compared to her cousins in the British cruiser tech tree. Ditching the typical — and expected — {{Smoke Generator}} consumable is only the first of her unique features, as ''{{#var:ship_name}}'' joins Japanese cruiser ''[[Furutaka]]'' as the only 203mm-armed heavy cruisers at Tier V. Additionally, she is able to fire HE shells while retaining access to {{Repair Party}}. | ||
| ? | + | |||
| ? | + | The removal of ''{{#var:ship_name}}''’s access to smoke has a large impact on how this ship is played. She's big and squishy, soaking up incoming fire at a prodigious rate. For any other cruiser at tier five, her vulnerability would equal a quick trip back to port; but the addition of her {{Repair Party}} consumable lengthens the amount of time she can afford to take fire. Her 203mm guns pack quite a punch for her tier, allowing ''{{#var:ship_name}}'' to combat other cruisers effectively while using AP shells. Alpha damage is key in most situations, and captains should seek to use the large caliber main guns to their fullest advantage. However, the effective use of HE shells are reduced, as the longer reload on these guns doesn't allow ''{{#var:ship_name}}'' to pump out quite the volume of fire that light cruisers can manage. This issue is only further compounded by ''{{#var:ship_name}}'' only having six guns. | ||
| ? | + | |||
| ? | + | Other than the smoke screen, ''{{#var:ship_name}}'' enjoys all the other advantages of being a British cruiser. She has their improved propulsion systems, allowing her to accelerate from a standstill very easily and retain much of her speed in a turn. Her torpedoes can be fired one at a time, or in a wide spread. Other than her Repair Party, ''{{#var:ship_name}}'s'' consumables are typical for a tier five cruiser, and she's relatively stealthy with a low concealment radius. | ||
| ? | + | |||
| ? | + | All in all, ''{{#var:ship_name}}'' is an extremely versatile ship, with hard hitting 203mm guns and the ability to soak up some damage with her Repair party consumable. | ||
| |Pros=<!-- write list of positive points below. use * as in ordinary wiki-list. --> | |Pros=<!-- write list of positive points below. use * as in ordinary wiki-list. --> | |||
| * Repair party consumable helps ''Exeter'' to survive longer in battle and put fire down range. | * Repair party consumable helps ''Exeter'' to survive longer in battle and put fire down range. | |||
| * Improved engine power similar to other British cruisers. | * Improved engine power similar to other British cruisers. | |||
| ? | * 203mm guns at | + | * 203mm guns at Tier V. | |
| ? | * Able to single fire her torpedoes out to | + | * Able to single fire her torpedoes out to 8.0 km. | |
| ? | * Good stealth, with a minimum surface detect of 9. | + | * Good stealth, with a minimum surface detect of 9.6 km with camouflage and captain skill. | |
| |Cons=<!-- write list of negative points below. use * as in ordinary wiki-list. --> | |Cons=<!-- write list of negative points below. use * as in ordinary wiki-list. --> | |||
| Line 29: | Line 29: | |||
| * Low rate of fire and low barrel count due to having 203mm guns. | * Low rate of fire and low barrel count due to having 203mm guns. | |||
| * Mediocre AA armament. | * Mediocre AA armament. | |||
| ? | + | <br> | ||
| + | {{AnnoWiki|content= | |||
| + | '''[https://forum.worldofwarships.com/topic/185142-premium-ship-review-121-exeter/ LittleWhiteMouse's Premium Ship Review: Exeter] from the NA forums'''}} | |||
| |Research=<!-- write text about priority sequence of research below --> | |Research=<!-- write text about priority sequence of research below --> | |||
| Line 44: | Line 46: | |||
| |OptimalConfiguration=<!-- write some general text about selection of optimal configuration below (optional)--> | |OptimalConfiguration=<!-- write some general text about selection of optimal configuration below (optional)--> | |||
| ? | |Upgrades= | + | |Upgrades=The recommended upgrades for ''{{#var:ship_name}}'' are as follows: | |
| + | * '''Slot 1''': {{Main Armaments Modification 1}} keeps the guns active and firing. | |||
| + | * '''Slot 2''': {{Steering Gears Modification 1}} reduces chances of losing rudder control. | |||
| + | * '''Slot 3''': {{Aiming Systems Modification 1}}* improves accuracy and generates more main battery hits on enemies. | |||
| ? | + | Players can opt to take {{AA Guns Modification 1}} instead for '''Slot 3''' because {{Aiming Systems Modification 1}} only has a small impact on her main battery accuracy and she lacks a proper AA suite against Tier VI carriers. | ||
| ? | + | |||
| ? | + | |||
| ? | + | |||
| ? | + | |||
| ? | + | |||
| ? | + | |||
| ? | + | |||
| |CommanderSkills=<!-- write text about best set of Commander Skills below --> | |CommanderSkills=<!-- write text about best set of Commander Skills below --> | |||
| ? | {{Commander Skills | + | {{Commander Skills 2 | |
| ? | | | + | <!-- This version enables a '0' rating. Use it for skills that have no effect (e.g. Improved Engines on a non-CV) or are detrimental to the ship. They should mirror what appears in the game client. --> | |
| ? | | | + | | rating11 = 3 <!-- Priority Target --> | |
| ? | | | + | | rating12 = 1 <!-- Preventive Maint --> | |
| ? | | Air Supremacy | + | | rating13 = 2 <!-- Expert Loader --> | |
| ? | | Direction Center for | + | | rating14 = 0 <!-- Air Supremacy --> | |
| ? | | Improved Engine Boost | + | | rating15 = 1 <!-- Direction Center for Fighters --> | |
| ? | | Incoming Fire Alert | + | | rating16 = 0 <!-- Improved Engine Boost --> | |
| ? | | Last Gasp | + | | rating17 = 1 <!-- Incoming Fire Alert --> | |
| + | | rating18 = 0 <!-- Last Gasp --> | |||
| ? | | High Alert | + | | rating21 = <!-- High Alert --> | |
| ? | | Jack of All Trades | + | | rating22 = 2 <!-- Jack of All Trades --> | |
| ? | | | + | | rating23 = 3 <!-- Expert Marksman --> | |
| ? | | Torpedo Acceleration | + | | rating24 = 0 <!-- Torpedo Acceleration --> | |
| ? | | Smoke Screen Expert | + | | rating25 = 0 <!-- Smoke Screen Expert --> | |
| ? | | Improved Engines | + | | rating26 = 0 <!-- Improved Engines --> | |
| ? | | | + | | rating27 = 3 <!-- Adrenaline Rush --> | |
| ? | | | + | | rating28 = 1 <!-- Last Stand --> | |
| ? | | Basics of Survivability | + | | rating31 = 1 <!-- Basics of Survivability --> | |
| ? | | Survivability Expert | + | | rating32 = <!-- Survivability Expert--> | |
| ? | | Torpedo Armament Expertise | + | | rating33 = 0 <!-- Torpedo Armament Expertise--> | |
| ? | | Aircraft Armor | + | | rating34 = 0 <!-- Aircraft Armor --> | |
| ? | | Basic Firing Training | + | | rating35 = <!-- Basic Firing Training --> | |
| ? | | | + | | rating36 = 3 <!-- Superintendent --> | |
| ? | | | + | | rating37 = 1 <!-- Demolition Expert --> | |
| ? | | | + | | rating38 = <!-- Vigilance --> | |
| ? | | Manual Fire Control for Secondary Armament | + | | rating41 = <!-- Manual Fire Control for Secondary Armament --> | |
| ? | | Fire Prevention | + | | rating42 = <!-- Fire Prevention --> | |
| ? | | Inertia Fuse for HE Shells | + | | rating43 = <!-- Inertia Fuse for HE Shells --> | |
| ? | | Sight Stabilization | + | | rating44 = 0 <!-- Sight Stabilization --> | |
| ? | | Advanced Firing Training | + | | rating45 = <!-- Advanced Firing Training --> | |
| ? | | | + | | rating46 = <!-- Massive AA Fire --> | |
| ? | | Radio Position Finding | + | | rating47 = <!-- Radio Position Finding --> | |
| ? | | Concealment Expert | + | | rating48 = 3 <!-- Concealment Expert --> | |
| }} | }} | |||
| |Consumables=<!-- write text about selection of Consumables below --> | |Consumables=<!-- write text about selection of Consumables below --> | |||
| ? | ''{{#var:ship_name}}'' | + | ''{{#var:ship_name}}'' equips the following consumables: | |
| ? | * '''Slot 1:''' {{Damage Control Party}} | + | * '''Slot 1:''' {{Damage Control Party}} | |
| ? | * '''Slot 2:'''{{Repair Party}} | + | * '''Slot 2:''' {{Repair Party}} | |
| ? | * '''Slot 3:'''{{Hydroacoustic Search}} | + | * '''Slot 3:''' {{Hydroacoustic Search}} | |
| ? | * '''Slot 4:'''{{Catapult Fighter}} | + | * '''Slot 4:''' {{Catapult Fighter}} | |
| ? | + | |||
| ? | + | |||
| |Camouflage=<!-- write text about useful camouflage below --> | |Camouflage=<!-- write text about useful camouflage below --> | |||
| ? | ||||
| ? | ||||
| ? | ||||
| ? | ||||
| ? | ||||
| ? | ||||
| ? | ||||
| ? | ||||
| ? | ||||
| ? | ||||
| ? | ||||
| As a premium ship, ''{{#var:ship_name}}'' comes included with [[Ship:Camouflage#Premium_Camouflage|Type 9 camouflage]] that lowers her detection radius, reduces the accuracy of incoming shells, reduces her repair costs, and increases the amount of experience she earns. | As a premium ship, ''{{#var:ship_name}}'' comes included with [[Ship:Camouflage#Premium_Camouflage|Type 9 camouflage]] that lowers her detection radius, reduces the accuracy of incoming shells, reduces her repair costs, and increases the amount of experience she earns. | |||
| ? | ||||
| |Signals=<!-- write text about best set of signals below --> | |Signals=<!-- write text about best set of signals below --> | |||
| + | ''Exeter'' captains should mount standard signal flags to improve the ship's performance in battle. Sierra Mike ({{Sierra Mike|Size=18px}}) flags are highly recommended to increase the ship's top speed. India Delta ({{India Delta|Size=18px}}) and India Yankee ({{India Yankee|Size=18px}}) flags should be mounted to improve the ship's survivability. November Foxtrot ({{November Foxtrot|Size=18px}}) flags can also be mounted to decrease consumable cooldown time. Lastly, economic and special signal flags can be mounted to increase the ship's economic gains per battle. | |||
| ? | + | {{Signal Flags | ||
| ? | | November Echo Setteseven = | + | | November Echo Setteseven = 2 | |
| | Mike Yankee Soxisix = | | Mike Yankee Soxisix = | |||
| ? | | India X-Ray = | + | | India X-Ray = 2 | |
| ? | | Juliet Whiskey Unaone = | + | | Juliet Whiskey Unaone = 1 | |
| ? | | Victor Lima = | + | | Victor Lima = 3 | |
| | Hotel Yankee = | | Hotel Yankee = | |||
| ? | | November Foxtrot = | + | | November Foxtrot = 3 | |
| ? | | Sierra Mike = | + | | Sierra Mike = 3 | |
| ? | | India Delta = | + | | India Delta = 3 | |
| ? | | Juliet Yankee Bissotwo = | + | | Juliet Yankee Bissotwo = 1 | |
| ? | | India Yankee = | + | | India Yankee = 2 | |
| ? | | Juliet Charlie = | + | | Juliet Charlie = 1 | |
| ? | | Zulu = | + | | Zulu = 1 | |
| | India Bravo Terrathree = | | India Bravo Terrathree = | |||
| ? | | Equal Speed Charlie London = | + | | Equal Speed Charlie London = 2 | |
| ? | | Zulu Hotel = | + | | Zulu Hotel = 1 | |
| | Papa Papa = | | Papa Papa = | |||
| ? | | Wyvern = | + | | Wyvern = 2 | |
| ? | | Red Dragon = | + | | Red Dragon = 2 | |
| ? | | Dragon Flag = | + | | Dragon Flag = 1 | |
| ? | | Ouroboros = | + | | Ouroboros = 1 | |
| ? | | Hydra = | + | | Hydra = 2 | |
| ? | | Basilisk = | + | | Basilisk = 2 | |
| ? | | Leviathan = | + | | Leviathan = 2 | |
| ? | | Scylla = | + | | Scylla = 2 | |
| ? | }} | + | }} | |
| |Gallery=<!-- write below list of files with description (if necessary) separated with | --><gallery> | |Gallery=<!-- write below list of files with description (if necessary) separated with | --><gallery> | |||
| Line 180: | Line 166: | |||
| ---- | ---- | |||
| ====Machinery==== | ====Machinery==== | |||
| ? | :8 Admiralty boilers | + | :Eight (8) Admiralty boilers | |
| ? | :4 Parsons turbines | + | :Four (4) Parsons turbines | |
| ---- | ---- | |||
| ====Performance==== | ====Performance==== | |||
| Line 212: | Line 198: | |||
| }} | }} | |||
| </div> | </div> | |||
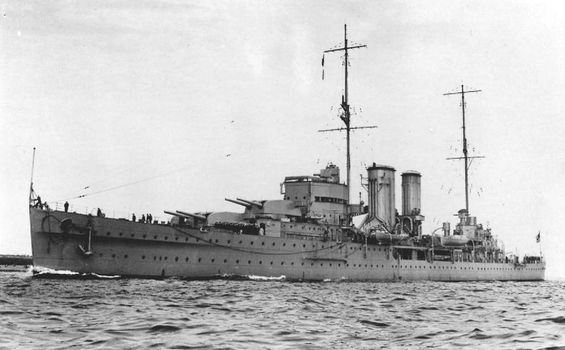
| ? | [[File:Hms_exeter.jpg| | + | [[File:Hms_exeter.jpg|none|frame|x350px|link=|HMS ''Exeter'' underway, date and location unknown.]] | |
| ====Design==== | ====Design==== | |||
| + | HMS ''Exeter'' was initially designed as a sister ship to HMS ''York''; however, several improvements made in her design resulted in ''Exeter'' being considered a ship of its own class. | |||
| ? | '' | + | Displacing 8,400 tons standard and 10,500 tons when fully loaded, ''Exeter'' was slightly heavier than her intended sister ship. Her length was identical with 175.25m, however her beam was increased to 17.68m while her draft remained the same. In her initial state her crew would count 628 men. | |
| ? | + | ''Exeter''’s armor was improved over that of ''York''. While the machinery protection remained identical with a 76mm strong belt and a 38mm deck, the magazine protection was drastically increased to 127mm side and 76mm deck armor. The main armament however only received the usual splinter protection — similar to the Japanese cruisers of the era — of 25mm all around. | ||
| ? | + | The main armament remained similar to that of ''York'': three twin turrets, mounted on the centerline with a superfiring pair fore and one turret aft. Her barrels were all 203mm/50 Mark VIIIs, the same gun found on preceding Royal Navy heavy cruiser classes. Capable of firing up to five 116.1kg heavy projectiles per minute to a range of 28 kilometers, these guns were mounted in slightly modified versions of the turret which saved weight and no longer possessed the ability to elevate the guns higher than 50 degrees. | ||
| ? | The | + | The secondary armament initially consisted of four single mounted 102mm/45 guns, capable of being used against both air and sea targets. In 1941, a new version of this gun came on board in a twin mounting, effectively doubling the firepower. These guns could fire a 28.8kg heavy shell against an air target up to 11.9 kilometers high, while maintaining up to 20 rounds per minute and gun. | |
| ? | + | ''Exeter''’s light anti-aircraft armament varied before the war, initially carrying a few single mounted 47mm and 40mm Pompoms. These were gradually replaced by two quad-mounted .50-caliber Vickers machine guns, and two octuple mounted 40mm Pompom mounts. Her torpedo armament was carried in two triple launchers, and aviation facilities allowed ''Exeter'' to carry two sea planes. | ||
| ? | '' | + | Her machinery spaces were identical to that of ''York'': eight Admiralty 3-drum boilers and four Parsons turbines that generated up to 80,000 shaft horsepower, capable of propelling ''Exeter'' up to 32 knots. Carrying 1,900 tons of fuel, a cruising range of 10,000 nautical miles at 14 knots was possible. | |
| ? | + | Ordered later than her sister ''York'' — and to a slightly different design — HMS ''Exeter'' (68) was laid down on 1 August 1928 at His Majesty’s Dockyards at Devonport, launched on 18 July 1929, and commissioned into the Royal Navy on 27 July 1931. | ||
| ? | + | |||
| ? | + | |||
| ====Service==== | ====Service==== | |||
| + | From the beginning, ''Exeter'' could already lay claim to a historical footnote: she would be the last heavy cruiser ever commissioned by the Royal Navy. Upon commissioning she joined the 2nd Squadron, where her sister served as flagship. In 1934 both cruisers were transferred to the America and West Indies Station, but this assignment was interrupted in late 1935 by the Abyssinian crisis. With a potential war with Italy looming on the horizon (an eventuality neither party had prepared for), both ''Exeter'' and ''York'' were ordered to join the Mediterranean Fleet, which was then under the command of Admiral Sir William Fisher. As open war never resulted with Italy, and the crisis ended in 1936 with the conquest of Ethiopia, both cruisers were transferred back to the America and West Indies Station where they would remain until 1939. | |||
| + | ||||
| + | Due to the presence of the German raider ''[[Admiral Graf Spee]]'' in the Atlantic when Britain declared war on Germany on 3 September 1939, ''Exeter'' was put into action almost immediately under the command of Captain F.S. Bell. ''Graf Spee'' had begun a terrifyingly effective campaign against Allied merchant traffic in the South Atlantic, so on 5 October 1939 the French and British put together eight hunter-killer groups assigned to patrol for, find, and sink her. ''Exeter'' was assigned to Force G, under the command of Commodore Henry Harwood, along with heavy cruiser ''Cumberland''. Force G was assigned to patrol off the southeast coast of South America, and later the two heavy cruisers were joined by light cruisers ''Achilles'' and ''Ajax''. | |||
| + | ||||
| + | Upon receiving intelligence that ''Graf Spee'' was in the area, Commodore Harwood gathered all available cruisers – ''Cumberland'' was undergoing maintenance in the Falkland Islands – to the Río de la Plata, the largest hub of shipping South Atlantic waters and an obvious choice for the ''Spee''’s next target. ''Exeter'' steamed north from her station near the Falklands, while ''Achilles'' traveled south from her station off Rio de Janeiro, to join ''Ajax'' near the Río de la Plata. | |||
| + | ||||
| + | Harwood’s intuition proved correct, and at 0608 on 13 December 1939, ''Ajax'' spotted smoke to the northwest. Harwood ordered ''Exeter'' to investigate, and shortly after at 0616 Captain Bell signaled, “I think it is a pocket-battleship” even as the German ship turned to bring its broadside to bear. With that, the three cruisers raised their battle ensigns and adopted the pre-arranged battle formation. In order to split ''Graf Spee''’s fire, the two light cruisers would engage from a separate heading compared to ''Exeter'', who, alone, would attempt to split the fire of the German cruiser on her north-northwest heading. The battle began at 0618 when ''Graf Spee'' fired her opening salvo, sending three 300kg armor-piercing shells shrieking through the air at ''Exeter'' from a range of just over 20,000 yards. Two minutes later, Captain F.S. Bell gave his order to engage, hailing the chief gunnery officer with the words: “There’s the [expletive] Scheer! Open fire at her!”. ''Exeter'' promptly fired a four-gun salvo from 'A' and 'B' turrets at a range of 18,700 yards. The two light cruisers also opened fire at 0621-0623 from 19,000 yards. ''Spee'' opened up on them with her 150mm secondary battery, but her 283mm main guns were reserved for ''Exeter''. At 0623 her third salvo straddled the heavy cruiser, with splinters from a near miss massacring ''Exeter''’s starboard torpedo crew, obliterating the command relay center, and causing damage to searchlights and seaplanes. However, ''Exeter'' was dishing out as much as she was getting at this point. Her fifth and sixth salvoes straddled, splinters perforating the ''Spee'''s hull, while a 203mm punched through one of the German cruiser’s 105mm secondary mounts, penetrating 9.75 meters into the ship and exploding. The blast, wiping out the fresh-water plant and killing many crew, was the first hit of the battle. Moments later, though, ''Graf Spee'' scored her own first hit, as a dud punched through the forecastle of the British cruiser. At 0624, just after she fired her eighth salvo, 283mm high explosive shell smashed into ''Exeter''’s 'B' turret, detonating on the thin 25mm faceplate with devastating affect. The turret was knocked out of action, and the explosion shredded the bridge, killing or wounding all present – including her captain. Two more blows and several near misses added to the damage, causing fires, wiping out communication systems, and destroying the aft conning position. ''Exeter'' was now relying on chains of messengers to pass orders along to steer the ship. | |||
| + | ||||
| + | The light cruisers had been engaging in a voluminous, but largely ineffective barrage of 152mm fire, until due to their proximity ''Spee''’s captain feared a torpedo attack and switched fire with his 283mm guns. ''Exeter'', spared for the moment, took the opportunity to fire three torpedoes from her starboard tubes at 0632, but failed to hit as the German cruiser retreated behind a smoke screen. At 0637, ''Exeter'' burst from the smoke intent on firing her port torpedoes at the German ship. Firing four-gun salvoes from her 'A' and 'Y' turrets, she again struck first, one shell punching through the enemy cruiser's tower mast and the other penetrating the belt armor of ''Graf Spee'', where it exploded in the ship’s workshop, destroying her fuel processing system. A near miss inflicted further splinter damage. However, at 0638 ''Graf Spee'', engaging ''Exeter'' again, scored another direct hit on one of ''Exeter''’s turrets, this time knocking 'A' turret out of the fight. ''Exeter'' continued to try and engage, but now that the light cruisers were starting to score hits ''Spee'' re-focused on them. ''Exeter'' finally uncorked her port torpedoes at 0643, but ''Spee'' dodged these and engaged ''Exeter'' again, with a hit amidships demolishing gyros and fire control instruments as well as sparking a large fire, while another shell exploded forward causing heavy flooding – ''Exeter'' was now listing seven degrees to starboard, and was down by the bow. Bell had initially hoped to ram ''Spee'', but as the battle began to recede away he finally retreated from the battle, his ship a cripple – ''Exeter'' was on fire in multiple places, down by the bow and listing. She had a single 203mm turret in action – until 0730, when flooding reached the machinery for her 'Y' turret and disabled it, leaving the cruiser toothless. She had fired about 200 rounds and scored three hits with her main guns, and fired six 533mm torpedoes to no effect. However, the few hits she had scored had inflicted decisive damage, which made it impossible for ''Admiral Graf Spee'' to escape back to Germany. | |||
| + | ||||
| + | ''Exeter'' did not stick around to see the end of the enemy ship. The crippled cruiser limped south to the Falklands, pulling into Port Stanley where emergency repairs were conducted until January. She then returned to her place of birth, Devonport, in February, where permanent repairs were affected. She also received extensive upgrades, trading her single 4”/45 QF Mk.V dual-purpose mounts for twin 4”/45 QF Mk.XVI, as well as installing two octuple 40mm pom-pom mounts and a Type 279 air-search radar. Her torpedoes were moved slightly forward to not obstruct the ammunition hoists for the new twin 4" (102mm) mounts. | |||
| + | ||||
| + | This work took over a year to complete, and it wasn’t until 10 March 1941 that she returned to service. Coincidentally, sixteen days later her only sister ''York'' was sunk in the Mediterranean by MT assault boats of the ''Decima Flottiglia Motoscafi Armati Siluranti'' (the 10th Assault Vehicle Flotilla) – the first British heavy cruiser lost in the war. Now the only survivor of her small class, ''Exeter'' spent the rest of 1941 escorting convoys in the Atlantic, which mercifully went very smoothly. However, with the entrance of Japan into the war on 7 December 1941, ''Exeter''’s presence was needed in the Far East. She was transferred to Singapore, arriving there on 13 January 1942. | |||
| + | ||||
| + | Upon reaching Singapore, ''Exeter'' was incorporated into to ABDACOM (American-British-Dutch-Australian Command), a joint Allied force whose task was to defend the Dutch East Indies from Japanese invasion. For a force whose end was so infamous, the early tasks were somewhat mundane in comparison; ''Exeter'' spent most of January and early February escorting convoys, but by mid-February matters had rapidly become more pressing as the Allied defenses began collapsing all around them. On 13 February 1942, reconnaissance aircraft spotted a Japanese invasion convoy east of Sumatra. An ABDA force made of five cruisers (including ''Exeter'') and nine destroyers, under command of Dutch Rear Admiral Karl Doorman, was dispatched to attack the Japanese. However, as the ABDA force traversed the Gaspar Strait on 14 February, things started going sour. First, destroyer ''Van Ghent'' struck a rock and had to be abandoned, in effect taking two destroyers out of action (as another had to be tasked to take off her crew). Then, making matters worse, the Allied force was spotted by Japanese aircraft, and subsequently came under attack from land-based aircraft and those of the carrier ''[[Ryujo]]''. Seven B5N bombers from the carrier launched their attacks against ''Exeter'', but all missed, their only damage being bomb splinters which shredded the cruiser’s seaplane. Attacks continued, and although ineffective, they convinced Doorman to turn back at 1242. Japanese air attacks followed them for the entire day as they retreated, but neither Japanese ordnance nor Allied anti-aircraft fire proved effective at drawing blood against the other. | |||
| + | ||||
| + | In late February, all ABDA ships were recalled to Surabaya to join the eastern force, in the wake of more Japanese forces being spotted by Dutch aircraft. The situation was now desperate; Java was the only island in the Dutch East Indies still under Allied control. On 26 February, the ABDA forces' captains met, and Admiral Doorman informed them of his intention to attack the Japanese invasion forces. The fleet, with two heavy cruisers, three light cruisers, and nine destroyers, set sail that evening, but had an inauspicious start, with the flagship ''De Ruyter'' accidentally ramming and sinking a tug. Doorman, mistaking the speed of the Japanese force and assuming they were much closer than they actually were, spent much of the night vainly seeking his opponents. It would not be until the next day that anyone from either side spotted the other, and unfortunately for ABDA, it was the Japanese who located Doorman’s fleet first, with Admiral Takagi receiving the sighting report at 1100 the next morning. Takagi increased speed, and ordered heavy cruiser ''Nachi'' to launch a scout plane by catapult at 1137. J ust short of an hour later, the scout plane found and reported the ABDA formation, tailing it as is started to head back. | |||
| + | ||||
| + | Deciding his path was open, Takagi decided to ignore Doorman’s fleet and continued with his mission. However, later that afternoon, a Dutch PBY Catalina spotted the Japanese force, giving Doorman the first solid information on the location of the Japanese of the entire day. Immediately upon receiving the information at 1427, he reversed course to attack. ''Nachi''’s scout duly reported this, and Takagi prepared for combat, opposing Doorman with a force totaling two heavy cruisers, two light, and ten destroyers. At 1610, lookouts aboard light cruiser ''Jintsu'' spotted masts at 30,000 yards, and two minutes later on the Allied side, British destroyer ''Electra'' also spotted Japanese ships. ''Jinstu'' firede the first shots of the action, engaging ''Electra'' at 19,000 yards, and at 1617 ''Nachi'' opened fire with her 203mm guns. However, her ranging was off badly: she opened fire from 28,000 yards, but her first salvo fell a full 2,000 yards short. ''Exeter'' became the first Allied ship to return fire at 1620, but her shooting wasn’t much better. | |||
| + | ||||
| + | At the outset, the duel was mostly between the four heavy cruisers: ''Nachi'' and ''Haguro'' on the Japanese side, opposed by ''Exeter'' and USS ''Houston'' (CA-30). The range was still beyond anything light cruisers could hope to engage at, and even though the heavy cruisers could engage, hits were few and far to be found. The first finally came at 1631 when a dud fired by ''Haguro'' struck Dutch light cruiser ''De Ruyter''. A long-range torpedo salvo was released by the Japanese, but all failed to hit. ''Haguro'' managed to smack ''De Ruyter'' with another dud at 1653. On the Allied side, fire was even less effective: ''Houston''’s blood-red salvos (due to her shell dye to aid spotting of fall of shot) frequently straddled Japanese ships as she fired at a furious rate, each gun spitting flame every 20-24 seconds. Accurate as her fire direction was, she also failed to secure any hits. ''Exeter'', meanwhile, couldn’t get any of her salvos close to her foes. Around the same time, the Japanese ships launched a new, massive wave of their dreaded Type 93 Long-Lance Torpedoes. | |||
| + | ||||
| + | Finally, the turning point of the battle came, as the Japanese scored three hits in succession – at 1706 a dud penetrated into ''Houston''’s engine room, followed shortly after by a second dud that penetrated into a fuel tank. Finally, at 1708, another dud stuck – this time scoring a hit on ''Exeter''. Coincidentally, the impact was similar to that of ''Exeter''’s first hit on ''Graf Spee'' more than two years prior – the shell punched directly through one of the 102mm mounts on the starboard side, penetrating through a ventilator for the boilers before exploding inside boiler room ‘B’, knocking all but two boilers out of action and releasing superheated steam. This resulted in the death of fourteen men, and made it impossible for both damage control teams and rescue parties to reach the boiler room. ''Exeter'' began to lose way and turned out of line, followed soon after by other Allied cruisers behind her. HMAS ''[[Perth]]'' was the first cruiser to realize ''Exeter'' had been badly hit, and began circling her with smoke. | |||
| + | ||||
| + | As if the situation had yet to become sour enough, at 1713, a Type 93 torpedo slammed into the Dutch destroyer ''Kortenaer'' amidships with a massive explosion. The destroyer sank in under two minutes. Here the ABDA force split for the last time. As Admiral Doorman attempted to marshal his forces, ''Exeter'' limped away to the south, burning and making only 5 knots. Escorting her were destroyers ''Electra'', ''Encounter'', ''Jupiter'', and the Dutch ''Witte de With''. | |||
| + | ||||
| + | Doorman’s force was now down to ''Houston'', three light cruisers (''De Ruyter'', ''Java'', ''Perth'') and four American ''[[Clemson]]''-class destroyers. In spite of this, he covered ''Exeter''’s retreat with his forces, trying to keep Japanese ships away from ''Exeter'' as they attempted to score torpedo hits. In the end, however, it took a sacrifice to keep ''Exeter'' safe. Recognizing the danger, Commander W.C. May, captain of the ''Electra'', informed his crew; “The Japanese are mounting a strong torpedo attack against the ''Exeter''. So we are going through the smoke to counterattack.”. ''Electra'' burst through the smoke, followed by ''Encounter''. ''Electra''’s guns blazed, and quickly landed a hit on cruiser ''Jintsu'', and not long after also punished destroyer ''Asagumo'', damaging her engine room and leaving her dead in the water. Meanwhile, ''Encounter'' traded salvoes with ''Minegumo''. One of them also registered hits on ''Tokitsukaze''. The action saved ''Exeter'', but it came at a cost, as ''Asagumo'' scored hits in return, hitting ''Electra'' below the bridge and in her No. 2 boiler room, shattering the boiler. She rapidly lost speed, while ''Minegumo'' began pummeling her at close range. At 1816, barely a quarter of an hour after she dashed out of the smoke, ''Electra'' sank. | |||
| + | ||||
| + | ''Exeter'' and her two escorts (''Encounter'' and ''Witte de With'') retreated to Surabaya, while Doorman continue on towards his infamous and fatal end. ''De Ruyter'' and ''Java'' were later both sunk by torpedoes from ''Haguro'', while ''Houston'' and ''Perth'' escaped to Tanjung Priok. | |||
| + | ||||
| + | ''Exeter'' arrived safely, but the heat in the boiler room was so intense that it could not be entered until the afternoon of the 26th, after which funerals were held for her lost crew. Emergency repairs to the boilers began immediately, as the Allies prepared to evacuate the remaining heavy ships to Colombo in Ceylon. ''Exeter'' departed Surabaya on the evening of the 28th, still crippled but able to work up to a top speed of 16 knots. Worse, because her draft was too great, she couldn’t navigate the nearby Bali Strait; she would have to travel west through the Java Sea until she reached the Sunda Strait. That same evening, ''Houston'' and ''Perth'' attempted to breach the Sunda Strait in company with Dutch destroyer ''Evertsen'', and ran into the Japanese Western Invasion Force, consisting of two heavy cruisers, three light cruisers, and nine destroyers. After a furious action, the Japanese sank all three Allied ships, and five of their own transport ships. | |||
| + | ||||
| + | Meanwhile, ''Exeter'', ''Encounter'', and the American destroyer ''Pope'' made their dash to freedom. Unfortunately for them, the Japanese knew right where to find them. On the morning of 1 March 1942, at 0750 hours, a lookout aboard ''Exeter'' spotted masts to the southwest: it was ''Nachi'' and ''Haguro''. ''Exeter'' altered course to avoid, but at 0935 her lookouts spotted two more heavy cruisers to the northwest, ''[[Myoko]]'' and ''Ashigara''. Their two accompanying destroyers tried to close, but at 1010 ''Exeter''’s surviving secondary guns, and the main guns of her destroyers, opened fire on their foes. The Japanese destroyers turned away firing their aft mounts, but neither side’s fire was accurate. | |||
| + | ||||
| + | ''Exeter'' made a hard turn to starboard and the Allied Force – the only remaining naval units of ABDA – attempted to fleet to the east. Her crew, never ceasing in their repair efforts, allowed ''Exeter'' to increase speed by a remarkable margin, and she was able to make 23 knots. However, the two Japanese cruisers were making their own top speed of 33 knots, and at 1020, when the range had closed to 25,000 yards, ''Myoko'' and ''Ashigara'' opened fire. ''Exeter'' returned fire immediately with a broadside, but her shots landed far from the Japanese cruisers; part of her fire control tables (AFCT Mk.III) had experienced a breakdown, and could no longer provide accurate fire solutions. Both Japanese cruiser groups closed to 18,000 yards, the northern group firing freely, while ''Nachi'' and ''Haguro'', having consumed two thirds of their ammunition (some 1,619 shells) the previous day, held their fire. | |||
| + | ||||
| + | The Allied ships began to weave and make smoke to throw off Japanese aim as 203mm shells from the two northern cruisers relentlessly fell closer. Japanese fire fell off somewhat as a result... but these actions could not prevent them from continuously closing. In a desperate bid, ''Exeter'' and her destroyer escorts launched torpedoes at the northern cruisers at a range of just 7,000 yards, causing them to cease-fire and take evasive action, but then ''Nachi'' and ''Haguro'' opened fire from 17,000 yards at 1115. ''Pope'' fired off her last five torpedoes at the former, but this did not dissuade ''Nachi''. The Japanese ships in return fired torpedoes, but these had little consequence. Then, disaster struck. At 1120, a full hour after fire had been opened, a 203mm shell stuck her and detonated in boiler room ‘A’ with devastating results: the cruiser’s speed dropped to only 4 knots as she rapidly lost steam and power. Her captain, realizing the end was neigh, ordered the destroyers to flee. ''Encounter'' was crippled by splinters and was immobilized around 1135, but ''Pope'' escaped into a squall at 1200. | |||
| + | ||||
| + | ''Exeter'', her fate clear, was ordered scuttled, and various valves were opened in order to begin the flooding. Even as she began to heel over to port, Japanese shells continued to pummel the stricken cruiser. At 1145, ''Nachi'' and ''Haguro'' ceased fire, having collectively fired 288 203mm shells. Meanwhile, the destroyer ''Ikazuchi'' dashed in and fired yet more torpedoes at the sinking cruiser. This time, the Japanese hit, a Type 90 torpedo striking directly amidships and another abreast the ‘A’ turret, causing Exeter to right herself and then capsize to starboard. ''Exeter'' finally capsized and disappeared below the waves at 1200. ''Encounter'', still under fire, followed at 1205, at which point ''Myoko'' and ''Ashigara'' finally ceased fire, having expended 1,171 shells. 652 men from ''Exeter''’s crew were rescued by the Japanese, but only 500 would survive captivity. | |||
| + | ||||
| + | The remains of HMS ''Exeter'' were discovered in February 2007 in 200 feet of water, 90 miles north-west of Bawean Island. A return expedition to her remains in 2016 made the gruesome discovery that the site — a British war grave — had been desecrated due to illegal scavengers salvaging the wreckage. | |||
| + | ===Historical Inaccuracies=== | |||
| + | * ''Exeter'' is depicted after her 1941 refit. Her 1939 configuration when she fought the German armored ship ''[[Admiral Graf Spee]]'' at the Battle of the River Plate is not represented. | |||
| + | * Permanent camouflage is actually based on the camouflage of HMS ''York''. The camouflage used by ''Exeter'' in game differs from ''York''’s historical camouflage by using different shades of grey and inconsistencies in pattern design. ''Exeter'' herself never received a camouflage pattern. | |||
| + | * ''Exeter'' was painted all over in a coat pre-war pale-grey during her fight with ''Admiral Graf Spee'', and after her refit was painted all over in mid-grey paint. Her wooden decks also remained unpainted. | |||
| + | * The tubs on B and Y turrets don't carry the anti-aircraft machine guns fitted there. These were likely 0.303mm Lewis Guns since no 20mm Oerlikons were available. | |||
| + | * Supermarine Walrus spotter plane is missing. | |||
| |HistoricalGallery=<!-- write below list of files with description (if necessary) separated with | --><gallery> | |HistoricalGallery=<!-- write below list of files with description (if necessary) separated with | --><gallery> | |||
| ? | File:British Warships of the Second World War A3555.jpg| | + | File:Exeter'sDamage1939.jpg|Damage received by ''Exeter'' during the Battle of the River Platte (December 1939). | |
| ? | + | File:British Warships of the Second World War A3555.jpg|''Exeter'' at anchor, early 1941. | ||
| ? | File:15 Feb Exeter air attack.jpg|''Exeter'' under air attack on 15 February 1942 | + | File:15 Feb Exeter air attack.jpg|''Exeter'' under air attack on 15 February 1942. | |
| ? | File:Exeter sinking.jpg|''Exeter'' sinking after the Second Battle of the Java Sea | + | File:Exeter sinking.jpg|''Exeter'' sinking after the Second Battle of the Java Sea. | |
| </gallery> | </gallery> | |||
| Line 245: | Line 277: | |||
| |Ref= <!-- write below --> | |Ref= <!-- write below --> | |||
| + | # [https://en.wikipedia.org/wiki/HMS_Exeter_(68) HMS ''Exeter'' (68) - Wikipedia] | |||
| + | # [https://en.wikipedia.org/wiki/York-class_cruiser ''York''-class cruiser - Wikipedia] | |||
| + | # [https://worldofwarships.com/en/news/history/armada-exeter/ Armada: HMS Exeter (no video) - News - World of Warships] | |||
| + | # [https://worldofwarships.com/en/news/history/java-sea-cruisers/ Cruisers of Java Sea - Ship Stories - News - World of Warships] | |||
| }}<!-- DO NOT DELETE THIS LINE. DO NOT INSERT ANYTHING BELOW THIS LINE --> | }}<!-- DO NOT DELETE THIS LINE. DO NOT INSERT ANYTHING BELOW THIS LINE --> | |||
Revision as of 19:00, 3 July 2020

| Purchase priceSpecial |
| Hit Points29,400 |
| 203 mm/50 Mk VIII on a Mk.II* mount3 х 2 pcs. |
| Rate of Fire4 shots/min. |
| Reload Time15 sec. |
| Rotation Speed8 deg./sec. |
| 180 Degree Turn Time22.5 sec. |
| Firing Range14.27 km. |
| Maximum Dispersion131 m. |
| HE Shell203 mm HE 256 lb |
| Maximum HE Shell Damage2,850 |
| Chance of Fire on Target Caused by HE Shell15 % |
| Initial HE Shell Velocity855 m./s. |
| HE Shell Weight116.1 kg. |
| AP Shell203 mm AP 256 lb |
| Maximum AP Shell Damage4,550 |
| Initial AP Shell Velocity855 m./s. |
| AP Shell Weight116.1 kg. |
| 102 mm/45 QF Mk.XVI on a Mk.XIX mount4 х 2 pcs. |
| Firing Range4.3 km. |
| Rate of Fire20 shots/min. |
| Reload Time3 sec. |
| HE Shell102 mm HE 35 lb |
| Maximum HE Shell Damage1,500 |
| Initial HE Shell Velocity811 m./s. |
| Chance of Fire on Target Caused by HE Shell6 % |
| 533 mm TR Mk IV2 х 3 pcs. |
| Rate of Fire0.83 shots/min. |
| Reload Time72 sec. |
| Rotation Speed25 deg./sec. |
| 180 Degree Turn Time7.2 sec. |
| Torpedo533 mm Mk IX* |
| Maximum Damage15,867 |
| Torpedo Speed61 knot |
| Torpedo Range8.01 km. |
| 102 mm/45 QF Mk.XVI on a Mk.XIX mount4 х 2 pcs. |
| . . . Average Damage per Second37.6 |
| . . . Firing Range5.01 km. |
| 40 mm/39 Vickers QF Mk.VIII on a Mk.VI mount2 х 8 pcs. |
| . . . Average Damage per Second39.6 |
| . . . Firing Range2.49 km. |
| 12.7 mm Mk.III2 х 4 pcs. |
| . . . Average Damage per Second4.2 |
| . . . Firing Range1.2 km. |
| Maximum Speed32 knot |
| Turning Circle Radius650 m. |
| Rudder Shift Time8.4 sec. |
| Surface Detectability Range10.66 km. |
| Air Detectability Range6.44 km. |

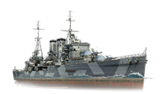
Exeter — British special premium Tier V cruiser.
This York-class ship was the last heavy cruiser to be inducted into the Royal Navy. She had relatively moderate dimensions for her type, but still featured a well-balanced combination of speed, armor protection, and armament.
Exeter was first released for sale worldwide on 28 February 2019.
Modules
 |
Rate of Fire (shots/min) | 180° Turn Time (sec) | Maximum Dispersion (m) | Maximum HE Shell Damage (HP) | Chance of Fire on Target Caused by HE Shell (%) | Maximum AP Shell Damage (HP) |
Research price (exp) |
Purchase price ( | |
|---|---|---|---|---|---|---|---|---|---|
| 203 mm/50 Mk VIII on a Mk.II* mount | 4 | 22.5 | 131 | 2,850 | 15 | 4,550 | 0 | 0 |
 |
Hit Points (HP) | Armor (mm) | Armor (mm) | Main Turrets (pcs.) | Secondary Gun Turrets (pcs.) | AA Mounts (pcs.) | Torpedo Tubes (pcs.) | Hangar Capacity (pcs.) |
Research price (exp) |
Purchase price ( | |
|---|---|---|---|---|---|---|---|---|---|---|---|
| Exeter | 29,400 | 6 | 76 | 3 | 4 | 2/2/4 | 2 | 0 | 0 |
 |
Rate of Fire (shots/min) | Torpedo Tubes Reload Time (sec) | 180° Turn Time (sec) | Maximum Damage (HP) | Torpedo Speed (knot) | Torpedo Range (km) |
Research price (exp) |
Purchase price ( | |
|---|---|---|---|---|---|---|---|---|---|
| 533 mm Mk IX* | 0.8 | 72 | 7.2 | 15,866 | 61 | 8 | 0 | 0 |
 |
IDS_SHIP_PARAM_SUO_INCREASE_DIST (%) | Maximum Firing Range (km) |
Research price (exp) |
Purchase price ( | |
|---|---|---|---|---|---|
| Mk V mod. 1 | 0 | 0 | 0 |
 |
Maximum Speed (knot) |
Research price (exp) |
Purchase price ( | |
|---|---|---|---|---|
| Propulsion: 80,000 hp | 32 | 0 | 0 |
Compatible Upgrades
| Slot 1 |
|||||
|---|---|---|---|---|---|
| Slot 2 |
|||||
| Slot 3 |
Player Opinion
Performance
Exeter is a bit of an odd duck compared to her cousins in the British cruiser tech tree. Ditching the typical — and expected — Smoke Generator ![]() consumable is only the first of her unique features, as Exeter joins Japanese cruiser Furutaka as the only 203mm-armed heavy cruisers at Tier V. Additionally, she is able to fire HE shells while retaining access to Repair Party
consumable is only the first of her unique features, as Exeter joins Japanese cruiser Furutaka as the only 203mm-armed heavy cruisers at Tier V. Additionally, she is able to fire HE shells while retaining access to Repair Party ![]() .
.
The removal of Exeter’s access to smoke has a large impact on how this ship is played. She's big and squishy, soaking up incoming fire at a prodigious rate. For any other cruiser at tier five, her vulnerability would equal a quick trip back to port; but the addition of her Repair Party ![]() consumable lengthens the amount of time she can afford to take fire. Her 203mm guns pack quite a punch for her tier, allowing Exeter to combat other cruisers effectively while using AP shells. Alpha damage is key in most situations, and captains should seek to use the large caliber main guns to their fullest advantage. However, the effective use of HE shells are reduced, as the longer reload on these guns doesn't allow Exeter to pump out quite the volume of fire that light cruisers can manage. This issue is only further compounded by Exeter only having six guns.
consumable lengthens the amount of time she can afford to take fire. Her 203mm guns pack quite a punch for her tier, allowing Exeter to combat other cruisers effectively while using AP shells. Alpha damage is key in most situations, and captains should seek to use the large caliber main guns to their fullest advantage. However, the effective use of HE shells are reduced, as the longer reload on these guns doesn't allow Exeter to pump out quite the volume of fire that light cruisers can manage. This issue is only further compounded by Exeter only having six guns.
Other than the smoke screen, Exeter enjoys all the other advantages of being a British cruiser. She has their improved propulsion systems, allowing her to accelerate from a standstill very easily and retain much of her speed in a turn. Her torpedoes can be fired one at a time, or in a wide spread. Other than her Repair Party, Exeter's consumables are typical for a tier five cruiser, and she's relatively stealthy with a low concealment radius.
All in all, Exeter is an extremely versatile ship, with hard hitting 203mm guns and the ability to soak up some damage with her Repair party consumable.Pros:
- Repair party consumable helps Exeter to survive longer in battle and put fire down range.
- Improved engine power similar to other British cruisers.
- 203mm guns at Tier V.
- Able to single fire her torpedoes out to 8.0 km.
- Good stealth, with a minimum surface detect of 9.6 km with camouflage and captain skill.
Cons:
- Fragile due to low HP and extremely thin plating.
- Large profile to go with the thin armor.
- Low rate of fire and low barrel count due to having 203mm guns.
- Mediocre AA armament.
LittleWhiteMouse's Premium Ship Review: Exeter from the NA forums
Research
Optimal Configuration
Upgrades
The recommended upgrades for Exeter are as follows:
- Slot 1: Main Armaments Modification 1
 keeps the guns active and firing.
- Slot 2: Steering Gears Modification 1
 reduces chances of losing rudder control.
- Slot 3: Aiming Systems Modification 1
 * improves accuracy and generates more main battery hits on enemies.
Players can opt to take AA Guns Modification 1 ![]() instead for Slot 3 because Aiming Systems Modification 1
instead for Slot 3 because Aiming Systems Modification 1 ![]() only has a small impact on her main battery accuracy and she lacks a proper AA suite against Tier VI carriers.
only has a small impact on her main battery accuracy and she lacks a proper AA suite against Tier VI carriers.
Commander Skills
| Recommended Commander Skills | ||||||||
|---|---|---|---|---|---|---|---|---|
| Cost (points) |
Endurance | Attack | Support | Versatility | ||||
| 1 |
★★★ |
★ |
★★ |
Χ |
★ |
Χ |
★ |
Χ |
| 2 |
|
★★ |
★★★ |
Χ |
Χ |
Χ |
★★★ |
★ |
| 3 |
★ |
|
Χ |
Χ |
|
★★★ |
★ |
|
| 4 |
|
|
|
Χ |
|
|
|
★★★ |
| Key: ★★★ - Extremely Useful ★★ - Frequently Useful ★ - Occasionally Useful No stars - Meh Χ - Not recommended | ||||||||
Consumables
Exeter equips the following consumables:
- Slot 1: Damage Control Party

- Slot 2: Repair Party

- Slot 3: Hydroacoustic Search

- Slot 4: Catapult Fighter

Camouflage
As a premium ship, Exeter comes included with Type 9 camouflage that lowers her detection radius, reduces the accuracy of incoming shells, reduces her repair costs, and increases the amount of experience she earns.
Signals
Exeter captains should mount standard signal flags to improve the ship's performance in battle. Sierra Mike (![]() ) flags are highly recommended to increase the ship's top speed. India Delta (
) flags are highly recommended to increase the ship's top speed. India Delta (![]() ) and India Yankee (
) and India Yankee (![]() ) flags should be mounted to improve the ship's survivability. November Foxtrot (
) flags should be mounted to improve the ship's survivability. November Foxtrot (![]() ) flags can also be mounted to decrease consumable cooldown time. Lastly, economic and special signal flags can be mounted to increase the ship's economic gains per battle.
) flags can also be mounted to decrease consumable cooldown time. Lastly, economic and special signal flags can be mounted to increase the ship's economic gains per battle.
Recommended Signal Flags 
| |||||
|---|---|---|---|---|---|
| Combat | |||||
 ★ |
 ★ |
 ★★ |

|
 ★★★ |
 ★★ |
 ★ |

|
 ★★ |
 ★★★ |
 ★★★ |
 ★★★ |

|

| ||||
Note: Use of the Juliet Charlie signal makes detonation impossible.
Gallery


Historical Info
Historical Gallery


References
- HMS Exeter (68) - Wikipedia
- York-class cruiser - Wikipedia
- Armada: HMS Exeter (no video) - News - World of Warships
- Cruisers of Java Sea - Ship Stories - News - World of Warships