Fiji
| Revision as of 23:37, 25 October 2016 Edited commander skills table; added comments for consumables; added comments for signals | Revision as of 06:43, 26 October 2016 Updated wording of Performance, Pros/Cons, Consumables, and Signals sections. Added text to Commander Skills section. Added Research and Upgrades sections. | |||
| Line 5: | Line 5: | |||
| |Performance=<!-- write text about performance in battles below --> | |Performance=<!-- write text about performance in battles below --> | |||
| ? | If | + | If Tier VI's ''[[Leander]]'' is considered "settling in" to the back half of the British cruiser line, then the best advice for captains embarking aboard Tier VII's ''Fiji'' for the first time should be: buckle up and enjoy the ride. | |
| ? | + | ''Fiji'' maintains the branch's theme of 152mm main battery rifles, but moves up to mounting twelve of them in four triple-barrel turrets. As such, she is considerably up-gunned from ''Leander'', and successors ''[[Edinburgh]]'' and ''[[Neptune]]'' boast identical configurations. At eight rounds per minute (a 7.5 second reload time), her main battery boasts the best rate of fire of all Tier VII cruisers, and she retains the 8.0 km maximum torpedo range of ''Leander''’s upgraded torpedoes. Her unique mix of main battery and longer range torpedoes allow ''Fiji'' to hang in fights with equal-tier cruisers of other nations, and maintains her as a threat to enemy destroyers who wander too close. | ||
| + | ||||
| + | First-time ''Fiji'' captains may think that she feels big for a light cruiser, and they're right. She has an increased beam over ''Leander'', which allowed her designers to fit triple-barreled turrets on her hull. There's a subsequent increase to her detection radius, but she retains most of ''Leander''’s handling characteristics; ''Fiji''’s turning circle is tighter, and her rudder shift is — for all intents and purposes — the same. Her anti-aircraft suite is satisfactory if unremarkable, and is approximately on par with German counterpart ''[[Yorck]]''. | |||
| + | ||||
| + | Just like ''Leander'', ''Fiji'' works best with friendly ships around. She's ideal for backing up allied destroyers, but is ill-equipped to go toe-to-toe with enemy battleships. If kept in combat where she is able to maximize her strengths against enemy cruisers and destroyers, she is an exceptional ship in the hands of the right captain. | |||
| |Pros=<!-- write list of positive points below. use * as in ordinary wiki-list. --> | |Pros=<!-- write list of positive points below. use * as in ordinary wiki-list. --> | |||
| ? | * | + | * Good main battery range (15.3 km fully upgraded). | |
| ? | * | + | * Highly effective against enemy cruisers and destroyers. | |
| ? | + | * Retains access to then [[Ship:Consumables#Repair Party|Repair Party]] consumable. | ||
| ? | * Retains | + | * Excellent main battery guns in a user-friendly layout. | |
| ? | * | + | * Below average detection range (i.e. good stealth). | |
| ? | + | * Excellent handling characteristics; quick rudder shift and tight turning circle. | ||
| ? | * | + | ||
| ? | * | + | ||
| ? | + | |||
| ? | + | |||
| |Cons=<!-- write list of negative points below. use * as in ordinary wiki-list. --> | |Cons=<!-- write list of negative points below. use * as in ordinary wiki-list. --> | |||
| ? | * | + | * Even lighter armor than ''[[Leander]]''; captains must make intelligent use of her consumables to get the most out of ''Fiji''. She will evaporate under concentrated enemy fire. | |
| ? | * | + | * Largely ineffective against enemy battleships. | |
| ? | * | + | * Anti-aircraft suite is merely average. | |
| + | * Though her maximum range is respectable, her shell velocity drops off sharply and makes landing hits difficult past medium range. | |||
| |Research=<!-- write text about priority sequence of research below --> | |Research=<!-- write text about priority sequence of research below --> | |||
| + | ''Fiji''’s stock range isn't bad for her guns; what she needs most is increased survivability. Invest experience points into Hull (B) first, then go for the Fire Control Systems module. The Torpedo module upgrade is nothing more than a small bump to her torpedo damage, and can be left for last or skipped entirely. | |||
| |OptimalConfiguration=<!-- write some general text about selection of optimal configuration below (optional)--> | |OptimalConfiguration=<!-- write some general text about selection of optimal configuration below (optional)--> | |||
| |Upgrades=<!-- write text about best upgrades below --> | |Upgrades=<!-- write text about best upgrades below --> | |||
| + | Most ''Fiji'' captains will equip Main Armaments Modification 1 in [[Ship:Upgrades#Tier_I.2B_Equipment_.28Slot_1.29|Upgrade Slot 1]], Damage Control System Modification 1 in [[Ship:Upgrades#Tier_III.2B_Equipment_.28Slot_4.29|Upgrade Slot 4]], and Steering Gear Modification 2 in [[Ship:Upgrades#Tier_VI.2B_Equipment_.28Slot_5.29|Upgrade Slot 5]]. Only [[Ship:Upgrades#Tier_V.2B_Equipment_.28Slot_2.29|Upgrade Slot 2]] offers real options: either AA Guns Modification 2 or Aiming Systems Modification 1. Either is a worthwhile upgrade, and is captain's choice. | |||
| |CommanderSkills=<!-- write text about best set of Commander Skills below --> | |CommanderSkills=<!-- write text about best set of Commander Skills below --> | |||
| + | ''Fiji''’s anti-aircraft suite finally provides a decent return for captains who want to invest in Basic Firing Training instead of Basics of Survivability at Tier 1. Tier 2's best skill remains Expert Marksman. Superintendent is recommended at Tier 3 given how dependent ''Fiji''’s performance is on effective use of her consumables. Tier 4 provides an interesting choice between Survivability Expert, Advanced Firing Training, and Manual Fire Control for AA Armament; Survivability Expert seems like a weak choice, but does buff ''Fiji''’s [[Ship:Consumables#Repair Party|Repair Party]] heal as well. Manual Fire Control for AA Armament is a more attractive skill for subsequent ships in the line and is worth considering if captains intend to move the commander to the next ship. Tier 5's best choice remains Concealment Expert. | |||
| {{Commander Skills | {{Commander Skills | |||
| Line 41: | Line 45: | |||
| | Expert Marksman=3 | | Expert Marksman=3 | |||
| ? | | Torpedo Armament Expertise= | + | | Torpedo Armament Expertise=1 | |
| | Fire Prevention=2 | | Fire Prevention=2 | |||
| | Incoming Fire Alert=2 | | Incoming Fire Alert=2 | |||
| ? | | Last Stand= | + | | Last Stand=1 | |
| ? | | Torpedo Acceleration= | + | | Torpedo Acceleration= | |
| | High Alert=2 | | High Alert=2 | |||
| | Vigilance=2 | | Vigilance=2 | |||
| Line 53: | Line 57: | |||
| | Demolition Expert= | | Demolition Expert= | |||
| ? | | Advanced Firing Training= | + | | Advanced Firing Training=2 | |
| | Survivability Expert=3 | | Survivability Expert=3 | |||
| | Aircraft Servicing Expert= | | Aircraft Servicing Expert= | |||
| ? | | Manual Fire Control for AA Armament= | + | | Manual Fire Control for AA Armament=1 | |
| | Last Chance=1 | | Last Chance=1 | |||
| Line 67: | Line 71: | |||
| |Consumables=<!-- write text about selection of Consumables below --> | |Consumables=<!-- write text about selection of Consumables below --> | |||
| ? | + | Though given the choice between [[Ship:Consumables#Smoke_Generator|Smoke Generator]], [[Ship:Consumables#Spotting Aircraft|Spotting Aircraft]], and [[Ship:Consumables#Catapult Fighter|Catapult Fighter]], ''Fiji'' captains will want to stick with Smoke Generator given how lightly armored she is. Premium consumables are highly recommended across the board. Players looking to conserve credits (or doubloons) should stick with non-premium [[Ship:Consumables#Hydroacoustic_Search|Hydroacoustic Search]], but are encouraged to equip both [[Ship:Consumables#Damage_Control_Party|Damage Control Party II]] and [[Ship:Consumables#Repair_Party|Repair Party II]]. | ||
| |Camouflage=<!-- write text about useful camouflage below --> | |Camouflage=<!-- write text about useful camouflage below --> | |||
| Line 75: | Line 79: | |||
| |Signals=<!-- write text about best set of signals below --> | |Signals=<!-- write text about best set of signals below --> | |||
| ? | + | Many of the enemy cruisers ''Fiji'' will run across in her games fire primarily high-explosive shells (such as ''[[Myoko]]'' and ''[[Shchors]]''), so equipping the India Yankee [[Ship:Consumables#Signal Flags|signal flag]] is a good idea if it is available for use. Because she has [[Ship:Consumables#Repair_Party|Repair Party]], it's also recommended to mount India Delta improve her survivability. Equal Speed Charlie London can be helpful in picking up useful module upgrades faster, such as the Fire Control System module (Mk VII mod. 2), which gives ''Fiji'' decent range at her tier. | ||
| |Gallery=<!-- write below list of files with description (if necessary) separated with | --><gallery> | |Gallery=<!-- write below list of files with description (if necessary) separated with | --><gallery> | |||
| Line 120: | Line 124: | |||
| ''Fiji'' was commissioned in mid-1940 and was assigned to the Home Fleet where she participated in the blockade of German-controlled Europe. In early 1941, she was transferred to Force H, this time operating off the west coast of France as well as performing convoy escort duties on the Malta route. In May of 1941, ''Fiji'' joined the defense of Greece where she was bombed and sunk on the 22nd of May, 1941. | ''Fiji'' was commissioned in mid-1940 and was assigned to the Home Fleet where she participated in the blockade of German-controlled Europe. In early 1941, she was transferred to Force H, this time operating off the west coast of France as well as performing convoy escort duties on the Malta route. In May of 1941, ''Fiji'' joined the defense of Greece where she was bombed and sunk on the 22nd of May, 1941. | |||
| ? | ''Kenya'' was commissioned in September | + | ''Kenya'' was commissioned in September 1940 and assigned to the Home Fleet. She performed convoy escort duties in the North Atlantic, but in May 1941 was tasked, along with the rest of her squadron, with hunting the ''[[Bismarck]]'' and her supply ships, one of which was caught by ''Kenya''. She then served a short tour in the Mediterranean before departing again for the North Atlantic, this time in Arctic waters. There she participated in operations against German ships and installations on the Norwegian coast until mid-1942. After another short deployment to the Mediterranean, ''Kenya'' was torpedoed by an Italian submarine and returned to the UK for repairs until the end of 1942. From 1943 to the end of the war, ''Kenya'' accompanied the British Pacific Fleet as it conducted raids through the East Indies and into the Central Pacific. Post-war, ''Kenya'' was assigned to the Americas until she was placed in reserve during the final years of the decade. ''Kenya'' was reactivated for the Korean War, and joined Royal Navy forces there. After the war, Kenya again served in the Americas, the Mediterranean, and the Atlantic before once again being placed in reserve in 1958. ''Kenya'' was sold for scrapping in 1962. | |
| ? | Mauritius was commissioned into the Home Fleet in January | + | Mauritius was commissioned into the Home Fleet in January 1941, where she performed convoy escort duties. Reassigned to the Eastern Fleet after war with Japan, she was then sent on to the Mediterranean in 1943 where she participated in the invasions of Sicily, Salerno, and Anzio. Returned to the UK to support Operation Overlord, Mauritius then patrolled the Brittany coast, sinking six small ships. In the last few months of 1944, Mauritius joined the aircraft carriers of the Home Fleet for raids on the Norwegian coast, and in early 1945 engaged in a small naval action with German destroyers. Her post-war service was spent in the Mediterranean until 1949, when she was transferred to the East Indies until 1951. Mauritius was placed in reserve in 1952 until she was sold for scrapping in 1965. | |
| ''Nigeria'' was commissioned in late 1940 and was also assigned to the Home fleet. There she spent the majority of her early war service performing convoy escort duties in the North Atlantic and Arctic, excepting a brief journey to the Mediterranean, where she was torpedoed and damaged by an Italian submarine. Sent to the US for repairs, ''Nigeria'' joined Kenya with the British Pacific Fleet and there she finished the war. Her post-war service station was the South Atlantic until 1950, when she was placed in reserve. In 1954, ''Nigeria'' was sold to India where she was renamed ''Mysore''. ''Mysore'' served in the Indian Navy until the 1980s when she was finally decommissioned and scrapped. | ''Nigeria'' was commissioned in late 1940 and was also assigned to the Home fleet. There she spent the majority of her early war service performing convoy escort duties in the North Atlantic and Arctic, excepting a brief journey to the Mediterranean, where she was torpedoed and damaged by an Italian submarine. Sent to the US for repairs, ''Nigeria'' joined Kenya with the British Pacific Fleet and there she finished the war. Her post-war service station was the South Atlantic until 1950, when she was placed in reserve. In 1954, ''Nigeria'' was sold to India where she was renamed ''Mysore''. ''Mysore'' served in the Indian Navy until the 1980s when she was finally decommissioned and scrapped. | |||
| ? | ''Trinidad'' was commissioned in October | + | ''Trinidad'' was commissioned in October 1941 and performed convoy escort service on the Arctic routes. In March 1942, she engaged several German destroyers attempting to attack convoy PQ-13 and was hit by one of her own torpedoes which had circled. ''Trinidad'' survived and was able to reach Murmansk, but on the return voyage she suffered a bomb hit which so severely damaged her she was evacuated and sunk by HMS ''Matchless'' on 15 May 1942. | |
| ''Gambia'' was assigned to the Eastern Fleet after commissioning in early 1942, and assisted in the occupation of Vichy Madagascar several months later. She then carried out convoy escort duties until mid-1943, when she was engaged in anti-submarine patrols off the Bay of Biscay. In 1944 ''Gambia'' returned to the Eastern Fleet, eventually joining her sisters in the British Pacific Fleet and participating in the carrier raids in the East Indies, Central Pacific, and the home islands of Japan. Post-war, ''Gambia'' continued service with the Eastern Fleet before transferring to the Mediterranean in 1950, the East Indies in 1955, the Mediterranean again in 1958, the South Atlantic in 1960, and finally the Home Fleet before being sent to reserve. She was sold off for scrapping in 1968. | ''Gambia'' was assigned to the Eastern Fleet after commissioning in early 1942, and assisted in the occupation of Vichy Madagascar several months later. She then carried out convoy escort duties until mid-1943, when she was engaged in anti-submarine patrols off the Bay of Biscay. In 1944 ''Gambia'' returned to the Eastern Fleet, eventually joining her sisters in the British Pacific Fleet and participating in the carrier raids in the East Indies, Central Pacific, and the home islands of Japan. Post-war, ''Gambia'' continued service with the Eastern Fleet before transferring to the Mediterranean in 1950, the East Indies in 1955, the Mediterranean again in 1958, the South Atlantic in 1960, and finally the Home Fleet before being sent to reserve. She was sold off for scrapping in 1968. | |||
| Line 132: | Line 136: | |||
| ''Jamaica'' was commissioned in mid-1942 and joined the Home Fleet for Arctic convoy duty. She briefly detoured to support Operation Torch, and then returned to Arctic waters. In 1943, she took part in the Battle of the North Cape where ''Scharnhorst'' was sunk. Post-war, ''Jamaica'' served with the Eastern Fleet through 1947, then in the Americas through 1949, returning to Asia for the Korean War. In reserve from 1951 to 1954, ''Jamaica'' served her final years in the Mediterranean until 1957. She was sold off for scrapping in 1960. | ''Jamaica'' was commissioned in mid-1942 and joined the Home Fleet for Arctic convoy duty. She briefly detoured to support Operation Torch, and then returned to Arctic waters. In 1943, she took part in the Battle of the North Cape where ''Scharnhorst'' was sunk. Post-war, ''Jamaica'' served with the Eastern Fleet through 1947, then in the Americas through 1949, returning to Asia for the Korean War. In reserve from 1951 to 1954, ''Jamaica'' served her final years in the Mediterranean until 1957. She was sold off for scrapping in 1960. | |||
| ? | ''Bermuda'' was commissioned in September | + | ''Bermuda'' was commissioned in September 1941 and joined the Home Fleet for convoy escort duty. In 1942, she participated in Operation Torch, returning to convoy duty on the UK-Gibraltar route. In 1943, ''Bermuda'' began anti-submarine patrols in the Bay of Biscay before joining operations in the Arctic through 1944. Under refit through early 1945, ''Bermuda'' was scheduled to join the British Pacific Fleet when the war ended. Post-war, ''Bermuda'' was assigned to the Eastern Fleet through 1947 when she was sent to the reserve until 1950. From 1950 to 1953, ''Bermuda'' served in the South Atlantic. She was then transferred to the Mediterranean in time to assist with the delivery of aid to earthquake victims in Greece, and was again placed in reserve in 1956, returning to the Mediterranean in 1958. She was finally decommissioned in 1962 and sold for scrap in 1965. | |
| |HistoricalGallery=<!-- write below list of files with description (if necessary) separated with | --><gallery> | |HistoricalGallery=<!-- write below list of files with description (if necessary) separated with | --><gallery> | |||
| ? | File:Hmsfijilaunch.jpg|Launch of HMS ''Fiji'', 31 May 1939 | + | File:Hmsfijilaunch.jpg|Launch of HMS ''Fiji'', 31 May 1939. | |
| ? | File:HMS FIJI, 28 August 1940 FL13125.jpg|HMS ''Fiji'' on 28 August 1940 | + | File:HMS FIJI, 28 August 1940 FL13125.jpg|HMS ''Fiji'' on 28 August 1940. | |
| ? | File:Hmsfijiunderway.jpg|HMS''Fiji'' underway at sea | + | File:Hmsfijiunderway.jpg|HMS''Fiji'' underway at sea. | |
| ? | File:Photo06clFiji1atAlex1941NPBruceConstable.jpg|''Fiji'' in 1941 | + | File:Photo06clFiji1atAlex1941NPBruceConstable.jpg|''Fiji'' in 1941. | |
| ? | File:Gre-fijibombs.jpg|''Fiji'' under bombing attack in Kithera Strait near Crete | + | File:Gre-fijibombs.jpg|''Fiji'' under bombing attack in Kithera Strait near Crete. | |
| ? | File:Hms-fiji-a.jpg|Plaque for HMS ''Fiji'' and her crew | + | File:Hms-fiji-a.jpg|Plaque for HMS ''Fiji'' and her crew. | |
| </gallery> | </gallery> | |||
Revision as of 06:43, 26 October 2016

| Research price70000 exp |
| Purchase price5,500,000 |
| Hit Points27,500 |
| 152 mm/50 BL Mk.XXIII on a Mk.XXIII mount4 х 3 pcs. |
| Rate of Fire7.5 shots/min. |
| Reload Time8 sec. |
| Rotation Speed7 deg./sec. |
| 180 Degree Turn Time25.71 sec. |
| Firing Range13.97 km. |
| Maximum Dispersion129 m. |
| Chance of Fire on Target Caused by HE Shell0 % |
| AP Shell152 mm AP 6crh Mk IV |
| Maximum AP Shell Damage3,100 |
| Initial AP Shell Velocity841 m./s. |
| AP Shell Weight50.8 kg. |
| 102 mm/45 QF Mk.XVI on a Mk.XIX mount4 х 2 pcs. |
| Firing Range5.6 km. |
| Rate of Fire20 shots/min. |
| Reload Time3 sec. |
| HE Shell102 mm HE 35 lb |
| Maximum HE Shell Damage1,500 |
| Initial HE Shell Velocity811 m./s. |
| Chance of Fire on Target Caused by HE Shell6 % |
| 533 mm TR Mk IV2 х 3 pcs. |
| Rate of Fire0.83 shots/min. |
| Reload Time72 sec. |
| Rotation Speed25 deg./sec. |
| 180 Degree Turn Time7.2 sec. |
| Torpedo533 mm Mk IX |
| Maximum Damage15,433 |
| Torpedo Speed61 knot |
| Torpedo Range8.01 km. |
| 102 mm/45 QF Mk.XVI on a Mk.XIX mount4 х 2 pcs. |
| . . . Average Damage per Second37.6 |
| . . . Firing Range5.01 km. |
| 20 mm Oerlikon Mk.I on a Mk.IIA mount5 х 1 pcs. |
| . . . Average Damage per Second18 |
| . . . Firing Range2.01 km. |
| 20 mm Oerlikon Mk.II on a Mk.V mount6 х 2 pcs. |
| . . . Average Damage per Second36.6 |
| . . . Firing Range2.01 km. |
| 40 mm/39 Vickers QF Mk.VIII on a Mk.VI mount2 х 8 pcs. |
| . . . Average Damage per Second39.6 |
| . . . Firing Range2.49 km. |
| Maximum Speed32.5 knot |
| Turning Circle Radius670 m. |
| Rudder Shift Time12.1 sec. |
| Surface Detectability Range11.17 km. |
| Air Detectability Range6.44 km. |

Fiji — British Tier VII cruiser.
The British Navy required light cruisers, so the Town class was realigned. The lead cruiser of the project—HMS Fiji—entered service in 1940. During her first operation, the ship was hit by a torpedo from a German submarine and was subsequently sent for repairs. In 1941, she was transferred to Force H in Gibraltar and then to the Mediterranean Fleet. In May 1941, she helped defend Crete from the landing of German troops. On May 22, Fiji was hit by two German bombers and sank.
Modules
 |
Rate of Fire (shots/min) | 180° Turn Time (sec) | Maximum Dispersion (m) | Maximum HE Shell Damage (HP) | Chance of Fire on Target Caused by HE Shell (%) | Maximum AP Shell Damage (HP) |
Research price (exp) |
Purchase price ( | |
|---|---|---|---|---|---|---|---|---|---|
| 152 mm/50 BL Mk.XXIII on a Mk.XXIII mount | 7.5 | 25.7 | 129 | 3,100 | 0 | 360,000 |
 |
Hit Points (HP) | Armor (mm) | Armor (mm) | Main Turrets (pcs.) | Secondary Gun Turrets (pcs.) | AA Mounts (pcs.) | Torpedo Tubes (pcs.) | Hangar Capacity (pcs.) |
Research price (exp) |
Purchase price ( | |
|---|---|---|---|---|---|---|---|---|---|---|---|
| Fiji (A) | 27,500 | 10 | 114 | 4 | 4 | 5/6/2/4 | 2 | 0 | 550,000 | ||
| Fiji (B) | 31,400 | 10 | 114 | 4 | 4 | 3/10/2/4 | 2 | 18,500 | 1,300,000 |
 |
Rate of Fire (shots/min) | Torpedo Tubes Reload Time (sec) | 180° Turn Time (sec) | Maximum Damage (HP) | Torpedo Speed (knot) | Torpedo Range (km) |
Research price (exp) |
Purchase price ( | |
|---|---|---|---|---|---|---|---|---|---|
| 533 mm Mk IX | 0.8 | 72 | 7.2 | 15,433 | 61 | 8 | 0 | 500,000 | |
| 533 mm Mk IX* | 0.8 | 72 | 7.2 | 15,866 | 61 | 8 | 12,000 | 1,000,000 |
 |
IDS_SHIP_PARAM_SUO_INCREASE_DIST (%) | Maximum Firing Range (km) |
Research price (exp) |
Purchase price ( | |
|---|---|---|---|---|---|
| Mk VII mod. 1 | 0 | 0 | 500,000 | ||
| Mk VII mod. 2 | 0 | 12,500 | 1,200,000 |
 |
Maximum Speed (knot) |
Research price (exp) |
Purchase price ( | |
|---|---|---|---|---|
| Propulsion: 80,000 hp | 32.5 | 0 | 400,000 |
Compatible Upgrades
| Slot 1 |
||||||
|---|---|---|---|---|---|---|
| Slot 2 |
||||||
| Slot 3 |
||||||
| Slot 4 |
Player Opinion
Performance
If Tier VI's Leander is considered "settling in" to the back half of the British cruiser line, then the best advice for captains embarking aboard Tier VII's Fiji for the first time should be: buckle up and enjoy the ride.
Fiji maintains the branch's theme of 152mm main battery rifles, but moves up to mounting twelve of them in four triple-barrel turrets. As such, she is considerably up-gunned from Leander, and successors Edinburgh and Neptune boast identical configurations. At eight rounds per minute (a 7.5 second reload time), her main battery boasts the best rate of fire of all Tier VII cruisers, and she retains the 8.0 km maximum torpedo range of Leander’s upgraded torpedoes. Her unique mix of main battery and longer range torpedoes allow Fiji to hang in fights with equal-tier cruisers of other nations, and maintains her as a threat to enemy destroyers who wander too close.
First-time Fiji captains may think that she feels big for a light cruiser, and they're right. She has an increased beam over Leander, which allowed her designers to fit triple-barreled turrets on her hull. There's a subsequent increase to her detection radius, but she retains most of Leander’s handling characteristics; Fiji’s turning circle is tighter, and her rudder shift is — for all intents and purposes — the same. Her anti-aircraft suite is satisfactory if unremarkable, and is approximately on par with German counterpart Yorck.
Just like Leander, Fiji works best with friendly ships around. She's ideal for backing up allied destroyers, but is ill-equipped to go toe-to-toe with enemy battleships. If kept in combat where she is able to maximize her strengths against enemy cruisers and destroyers, she is an exceptional ship in the hands of the right captain.Pros:
- Good main battery range (15.3 km fully upgraded).
- Highly effective against enemy cruisers and destroyers.
- Retains access to then Repair Party consumable.
- Excellent main battery guns in a user-friendly layout.
- Below average detection range (i.e. good stealth).
- Excellent handling characteristics; quick rudder shift and tight turning circle.
Cons:
- Even lighter armor than Leander; captains must make intelligent use of her consumables to get the most out of Fiji. She will evaporate under concentrated enemy fire.
- Largely ineffective against enemy battleships.
- Anti-aircraft suite is merely average.
- Though her maximum range is respectable, her shell velocity drops off sharply and makes landing hits difficult past medium range.
Research
Optimal Configuration
Upgrades
Most Fiji captains will equip Main Armaments Modification 1 in Upgrade Slot 1, Damage Control System Modification 1 in Upgrade Slot 4, and Steering Gear Modification 2 in Upgrade Slot 5. Only Upgrade Slot 2 offers real options: either AA Guns Modification 2 or Aiming Systems Modification 1. Either is a worthwhile upgrade, and is captain's choice.
Commander Skills
Fiji’s anti-aircraft suite finally provides a decent return for captains who want to invest in Basic Firing Training instead of Basics of Survivability at Tier 1. Tier 2's best skill remains Expert Marksman. Superintendent is recommended at Tier 3 given how dependent Fiji’s performance is on effective use of her consumables. Tier 4 provides an interesting choice between Survivability Expert, Advanced Firing Training, and Manual Fire Control for AA Armament; Survivability Expert seems like a weak choice, but does buff Fiji’s Repair Party heal as well. Manual Fire Control for AA Armament is a more attractive skill for subsequent ships in the line and is worth considering if captains intend to move the commander to the next ship. Tier 5's best choice remains Concealment Expert.
| Recommended Commander Skills | ||||||||
|---|---|---|---|---|---|---|---|---|
| Cost (points) |
Endurance | Attack | Support | Versatility | ||||
| 1 |
|
★ |
|
|
|
|
★★ |
|
| 2 |
★★ |
★★ |
★★★ |
|
|
|
|
★ |
| 3 |
★★★ |
★★★ |
★ |
|
★ |
★★★ |
|
★★ |
| 4 |
|
★★ |
|
|
★★ |
|
|
★★★ |
| Key: ★★★ - Extremely Useful ★★ - Frequently Useful ★ - Occasionally Useful No stars - Meh Χ - Not recommended | ||||||||
Consumables
Though given the choice between Smoke Generator, Spotting Aircraft, and Catapult Fighter, Fiji captains will want to stick with Smoke Generator given how lightly armored she is. Premium consumables are highly recommended across the board. Players looking to conserve credits (or doubloons) should stick with non-premium Hydroacoustic Search, but are encouraged to equip both Damage Control Party II and Repair Party II.
Camouflage
Type 1, 2, or 5 camouflage can be equipped for credits; Types 2 or 5 are recommended at a minimum to reduce the accuracy of incoming shells.
Players who wish to spend doubloons can equip Fiji with Type 17 camouflage that lowers her detection radius, reduces the accuracy of incoming shells, and increases the amount of experience she earns.
Signals
Many of the enemy cruisers Fiji will run across in her games fire primarily high-explosive shells (such as Myoko and Shchors), so equipping the India Yankee signal flag is a good idea if it is available for use. Because she has Repair Party, it's also recommended to mount India Delta improve her survivability. Equal Speed Charlie London can be helpful in picking up useful module upgrades faster, such as the Fire Control System module (Mk VII mod. 2), which gives Fiji decent range at her tier.Gallery
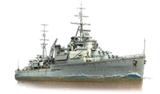
Fiji hides behind an island to stay concealed from the enemy.
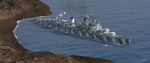
Fiji fires a long range salvo.
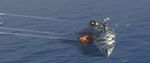
Fiji uses an island to screen its advance.
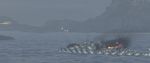
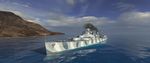
On fire but not out of action, the Fiji fires its main guns at an enemy battleship during a storm.


Historical Info
Historical Gallery


