Fletcher
| Revision as of 00:58, 8 October 2016 | Revision as of 00:16, 1 November 2016 Re-wrote Performance, Commander Skills, and Pros/Cons sections. Added Research, Consumables, Signals, and Upgrades sections. | |||
| Line 3: | Line 3: | |||
| |Anno=<!-- you can write below short description for the ship. it will replace default once. --> | |Anno=<!-- you can write below short description for the ship. it will replace default once. --> | |||
| + | ''Fletcher'' was the lead ship of the most numerous series of destroyers ever produced. They proved to be highly successful ships, combining high speed with efficient AA defenses, quick-firing artillery, and powerful torpedo armament. | |||
| |Performance=<!-- write text about performance in battles below --> | |Performance=<!-- write text about performance in battles below --> | |||
| ? | + | ''Fletcher''-class ships were workhorses of the United States Navy during World War II, and their legacy transfers well into World of Warships. ''Fletcher'' herself is, without question, the most flexible destroyer in the game. She can be tailored — via Commander Skills and Upgrades — to be a torpedo boat with good guns, or to be a murderous gunboat with above average torpedoes. She is one of a handful of destroyers in the game with decent anti-aircraft armament in her top configuration, and can finally equip the [[Ship:Consumables#Defensive AA Fire|Defensive AA Fire]] consumable without having to sacrifice any of her five main battery guns. | ||
| ? | + | As with her immediate predecessors, ''Fletcher''’s main battery is punishing to enemy destroyers at close range. The ballistics of her guns make landing shells reliably on targets beyond 7 or 8 km problematic, but in close-quarters combat she has few rivals. Her upgraded torpedoes are the hardest-hitting torpedoes in the American destroyer line, and she retains ''[[Benson]]''’s ability to fire them from well beyond her detection range. Her torpedoes also remain more difficult to spot than those of her Japanese or Russian counterparts. Most importantly, ''Fletcher'' gains access to [[Ship:Upgrades#Tier_IX.2B_Equipment_.28Slot_3.29|Upgrade Slot 3]], allowing her captain to tailor her to a torpedo-centric build (via Torpedo Tubes Modification 3 and Torpedo Armament Expertise) or a gun-centric build (with Main Battery Modification 3 and Basic Firing Training) with relative ease. | ||
| ? | + | There are only a handful of categories where ''Fletcher'' does not improve upon ''Benson'', and they're relatively minor things (such as air detection radius). Without [[Ship:Consumables#Defensive AA Fire|Defensive AA Fire]] equipped she's still very vulnerable to enemy planes, and she's noticeably slower than ''Benson'' as well. Still, she's a significant upgrade from Tier VIII and a true joy to play... so much so that many players simply stop playing the line at ''Fletcher'' and never move on to ''[[Gearing]]''. | ||
| |Pros=<!-- write list of positive points below. use * as in ordinary wiki-list. --> | |Pros=<!-- write list of positive points below. use * as in ordinary wiki-list. --> | |||
| ? | * | + | * Excellent concealment. | |
| ? | + | * Punishing main battery reload speed; ''Fletcher'' is capable of putting a lot of shells on target in a short amount of time. | ||
| ? | * Very fast turret rotation speed | + | * Very fast turret rotation speed. | |
| ? | * Hard hitting | + | * Hard hitting torpedoes deal more damage and reload faster than Tier X ''[[Gearing]]''. | |
| + | * Can equip the [[Ship:Consumables#Defensive AA Fire|Defensive AA Fire]] consumable without giving up any of her main battery guns. | |||
| |Cons=<!-- write list of negative points below. use * as in ordinary wiki-list. --> | |Cons=<!-- write list of negative points below. use * as in ordinary wiki-list. --> | |||
| ? | * Still fragile | + | * Still fragile; engaging Russian destroyers beyond 6km range is inadvisable, and ''Fletcher'' remains vulnerable to cruisers of all tiers she will face. | |
| ? | * | + | * As good as her torpedoes are, ''[[Kagero]]''’s still pack more punch with greater range. | |
| ? | * | + | * Slower than ''[[Benson]]''. | |
| ? | * Upgraded | + | * Upgraded torpedo range is still 6km shorter than ''[[Gearing]]''’s. | |
| + | ||||
| + | |Research=<!-- write text about priority sequence of research below --> | |||
| + | ''Fletcher'' is likely to spend most of her time in close-combat with enemy destroyers, making Hull (B) the best upgrade to invest in first (for the extra hit points). The Mk16 mod. 1 Torpedo upgrade should come next, as it is a drastic upgrade to her torpedo armament. The Fire Control System upgrade should be saved for last or skipped entirely. | |||
| |OptimalConfiguration=<!-- write some general text about selection of optimal configuration below (optional)--> | |OptimalConfiguration=<!-- write some general text about selection of optimal configuration below (optional)--> | |||
| + | ''Fletcher'' is a highly flexible destroyer capable of being tailored in a variety of different ways. Most captains, however, will choose to focus on improving one of her main armaments to the maximum extent possible. | |||
| + | ||||
| + | |Upgrades=<!-- write text about best upgrades below --> | |||
| + | Most ''Fletcher'' captains will equip Main Armaments Modification 1 in [[Ship:Upgrades#Tier_I.2B_Equipment_.28Slot_1.29|Upgrade Slot 1]], AA Guns Modification 2 or Aiming Systems Modification 1 in [[Ship:Upgrades#Tier_V.2B_Equipment_.28Slot_2.29|Upgrade Slot 2]], Propulsion Modification 1 in [[Ship:Upgrades#Tier_III.2B_Equipment_.28Slot_4.29|Upgrade Slot 4]], Propulsion Modification 2 or Steering Gears Modification 2 in [[Ship:Upgrades#Tier_VI.2B_Equipment_.28Slot_5.29|Upgrade Slot 5]], and Concealment Systems Modification 1 in [[Ship:Upgrades#Tier_VIII.2B_Equipment_.28Slot_6.29|Upgrade Slot 6]]. The upgrade chosen for [[Ship:Upgrades#Tier_IX.2B_Equipment_.28Slot_3.29|Upgrade Slot 3]] — and the corresponding commander skills — is where most of the customization lies. | |||
| + | ||||
| + | '''Torpedo Build:''' Captains wishing to focus their ''Fletcher'' as a torpedo boat will opt for Torpedo Tubes Modification 3 in Upgrade Slot 3. This lowers her torpedo reload to only 90 seconds. If her commander invests in the Tier 2 skill Torpedo Armament Expertise, the reload time drops to a scant 81 seconds. Given how hard her torpedoes hit and how fast they travel, this configuration of ''Fletcher'' can give even the vaunted Japanese destroyers a run for their money in the torpedo damage category. | |||
| + | ||||
| + | '''Main Battery Build:''' The other solid choice for ''Fletcher'' in Upgrade Slot 3 is Main Battery Modification 3. When coupled with Tier 1 commander skill Basic Firing Training, her rate of fire increases significantly. In this configuration, the reload time on her main battery guns drops to 2.6 seconds (from a base of 3.3 seconds). | |||
| |CommanderSkills=<!-- write text about best set of Commander Skills below --> | |CommanderSkills=<!-- write text about best set of Commander Skills below --> | |||
| ? | + | Regardless of other choices, ''Fletcher'' commanders should always invest in Basic Firing Training at Tier 1 and Concealment Expert at Tier 5. Where points go in between is a matter of choice and risk. | ||
| + | ||||
| + | Tier 2 offers the typical default for American destroyers: Last Stand. However, a '''Torpedo Build''' ''Fletcher'' may wish to take Torpedo Armament Expertise and rely on [[Ship:Consumables#Damage_Control_Party|Damage Control Party]] to keep their engine operating when under fire. It's a risky choice, but it can pay off in the hands of a heads-up captain. | |||
| + | ||||
| + | Tier 3 is, once again, a personal choice: Vigilance is recommended over Superintendent if premium consumables are equipped; Superintendent is recommended before Vigilance otherwise. | |||
| + | ||||
| + | Tier 4 offers several strong skills: Survivability Expert is the safe choice, as another 3600 hit points is nothing to sneeze at and gives her a health pool in excess of 20,000 points. Demolition Expert is attractive for a '''Main Battery Build''' ''Fletcher'', as she is capable of setting a lot of fires with her shortened reload time. Captains concerned about enemy aircraft could opt for Advanced Firing Training or Manual Fire Control for AA Armament. The latter is the better option, as ''Fletcher'' will run most of the time with her anti-aircraft guns disabled in order to avoid detection. | |||
| {{Commander Skills | {{Commander Skills | |||
| | Expert Loader= | | Expert Loader= | |||
| | Basic Firing Training=3 | | Basic Firing Training=3 | |||
| ? | | Basics of Survivability= | + | | Basics of Survivability= | |
| | Expert Rear Gunner= | | Expert Rear Gunner= | |||
| | Expert Marksman= | | Expert Marksman= | |||
| | Torpedo Armament Expertise=2 | | Torpedo Armament Expertise=2 | |||
| ? | | Fire Prevention= | + | | Fire Prevention= | |
| ? | | Incoming Fire Alert= | + | | Incoming Fire Alert= | |
| | Last Stand=3 | | Last Stand=3 | |||
| | Torpedo Acceleration= | | Torpedo Acceleration= | |||
| ? | | High Alert= | + | | High Alert=2 | |
| | Vigilance=3 | | Vigilance=3 | |||
| | Dogfighting Expert = | | Dogfighting Expert = | |||
| ? | | Superintendent= | + | | Superintendent=3 | |
| | Demolition Expert=2 | | Demolition Expert=2 | |||
| ? | | Advanced Firing Training= | + | | Advanced Firing Training=1 | |
| ? | | Survivability Expert= | + | | Survivability Expert=3 | |
| | Aircraft Servicing Expert= | | Aircraft Servicing Expert= | |||
| ? | | Manual Fire Control for AA Armament= | + | | Manual Fire Control for AA Armament=2 | |
| ? | | Last Chance= | + | | Last Chance=1 | |
| | Manual Fire Control for Secondary Armament= | | Manual Fire Control for Secondary Armament= | |||
| ? | | Preventative Maintenance= | + | | Preventative Maintenance=2 | |
| | Concealment Expert=3 | | Concealment Expert=3 | |||
| | Air Supremacy= | | Air Supremacy= | |||
| Line 60: | Line 79: | |||
| }} | }} | |||
| ? | |Gallery=<!-- write below list of files without tags. description (if necessary) for each should be separated | + | |Consumables=<!-- write text about selection of Consumables below --> | |
| + | Even if her captain doesn't sink any commander skill points or upgrades into improving her anti-aircraft suite, [[Ship:Consumables#Defensive AA Fire|Defensive AA Fire]] is recommended over [[Ship:Consumables#Engine Boost|Engine Boost]] due to the extreme threat that enemy aircraft create for a ''Fletcher''. Simply having it equipped and demonstrating to an enemy carrier that it is available is frequently a deterrent to them swarming ''Fletcher'' with bombers or assigning a fighter squadron to keep her spotted. | |||
| + | ||||
| + | Beyond that, [[Ship:Consumables#Damage Control Party|Damage Control Party II]] is worth the credits (or doubloons) for the shortened cooldown on repairing broken modules. | |||
| + | ||||
| + | |Camouflage=<!-- write text about useful camouflage below --> | |||
| + | [[Ship:Camouflage#Standard Camouflage|Type 1, 2, or 5 camouflage]] can be equipped for credits; Types 1 or 5 are recommended at a minimum to reduce detectibility range. | |||
| + | ||||
| + | Players who wish to spend doubloons can equip ''Fletcher'' with [[Ship:Camouflage#Permanent_Camouflage|Type 19 camouflage]] that lowers her detection radius, reduces the accuracy of incoming shells, reduces her repair costs, and increases the amount of experience she earns. | |||
| + | ||||
| + | |Signals=<!-- write text about best set of signals below --> | |||
| + | Captains who have opted for a '''Torpedo Build''' ''Fletcher'' will want to equip a Juliet Whiskey Unaone [[Ship:Consumables#Signal Flags|signal flag]] in order to maximize potential damage from torpedo hits. Throwing on a Sierra Mike flag is an excellent way to help make up for her loss of speed from ''[[Benson]]''. November Foxtrot and Juliet Charlie are also highly recommended, if available. | |||
| + | ||||
| + | |Gallery=<!-- write below list of files without tags. description (if necessary) for each should be separated by | --><gallery> | |||
| </gallery>|History=<!-- write text below --> | </gallery>|History=<!-- write text below --> | |||
| ? | The ''Fletcher'' class (named for Admiral Frank F. Fletcher) was the largest class of destroyer ordered, and was also one of the most successful and popular with the destroyer men themselves. Compared to earlier classes built for the Navy, they carried a significant increase in anti-aircraft weapons and other weaponry, which caused displacements to rise. Their flush deck construction added structural strength, although it did make them rather cramped, as less space was available below decks compared with a raised forecastle. | + | The ''Fletcher'' class (named for Admiral Frank F. Fletcher) was the largest class of destroyer ever ordered, and was also one of the most successful and popular with the destroyer men themselves. Compared to earlier classes built for the Navy, they carried a significant increase in anti-aircraft weapons and other weaponry, which caused displacements to rise. Their flush deck construction added structural strength, although it did make them rather cramped, as less space was available below decks compared with a raised forecastle. | |
| == Design: == | == Design: == | |||
| Line 83: | Line 115: | |||
| With the outbreak of the Korean War many were returned to active duty. During this time 39 were refitted, reducing their overall main armament and the number of torpedo tubes to accommodate other weapons. A new ahead-throwing weapon called Weapon Alpha was installed in many of the ships. Others carried trainable Hedgehogs. Eighteen ships were redesignated as escort destroyers (DDE), optimized for anti-submarine warfare. | With the outbreak of the Korean War many were returned to active duty. During this time 39 were refitted, reducing their overall main armament and the number of torpedo tubes to accommodate other weapons. A new ahead-throwing weapon called Weapon Alpha was installed in many of the ships. Others carried trainable Hedgehogs. Eighteen ships were redesignated as escort destroyers (DDE), optimized for anti-submarine warfare. | |||
| ? | |HistoricalGallery=<!-- write below list of files without tags. description (if necessary) for each should be separated | + | |HistoricalGallery=<!-- write below list of files without tags. description (if necessary) for each should be separated by | --><gallery> | |
| ? | File:Fletcherclass.jpg|USS Fletcher in her original layout, 1942 | + | File:Fletcherclass.jpg|USS ''Fletcher'' in her original layout, 1942. | |
| File:Fletcher-class destroyer technical drawing 1954.jpeg | File:Fletcher-class destroyer technical drawing 1954.jpeg | |||
| ? | File:U.S. NAVY MUSEUM, WASHINGTON D.C..jpg|The bridge of Fletcher at the U.S. Navy Museum | + | File:U.S. NAVY MUSEUM, WASHINGTON D.C..jpg|The bridge of ''Fletcher'' at the U.S. Navy Museum. | |
| + | ||||
| + | </gallery> | |||
| ? | + | |Video=<!-- put below video clips with using template VideoYT. You can use html-tags for formatting. --> | ||
| |Ref= <!-- write below --> | |Ref= <!-- write below --> | |||
| }}<!-- DO NOT DELETE THIS LINE. DO NOT INSERT ANYTHING BELOW THIS LINE --> | }}<!-- DO NOT DELETE THIS LINE. DO NOT INSERT ANYTHING BELOW THIS LINE --> | |||
Revision as of 00:16, 1 November 2016

| Research price158000 exp |
| Purchase price12,850,000 |
| Hit Points13,900 |
| 127 mm/38 Mk.12 on a Mk.30 mod.0 mount5 х 1 pcs. |
| Rate of Fire17.96 shots/min. |
| Reload Time3.34 sec. |
| Rotation Speed34 deg./sec. |
| 180 Degree Turn Time5.29 sec. |
| Firing Range11.77 km. |
| Maximum Dispersion103 m. |
| HE Shell127 mm HE Mk32 |
| Maximum HE Shell Damage1,800 |
| Chance of Fire on Target Caused by HE Shell5 % |
| Initial HE Shell Velocity792 m./s. |
| HE Shell Weight24.5 kg. |
| AP Shell127 mm AP/SC Mk38 |
| Maximum AP Shell Damage2,100 |
| Initial AP Shell Velocity792 m./s. |
| AP Shell Weight25 kg. |
| 533 mm Mk152 х 5 pcs. |
| Rate of Fire0.49 shots/min. |
| Reload Time122 sec. |
| Rotation Speed25 deg./sec. |
| 180 Degree Turn Time7.2 sec. |
| TorpedoMk15 mod. 3 |
| Maximum Damage16,633 |
| Torpedo Speed55 knot |
| Torpedo Range9.15 km. |
| 127 mm/38 Mk.12 on a Mk.30 mod.0 mount5 х 1 pcs. |
| . . . Average Damage per Second53.5 |
| . . . Firing Range5.01 km. |
| 40 mm/56 Bofors on a Mk.1 mount3 х 2 pcs. |
| . . . Average Damage per Second33.9 |
| . . . Firing Range3.51 km. |
| 20 mm Oerlikon on a Mk.4 mount9 х 1 pcs. |
| . . . Average Damage per Second32.4 |
| . . . Firing Range2.01 km. |
| Maximum Speed36.5 knot |
| Turning Circle Radius560 m. |
| Rudder Shift Time4.5 sec. |
| Surface Detectability Range7.16 km. |
| Air Detectability Range3.24 km. |

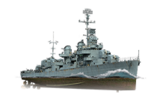
Fletcher — American Tier IX destroyer.
Fletcher was the lead ship of the most numerous series of destroyers ever produced. They proved to be highly successful ships, combining high speed with efficient AA defenses, quick-firing artillery, and powerful torpedo armament.
Modules
 |
Rate of Fire (shots/min) | 180° Turn Time (sec) | Maximum Dispersion (m) | Maximum HE Shell Damage (HP) | Chance of Fire on Target Caused by HE Shell (%) | Maximum AP Shell Damage (HP) |
Research price (exp) |
Purchase price ( | |
|---|---|---|---|---|---|---|---|---|---|
| 127 mm/38 Mk.12 on a Mk.30 mod.0 mount | 18 | 5.3 | 103 | 1,800 | 5 | 2,100 | 0 | 1,050,000 |
 |
Hit Points (HP) | Armor (mm) | Armor (mm) | Main Turrets (pcs.) | Secondary Gun Turrets (pcs.) | AA Mounts (pcs.) | Torpedo Tubes (pcs.) | Hangar Capacity (pcs.) |
Research price (exp) |
Purchase price ( | |
|---|---|---|---|---|---|---|---|---|---|---|---|
| Fletcher (A) | 13,900 | 13 | 20 | 5 | 9/3/5 | 2 | 0 | 1,400,000 | |||
| Fletcher (B) | 17,100 | 13 | 20 | 5 | 7/5 | 2 | 36,000 | 3,250,000 |
 |
Rate of Fire (shots/min) | Torpedo Tubes Reload Time (sec) | 180° Turn Time (sec) | Maximum Damage (HP) | Torpedo Speed (knot) | Torpedo Range (km) |
Research price (exp) |
Purchase price ( | |
|---|---|---|---|---|---|---|---|---|---|
| Mk15 mod. 3 | 0.5 | 122 | 7.2 | 16,633 | 55 | 9.2 | 0 | 1,470,000 | |
| Mk16 mod. 1 | 0.6 | 106 | 7.2 | 19,033 | 66 | 10.5 | 34,500 | 2,400,000 |
 |
IDS_SHIP_PARAM_SUO_INCREASE_DIST (%) | Maximum Firing Range (km) |
Research price (exp) |
Purchase price ( | |
|---|---|---|---|---|---|
| Mk9 mod. 1 | 0 | 0 | 880,000 | ||
| Mk9 mod. 2 | 0 | 22,500 | 1,850,000 |
 |
Maximum Speed (knot) |
Research price (exp) |
Purchase price ( | |
|---|---|---|---|---|
| Propulsion: 60,000 hp | 36.5 | 0 | 1,100,000 |
Compatible Upgrades
| Slot 1 |
|||||
|---|---|---|---|---|---|
| Slot 2 |
|||||
| Slot 3 |
|||||
| Slot 4 |
|||||
| Slot 5 |
|||||
| Slot 6 |
Player Opinion
Performance
Fletcher-class ships were workhorses of the United States Navy during World War II, and their legacy transfers well into World of Warships. Fletcher herself is, without question, the most flexible destroyer in the game. She can be tailored — via Commander Skills and Upgrades — to be a torpedo boat with good guns, or to be a murderous gunboat with above average torpedoes. She is one of a handful of destroyers in the game with decent anti-aircraft armament in her top configuration, and can finally equip the Defensive AA Fire consumable without having to sacrifice any of her five main battery guns.
As with her immediate predecessors, Fletcher’s main battery is punishing to enemy destroyers at close range. The ballistics of her guns make landing shells reliably on targets beyond 7 or 8 km problematic, but in close-quarters combat she has few rivals. Her upgraded torpedoes are the hardest-hitting torpedoes in the American destroyer line, and she retains Benson’s ability to fire them from well beyond her detection range. Her torpedoes also remain more difficult to spot than those of her Japanese or Russian counterparts. Most importantly, Fletcher gains access to Upgrade Slot 3, allowing her captain to tailor her to a torpedo-centric build (via Torpedo Tubes Modification 3 and Torpedo Armament Expertise) or a gun-centric build (with Main Battery Modification 3 and Basic Firing Training) with relative ease.
There are only a handful of categories where Fletcher does not improve upon Benson, and they're relatively minor things (such as air detection radius). Without Defensive AA Fire equipped she's still very vulnerable to enemy planes, and she's noticeably slower than Benson as well. Still, she's a significant upgrade from Tier VIII and a true joy to play... so much so that many players simply stop playing the line at Fletcher and never move on to Gearing.Pros:
- Excellent concealment.
- Punishing main battery reload speed; Fletcher is capable of putting a lot of shells on target in a short amount of time.
- Very fast turret rotation speed.
- Hard hitting torpedoes deal more damage and reload faster than Tier X Gearing.
- Can equip the Defensive AA Fire consumable without giving up any of her main battery guns.
Cons:
- Still fragile; engaging Russian destroyers beyond 6km range is inadvisable, and Fletcher remains vulnerable to cruisers of all tiers she will face.
- As good as her torpedoes are, Kagero’s still pack more punch with greater range.
- Slower than Benson.
- Upgraded torpedo range is still 6km shorter than Gearing’s.
Research
Optimal Configuration
Fletcher is a highly flexible destroyer capable of being tailored in a variety of different ways. Most captains, however, will choose to focus on improving one of her main armaments to the maximum extent possible.
Upgrades
Most Fletcher captains will equip Main Armaments Modification 1 in Upgrade Slot 1, AA Guns Modification 2 or Aiming Systems Modification 1 in Upgrade Slot 2, Propulsion Modification 1 in Upgrade Slot 4, Propulsion Modification 2 or Steering Gears Modification 2 in Upgrade Slot 5, and Concealment Systems Modification 1 in Upgrade Slot 6. The upgrade chosen for Upgrade Slot 3 — and the corresponding commander skills — is where most of the customization lies.
Torpedo Build: Captains wishing to focus their Fletcher as a torpedo boat will opt for Torpedo Tubes Modification 3 in Upgrade Slot 3. This lowers her torpedo reload to only 90 seconds. If her commander invests in the Tier 2 skill Torpedo Armament Expertise, the reload time drops to a scant 81 seconds. Given how hard her torpedoes hit and how fast they travel, this configuration of Fletcher can give even the vaunted Japanese destroyers a run for their money in the torpedo damage category.
Main Battery Build: The other solid choice for Fletcher in Upgrade Slot 3 is Main Battery Modification 3. When coupled with Tier 1 commander skill Basic Firing Training, her rate of fire increases significantly. In this configuration, the reload time on her main battery guns drops to 2.6 seconds (from a base of 3.3 seconds).
Commander Skills
Regardless of other choices, Fletcher commanders should always invest in Basic Firing Training at Tier 1 and Concealment Expert at Tier 5. Where points go in between is a matter of choice and risk.
Tier 2 offers the typical default for American destroyers: Last Stand. However, a Torpedo Build Fletcher may wish to take Torpedo Armament Expertise and rely on Damage Control Party to keep their engine operating when under fire. It's a risky choice, but it can pay off in the hands of a heads-up captain.
Tier 3 is, once again, a personal choice: Vigilance is recommended over Superintendent if premium consumables are equipped; Superintendent is recommended before Vigilance otherwise.
Tier 4 offers several strong skills: Survivability Expert is the safe choice, as another 3600 hit points is nothing to sneeze at and gives her a health pool in excess of 20,000 points. Demolition Expert is attractive for a Main Battery Build Fletcher, as she is capable of setting a lot of fires with her shortened reload time. Captains concerned about enemy aircraft could opt for Advanced Firing Training or Manual Fire Control for AA Armament. The latter is the better option, as Fletcher will run most of the time with her anti-aircraft guns disabled in order to avoid detection.
| Recommended Commander Skills | ||||||||
|---|---|---|---|---|---|---|---|---|
| Cost (points) |
Endurance | Attack | Support | Versatility | ||||
| 1 |
|
★★ |
|
|
|
|
|
|
| 2 |
★★ |
★★ |
|
|
|
|
|
★★★ |
| 3 |
|
★★★ |
★★ |
|
★★★ |
★★★ |
★★ |
★★★ |
| 4 |
|
|
|
|
★ |
|
|
★★★ |
| Key: ★★★ - Extremely Useful ★★ - Frequently Useful ★ - Occasionally Useful No stars - Meh Χ - Not recommended | ||||||||
Consumables
Even if her captain doesn't sink any commander skill points or upgrades into improving her anti-aircraft suite, Defensive AA Fire is recommended over Engine Boost due to the extreme threat that enemy aircraft create for a Fletcher. Simply having it equipped and demonstrating to an enemy carrier that it is available is frequently a deterrent to them swarming Fletcher with bombers or assigning a fighter squadron to keep her spotted.
Beyond that, Damage Control Party II is worth the credits (or doubloons) for the shortened cooldown on repairing broken modules.
Camouflage
Type 1, 2, or 5 camouflage can be equipped for credits; Types 1 or 5 are recommended at a minimum to reduce detectibility range.
Players who wish to spend doubloons can equip Fletcher with Type 19 camouflage that lowers her detection radius, reduces the accuracy of incoming shells, reduces her repair costs, and increases the amount of experience she earns.
Signals
Captains who have opted for a Torpedo Build Fletcher will want to equip a Juliet Whiskey Unaone signal flag in order to maximize potential damage from torpedo hits. Throwing on a Sierra Mike flag is an excellent way to help make up for her loss of speed from Benson. November Foxtrot and Juliet Charlie are also highly recommended, if available.Gallery
Historical Info
Historical Gallery


