Großer Kurfürst
| Revision as of 19:46, 3 April 2020 references to ship - worldofwarships.com & YouTube | Revision as of 04:29, 9 April 2020 | |||
| Line 176: | Line 176: | |||
| The ships' main armor decks were substantially strengthened: the deck was increased in thickness from 120 mm (4.7 in) to 200 mm (7.9 in) and the sloped armor at the edges was thickened from 150 mm (5.9 in) to 175 mm (6.9 in). Wartime experience with the ''Scharnhorst'' class indicated that the torpedo-defense system was insufficiently strong to protect the H-39 design from underwater damage. Beam was therefore increased, with greater width added at the ends of the armored citadel to allow a greater distance between the side wall and the torpedo bulkhead. The stern section of the torpedo bulkhead was also strengthened structurally to allow it to better contain the force of an underwater explosion. A triple bottom was also included in the design, the first time a feature was used in a German warship design. The loss of ''Bismarck'' in May 1941 also influenced the design; two large skegs were added to the outboard shafts to protect them and increase support for the stern while in drydock. The rudder system was also designed with an explosive charge to detach the rudders in the event they became jammed. | The ships' main armor decks were substantially strengthened: the deck was increased in thickness from 120 mm (4.7 in) to 200 mm (7.9 in) and the sloped armor at the edges was thickened from 150 mm (5.9 in) to 175 mm (6.9 in). Wartime experience with the ''Scharnhorst'' class indicated that the torpedo-defense system was insufficiently strong to protect the H-39 design from underwater damage. Beam was therefore increased, with greater width added at the ends of the armored citadel to allow a greater distance between the side wall and the torpedo bulkhead. The stern section of the torpedo bulkhead was also strengthened structurally to allow it to better contain the force of an underwater explosion. A triple bottom was also included in the design, the first time a feature was used in a German warship design. The loss of ''Bismarck'' in May 1941 also influenced the design; two large skegs were added to the outboard shafts to protect them and increase support for the stern while in drydock. The rudder system was also designed with an explosive charge to detach the rudders in the event they became jammed. | |||
| ? | + | The new design measured 275 m (902 ft 3 in) long at the waterline and 282 m (925 ft 2 in) long overall, had a beam of 39 m (127 ft 11 in), and a draft of up to 12.2 m (40 ft 0 in) at full load displacement of about 74,800 long tons (76,000 t). The increase in weight, while engine power remained constant, reduced speed to 28.8 kn (53.3 km/h; 33.1 mph). However, German naval constructors were not satisfied with the torpedo side-protection system, and a series of design changes were approved by Admiral Raeder on 15 November 1941; these included increasing the side-protection system depth from 5.5 m (18 ft 1 in) to 6.65 m (21 ft 10 in), increasing beam to 40.5 m (132 ft 10 in), and greater hull depth and freeboard at full load. These changes resulted in full load displacement increasing to 77,752 long tons (79,000 t) and maximum speed further decreasing to 28 kn (52 km/h; 32 mph). | ||
| + | ||||
| + | As detailed design continued into 1942, the OKM planned to begin construction six to nine months after demobilization, initially at Blohm & Voss and the Deutsche Werke shipyard in Kiel. Deschimag, which had been awarded the contract for "J", could no longer be used due to the increase in draft, which precluded travel through the shallow Weser. Following the completion of a new, larger dock at the Kriegsmarinewerft in Wilhelmshaven, work would also be done there. The increased size of the ships would have lengthened the building time from four to five years. | |||
| ====Further Design Studies (H-42 to H-44)==== | ====Further Design Studies (H-42 to H-44)==== | |||
Revision as of 04:29, 9 April 2020
[[File:<value_unset_error>_icon_small.png|<value_unset_error>|link=Ship:<value_unset_error>]] [[File:<value_unset_error>_icon_small.png|<value_unset_error>|link=Ship:<value_unset_error>]] [[File:<value_unset_error>_icon_small.png|<value_unset_error>|link=Ship:<value_unset_error>]] |
| File:icon small.png |
[[File:<value_unset_error>_icon_small.png|<value_unset_error>|link=Ship:<value_unset_error>]] [[File:<value_unset_error>_icon_small.png|<value_unset_error>|link=Ship:<value_unset_error>]] [[File:<value_unset_error>_icon_small.png|<value_unset_error>|link=Ship:<value_unset_error>]] |
| Research pricelevel;mark_id;mark;shortmark_id;shortMark;description_id;description;price_credit;price_gold;nation;icon;name;aa_caliber_0;aa_caliber_1;aa_caliber_2;aa_caliber_3;aa_damage;aa_defense;aa_maxDist;aaMaxdist;aa_maxDist_0;aaMaxdist0;aa_maxDist_1;aaMaxdist1;aa_maxDist_2;aaMaxdist2;aa_maxDist_3;aaMaxdist3;aa_name_0;aaName0;aa_name_1;aaName1;aa_name_2;aaName2;aa_name_3;aaName3;aa_numBarrels_0;aaNumbarrels0;aa_numBarrels_1;aaNumbarrels1;aa_numBarrels_2;aaNumbarrels2;aa_numBarrels_3;aaNumbarrels3;aa_numGuns_0;aaNumguns0;aa_numGuns_1;aaNumguns1;aa_numGuns_2;aaNumguns2;aa_numGuns_3;aaNumguns3;air_support;air_support_bombDamage_depthcharge;air_support_bombName_depthcharge;air_support_maxDist_depthcharge;air_support_numBombsOnPlane_depthcharge;air_support_numPlanesInCharge_depthcharge;air_support_numSquadrons_depthcharge;air_support_planeMaxHealth_depthcharge;air_support_planeName_depthcharge;air_support_reloadTime_depthcharge;armour_casMax;armourCasmax;armour_casMin;armourCasmin;armour_citMax;armourCitmax;armour_citMin;armourCitmin;armour_deckMax;armourDeckmax;armour_deckMin;armourDeckmin;armour_extremitiesMax;armourExtremitiesmax;armour_extremitiesMin;armourExtremitiesmin;armour_rangeMax;armourRangemax;armour_rangeMin;armourRangemin;artillery_weaponry;atba_bulletMassHE_0;atba_bulletMassHE_1;atba_bulletSpeedHE_0;atba_bulletSpeedHE_1;atba_burnProbHE_0;atba_burnProbHE_1;atba_caliber_0;atba_caliber_1;atba_damageHE_0;atba_damageHE_1;atba_maxDist;atbaMaxdist;atba_nameHE_0;atba_nameHE_1;atba_name_0;atbaName0;atba_name_1;atbaName1;atba_numBarrels_0;atba_numBarrels_1;atba_numGuns_0;atba_numGuns_1;atba_piercingHE_0;atba_piercingHE_1;atba_shotDelay_0;atba_shotDelay_1;atba_shotSpeed;atba_shotSpeed_0;atba_shotSpeed_1;battleLevelRangeMax;battleLevelRangeMin;durability;floodDamage;health;mobility;mobility_maxSpeed;mobilityMaxspeed;mobility_rudderTime;mobilityRuddertime;mobility_turningRadius;mobilityTurningradius;planes_aviation;planes_bomber_forsageRestore;planes_bomber_forsageTime;planes_bomber_hangarVolume;planes_bomber_level;planes_bomber_maxSpeed;planes_bomber_name;planes_bomber_numAttackers;planes_bomber_numInSquadron;planes_bomber_numSquadrons;planesBomberNumsquadrons;planes_bomber_planesRestoreTime;planes_bomber_speed;planes_bomber_torpedo_maxDamage;planes_bomber_torpedo_maxDist;planes_bomber_torpedo_name;planes_bomber_torpedo_speed;planes_bomber_visibility;planes_bomber_vitality;planes_dive_bomb_bulletMassHE_alt;planes_dive_bomb_bulletMass_alt;planes_dive_bomb_bulletSpeedHE_alt;planes_dive_bomb_bulletSpeed_alt;planes_dive_bomb_burnProbHE_alt;planes_dive_bomb_burnProb_alt;planes_dive_bomb_damageHE_alt;planes_dive_bomb_nameHE_alt;planes_dive_bomb_numBombsHE_alt;planes_dive_forsageRestore_alt;planes_dive_forsageTime_alt;planes_dive_hangarVolume_alt;planes_dive_level_alt;planes_dive_maxSpeed_alt;planes_dive_name_alt;planes_dive_numAttackers_alt;planes_dive_numInSquadron_alt;planes_dive_numSquadrons_alt;planes_dive_planesRestoreTime_alt;planes_dive_speed_alt;planes_dive_visibility_alt;planes_dive_vitality_alt;planes_fighter_forsageRestore_alt;planes_fighter_forsageTime_alt;planes_fighter_hangarVolume_alt;planes_fighter_level_alt;planes_fighter_maxSpeed_alt;planes_fighter_name_alt;planes_fighter_numAttackers_alt;planes_fighter_numInSquadron_alt;planes_fighter_numSquadrons_alt;planes_fighter_planesRestoreTime_alt;planes_fighter_rocket_bulletMassHE_alt;planes_fighter_rocket_bulletSpeedHE_alt;planes_fighter_rocket_burnProbHE_alt;planes_fighter_rocket_damageHE_alt;planes_fighter_rocket_nameHE_alt;planes_fighter_rocket_numBombsHE_alt;planes_fighter_speed_alt;planes_fighter_visibility_alt;planes_fighter_vitality_alt;slotsNum;visibility_detection;visibility_distByPlane;visibilityDistbyplane;visibility_distByPlane_fire;visibility_distByPlane_mg;visibility_distByShip;visibilityDistbyship;visibility_distByShip_fire;visibility_distByShip_mg;visibility_distByShip_smoke;visibility_distBySubmarine exp |
| Purchase priceSpecial |
| Maximum SpeedExpression error: Unexpected * operator. knot |
[[Ship:|]] — N/A special premium Tier N/A.
One of the last stages of a battleship design for the German Navy. The ship was fitted with triple main turrets designed at the outbreak of World War II. The project was developed based on combat experience and featured powerful torpedo protection, enhanced horizontal armor and more advanced AA guns.
Modules
Compatible Upgrades
| Slot 1 |
||||||||||||||||||||||||||||
|---|---|---|---|---|---|---|---|---|---|---|---|---|---|---|---|---|---|---|---|---|---|---|---|---|---|---|---|---|
| Slot 2 |
Damage Control System Modification 3 | |||||||||||||||||||||||||||
| Slot 3 |
||||||||||||||||||||||||||||
| Slot 4 |
||||||||||||||||||||||||||||
| Slot 5 |
Torpedo Tubes Modification 3 |
Reinforced Bulkheads | ||||||||||||||||||||||||||
| Slot 6 |
Automated Gun and Fuel Systems |
Player Opinion
Performance
Sharing the name with one of König’s sister ships, ' (translation: "Great Elector", from the title of Frederick William, Elector of Brandenburg) sits atop the German battleship line at Tier X. She lived up to her name when released, breaking the then long-standing stalemate of Yamato and Montana by simply entering into the fray. Subtlety is not '’s forte because she is detected from 18.1km.
Due to her size she possesses an effective array of secondaries along with two pairs of guns — the same caliber as her predecessor Friedrich der Große — but with triple mounts with the same AB-XY configuration. Even Montana, which shares the same triple mount turret style and layout, will respect her for her heavy broadside, while the responsive turret traverse — among the quickest turret traverse speeds of Tier X battleships — can be made even faster with upgrades. Even more, she can surpass the American battleship through barrel diameter, with her last gun upgrade being 420mm barrels still mounted in four triple turrets while still retaining the excellent traverse speed. In addition, her bustling secondary batteries ensure that any enemy getting close enough for the guns to unload will be constantly whittled down, dealing heavy damage over time or outright destroying low health ships that get too close.
Her AA is fairly typical of other German battleships, with an adequate long range punch that sadly does not follow through as planes come closer to the ship itself. Planes that make it past the long range armament will have no trouble hitting her due to her large size and abysmal turning circle. Her armor is also typical of German battleship design, with a turtle-back armor scheme that will make citadeling her at close range near impossible. Her deck armor is also quite substantial at 50mm along the center meaning that long range plunging fire from low caliber guns will have difficulty penetrating her. With her large hit point pool — the largest in the game — she will be able to weather a large amount of armor piercing rounds and keep on fighting. As per standard for German battleships starting from Bismarck, ' is equipped with the Hydroacoustic Search ![]() consumable to help detect incoming threats such as torpedoes and destroyers attempting to get close or vessels hiding in smoke screens.
consumable to help detect incoming threats such as torpedoes and destroyers attempting to get close or vessels hiding in smoke screens.
However, despite her impressive offensive and defensive assets, much of it is a double edged sword, helping and harming depending on the situation. Both of her guns are rather inaccurate at long range, becoming deadly only once they pass the mid range for battleships of ~11km. Her 406mm guns have a better reload rate than those found on Montana, but lack Montana’s super-heavy AP shells which hampers her penetration at range while also reducing her damage per shell. Her 420mm guns are not large enough to overmatch the 32mm bow armor most battleships have at Tier X , and while she can match Montana damage per shell with the 420s, they have a longer reload time than the 406s (32 seconds versus 29 seconds, respectively). Additionally, her armor is not unbreakable as it may seem. At long ranges her deck armor is still not sufficient to stop plunging fire from other battleships from penetrating, meaning her citadel is relatively easy to penetrate at a considerable distance. Also the armor belt is actually among the thinnest at Tier X, topping out at 380mm. While she will almost never take citadel damage, her massive size and armor belt mean she will take higher-than-average normal regular penetration damage. This is especially evident when considering s biggest flaw: her poor firing angles. Because of the amount of broadside '' has to show, she takes 10-30k salvos fa more often than her contemporaries; the side benefit to this is that regular penetration damage heals back more than citadel damage when using Repair Party ![]() . At close range, the trade off is well worth it when ' takes a 10k-30k salvo while other battleships are destroyed in a single salvo right into their citadels.
. At close range, the trade off is well worth it when ' takes a 10k-30k salvo while other battleships are destroyed in a single salvo right into their citadels.
Finally, her size also betrays her as she is remarkably easy to hit and has one of the largest turn radii out of all Tier X battleships at over a kilometer. While her rudder shift time is fairly quick, she is so long that she takes a while to actually begin responding to turns. Even with Hydroacoustic Search ![]() active, captains should expect to sustain heavy damage when torpedoes are inevitably being sent at her if she is not already responding because of the aforementioned issues combined with her bad torpedo protection of 28%. Fire and flooding are also a concern, since they deal damage based on a percentage of maximum hit points, causing her massive health pool to work against her when volleys of enemy high explosive shells start fires and torpedoes cause flooding.
active, captains should expect to sustain heavy damage when torpedoes are inevitably being sent at her if she is not already responding because of the aforementioned issues combined with her bad torpedo protection of 28%. Fire and flooding are also a concern, since they deal damage based on a percentage of maximum hit points, causing her massive health pool to work against her when volleys of enemy high explosive shells start fires and torpedoes cause flooding.
Pros:
- One of the heaviest battleship broadsides in Tier 10, better than American counterpart Montana
- Can achieve the highest AP DPM of all Tier 10 battleships with the right upgrades and captain skills
- Comfortable shell velocity
- Good turret traverse speed
- Large secondary armament with a very good 7.5km base range
- Very heavily armored, with thick deck armor and well protected bow
- Second highest hitpoint pool in the game, behind Kremlin
- Has access to the long range and long lasting Hydroacoustic Search
 found on top tier German ships
- The citadel sits below the waterline and is protected by a turtleback, making citadel penetrations from surface ships almost impossible
Cons:
- The largest ship in the game, very difficult to sail unspotted or disengage
- The AA suite is somewhat lacking, being rather weak at mid- and close range
- Lowest base main battery range of all Tier 10 battleships
- Massive turn radius and slow rudder shift time
- Enormous superstructure is easily damaged and set on fire
- Rather inadequate main turret armor for a brawling battleship
- Poor torpedo protection
- Very poor firing angles
- Extremely vulnerable to fires and normal penetration damage
Research
Optimal Configuration
Upgrades
The recommended upgrades for ' are as follows:
- Slot 1: Main Armaments Modification 1

- Slot 2: Damage Control System Modification 1
 *
*
- Slot 3: Aiming Systems Modification 1
 *
*
- Slot 4: Damage Control System Modification 2

- Slot 5: Concealment System Modification 1

- Slot 6: Main Battery Modification 3
 *
*
In Upgrade Slot 2, the Special Upgrade Hydroacoustic Search Modification 1 ![]() is the preferred option for ' as it extends her Hydroacoustic Search
is the preferred option for ' as it extends her Hydroacoustic Search ![]() action time by 24 seconds. Damage Control System Modification 1
action time by 24 seconds. Damage Control System Modification 1 ![]() can be used to reduce the risk of fire.
can be used to reduce the risk of fire.
Aiming Systems Modification 1 ![]() or Secondary Battery Modification 1 (
or Secondary Battery Modification 1 (![]() ) are both good choices in Upgrade Slot 3 , depending on whether captains build for secondaries or not.
) are both good choices in Upgrade Slot 3 , depending on whether captains build for secondaries or not.
Main Battery Modification 3 ![]() is the top choice for Upgrade Slot 6. Auxiliary Armaments Modification 2
is the top choice for Upgrade Slot 6. Auxiliary Armaments Modification 2 ![]() improves the effectiveness of both secondaries and AA. The unique upgrade Improved Ammunition Hoists (
improves the effectiveness of both secondaries and AA. The unique upgrade Improved Ammunition Hoists (![]() ) gives a large -15% boost to both main and secondary armament reload time, at the cost of -7% main turrets traverse speed and -8% main battery maximum firing range. The range penalty from 20.61km to 18.96km is especially difficult. Use the Expert Marksman commander skill and the Spotting Aircraft
) gives a large -15% boost to both main and secondary armament reload time, at the cost of -7% main turrets traverse speed and -8% main battery maximum firing range. The range penalty from 20.61km to 18.96km is especially difficult. Use the Expert Marksman commander skill and the Spotting Aircraft ![]() consumable to counteract the negatives.
consumable to counteract the negatives.
Commander Skills
' is often configured either for secondary power, or in a survival build.
Secondary Battery Build: Captains who value their secondaries as an important source of damage should invest in Basic Firing Training, Adrenaline Rush, Manual Fire Control for Secondary Armament and Advanced Firing Training. This leaves 6 points, one of which must be a tier 1 skill. Since closing to secondaries range will result in you getting fired upon by every enemy ship, survivability should be focused, which leaves two options:
- A) Fire Prevention, Priority target and Preventative Maintenance for one less fire amidships and main battery reliablity (Preventative Maintenance DOES NOT improve secondaries),
- B) Basics or Survivability a choice between High Alert / Jack Of All Trades and another choice between Priority Target and Preventative Maintenance.
Main difference between A and B is first focuses on getting less fires and the other on shortening duration of fires (as well as floods as a bonus). After 0.9.2 IFHE is less needed, as 128mm and 150mm guns can now penetrate 32mm and 38mm armor respectively, which is enough for most ships.
| Recommended Commander Skills | ||||||||
|---|---|---|---|---|---|---|---|---|
| Cost (points) |
Endurance | Attack | Support | Versatility | ||||
| 1 |
★★★ |
★★ |
★ |
Χ |
★ |
Χ |
|
Χ |
| 2 |
★ |
★★ |
★★★ |
Χ |
Χ |
Χ |
★★★ |
|
| 3 |
★★ |
|
Χ |
Χ |
★★ |
★★★ |
|
★★ |
| 4 |
★★ |
★★★ |
|
Χ |
★★ |
|
|
★★★ |
| Key: ★★★ - Extremely Useful ★★ - Frequently Useful ★ - Occasionally Useful No stars - Meh Χ - Not recommended | ||||||||
Consumables
' can equip the following consumables:
- Slot 1: Damage Control Party

- Slot 2: Repair Party

- Slot 3: Spotting Aircraft
 or Catapult Fighter
- Slot 4: Hydroacoustic Search
Camouflage
Type 1, 2, or 5 camouflage can be equipped for credits; Types 2 or 5 are recommended at a minimum to reduce the accuracy of incoming shells.
Players who wish to spend doubloons can equip ' with Type 20 camouflage that lowers her detection radius, reduces the accuracy of incoming shells, reduces her repair costs, and increases the amount of experience she earns.
Signals
As a Tier X battleship, it is recommended to mount the following signals on ': India Delta (![]() ), India Yankee (
), India Yankee (![]() ), Mike Yankee Soxisix (
), Mike Yankee Soxisix (![]() ) if a secondary build is used, and November Foxtrot (
) if a secondary build is used, and November Foxtrot (![]() ). November Echo Setteseven (
). November Echo Setteseven (![]() ) can be used if the player has selected an anti-air build, and Sierra Mike (
) can be used if the player has selected an anti-air build, and Sierra Mike (![]() ) for higher speed can also be useful. The various economic flags can also be useful.
) for higher speed can also be useful. The various economic flags can also be useful.
Recommended Signal Flags 
| |||||
|---|---|---|---|---|---|
| Combat | |||||
 ★ |

|
 ★★★ |
 ★ |

|

|

|
 ★★ |
 ★ |
 ★★ |
 ★★★ |
 ★★★ |

|

| ||||
Note: Use of the Juliet Charlie signal makes detonation impossible.
Gallery
Großer Kurfürst, after emptying her main barrels, supported by a fellow Großer Kurfürst and Prinz Eugen.
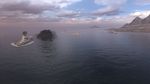
Großer Kurfürst and a friendly Baltimore provide long-range artillery support, while moving closer to the front lines.
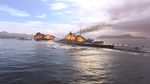
Großer Kurfürst spearheads the push, the friendly Baltimore in tow, her starboard secondaries already ripping into an enemy ship.
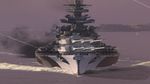
As the vanguard of the team, Großer Kurfürst sustains heavy fire from several enemy ships, but her sheer armour and massive health pool keeps the momentum going.
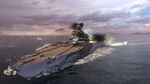
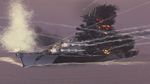
Despite taking massive amounts of damage, Großer Kurfürst proves her tenacity, keeping the line of battle even in the midst of shrugging off a full torpedo salvo.


Historical Info
Historical Gallery


Video
References
- New Video: Armada - Großer Kurfürst - News - World of Warships
- Dry Dock: Großer Kurfürst - News - World of Warships
- Armada 2.0 - Großer Kurfürst - World of Warships Official Channel - YouTube
- Dry Dock: Großer Kurfürst - World of Warships Official Channel - YouTube
- https://www.navweaps.com/Weapons/WNGER_16-52_skc34.php
- https://forum.worldofwarships.eu/topic/107061-gro%C3%9Fer-kurf%C3%BCrst-secondary-build/
| Destroyers | |
| Cruisers | |
| Battleships | |
| Aircraft Carriers |
| Japan | |
| U.K. | |
| France | |
| U.S.S.R. | |
| U.S.A. | |
| Germany | |
| Pan-Asia | |
| Spain | |
| Europe | |
| Netherlands | |
| Italy | |
| Commonwealth | |
| Pan-America |