Haida
| Revision as of 04:26, 2 July 2018 Updated Design History | Revision as of 04:39, 2 July 2018 Added Service History | |||
| Line 251: | Line 251: | |||
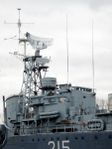
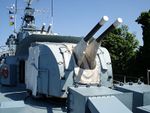
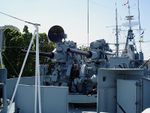
| In the late 1940s, ''Haida'' underwent a massive refit of armaments and equipment. Her two forward twin 4.7-inch guns were replaced by 2 MkXVI mounts sprouting twin 4-inch guns (similar to what was on the X mount). The X-turret was replaced with a twin 3-inch/50 calibre guns, and the aft 4.7-inch twin turret was replaced with a pair of Squid anti-submarine mortars. Furthermore she was equipped with a plethora of new radar and sonar equipment. | In the late 1940s, ''Haida'' underwent a massive refit of armaments and equipment. Her two forward twin 4.7-inch guns were replaced by 2 MkXVI mounts sprouting twin 4-inch guns (similar to what was on the X mount). The X-turret was replaced with a twin 3-inch/50 calibre guns, and the aft 4.7-inch twin turret was replaced with a pair of Squid anti-submarine mortars. Furthermore she was equipped with a plethora of new radar and sonar equipment. | |||
| ====Service==== | ====Service==== | |||
| + | HMCS ''Haida'' was laid down by the Vickers-Armstrong company at Newcastle-upon-Tyne on 29 September 1941. She was launched 25 August 1942 and commissioned into the Royal Canadian Navy on 30 August 1943 (pennant G63). | |||
| + | After being commissioned, she was put under command of her legendary commander, H. G. DeWolf, and spent the first leg of her career with the British Home Fleet, stationed in Scapa Flow. Her main duties were as convoy escorts for merchantmen migrating to and from Loch Ewe in Scotland to port cities in Russia. | |||
| + | ||||
| + | One notable patrol during this time was her participation as the escort for convoy JW 55B; departing Loch Ewe on 20 December for Murmansk, Russia. This was the very convoy that ''[[Scharnhorst]]'' attempted to intercept on her final sortie. While the stationed cruisers kept the German raider at bay, the destroyers shepherded the merchants away from harm to the awaiting Russian forces near Murmansk. | |||
| + | ||||
| + | By January of the following year, ''Haida'' was assigned to the 10th Destroyer Flotilla stationed on the English Channel. Here she partook in a plethora of patrols along the Bay of Biscay and the Channel, contributing to Operations Tunnel and Hostile; operations designed to suppress German forces in preparation for Operation Overlord. It was here where ''Haida'' earned her reputation as a fearsome fighter. | |||
| + | ||||
| + | On the night of April 25/26, a force of Canadian Tribals engaged the 4th Torpedo boat flotilla of the German [[Ship:Ships_of_Germany|Kriegsmarine]]. ''Haida'' managed to sink ''[[T-22|T29]]'' in fearsome shellfire and managed to cripple ''T24'', while the rest of the force managed to damage ''T27''. | |||
| + | ||||
| + | A few nights later, HMCS ''Athabaskan'' and ''Haida'' reengaged the remnants of the 4th Torpedo boat flotilla. Haida finished what she started by running ''T27'' aground and lighting her ablaze with gunfire, but not before ''T24'' scored a direct hit on ''Athabaskan'' with a torpedo salvo. In characteristic bravery – and against orders – DeWolf delved back into the inky night to rescue 44 of her sister ship’s crew. | |||
| + | ||||
| + | Few months later, ''Haida'' found herself providing supporting fire on D-Day. Follow up to that, the 10th Destroyer Flotilla engaged the 8th Destroyer Flotilla, north of the landings. ''Haida'' contributed to sinking Z32. Actions such as this drove the German [[T-22|E-boat]] presence out of the sector, securing 10th Destroyer Flotilla dominance; now having free reign to seek and destroy axis shipping. | |||
| + | ||||
| + | The following summer was fraught with activity. On a routine patrol on the 24th of June, reports directed ''Haida'' and HMS ''Eskimo'' towards an ongoing submarine hunt; dropping her own depth charges; she managed to scare out ''U-971'', which attempted to flee until gunned down by the two destroyers. In Mid July, ''Haida'' and ORP ''[[Błyskawica]]'' intercepted a large German force; the two managed to sink 2 sub-chasers, 1 merchant ship, and lighting another 2 merchants on fire. In early August, ''Haida'' took part against another raid on a German convoy; contributing to sinking 4 enemy vessels. Unfortunately, enemy fire incapacitated a turret and their crew; forcing ''Haida'' to return to Halifax for a refit and retire from the theatre. | |||
| + | ||||
| + | ''Haida'' returned to service back in Scapa Flow, and spent the last few months of the war on convoy and escort duties. Convoy RA 66 was the last official RCN engagement; as a contributor, ''Haida'' aided in the sinking of 2 U-boats. Back in Canada, she was undergoing tropicalization when Japan sued for peace, ending the War. | |||
| + | ||||
| + | In 1947, ''Haida'' was reactivated and underwent a massive overhaul. Her armaments were replaced and she was ungraded with an entire suite of new radars and sonars, and she spent the late 1940s participating in a few naval exercises. | |||
| + | ||||
| + | When the Korean War initiated in 1950, ''Haida'' returned to active surface. She was reclassified as a destroyer escort (pennant DDE 215) and underwent further refit of armaments and systems. With the work done in early 1952, she set sail for the Far East. | |||
| + | ||||
| + | Her first duties in November encompassed shore patrol and aircraft carrier screening operations, which were uneventful. In December she spent her time on further shore patrols and shelling a coastal batteries and a railway yards near Songjin with USS ''Moore''. | |||
| + | ||||
| + | In her January patrols, ''Haida'' finally joined the “Trainbusters Club” when she destroyed a train north of Riwon. This was not an easy feat, as it required sniping the locomotive engine while the trains were darting between coastal tunnels at high speed. A second train fell to her guns in late May, as well as a drifting anti-ship mine. She left in June, returning to Halifax on July 1953. | |||
| + | ||||
| + | Despite the formal declaration of a cease-fire, ''Haida'' returned to the theatre in February 1954 due to reports of infractions between China and North Korea, alongside the still uneasy tensions between the two Koreas. Spending a few months in patrol, she returned home on November 1954. | |||
| + | ||||
| + | Following Korea, ''Haida'' spent the remainder of the decade on anti-submarine operations, hunting Soviet nuclear boats alongside other NATO forces all across the North Atlantic and West Indies. By now, her age began to show with a series of equipment failures that required almost annual refits. By 1963, her days were numbered. | |||
| + | ||||
| + | Her final duties were to serve on public tours across the Great Lakes. One of the visitors was a man named Neil Bruce, a former RCN rating, who decided he would alter ''Haida’s'' fate. Alongside 4 other ratings, they formed HAIDA Inc. and won possession of the vessel with a $20,000 bid. After restoration, she was towed to Toronto Harbour where she served as an attraction starting in 1965. Due to financial difficulties, possession of ''Haida'' transferred to the provincial government in a bid of $1. She continued serving as an attraction until 2002, when she was purchased by Parks Canada and towed to her current home of Hamilton, Ontario. After a 5 million dollar refit, she currently serves her final role as a National Historic Site of Canada; preserving her story for generations of Canadians to come. And Canadians are not soon to forget her glory; as of February 2018 “Canada’s Fightingest Warship” has the distinction of serving as the ceremonial flagship of the Royal Canadian Navy. | |||
| |HistoricalGallery=<!-- write below list of files with description (if necessary) separated with | --><gallery> | |HistoricalGallery=<!-- write below list of files with description (if necessary) separated with | --><gallery> | |||
Revision as of 04:39, 2 July 2018
| 120 mm/45 Mk.IX on a CPXIX mount3 х 2 pcs. |
| Rate of Fire12 shots/min. |
| Reload Time5 sec. |
| Rotation Speed10 deg./sec. |
| 180 Degree Turn Time18 sec. |
| Firing Range12.32 km. |
| Maximum Dispersion107 m. |
| HE Shell120 mm HE |
| Maximum HE Shell Damage1,900 |
| Chance of Fire on Target Caused by HE Shell5 % |
| Initial HE Shell Velocity808 m./s. |
| HE Shell Weight22.68 kg. |
| AP Shell120 mm AP |
| Maximum AP Shell Damage2,100 |
| Initial AP Shell Velocity808 m./s. |
| AP Shell Weight22.68 kg. |
| 102 mm/45 QF Mk.XVI on a Mk.XIX mount1 х 2 pcs. |
| Firing Range4 km. |
| Rate of Fire20 shots/min. |
| Reload Time3 sec. |
| HE Shell102 mm HE 35 lb |
| Maximum HE Shell Damage1,500 |
| Initial HE Shell Velocity811 m./s. |
| Chance of Fire on Target Caused by HE Shell6 % |
| 533 mm QR Mk II1 х 4 pcs. |
| Rate of Fire0.63 shots/min. |
| Reload Time96 sec. |
| Rotation Speed25 deg./sec. |
| 180 Degree Turn Time7.2 sec. |
| Torpedo533 mm Mk IXM |
| Maximum Damage16,767 |
| Torpedo Speed62 knot |
| Torpedo Range8.01 km. |
| 102 mm/45 QF Mk.XVI on a Mk.XIX mount1 х 2 pcs. |
| . . . Average Damage per Second9.4 |
| . . . Firing Range5.01 km. |
| 40 mm/39 Vickers QF Mk.VIII on a Mk.VII mount1 х 4 pcs. |
| . . . Average Damage per Second12.9 |
| . . . Firing Range2.49 km. |
| 20 mm Oerlikon Mk.II on a Mk.V mount6 х 2 pcs. |
| . . . Average Damage per Second36.6 |
| . . . Firing Range2.01 km. |
| Maximum Speed36.5 knot |
| Turning Circle Radius630 m. |
| Rudder Shift Time3.8 sec. |
| Surface Detectability Range6.3 km. |
| Air Detectability Range3.12 km. |
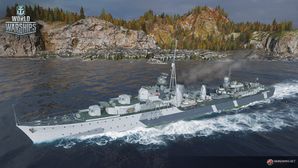
Haida — Commonwealth premium Tier VII destroyer.
HMCS Haida is now preserved as a military museum ship in Hamilton, Ontario.
Modules
 |
Hit Points (HP) | Armor (mm) | Armor (mm) | Main Turrets (pcs.) | Secondary Gun Turrets (pcs.) | AA Mounts (pcs.) | Torpedo Tubes (pcs.) | Hangar Capacity (pcs.) |
Research price (exp) |
Purchase price ( | |
|---|---|---|---|---|---|---|---|---|---|---|---|
| Haida | 15,700 | 6 | 19 | 3 | 1 | 6/1/1 | 1 | 0 | 0 |
 |
Rate of Fire (shots/min) | Torpedo Tubes Reload Time (sec) | 180° Turn Time (sec) | Maximum Damage (HP) | Torpedo Speed (knot) | Torpedo Range (km) |
Research price (exp) |
Purchase price ( | |
|---|---|---|---|---|---|---|---|---|---|
| 533 mm Mk IXM | 0.6 | 96 | 7.2 | 16,766 | 62 | 8 | 0 | 0 |
Compatible Upgrades
| Slot 1 |
|||||
|---|---|---|---|---|---|
| Slot 2 |
|||||
| Slot 3 |
|||||
| Slot 4 |
Player Opinion
Performance
Haida is a ship that belongs on the front lines. Her play style is that of a forward scout and destroyer-hunter. She is adept at applying pressure to capture points early on, providing forward vision for her team and foiling enemy ships from doing the same. Unique among Tier VII destroyers, she is incredibly stealthy while still having a sizable hit point pool and decent agility.
Her greatest asset is her ability to control vision. Her surface detection is one of the lowest found within her matchmaking spread with just a handful of ships being more stealthy. Of these, most are Japanese destroyers and present little in the way of a threat to this gunship. Haida can out-fight anything that out-spots her and she can out-spot anything that she cannot out-fight. But she has two more tricks to play.
Haida’s Smoke Generator ![]() allows her to remain mobile while hidden. This has the obvious benefits of making it more difficult to attack Haida with blind-fire drops of torpedoes, bombs and shells, but it may also be used offensively. Other ships must risk leaving their smoke cover if a battle progresses away from where they initially laid it. Haida doesn't suffer this problem. She can quickly redeploy and then slow down to once again take advantage of her Smoke Generator's concealment and resume attacking. Her flexibility allows her to keep up with the pace of battle either on the attack or the retreat.
allows her to remain mobile while hidden. This has the obvious benefits of making it more difficult to attack Haida with blind-fire drops of torpedoes, bombs and shells, but it may also be used offensively. Other ships must risk leaving their smoke cover if a battle progresses away from where they initially laid it. Haida doesn't suffer this problem. She can quickly redeploy and then slow down to once again take advantage of her Smoke Generator's concealment and resume attacking. Her flexibility allows her to keep up with the pace of battle either on the attack or the retreat.
Similarly, her Hydroacoustic Search ![]() has offensive and defensive uses. Though very short ranged, the increased warning time provided is more than sufficient to trivialize the dangers of enemy torpedoes. The long run time also facilitates this, ensuring that Haida will have ample warning throughout all stages of an encounter. Finally, it may also be used offensively to dig out enemy ships hiding in smoke. For this role, it's less than ideal. Her Hydroacoustic Search lacks the range of the ones found on German destroyers or the vaunted reach of Loyang. However, Haida’s guns have a very small detection bloom when firing through smoke, allowing her to deliver several salvos before her target can respond.
has offensive and defensive uses. Though very short ranged, the increased warning time provided is more than sufficient to trivialize the dangers of enemy torpedoes. The long run time also facilitates this, ensuring that Haida will have ample warning throughout all stages of an encounter. Finally, it may also be used offensively to dig out enemy ships hiding in smoke. For this role, it's less than ideal. Her Hydroacoustic Search lacks the range of the ones found on German destroyers or the vaunted reach of Loyang. However, Haida’s guns have a very small detection bloom when firing through smoke, allowing her to deliver several salvos before her target can respond.
Haida’s advantages in stealth largely mitigate her biggest weakness: a lack of striking power. While she does boast some of the best damage-per-minute values with her high explosive shells, the effective range of Haida’s weapon systems is very short. Her fire angles are less than ideal and the shell flight times of her guns become very punitive at ranges greater than 7.0 km (even worse than American 127mm/38s). In addition, her penetration values are lackluster and she's not good at starting fires, making it difficult to engage larger targets with her guns. Finally there are Haida’s torpedoes. These are individually hard hitting and may be single-launched, but she is limited to a single quadruple launcher with a long, 96-second reload.
Haida is a destroyer that needs to get in close to ensure she lands as many hits as possible, whether that be with her guns in a knife fight or single-firing her torpedoes into an enemy cruiser or battleship. Thankfully, her stealth and consumables give her all the tools needed to ensure she can deliver these attacks on target and to devastating effect.
Pros:
- Good health pool
- Good guns - fast firing and good range
- Decent torpedoes - decent range, decent speed, decent damage, and decent reload
- Decent maneuverability - decent max speed, good turning radius, decent rudder shift
- Great concealment - best of its tier with a base of 6.3km
- Has special "moving" smoke like Perth and separate consumable slot for Hydroacoustic Search

Cons:
- Small main battery caliber - requires Inertia Fuse for HE Shells to deal significant damage
- Slow shells - difficult to hit other enemy destroyers at range
- Small torpedo arsenal - only four torpedo tubes
- Poor anti-aircraft armament (like most other destroyers)
Research
Optimal Configuration
Commander Skills
Key skills for Haida commanders include standard Destroyer skills such as Concealment Expert, Last Stand, and Survivability Expert. Other useful skills for a gunboat include Priority Target, Inertial Fuse for HE Shells, Basic Firing Training, and Adrenaline Rush. Haida can benefit from a large number of other skills, so one must choose what else to improve.
| Recommended Commander Skills | ||||||||
|---|---|---|---|---|---|---|---|---|
| Cost (points) |
Endurance | Attack | Support | Versatility | ||||
| 1 |
★★★ |
★ |
|
|
|
|
★ |
|
| 2 |
★ |
★ |
★ |
|
★ |
|
★★ |
★★★ |
| 3 |
|
★★★ |
|
|
★★★ |
★ |
★ |
★ |
| 4 |
|
|
★★★ |
|
|
|
★ |
★★★ |
| Key: ★★★ - Extremely Useful ★★ - Frequently Useful ★ - Occasionally Useful No stars - Meh Χ - Not recommended | ||||||||
Consumables
Haida can equip the following consumables:
- Slot 1: Damage Control Party

- Slot 2: Smoke Generator

- Slot 3: Engine Boost

- Slot 4: Hydroacoustic Search

Haida has no alternative consumables in any of her slots. Although she has Hydroacoustic Search as a consumable, the version she equips is less potent than those equipped by equal tier German destroyers. Nonetheless, it is a powerful tool; both for offense and defense.
Premium variants of the consumables can be mounted for increased performance in battle.
Camouflage
As a premium ship, Haida comes included with Type 10 camouflage that lowers her detection radius, reduces the accuracy of incoming shells, reduces her repair costs, and increases the amount of experience she earns.
She also has an alternative camouflage, Maple Leaf, purchasable for 2,000 doubloons.
Signals
Recommended Signal Flags 
| |||||
|---|---|---|---|---|---|
| Combat | |||||
 ★★★ |

|

|

|
 ★★★ |
 ★★ |
 ★★ |

|

|
 ★★★ |
 ★★★ |

|

|

| ||||
Note: Use of the Juliet Charlie signal makes detonation impossible.
Gallery
Historical Info
Historical Gallery


