Haida
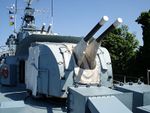
| 120 mm/45 Mk.IX on a CPXIX mount3 х 2 pcs. |
| Rate of Fire12 shots/min. |
| Reload Time5 sec. |
| Rotation Speed10 deg./sec. |
| 180 Degree Turn Time18 sec. |
| Firing Range12.32 km. |
| Maximum Dispersion107 m. |
| HE Shell120 mm HE |
| Maximum HE Shell Damage1,900 |
| Chance of Fire on Target Caused by HE Shell5 % |
| Initial HE Shell Velocity808 m./s. |
| HE Shell Weight22.68 kg. |
| AP Shell120 mm AP |
| Maximum AP Shell Damage2,100 |
| Initial AP Shell Velocity808 m./s. |
| AP Shell Weight22.68 kg. |
| 102 mm/45 QF Mk.XVI on a Mk.XIX mount1 х 2 pcs. |
| Firing Range4 km. |
| Rate of Fire20 shots/min. |
| Reload Time3 sec. |
| HE Shell102 mm HE 35 lb |
| Maximum HE Shell Damage1,500 |
| Initial HE Shell Velocity811 m./s. |
| Chance of Fire on Target Caused by HE Shell6 % |
| 533 mm QR Mk II1 х 4 pcs. |
| Rate of Fire0.63 shots/min. |
| Reload Time96 sec. |
| Rotation Speed25 deg./sec. |
| 180 Degree Turn Time7.2 sec. |
| Torpedo533 mm Mk IXM |
| Maximum Damage16,767 |
| Torpedo Speed62 knot |
| Torpedo Range8.01 km. |
| 102 mm/45 QF Mk.XVI on a Mk.XIX mount1 х 2 pcs. |
| . . . Average Damage per Second9.4 |
| . . . Firing Range5.01 km. |
| 40 mm/39 Vickers QF Mk.VIII on a Mk.VII mount1 х 4 pcs. |
| . . . Average Damage per Second12.9 |
| . . . Firing Range2.49 km. |
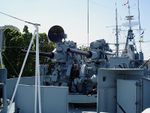
| 20 mm Oerlikon Mk.II on a Mk.V mount6 х 2 pcs. |
| . . . Average Damage per Second36.6 |
| . . . Firing Range2.01 km. |
| Maximum Speed36.5 knot |
| Turning Circle Radius630 m. |
| Rudder Shift Time3.8 sec. |
| Surface Detectability Range6.3 km. |
| Air Detectability Range3.12 km. |
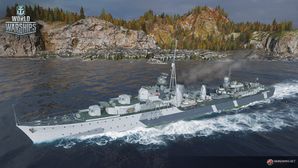
Haida — Commonwealth premium Tier VII destroyer.
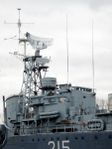
HMCS Haida is now preserved as a military museum ship in Hamilton, Ontario.
Modules
 |
Hit Points (HP) | Armor (mm) | Armor (mm) | Main Turrets (pcs.) | Secondary Gun Turrets (pcs.) | AA Mounts (pcs.) | Torpedo Tubes (pcs.) | Hangar Capacity (pcs.) |
Research price (exp) |
Purchase price ( | |
|---|---|---|---|---|---|---|---|---|---|---|---|
| Haida | 15,700 | 6 | 19 | 3 | 1 | 6/1/1 | 1 | 0 | 0 |
 |
Rate of Fire (shots/min) | Torpedo Tubes Reload Time (sec) | 180° Turn Time (sec) | Maximum Damage (HP) | Torpedo Speed (knot) | Torpedo Range (km) |
Research price (exp) |
Purchase price ( | |
|---|---|---|---|---|---|---|---|---|---|
| 533 mm Mk IXM | 0.6 | 96 | 7.2 | 16,766 | 62 | 8 | 0 | 0 |
Compatible Upgrades
| Slot 1 |
|||||
|---|---|---|---|---|---|
| Slot 2 |
|||||
| Slot 3 |
|||||
| Slot 4 |
Player Opinion
Performance
Haida is a ship that belongs on the front lines. Her play style is that of a forward scout and destroyer-hunter. She is adept at applying pressure to capture points early on, providing forward vision for her team and foiling enemy ships from doing the same. Unique among Tier VII destroyers, she is incredibly stealthy while still having a sizable hit point pool and decent agility.
Her greatest asset is her ability to control vision. Her surface detection is one of the lowest found within her matchmaking spread with just a handful of ships being more stealthy. Of these, most are Japanese destroyers and present little in the way of a threat to this gunship. Haida can out-fight anything that out-spots her and she can out-spot anything that she cannot out-fight. But she has two more tricks to play.
Haida’s Smoke Generator ![]() allows her to remain mobile while hidden. This has the obvious benefits of making it more difficult to attack Haida with blind-fire drops of torpedoes, bombs and shells, but it may also be used offensively. Other ships must risk leaving their smoke cover if a battle progresses away from where they initially laid it. Haida doesn't suffer this problem. She can quickly redeploy and then slow down to once again take advantage of her Smoke Generator's concealment and resume attacking. Her flexibility allows her to keep up with the pace of battle either on the attack or the retreat.
allows her to remain mobile while hidden. This has the obvious benefits of making it more difficult to attack Haida with blind-fire drops of torpedoes, bombs and shells, but it may also be used offensively. Other ships must risk leaving their smoke cover if a battle progresses away from where they initially laid it. Haida doesn't suffer this problem. She can quickly redeploy and then slow down to once again take advantage of her Smoke Generator's concealment and resume attacking. Her flexibility allows her to keep up with the pace of battle either on the attack or the retreat.
Similarly, her Hydroacoustic Search ![]() has offensive and defensive uses. Though very short ranged, the increased warning time provided is more than sufficient to trivialize the dangers of enemy torpedoes. The long run time also facilitates this, ensuring that Haida will have ample warning throughout all stages of an encounter. Finally, it may also be used offensively to dig out enemy ships hiding in smoke. For this role, it's less than ideal. Her Hydroacoustic Search lacks the range of the ones found on German destroyers or the vaunted reach of Loyang. However, Haida’s guns have a very small detection bloom when firing through smoke, allowing her to deliver several salvos before her target can respond.
has offensive and defensive uses. Though very short ranged, the increased warning time provided is more than sufficient to trivialize the dangers of enemy torpedoes. The long run time also facilitates this, ensuring that Haida will have ample warning throughout all stages of an encounter. Finally, it may also be used offensively to dig out enemy ships hiding in smoke. For this role, it's less than ideal. Her Hydroacoustic Search lacks the range of the ones found on German destroyers or the vaunted reach of Loyang. However, Haida’s guns have a very small detection bloom when firing through smoke, allowing her to deliver several salvos before her target can respond.
Haida’s advantages in stealth largely mitigate her biggest weakness: a lack of striking power. While she does boast some of the best damage-per-minute values with her high explosive shells, the effective range of Haida’s weapon systems is very short. Her fire angles are less than ideal and the shell flight times of her guns become very punitive at ranges greater than 7.0 km (even worse than American 127mm/38s). In addition, her penetration values are lackluster and she's not good at starting fires, making it difficult to engage larger targets with her guns. Finally there are Haida’s torpedoes. These are individually hard hitting and may be single-launched, but she is limited to a single quadruple launcher with a long, 96-second reload.
Haida is a destroyer that needs to get in close to ensure she lands as many hits as possible, whether that be with her guns in a knife fight or single-firing her torpedoes into an enemy cruiser or battleship. Thankfully, her stealth and consumables give her all the tools needed to ensure she can deliver these attacks on target and to devastating effect.
Pros:
Cons:
Optimal Configuration
Consumables
Haida can equip the following consumables:
- Slot 1: Damage Control Party

- Slot 2: Smoke Generator

- Slot 3: Engine Boost

- Slot 4: Hydroacoustic Search

Haida has no alternative consumables in any of her slots. Although she has Hydroacoustic Search as a consumable, the version she equips is less potent than those equipped by equal tier German destroyers. Nonetheless, it is a powerful tool; both for offense and defense.
Premium variants of the consumables can be mounted for increased performance in battle.
Signals
Recommended Signal Flags 
| |||||
|---|---|---|---|---|---|
| Combat | |||||
 ★★★ |

|

|

|
 ★★★ |
 ★★ |
 ★★ |

|

|
 ★★★ |
 ★★★ |

|

|

| ||||
Note: Use of the Juliet Charlie signal makes detonation impossible.
Gallery
Historical Info
Historical Gallery


