Izumo
| Revision as of 22:27, 19 January 2021 | Revision as of 03:01, 23 February 2021 | |||
2 intermediate revisions by 2 users not shown | ||||
| Line 11: | Line 11: | |||
| |Pros=<!-- write list of positive points below. use * as in ordinary wiki-list. --> | |Pros=<!-- write list of positive points below. use * as in ordinary wiki-list. --> | |||
| ? | ||||
| * Main battery gun penetration is excellent, with very high shell velocity for a battleship. | * Main battery gun penetration is excellent, with very high shell velocity for a battleship. | |||
| ? | * Great dispersion due to | + | * Great dispersion due to IJN battleship dispersion and sigma. | |
| ? | + | * Small superstructure means that incoming shells don't have a whole lot to hit, and the 57mm weather deck over the middle shatters all cruiser HE, besides ''[[Goliath]]''. | ||
| ? | + | * Good belt armor. | ||
| ? | * Small superstructure means that incoming shells don't have a whole lot to hit, 57mm weather deck over the middle shatters all cruiser | + | * Great angling potential due to guns having favorable arcs front and rear. | |
| ? | * Great angling potential. | + | * Decent speed for a tier IX battleship. | |
| |Cons=<!-- write list of negative points below. use * as in ordinary wiki-list. --> | |Cons=<!-- write list of negative points below. use * as in ordinary wiki-list. --> | |||
| * ''Izumo'' is a large target (larger than ''[[Yamato]]''!). | * ''Izumo'' is a large target (larger than ''[[Yamato]]''!). | |||
| ? | * Has one less gun barrel | + | * Has one less gun barrel compared to ''[[Amagi]]''. | |
| * In many respects, ''Izumo'' is inferior to ''[[Amagi]]'' - including size, speed, torpedo protection, and maneuverability. | * In many respects, ''Izumo'' is inferior to ''[[Amagi]]'' - including size, speed, torpedo protection, and maneuverability. | |||
| ? | ||||
| * Second turret's tall barbette makes the turret vulnerable to getting knocked out. | * Second turret's tall barbette makes the turret vulnerable to getting knocked out. | |||
| * The middle turret does not have full 360 degree rotation, even though it seems possible. | * The middle turret does not have full 360 degree rotation, even though it seems possible. | |||
| ? | * | + | * While she has a turtleback, it is not as effective as the German's, meaning turning broadside can result in multiple citadels. | |
| ? | * Turret placement leaves ship extremely vulnerable to attacks in aft arc and makes the No. 3 turret | + | * Turret placement leaves ship extremely vulnerable to attacks in aft arc and makes the No. 3 turret somewhat difficult to use. | |
| ? | + | * Though buffed, concealment is still mediocre, with only the ''[[Friedrich der Große]]'' and ''[[Minnesota]]'' being worse. | ||
| ? | + | |||
| ? | * Though buffed, concealment is still mediocre, with only the ''[[Friedrich der Große]]'' being worse. | + | ||
| ? | + | |||
| |Research=<!-- write text about priority sequence of research below --> | |Research=<!-- write text about priority sequence of research below --> | |||
| Line 55: | Line 51: | |||
| |CommanderSkills=<!-- write text about best set of Commander Skills below --> | |CommanderSkills=<!-- write text about best set of Commander Skills below --> | |||
| ? | {{Commander Skills | + | {{Commander Skills 3 BB | |
| ? | + | | rating11 = <!-- Gun Feeder --> | ||
| ? | | rating11 = | + | | rating12 = <!-- Pyrotechnician --> | |
| ? | | rating12 = | + | | rating13 = <!-- Consumables Specialist --> | |
| ? | | rating13 = <!-- | + | | rating14 = 2 <!-- Emergency Repair Specialist --> | |
| ? | | rating14 = | + | | rating15 = <!-- Incoming Fire Alert --> | |
| ? | | rating15 = | + | | rating16 = <!-- Preventive Maintenance --> | |
| ? | + | |||
| ? | + | |||
| ? | | | + | ||
| ? | | rating21 = 2 <!-- | + | | rating21 = 2 <!-- Grease the Gears --> | |
| ? | | rating22 = | + | | rating22 = <!-- Inertial Fuse for HE Shells --> | |
| ? | | rating23 = | + | | rating23 = <!-- Consumables Enhancements --> | |
| ? | | rating24 = | + | | rating24 = 2 <!-- Vigilance --> | |
| ? | | rating25 = | + | | rating25 = 2 <!-- Priority Target --> | |
| ? | | rating26 | + | | rating26 = <!-- AA Gunner --> | |
| ? | + | |||
| ? | + | |||
| ? | | rating31 = | + | | rating31 = <!-- Super-Heavy AP Shells --> | |
| ? | | rating32 = <!-- | + | | rating32 = <!-- Long-Range Secondary Battery Shells --> | |
| ? | | rating33 = | + | | rating33 = 2 <!-- Adrenaline Rush --> | |
| ? | | rating34 = | + | | rating34 = 2 <!-- Basics of Survivability --> | |
| ? | | rating35 = | + | | rating35 = <!-- Enhanced Anti-Torpedo Protection --> | |
| ? | | rating36 | + | | rating36 = <!-- Expert AA Marksman --> | |
| ? | + | |||
| ? | + | |||
| ? | | rating41 = | + | | rating41 = <!-- Dead Eye --> | |
| ? | | rating42 = | + | | rating42 = <!-- Improved Secondary Battery Aiming --> | |
| ? | | rating43 = | + | | rating43 = <!-- Close Quarters Combat --> | |
| ? | | rating44 = | + | | rating44 = 2 <!-- Emergency Repair Expert --> | |
| ? | | rating45 = | + | | rating45 = <!-- Concealment Expert --> | |
| ? | | rating46 = | + | | rating46 = 2 <!-- Fire Prevention Expert --> | |
| ? | + | |||
| ? | + | |||
| }} | }} | |||
Revision as of 03:01, 23 February 2021

| Research price178000 exp |
| Purchase price15,900,000 |
| Hit Points76,500 |
| IDS_PJGM100_410MM50_RF3 х 3 pcs. |
| Rate of Fire2 shots/min. |
| Reload Time30 sec. |
| Rotation Speed4.5 deg./sec. |
| 180 Degree Turn Time40 sec. |
| Firing Range19.71 km. |
| Maximum Dispersion225 m. |
| HE Shell410 mm HE Type0 |
| Maximum HE Shell Damage6,500 |
| Chance of Fire on Target Caused by HE Shell30 % |
| Initial HE Shell Velocity869 m./s. |
| HE Shell Weight938.5 kg. |
| AP Shell410 mm AP/APC Type91 |
| Maximum AP Shell Damage12,900 |
| Initial AP Shell Velocity870 m./s. |
| AP Shell Weight1020 kg. |
| 127 mm/40 Type 89 on a Model A1 Mod.3 mount12 х 2 pcs. |
| Firing Range6.95 km. |
| Rate of Fire10 shots/min. |
| Reload Time6 sec. |
| HE Shell127 mm HE Type0 |
| Maximum HE Shell Damage2,100 |
| Initial HE Shell Velocity725 m./s. |
| Chance of Fire on Target Caused by HE Shell8 % |
| 155 mm/60 3rd Year Type in a triple turret1 х 3 pcs. |
| Firing Range6.95 km. |
| Rate of Fire5 shots/min. |
| Reload Time12 sec. |
| HE Shell155 mm HE Type0 |
| Maximum HE Shell Damage2,600 |
| Initial HE Shell Velocity925 m./s. |
| Chance of Fire on Target Caused by HE Shell10 % |
| 127 mm/40 Type 89 on a Model A1 Mod.3 mount12 х 2 pcs. |
| . . . Average Damage per Second121.2 |
| . . . Firing Range5.01 km. |
| 25 mm/60 Type 96 on a single mount24 х 1 pcs. |
| . . . Average Damage per Second43.2 |
| . . . Firing Range2.49 km. |
| 25 mm/60 Type 96 on a triple mount12 х 3 pcs. |
| . . . Average Damage per Second39.6 |
| . . . Firing Range2.49 km. |
| Maximum Speed27.16 knot |
| Turning Circle Radius890 m. |
| Rudder Shift Time26 sec. |
| Surface Detectability Range16.67 km. |
| Air Detectability Range12.53 km. |

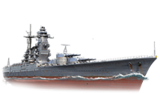
Izumo — Japanese Tier IX battleship.
One of the draft designs for a "super battleship" concept, preceding the appearance of the Yamato-class battleships. This design featured heavy armor and a sufficiently high speed complemented by powerful main battery guns that were unconventionally placed in three turrets located at the ship's front end.
Modules
 |
Rate of Fire (shots/min) | 180° Turn Time (sec) | Maximum Dispersion (m) | Maximum HE Shell Damage (HP) | Chance of Fire on Target Caused by HE Shell (%) | Maximum AP Shell Damage (HP) |
Research price (exp) |
Purchase price ( | |
|---|---|---|---|---|---|---|---|---|---|
| 410 mm/50 10th Year Type in a triple turret | 2 | 40 | 225 | 6,500 | 30 | 12,900 | 0 | 1,300,000 |
 |
Hit Points (HP) | Armor (mm) | Armor (mm) | Main Turrets (pcs.) | Secondary Gun Turrets (pcs.) | AA Mounts (pcs.) | Torpedo Tubes (pcs.) | Hangar Capacity (pcs.) |
Research price (exp) |
Purchase price ( | |
|---|---|---|---|---|---|---|---|---|---|---|---|
| Izumo (A) | 76,500 | 19 | 508 | 3 | 12/1 | 24/12/12 | 0 | 1,800,000 | |||
| Izumo (B) | 78,900 | 19 | 508 | 3 | 12/1 | 28 | 60,000 | 5,500,000 |
 |
IDS_SHIP_PARAM_SUO_INCREASE_DIST (%) | Maximum Firing Range (km) |
Research price (exp) |
Purchase price ( | |
|---|---|---|---|---|---|
| Type9 mod. 1 | 0 | 0 | 1,000,000 | ||
| Type9 mod. 2 | 0 | 26,000 | 2,400,000 |
 |
Maximum Speed (knot) |
Research price (exp) |
Purchase price ( | |
|---|---|---|---|---|
| Propulsion: 132,000 hp | 27.2 | 0 | 550,000 | |
| Propulsion: 135,000 hp | 28 | 16,000 | 1,000,000 |
Compatible Upgrades
| Slot 1 |
|||||
|---|---|---|---|---|---|
| Slot 2 |
|||||
| Slot 3 |
|||||
| Slot 4 |
|||||
| Slot 5 |
|||||
| Slot 6 |
Player Opinion
Performance
Once considered by many to be among the worst Tier IX ships in the game, Izumo has seen a variety of improvements since the launch of World of Warships. While her stock hull still has mediocre secondaries, a weak anti-aircraft battery, and bad turning characteristics, the AP shell penetration of Hull (A) has been significantly improved, allowing her guns (at least) to remain competitive against the likes of Iowa and Friedrich der Große beyond 15km. The central weather deck was increased to 57mm to mitigate damage from high explosive shells from 203mm and IFHE 152mm guns. The concealment, once among the worst of any ship in the game, has been considerably improved, though still on the lower end of the spectrum for Tier IX battleships.
Izumo’s armor on her sharply-angled bow can deflect most AP shells fired at the hull, save for ships whose guns can overmatch 32mm bow plating. Once Hull (B) is unlocked, she gains somewhat better secondaries and AA. While the middle weather deck was buffed, she remains vulnerable to full penetration damage from high explosive shells in upper belt, bow, and stern and the fully upgraded AA suite is not adequate enough to fend off air attacks, even with support from allies. Pointing her bow at enemies and reversing at mid range — similar to how many captains play Dunkerque, Iowa, and North Carolina — is a valid tactic in Izumo, and is quite effective against enemy AP rounds. Like all high tier battleships, she remains vulnerable to fire.Pros:
- Main battery gun penetration is excellent, with very high shell velocity for a battleship.
- Great dispersion due to IJN battleship dispersion and sigma.
- Small superstructure means that incoming shells don't have a whole lot to hit, and the 57mm weather deck over the middle shatters all cruiser HE, besides Goliath.
- Good belt armor.
- Great angling potential due to guns having favorable arcs front and rear.
- Decent speed for a tier IX battleship.
Cons:
- Izumo is a large target (larger than Yamato!).
- Has one less gun barrel compared to Amagi.
- In many respects, Izumo is inferior to Amagi - including size, speed, torpedo protection, and maneuverability.
- Second turret's tall barbette makes the turret vulnerable to getting knocked out.
- The middle turret does not have full 360 degree rotation, even though it seems possible.
- While she has a turtleback, it is not as effective as the German's, meaning turning broadside can result in multiple citadels.
- Turret placement leaves ship extremely vulnerable to attacks in aft arc and makes the No. 3 turret somewhat difficult to use.
- Though buffed, concealment is still mediocre, with only the Friedrich der Große and Minnesota being worse.
Research
Optimal Configuration
Upgrades
The recommended upgrades for Izumo are as follows:
- Slot 1: Main Armaments Modification 1

- Slot 2: Damage Control System Modification 1

- Slot 3: Aiming Systems Modification 1
 *
*
- Slot 4: Damage Control System Modification 2

- Slot 5: Concealment System Modification 1

- Slot 6: Main Battery Modification 3
 *
*
Because of the limited field of fire of Izumo's secondary batteries, a secondary build is not recommended.
Slot 3 allows for further specialization. Generally, Aiming Systems Modification 1 is recommended because it reduces shell dispersion of the main and secondary armaments. Main Battery Modification 2 ![]() is worth serious consideration to speed the glacial turret rotation. To increase the effectiveness of the anti-aircraft armament, mount AA Guns Modification 1
is worth serious consideration to speed the glacial turret rotation. To increase the effectiveness of the anti-aircraft armament, mount AA Guns Modification 1 ![]() .
.
Slot 6 gives players options to finalize their build. For gunnery, mount Main Battery Modification 3 to decrease the reload time of the main battery at the cost of turret rotation. Auxiliary Armaments Modification 2 ![]() improves the effectiveness of both secondaries and AA.
improves the effectiveness of both secondaries and AA.
Commander Skills
| Recommended Commander Skills | ||||||
|---|---|---|---|---|---|---|
| Cost (points) |
Attack | Defense | ||||
| 1 |
|
|
|
★★ |
|
|
| 2 |
★★ |
|
|
★★ |
★★ |
|
| 3 |
|
|
★★ |
★★ |
|
|
| 4 |
|
|
|
★★ |
|
★★ |
| Key: ★★★ - Extremely Useful ★★ - Frequently Useful ★ - Occasionally Useful No stars - Not Useful | ||||||
Consumables
Players can equip the following consumables on Izumo:
- Slot 1: Damage Control Party

- Slot 2: Repair Party

- Slot 3: Spotting Aircraft
 or Catapult Fighter
Camouflage
Type 1, 2, or 5 camouflage can be equipped for credits; Types 2 or 5 are recommended at a minimum to reduce the accuracy of incoming shells.
Players who wish to spend doubloons can equip Izumo with Type 19 camouflage that lowers her detection radius, reduces the accuracy of incoming shells, reduces her repair costs, increases her credit earnings, and increases the amount of experience she earns.
Signals
Izumo comes with 21 signal flag slots. The three most important flags are India Delta, Juliet Yankee Bissotwo and India Yankee; all of which will improve your survivability. If the captain goes with the Secondary Build, the addition of Mike Yankee Soxisix will further improve the performance of Izumo’s secondaries.
Recommended Signal Flags 
| |||||
|---|---|---|---|---|---|
| Combat | |||||

|
 ★★★ |
 ★★★ |

|

|

|

|
 ★★ |
 ★★ |
 ★ |
 ★★ |
 ★★★ |

|

| ||||
Note: Use of the Juliet Charlie signal makes detonation impossible.
Gallery
Historical Info
Historical Gallery


