Khabarovsk
| Revision as of 21:10, 3 April 2018 | Revision as of 04:18, 7 August 2020 User renamed UU template | |||
16 intermediate revisions by 9 users not shown | ||||
| Line 3: | Line 3: | |||
| |Anno=<!-- you can write below short description for the ship. it will replace default once. --> | |Anno=<!-- you can write below short description for the ship. it will replace default once. --> | |||
| ? | + | The ship was designed as a destroyer flotilla leader. No destroyer in the world could rival her in terms of speed, while her armour and the power of her artillery were comparable to those of light cruisers. Dual-purpose main guns and a battery of automatic AA guns ensured a strong AA defence.<br><br>{{Model3DViewer|280a4383c735472b8874e4d839b74cc0}} | ||
| |Performance=<!-- write text about performance in battles below --> | |Performance=<!-- write text about performance in battles below --> | |||
| ? | The ''Khabarovsk'' is the epitome of the "running and gunning" method of Soviet destroyer leaders. | + | The ''Khabarovsk'' is the epitome of the "running and gunning" method of Soviet destroyer leaders first introduced at Tier 5 with ''[[Podvoisky]]''. | |
| ? | First | + | First: the running. ''Khabarovsk'' enjoys a top speed of 43 knots which, while outclassed by French counterpart ''[[Kléber]]'', is still very remarkable and excellent for a gunboat. Adding the bonuses provided by the Sierra Mike ({{Sierra Mike|Size=18px}}) signal and {{Engine Boost}} consumable, this ship can reach a top speed close to 49 knots, making itself a frustrating target to hit at range. ''Khabarovsk'' also benefits from a very powerful engine and great acceleration. Unfortunately, while very fast in a straight line, the ship is sorely lacking in agility as her turning radius is large and her rudder shift is downright atrocious, meaning upgrades to improve it are all but mandatory to make ''Khabarovsk'' wiggly enough to dodge incoming fire, especially from high velocity guns (of which there's an abundance in Tier 8 and above). Also, while she can run, she cannot hide: ''Khabarovsk'' has the poorest concealment of all destroyers currently available in ''World of Warships'', making the ship extremely easy to spot, especially if attempting to contest caps (something ''Khabarovsk'' is very bad at). | |
| ? | + | Next: the gunning. She fires the same shells as ''[[Tashkent]]'' at the same rate of fire per barrel; however, she gains a fourth turret, as well as a slightly higher muzzle velocity. Together this allows her to put a withering storm of fire on any target, and switch targets quickly as conditions dictate. Unfortunately, while her firepower is impressive, her gun range is sorely lacking and needs every available upgrade to keep ''Khabarovsk'' at a comfortable range from its targets. | ||
| ? | While she does not have the range or maneuverability of ''Tashkent'', she shares similar advantages of a very large health pool for a destroyer and access to Repair Party. Most notable, however, is the | + | While she does not have the range or maneuverability of ''Tashkent'', she shares similar advantages of a very large health pool for a destroyer and access to {{Repair Party}} consumable. Most notable, however, is the armour: ''Khabarovsk'' is the most heavily armoured destroyer currently available to players, with a 25mm thick deck and a 50mm thick midsection; this "chestplate" can shatter most cruiser HE shells, and at extreme angles, even bounce battleship AP shells. However, this and her large size for a destroyer can occasionally backfire, arming AP shells that would merely over-penetrate smaller, more lightly-armoured destroyers. Optimal angling will depend on the enemy guns and their shell selection. | |
| ? | Her | + | Her AA is fairly decent for a destroyer and can shoot down a few planes, but it is in no way enough to deter plane strikes, especially considering the lack of the {{Defensive AA Fire}} consumable. That being said, the thickly armoured midsection of the ship can withstand some punishment from plane strikes without losing too much health, provided the player actively attempts to dodge plane strikes as well. | |
| ? | The torpedoes are mostly a curiosity. With a 6 km range | + | The torpedoes are mostly a situational curiosity. With a 6.0 km range they will see little use in the majority of games. They are also very slow at 53 knots - only slightly faster than the ship they were fired from! However, they do have one special feature: their detection radius is an amazing 0.6 km, meaning that a close pursuer or smoke camper without {{Hydroacoustic Search}} active will have almost no chance to react in time. Their damage is also respectable, making them potentially lethal ambush weapons. | |
| |Research=<!-- write text about priority sequence of research below --> | |Research=<!-- write text about priority sequence of research below --> | |||
| ? | + | As a Tier X ship, ''{{#var:ship_name}}'' has no additional modules to research. | ||
| |Pros=<!-- write list of positive points below. use * as in ordinary wiki-list. --> | |Pros=<!-- write list of positive points below. use * as in ordinary wiki-list. --> | |||
| ? | * | + | * Very fast with a base speed of 43 knots, which can be further improved with the ''Sierra Mike'' ({{Sierra Mike|Size=18px}}) signal flag and the {{Engine Boost}} consumable | |
| ? | * | + | * Powerful main armament of eight guns in four twin turrets with high rate of fire and good HE and AP performance | |
| ? | + | * Very large health pool | ||
| ? | * | + | * Has 25mm of deck armor and a 50mm midsection, excellent to shatter most HE and even bounce some large calliber AP shells | |
| ? | * | + | * Has access to the {{Repair Party}} consumable | |
| ? | * Has access to the Repair Party consumable | + | * Two quintuple torpedo racks with the stealthiest torpedoes in the game | |
| ? | * | + | ||
| |Cons=<!-- write list of negative points below. use * as in ordinary wiki-list. --> | |Cons=<!-- write list of negative points below. use * as in ordinary wiki-list. --> | |||
| ? | * | + | * Very poor stock gun range | |
| ? | * | + | * Abysmal rudder shift time, worse than a heavy cruiser's without upgrades | |
| ? | * | + | * Worst concealment out of all destroyers in the game | |
| ? | * | + | * Very slow torpedoes with poor range and slow reload speed | |
| + | * Must give up {{Smoke Generator}} to equip {{Repair Party}} | |||
| + | * Can take devastating damage from normal AP penetrations, especially from battleships | |||
| |Upgrades= | |Upgrades= | |||
| + | The recommended upgrades for ''{{#var:ship_name}}'' are as follows: | |||
| + | * '''Slot 1''': {{Main Armaments Modification 1}} | |||
| + | * '''Slot 2''': {{Engine Room Protection}} ''or'' {{Engine Boost Modification 1}} | |||
| + | * '''Slot 3''': {{Aiming Systems Modification 1}} | |||
| + | * '''Slot 4''': {{Steering Gears Modification 2}} | |||
| + | * '''Slot 5''': {{Steering Gears Modification 3}} ''or'' {{UU Khabarovsk}} | |||
| + | * '''Slot 6''': {{Main Battery Modification 3}} | |||
| ? | + | {{block|i|content=Captains who have the rare {{Engine Boost Modification 1}} upgrade '''and''' have the Sierra Mike ({{Sierra Mike|Size=18px}}) signal equipped are encouraged to replace the {{Engine Room Protection}} upgrade, as it extends the {{Engine Boost}} consumable duration by 50%, thereby allowing her to maintain a max speed of 48.7 knots for '''three minutes'''.}} | ||
| ? | + | |||
| ? | + | |||
| ? | + | |||
| ? | + | |||
| ? | + | |||
| |CommanderSkills=<!-- write text about best set of Commander Skills below --> | |CommanderSkills=<!-- write text about best set of Commander Skills below --> | |||
| ? | ||||
| ? | ||||
| ? | ||||
| ? | ||||
| ? | ||||
| ? | ||||
| ? | ||||
| ? | ||||
| ? | ||||
| ? | | | + | {{Commander Skills 2 | |
| ? | | | + | <!-- This version enables a '0' rating. Use it for skills that have no effect (e.g. Improved Engines on a non-CV) or are detrimental to the ship. They should mirror what appears in the game client. --> | |
| ? | | | + | | rating11 = 2 <!-- Priority Target --> | |
| ? | | | + | | rating12 = 3 <!-- Preventive Maint --> | |
| ? | | | + | | rating13 = <!-- Expert Loader --> | |
| ? | | | + | | rating14 = 0 <!-- Air Supremacy --> | |
| ? | | | + | | rating15 = 0 <!-- Direction Center for Fighters --> | |
| ? | | Last | + | | rating16 = 0 <!-- Improved Engine Boost --> | |
| + | | rating17 = <!-- Incoming Fire Alert --> | |||
| + | | rating18 = 0 <!-- Last Gasp --> | |||
| ? | | | + | | rating21 = 1 <!-- High Alert --> | |
| ? | | | + | | rating22 = 1 <!-- Jack of All Trades --> | |
| ? | | | + | | rating23 = <!-- Expert Marksman --> | |
| ? | | | + | | rating24 = <!-- Torpedo Acceleration --> | |
| ? | | | + | | rating25 = 1 <!-- Smoke Screen Expert --> | |
| ? | | | + | | rating26 = 0 <!-- Improved Engines --> | |
| ? | | | + | | rating27 = 2 <!-- Adrenaline Rush --> | |
| ? | | | + | | rating28 = 3 <!-- Last Stand --> | |
| ? | | Manual Fire Control for Secondary Armament | + | | rating31 = <!-- Basics of Survivability --> | |
| ? | | Fire Prevention | + | | rating32 = 3 <!-- Survivability Expert--> | |
| ? | | Inertia Fuse for HE Shells | + | | rating33 = <!-- Torpedo Armament Expertise--> | |
| ? | | | + | | rating34 = 0 <!-- Aircraft Armor --> | |
| ? | | Advanced Firing Training | + | | rating35 = 2 <!-- Basic Firing Training --> | |
| ? | | | + | | rating36 = 3 <!-- Superintendent --> | |
| ? | | Radio Position Finding | + | | rating37 = 3 <!-- Demolition Expert --> | |
| ? | | | + | | rating38 = 1 <!-- Vigilance --> | |
| + | ||||
| + | | rating41 = <!-- Manual Fire Control for Secondary Armament --> | |||
| + | | rating42 = <!-- Fire Prevention --> | |||
| + | | rating43 = <!-- Inertia Fuse for HE Shells --> | |||
| + | | rating44 = 0 <!-- Sight Stabilization --> | |||
| + | | rating45 = 3 <!-- Advanced Firing Training --> | |||
| + | | rating46 = 0 <!-- Massive AA Fire --> | |||
| + | | rating47 = <!-- Radio Position Finding --> | |||
| + | | rating48 = 1 <!-- Concealment Expert --> | |||
| }} | }} | |||
| |Consumables=<!-- write text about selection of Consumables below --> | |Consumables=<!-- write text about selection of Consumables below --> | |||
| ? | + | ''{{#var:ship_name}}'' can equip the following consumables: | ||
| ? | * | + | * '''Slot 1:''' {{Damage Control Party}} | |
| ? | * | + | * '''Slot 2:''' {{Smoke Generator}} ''or'' {{Repair Party}} | |
| ? | * | + | * '''Slot 3:''' {{Engine Boost}} | |
| ? | ||||
| |Camouflage=<!-- write text about useful camouflage below --> | |Camouflage=<!-- write text about useful camouflage below --> | |||
| [[Ship:Camouflage#Standard Camouflage|Type 1, 2, or 5 camouflage]] can be equipped for credits; Types 2 or 5 are recommended at a minimum to reduce the accuracy of incoming shells. | [[Ship:Camouflage#Standard Camouflage|Type 1, 2, or 5 camouflage]] can be equipped for credits; Types 2 or 5 are recommended at a minimum to reduce the accuracy of incoming shells. | |||
| ? | Players who wish to spend doubloons | + | Players who wish to spend doubloons can equip ''{{#var:ship_name}}'' with [[Ship:Camouflage#Permanent_Camouflage|Type 20 camouflage]] that lowers her detection radius, reduces the accuracy of incoming shells, reduces her repair costs, and increases the amount of experience she earns. | |
| |Signals=<!-- write text about best set of signals below --> | |Signals=<!-- write text about best set of signals below --> | |||
| ? | + | Like ''[[Tashkent]]'', Victor Lima ({{Victor Lima|Size=18px}}), India X-Ray ({{India X-Ray|Size=18px}}), Sierra Mike ({{Sierra Mike|Size=18px}}), and Juliet Charlie ({{Juliet Charlie|Size=18px}}) are the most recommended signals. Additionally, because ''Khabarovsk'' has access to the {{Repair Party}} consumable, players using said consumable are thus highly recommended to also mount India Delta ({{India Delta|Size=18px}}). Zulu Hotel ({{Zulu Hotel|Size=18px}}) and Dragon Flag ({{Dragon Flag|Size=18px}}) are recommended for captain (re)training. Players can opt to mount Zulu Hotel to stack the effect of the premium permanent camouflage credit earning bonus. | ||
| {{Signal Flags | {{Signal Flags | |||
| Line 132: | Line 136: | |||
| </gallery>|History=<!-- write text below --> | </gallery>|History=<!-- write text below --> | |||
| ===Specifications=== | ===Specifications=== | |||
| ? | :3,400 tons displacement, standard | + | :3,400 tons displacement, standard | |
| ? | :140m length | + | :140m length | |
| ? | :13m beam | + | :13m beam | |
| :4.1m draft | :4.1m draft | |||
| ====Performance==== | ====Performance==== | |||
| ? | :47knots at 140,000shaft horsepower | + | :47knots at 140,000shaft horsepower | |
| :5,200nautical miles at knots | :5,200nautical miles at knots | |||
| ====Armament==== | ====Armament==== | |||
| =====Main===== | =====Main===== | |||
| ? | :Eight (4x2) 130mm guns | + | :Eight (4x2) 130mm guns | |
| =====Anti-Aircraft===== | =====Anti-Aircraft===== | |||
| ? | :Eight (2x4) 45mm guns | + | :Eight (2x4) 45mm guns | |
| =====Torpedoes===== | =====Torpedoes===== | |||
| ? | :Ten (2x5) 533mm torpedo tubes | + | :Ten (2x5) 533mm torpedo tubes | |
| ===History=== | ===History=== | |||
| ? | The Khabarovsk as it appears in World of Warships is a representation of the 1936 | + | The Khabarovsk as it appears in World of Warships is a representation of the 1936 4500-ton Project 47 armored destroyer design. | |
| ===Historical Inaccuracies=== | ===Historical Inaccuracies=== | |||
| Line 165: | Line 169: | |||
| |Ref= <!-- write below --> | |Ref= <!-- write below --> | |||
| ? | * [https://ru.wikipedia.org/wiki/%D0%9B%D0%B8%D0%B4%D0%B5%D1%80%D1%8B_%D1%8D%D1%81%D0%BA%D0%B0%D0%B4%D1%80%D0%B5%D0%BD%D0%BD%D1%8B%D1%85_%D0%BC%D0%B8%D0%BD%D0%BE%D0%BD%D0%BE%D1%81%D1%86%D0%B5%D0%B2_%D0%BF%D1%80%D0%BE%D0%B5%D0%BA%D1%82%D0%B0_47]:Russian Wikipedia page on the Project 47 Destroyer | + | * [https://ru.wikipedia.org/wiki/%D0%9B%D0%B8%D0%B4%D0%B5%D1%80%D1%8B_%D1%8D%D1%81%D0%BA%D0%B0%D0%B4%D1%80%D0%B5%D0%BD%D0%BD%D1%8B%D1%85_%D0%BC%D0%B8%D0%BD%D0%BE%D0%BD%D0%BE%D1%81%D1%86%D0%B5%D0%B2_%D0%BF%D1%80%D0%BE%D0%B5%D0%BA%D1%82%D0%B0_47]:Russian Wikipedia page on the Project 47 Destroyer which briefly covers the design history of the Project 24. | |
| + | ||||
| + | * | |||
| + | [https://wiki.wargaming.net/ru/Navy:Лидер_эскадренных_миноносцев_проекта_24] War Gaming Wiki Page on the Project 24 design the Khabarovsk is based on. | |||
| * | * | |||
Revision as of 04:18, 7 August 2020

| Purchase priceSpecial |
| Hit Points22,500 |
| 130 mm/55 on a B-2-U mount4 х 2 pcs. |
| Rate of Fire12 shots/min. |
| Reload Time5 sec. |
| Rotation Speed20 deg./sec. |
| 180 Degree Turn Time9 sec. |
| Firing Range11.24 km. |
| Maximum Dispersion99 m. |
| HE ShellHE-46 |
| Maximum HE Shell Damage1,900 |
| Chance of Fire on Target Caused by HE Shell8 % |
| Initial HE Shell Velocity900 m./s. |
| HE Shell Weight33.4 kg. |
| AP ShellSAP-46 |
| Maximum AP Shell Damage2,600 |
| Initial AP Shell Velocity900 m./s. |
| AP Shell Weight33.5 kg. |
| 533 mm Quintuple 2-N2 х 5 pcs. |
| Rate of Fire0.47 shots/min. |
| Reload Time127 sec. |
| Rotation Speed25 deg./sec. |
| 180 Degree Turn Time7.2 sec. |
| TorpedoET-46 |
| Maximum Damage19,500 |
| Torpedo Speed53 knot |
| Torpedo Range6 km. |
| 130 mm/55 on a B-2-U mount4 х 2 pcs. |
| . . . Average Damage per Second49.2 |
| . . . Firing Range5.19 km. |
| 37 mm 46-K mount4 х 4 pcs. |
| . . . Average Damage per Second48.8 |
| . . . Firing Range3.51 km. |
| 12.7 mm DShK4 х 1 pcs. |
| . . . Average Damage per Second14.4 |
| . . . Firing Range1.2 km. |
| 37 mm V-11 mount2 х 2 pcs. |
| . . . Average Damage per Second18.4 |
| . . . Firing Range3.51 km. |
| Maximum Speed43 knot |
| Turning Circle Radius760 m. |
| Rudder Shift Time11.1 sec. |
| Surface Detectability Range9.7 km. |
| Air Detectability Range3.96 km. |

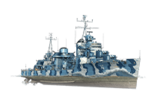
Khabarovsk — Soviet special premium Tier X destroyer.
The ship was designed as a destroyer flotilla leader. No destroyer in the world could rival her in terms of speed, while her armour and the power of her artillery were comparable to those of light cruisers. Dual-purpose main guns and a battery of automatic AA guns ensured a strong AA defence.
Modules
 |
Rate of Fire (shots/min) | 180° Turn Time (sec) | Maximum Dispersion (m) | Maximum HE Shell Damage (HP) | Chance of Fire on Target Caused by HE Shell (%) | Maximum AP Shell Damage (HP) |
Research price (exp) |
Purchase price ( | |
|---|---|---|---|---|---|---|---|---|---|
| 130 mm/55 on a B-2-U mount | 12 | 9 | 99 | 1,900 | 8 | 2,600 | 0 | 1,800,000 |
 |
Hit Points (HP) | Armor (mm) | Armor (mm) | Main Turrets (pcs.) | Secondary Gun Turrets (pcs.) | AA Mounts (pcs.) | Torpedo Tubes (pcs.) | Hangar Capacity (pcs.) |
Research price (exp) |
Purchase price ( | |
|---|---|---|---|---|---|---|---|---|---|---|---|
| Khabarovsk | 22,500 | 12 | 50 | 4 | 4/2/4/4 | 2 | 0 | 2,500,000 |
 |
Rate of Fire (shots/min) | Torpedo Tubes Reload Time (sec) | 180° Turn Time (sec) | Maximum Damage (HP) | Torpedo Speed (knot) | Torpedo Range (km) |
Research price (exp) |
Purchase price ( | |
|---|---|---|---|---|---|---|---|---|---|
| ET-46 | 0.5 | 127 | 7.2 | 19,500 | 53 | 6 | 0 | 1,100,000 |
 |
IDS_SHIP_PARAM_SUO_INCREASE_DIST (%) | Maximum Firing Range (km) |
Research price (exp) |
Purchase price ( | |
|---|---|---|---|---|---|
| GFCS X mod. 1 | 0 | 0 | 1,500,000 |
 |
Maximum Speed (knot) |
Research price (exp) |
Purchase price ( | |
|---|---|---|---|---|
| Propulsion: 130,000 hp | 43 | 0 | 1,800,000 |
Compatible Upgrades
| Slot 1 |
|||||
|---|---|---|---|---|---|
| Slot 2 |
|||||
| Slot 3 |
|||||
| Slot 4 |
|||||
| Slot 5 |
|||||
| Slot 6 |
Player Opinion
Performance
The Khabarovsk is the epitome of the "running and gunning" method of Soviet destroyer leaders first introduced at Tier 5 with Podvoisky.
First: the running. Khabarovsk enjoys a top speed of 43 knots which, while outclassed by French counterpart Kléber, is still very remarkable and excellent for a gunboat. Adding the bonuses provided by the Sierra Mike (![]() ) signal and Engine Boost
) signal and Engine Boost ![]() consumable, this ship can reach a top speed close to 49 knots, making itself a frustrating target to hit at range. Khabarovsk also benefits from a very powerful engine and great acceleration. Unfortunately, while very fast in a straight line, the ship is sorely lacking in agility as her turning radius is large and her rudder shift is downright atrocious, meaning upgrades to improve it are all but mandatory to make Khabarovsk wiggly enough to dodge incoming fire, especially from high velocity guns (of which there's an abundance in Tier 8 and above). Also, while she can run, she cannot hide: Khabarovsk has the poorest concealment of all destroyers currently available in World of Warships, making the ship extremely easy to spot, especially if attempting to contest caps (something Khabarovsk is very bad at).
consumable, this ship can reach a top speed close to 49 knots, making itself a frustrating target to hit at range. Khabarovsk also benefits from a very powerful engine and great acceleration. Unfortunately, while very fast in a straight line, the ship is sorely lacking in agility as her turning radius is large and her rudder shift is downright atrocious, meaning upgrades to improve it are all but mandatory to make Khabarovsk wiggly enough to dodge incoming fire, especially from high velocity guns (of which there's an abundance in Tier 8 and above). Also, while she can run, she cannot hide: Khabarovsk has the poorest concealment of all destroyers currently available in World of Warships, making the ship extremely easy to spot, especially if attempting to contest caps (something Khabarovsk is very bad at).
Next: the gunning. She fires the same shells as Tashkent at the same rate of fire per barrel; however, she gains a fourth turret, as well as a slightly higher muzzle velocity. Together this allows her to put a withering storm of fire on any target, and switch targets quickly as conditions dictate. Unfortunately, while her firepower is impressive, her gun range is sorely lacking and needs every available upgrade to keep Khabarovsk at a comfortable range from its targets.
While she does not have the range or maneuverability of Tashkent, she shares similar advantages of a very large health pool for a destroyer and access to Repair Party ![]() consumable. Most notable, however, is the armour: Khabarovsk is the most heavily armoured destroyer currently available to players, with a 25mm thick deck and a 50mm thick midsection; this "chestplate" can shatter most cruiser HE shells, and at extreme angles, even bounce battleship AP shells. However, this and her large size for a destroyer can occasionally backfire, arming AP shells that would merely over-penetrate smaller, more lightly-armoured destroyers. Optimal angling will depend on the enemy guns and their shell selection.
consumable. Most notable, however, is the armour: Khabarovsk is the most heavily armoured destroyer currently available to players, with a 25mm thick deck and a 50mm thick midsection; this "chestplate" can shatter most cruiser HE shells, and at extreme angles, even bounce battleship AP shells. However, this and her large size for a destroyer can occasionally backfire, arming AP shells that would merely over-penetrate smaller, more lightly-armoured destroyers. Optimal angling will depend on the enemy guns and their shell selection.
Her AA is fairly decent for a destroyer and can shoot down a few planes, but it is in no way enough to deter plane strikes, especially considering the lack of the Defensive AA Fire ![]() consumable. That being said, the thickly armoured midsection of the ship can withstand some punishment from plane strikes without losing too much health, provided the player actively attempts to dodge plane strikes as well.
consumable. That being said, the thickly armoured midsection of the ship can withstand some punishment from plane strikes without losing too much health, provided the player actively attempts to dodge plane strikes as well.
Pros:
- Very fast with a base speed of 43 knots, which can be further improved with the Sierra Mike (
 ) signal flag and the Engine Boost
  consumable
- Powerful main armament of eight guns in four twin turrets with high rate of fire and good HE and AP performance
- Very large health pool
- Has 25mm of deck armor and a 50mm midsection, excellent to shatter most HE and even bounce some large calliber AP shells
- Has access to the Repair Party
 consumable
- Two quintuple torpedo racks with the stealthiest torpedoes in the game
Cons:
- Very poor stock gun range
- Abysmal rudder shift time, worse than a heavy cruiser's without upgrades
- Worst concealment out of all destroyers in the game
- Very slow torpedoes with poor range and slow reload speed
- Must give up Smoke Generator
 to equip Repair Party
- Can take devastating damage from normal AP penetrations, especially from battleships
Research
Optimal Configuration
Upgrades
The recommended upgrades for Khabarovsk are as follows:
- Slot 1: Main Armaments Modification 1

- Slot 2: Engine Room Protection
 or Engine Boost Modification 1
- Slot 3: Aiming Systems Modification 1

- Slot 4: Steering Gears Modification 2

- Slot 5: Steering Gears Modification 2 (
 ) or Master Fire Control Director (
 )
)
- Slot 6: Main Battery Modification 3

Captains who have the rare Engine Boost Modification 1 ![]() upgrade and have the Sierra Mike (
upgrade and have the Sierra Mike (![]() ) signal equipped are encouraged to replace the Engine Room Protection
) signal equipped are encouraged to replace the Engine Room Protection ![]() upgrade, as it extends the Engine Boost
upgrade, as it extends the Engine Boost ![]() consumable duration by 50%, thereby allowing her to maintain a max speed of 48.7 knots for three minutes.
consumable duration by 50%, thereby allowing her to maintain a max speed of 48.7 knots for three minutes.
Commander Skills
| Recommended Commander Skills | ||||||||
|---|---|---|---|---|---|---|---|---|
| Cost (points) |
Endurance | Attack | Support | Versatility | ||||
| 1 |
★★ |
★★★ |
|
Χ |
Χ |
Χ |
|
Χ |
| 2 |
★ |
★ |
|
|
★ |
Χ |
★★ |
★★★ |
| 3 |
|
★★★ |
|
Χ |
★★ |
★★★ |
★★★ |
★ |
| 4 |
|
|
|
Χ |
★★★ |
Χ |
|
★ |
| Key: ★★★ - Extremely Useful ★★ - Frequently Useful ★ - Occasionally Useful No stars - Meh Χ - Not recommended | ||||||||
Consumables
Khabarovsk can equip the following consumables:
- Slot 1: Damage Control Party

- Slot 2: Smoke Generator or Repair Party
- Slot 3: Engine Boost
Camouflage
Type 1, 2, or 5 camouflage can be equipped for credits; Types 2 or 5 are recommended at a minimum to reduce the accuracy of incoming shells.
Players who wish to spend doubloons can equip Khabarovsk with Type 20 camouflage that lowers her detection radius, reduces the accuracy of incoming shells, reduces her repair costs, and increases the amount of experience she earns.
Signals
Like Tashkent, Victor Lima (![]() ), India X-Ray (
), India X-Ray (![]() ), Sierra Mike (
), Sierra Mike (![]() ), and Juliet Charlie (
), and Juliet Charlie (![]() ) are the most recommended signals. Additionally, because Khabarovsk has access to the Repair Party
) are the most recommended signals. Additionally, because Khabarovsk has access to the Repair Party ![]() consumable, players using said consumable are thus highly recommended to also mount India Delta (
consumable, players using said consumable are thus highly recommended to also mount India Delta (![]() ). Zulu Hotel (🚫) and Dragon Flag (🚫) are recommended for captain (re)training. Players can opt to mount Zulu Hotel to stack the effect of the premium permanent camouflage credit earning bonus.
). Zulu Hotel (🚫) and Dragon Flag (🚫) are recommended for captain (re)training. Players can opt to mount Zulu Hotel to stack the effect of the premium permanent camouflage credit earning bonus.
Recommended Signal Flags 
| |||||
|---|---|---|---|---|---|
| Combat | |||||
 ★★★ |

|

|

|
 ★★ |
 ★★ |
 ★ |

|

|
 ★★★ |
 ★★ |
 ★★ |

|

| ||||
Note: Use of the Juliet Charlie signal makes detonation impossible.
Gallery
Press F to pay respects.
Double Strike!


Historical Info
Historical Gallery


References
- [1]:Russian Wikipedia page on the Project 47 Destroyer which briefly covers the design history of the Project 24.
[2] War Gaming Wiki Page on the Project 24 design the Khabarovsk is based on.
[3]: Information on the 130 mm/55 B-2-U guns (4th paragraph)