Kitakaze
| Revision as of 11:59, 7 August 2018 | Revision as of 01:11, 21 August 2018 | |||
| Line 15: | Line 15: | |||
| 3. Write a brief summary paragraph of 1-3 sentences highlighting the key takeaways from the paragraphs above. | 3. Write a brief summary paragraph of 1-3 sentences highlighting the key takeaways from the paragraphs above. | |||
| --> | --> | |||
| + | ||||
| + | In many ways, ''{{#var:ship_name}}'' is extremely comparable to her predecessor, ''[[Akizuki]]'', and is simply a straight upgrade in most regards. She improves on ''Akizuki's'' speed, maneuverability, torpedo launchers, concealment, and has access to the tier nine module slot. Players who enjoyed ''Akizuki'' should feel right at home in the tier nine version. | |||
| + | ||||
| + | ''{{#var:ship_name}}'' has four 100mm gun mounts, each with two barrels for a total of eight 100mm armaments. These guns provide most of ''{{#var:ship_name}}'s'' offensive firepower, especially when pared with her blistering three second base reload. This reload can be further lowered by selecting the [[Ship:Commander#Basic_Firing_Training|Basic Firing Training]] skill in conjunction with the tier nine {{Main Battery Modification 3}} module. Normally, a 100mm gun would not be capable of penetrating anything more than 17mm of armor—limiting the effectiveness of any such guns without the [[Ship:Commander#Inertia_Fuse_for_HE_Shells|Inertia Fuse for HE Shells]] skill. However, all Japanese 100mm guns have an increased penetration for their base HE shells, allowing them to penetrate up to 25mm of armor even without the captain skill—And with IFHE, these shells can penetrate 32mm armor plating. | |||
| + | ||||
| + | In addition to her impressive main battery firepower, ''{{#var:ship_name}}'' has a sextuple torpedo launcher. Along with her {{Torpedo Reload Booster}}, this allows her to put twelve torpedoes in the water during a short period of time. However, keep in mind that this launcher also has a very long reload speed, taking more than two and a half minutes to be ready. ''{{#var:ship_name}}'s'' torpedoes are a useful tool to have in combination with her main battery firepower, and proves to be a direct upgrade from the torpedoes found on ''[[Akizuki]]''. In addition, ''{{#var:ship_name}}'' gains an extra three knots of speed in comparison with ''Akizuki'', a second off her rudder shift time, greater concealment, and slightly better short range AA. | |||
| + | ||||
| + | Fans of ''[[Akizuki]]'' should greatly enjoy ''{{#var:ship_name}}'', as she essentially shores up some of ''Akizuki's'' key weaknesses like speed while also improving as a whole. She is a strong ship for anyone who appreciates the playstyle of a gun focused destroyer. | |||
| |Pros=<!-- write list of positive points below. use * as in ordinary wiki-list. --> | |Pros=<!-- write list of positive points below. use * as in ordinary wiki-list. --> | |||
| ? | * | + | * Great firepower with her main battery guns. | |
| ? | * | + | * Able to fire twelve torpedoes using the {{Torpedo Reload Booster}}. | |
| ? | * | + | * Decent amount of health for a destroyer at tier nine. | |
| ? | * | + | * Pretty good concealment values. | |
| |Cons=<!-- write list of negative points below. use * as in ordinary wiki-list. --> | |Cons=<!-- write list of negative points below. use * as in ordinary wiki-list. --> | |||
| ? | * | + | * Provides a large target for enemy ships to shoot at. | |
| ? | * | + | * Torpedoes take a monstrously long time to reload. | |
| ? | * | + | * Large and clumsy turning circle for a destroyer. | |
| ? | * | + | * Doesn't have {{Defensive AA Fire}} to boost her AA firepower. | |
| |Research=<!-- write text about priority sequence of research below --> | |Research=<!-- write text about priority sequence of research below --> | |||
| Line 36: | Line 44: | |||
| * '''Propulsion:''' | * '''Propulsion:''' | |||
| --> | --> | |||
| + | Captains should prioritise unlocking either the upgraded Hull or Gun Fire Control System first, depending on their own playstyle. Unlocking the B Hull give ''{{#var:ship_name}}'' more health and a better rudder shift time, but the Fire Control System improves her gun range. Leave the torpedoes for last, as they are more of a secondary focus for ''{{#var:ship_name}}''. It should be noted that generally, it is acknowledged that the 12km version torpedoes are the most effective. | |||
| <!-- FOR PREMIUM SHIPS: | <!-- FOR PREMIUM SHIPS: | |||
| Line 44: | Line 53: | |||
| |Upgrades=<!-- write text about best upgrades below, add * after upgrade link to designate that another upgrade may be viable --> | |Upgrades=<!-- write text about best upgrades below, add * after upgrade link to designate that another upgrade may be viable --> | |||
| ? | + | The recommended upgrades for ''{{#var:ship_name}}'' are as follows: | ||
| ? | * '''Slot 1''': | + | * '''Slot 1''': {{Magazine Modification 1}} to help prevent the ship from blowing up too early. | |
| ? | * '''Slot 2''': | + | * '''Slot 2''': {{Propulsion Modification 1}} to lessen the changes of the engine blowing up and to get it running again faster. | |
| ? | * '''Slot 3''': | + | * '''Slot 3''': {{Aiming Systems Modification 1}} or {{AA Guns Modification 2}}, depending on how important captains think having greater AA range is. | |
| ? | * '''Slot 4''': | + | * '''Slot 4''': {{Propulsion Modification 2}} so you get moving faster. | |
| ? | * '''Slot 5''': | + | * '''Slot 5''': {{Concealment System Modification 1}} to better sneak with. | |
| ? | * '''Slot 6''': | + | * '''Slot 6''': {{Main Battery Modification 3}}, because watching the world burn is wonderful. | |
| ? | + | |||
| |CommanderSkills=<!-- write text about best set of Commander Skills below --> | |CommanderSkills=<!-- write text about best set of Commander Skills below --> | |||
| Line 57: | Line 66: | |||
| {{Commander Skills | {{Commander Skills | |||
| ? | | Priority Target = | + | | Priority Target = 2 | |
| ? | | Preventative Maintenance = | + | | Preventative Maintenance = 3 | |
| | Expert Loader = | | Expert Loader = | |||
| | Aircraft Servicing Expert = | | Aircraft Servicing Expert = | |||
| | Direction Center for Catapult Aircraft = | | Direction Center for Catapult Aircraft = | |||
| | Dogfighting Expert = | | Dogfighting Expert = | |||
| ? | | Incoming Fire Alert = | + | | Incoming Fire Alert = 1 | |
| | Evasive Maneuver = | | Evasive Maneuver = | |||
| ? | | High Alert = | + | | High Alert = 1 | |
| ? | | Jack of All Trades = | + | | Jack of All Trades = 1 | |
| | Expert Marksman = | | Expert Marksman = | |||
| | Torpedo Acceleration = | | Torpedo Acceleration = | |||
| ? | | Smoke Screen Expert = | + | | Smoke Screen Expert = 1 | |
| | Expert Rear Gunner = | | Expert Rear Gunner = | |||
| ? | | Adrenaline Rush = | + | | Adrenaline Rush = 3 | |
| ? | | Last Stand = | + | | Last Stand = 3 | |
| ? | | Basics of Survivability = | + | | Basics of Survivability = 1 | |
| ? | | Survivability Expert = | + | | Survivability Expert = 3 | |
| ? | | Torpedo Armament Expertise = | + | | Torpedo Armament Expertise = 1 | |
| | Emergency Takeoff = | | Emergency Takeoff = | |||
| ? | | Basic Firing Training = | + | | Basic Firing Training = 2 | |
| ? | | Superintendent = | + | | Superintendent = 3 | |
| ? | | Demolition Expert = | + | | Demolition Expert = 2 | |
| | Vigilance = | | Vigilance = | |||
| | Manual Fire Control for Secondary Armament = | | Manual Fire Control for Secondary Armament = | |||
| | Fire Prevention = | | Fire Prevention = | |||
| ? | | Inertia Fuse for HE Shells = | + | | Inertia Fuse for HE Shells = 3 | |
| | Air Supremacy = | | Air Supremacy = | |||
| ? | | Advanced Firing Training = | + | | Advanced Firing Training = 2 | |
| | Manual Fire Control for AA Armament = | | Manual Fire Control for AA Armament = | |||
| ? | | Radio Position Finding = | + | | Radio Position Finding = 2 | |
| ? | | Concealment Expert = | + | | Concealment Expert = 3 | |
| }}--> | }}--> | |||
| |Consumables=<!-- write text about selection of Consumables below --> | |Consumables=<!-- write text about selection of Consumables below --> | |||
| ? | + | ''{{#var:ship_name}}'' can equip the following consumables: | ||
| * '''Slot 1:''' {{Damage Control Party}} | * '''Slot 1:''' {{Damage Control Party}} | |||
| ? | * | + | * '''Slot 2:''' {{Smoke Generator}} | |
| ? | + | * '''Slot 3:''' {{Engine Boost}} | ||
| ? | * | + | * '''Slot 4:''' {{Torpedo Reload Booster}} | |
| ? | * {{ | + | ||
| ? | + | Generally, using the premium versions of {{Damage Control Party}}, {{Smoke Generator}}, and {{Torpedo Reload Booster}} greatly enhances ''{{#var:ship_name}}'s'' combat performance, and using them can be well worth the extra silver it costs. | ||
| ? | + | |||
| ? | + | |||
| |Camouflage=<!-- write text about useful camouflage below --> | |Camouflage=<!-- write text about useful camouflage below --> | |||
| ? | ||||
| ? | ||||
| ? | + | [[Ship:Camouflage#Standard Camouflage|Type 1, 2, or 5 camouflage]] can be equipped for credits; Types 1 or 5 are recommended at a minimum to reduce detectibility range. | ||
| ? | Types 1 or 5 are recommended at a minimum to reduce detectibility range | + | ||
| ? | + | |||
| ? | Players who wish to spend doubloons can equip ''{{#var:ship_name}}'' with [[Ship:Camouflage#Permanent_Camouflage|Type | + | Players who wish to spend doubloons can equip ''{{#var:ship_name}}'' with [[Ship:Camouflage#Permanent_Camouflage|Type 19 camouflage]] that lowers her detection radius, reduces the accuracy of incoming shells, reduces her repair costs, and increases the amount of experience she earns. | |
| ? | + | |||
| ? | ||||
| ? | ||||
| ? | ||||
| |Signals=<!-- write text about best set of signals below --> | |Signals=<!-- write text about best set of signals below --> | |||
| <!-- {{Signal Flags | <!-- {{Signal Flags | |||
| ? | | November Echo Setteseven = | + | | November Echo Setteseven = 2 | |
| | Mike Yankee Soxisix = | | Mike Yankee Soxisix = | |||
| ? | | India X-Ray = | + | | India X-Ray = 3 | |
| ? | | Juliet Whiskey Unaone = | + | | Juliet Whiskey Unaone = 2 | |
| ? | | Victor Lima = | + | | Victor Lima = 3 | |
| ? | | Hotel Yankee = | + | | Hotel Yankee = 1 | |
| ? | | November Foxtrot = | + | | November Foxtrot = 1 | |
| ? | | Sierra Mike = | + | | Sierra Mike = 3 | |
| | India Delta = | | India Delta = | |||
| ? | | Juliet Yankee Bissotwo = | + | | Juliet Yankee Bissotwo = | |
| | India Yankee = | | India Yankee = | |||
| ? | | Juliet Charlie = | + | | Juliet Charlie = 3 | |
| ? | | Zulu = | + | | Zulu = 2 | |
| ? | | India Bravo Terrathree = | + | | India Bravo Terrathree = 2 | |
| ? | | Equal Speed Charlie London = | + | | Equal Speed Charlie London = 2 | |
| ? | | Zulu Hotel = | + | | Zulu Hotel = 2 | |
| ? | | Papa Papa = | + | | Papa Papa = 2 | |
| ? | | Wyvern = | + | | Wyvern = 2 | |
| ? | | Red Dragon = | + | | Red Dragon = 2 | |
| ? | | Dragon Flag = | + | | Dragon Flag = 2 | |
| ? | | Ouroboros = | + | | Ouroboros = 2 | |
| ? | | Hydra = | + | | Hydra = 2 | |
| }} --> | }} --> | |||
Revision as of 01:11, 21 August 2018

| Research price154000 exp |
| Purchase price13,200,000 |
| Hit Points16,200 |
| 100 mm/65 Type 98 on a Model A mount4 х 2 pcs. |
| Rate of Fire20 shots/min. |
| Reload Time3 sec. |
| Rotation Speed16 deg./sec. |
| 180 Degree Turn Time11.25 sec. |
| Firing Range11.33 km. |
| Maximum Dispersion108 m. |
| HE Shell100 mm HE Type98 |
| Maximum HE Shell Damage1,200 |
| Chance of Fire on Target Caused by HE Shell5 % |
| Initial HE Shell Velocity1000 m./s. |
| HE Shell Weight13 kg. |
| AP Shell100 mm AP Type98 |
| Maximum AP Shell Damage1,700 |
| Initial AP Shell Velocity1000 m./s. |
| AP Shell Weight13 kg. |
| 610 mm Sextuple1 х 6 pcs. |
| Rate of Fire0.36 shots/min. |
| Reload Time167 sec. |
| Rotation Speed25 deg./sec. |
| 180 Degree Turn Time7.2 sec. |
| TorpedoType93 mod. 2 |
| Maximum Damage20,967 |
| Torpedo Speed67 knot |
| Torpedo Range9.99 km. |
| 100 mm/65 Type 98 on a Model A mount4 х 2 pcs. |
| . . . Average Damage per Second83.2 |
| . . . Firing Range5.01 km. |
| 25 mm/60 Type 96 on a single mount18 х 1 pcs. |
| . . . Average Damage per Second32.4 |
| . . . Firing Range2.49 km. |
| 25 mm/60 Type 96 on a triple mount6 х 3 pcs. |
| . . . Average Damage per Second19.8 |
| . . . Firing Range2.49 km. |
| 100 mm/65 Type 98 on a Model A mount4 х 2 pcs. |
| . . . Average Damage per Second83.2 |
| . . . Firing Range5.01 km. |
| Maximum Speed36 knot |
| Turning Circle Radius730 m. |
| Rudder Shift Time6.5 sec. |
| Surface Detectability Range7.53 km. |
| Air Detectability Range3.66 km. |

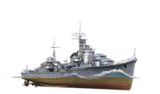
Kitakaze — Japanese Tier IX destroyer.
A V7 project destroyer. This ship was a further development of the Akizuki-class destroyers. Compared to her prototype, she had a higher speed and carried more powerful torpedo armament.
Modules
 |
Rate of Fire (shots/min) | 180° Turn Time (sec) | Maximum Dispersion (m) | Maximum HE Shell Damage (HP) | Chance of Fire on Target Caused by HE Shell (%) | Maximum AP Shell Damage (HP) |
Research price (exp) |
Purchase price ( | |
|---|---|---|---|---|---|---|---|---|---|
| 100 mm/65 Type 98 on a Model A mount | 20 | 11.3 | 108 | 1,200 | 5 | 1,700 | 0 | 1,000,000 |
 |
Hit Points (HP) | Armor (mm) | Armor (mm) | Main Turrets (pcs.) | Secondary Gun Turrets (pcs.) | AA Mounts (pcs.) | Torpedo Tubes (pcs.) | Hangar Capacity (pcs.) |
Research price (exp) |
Purchase price ( | |
|---|---|---|---|---|---|---|---|---|---|---|---|
| Kitakaze (A) | 16,200 | 13 | 20 | 4 | 18/6/4 | 1 | 0 | 980,000 | |||
| Kitakaze (B) | 20,700 | 13 | 20 | 4 | 18/6/4 | 1 | 26,000 | 2,000,000 |
 |
Rate of Fire (shots/min) | Torpedo Tubes Reload Time (sec) | 180° Turn Time (sec) | Maximum Damage (HP) | Torpedo Speed (knot) | Torpedo Range (km) |
Research price (exp) |
Purchase price ( | |
|---|---|---|---|---|---|---|---|---|---|
| Type93 mod. 2 | 0.4 | 167 | 7.2 | 20,966 | 67 | 10 | 0 | 1,800,000 | |
| Type93 | 0.4 | 157 | 7.2 | 21,366 | 76 | 8 | 30,000 | 2,500,000 | |
| Type93 mod. 3 | 0.4 | 171 | 7.2 | 23,766 | 67 | 12 | 30,000 | 2,500,000 |
 |
IDS_SHIP_PARAM_SUO_INCREASE_DIST (%) | Maximum Firing Range (km) |
Research price (exp) |
Purchase price ( | |
|---|---|---|---|---|---|
| Type9 mod. 1 | 0 | 0 | 530,000 | ||
| Type9 mod. 2 | 0 | 14,000 | 1,100,000 |
 |
Maximum Speed (knot) |
Research price (exp) |
Purchase price ( | |
|---|---|---|---|---|
| Propulsion: 52,000 hp | 36 | 0 | 900,000 |
Compatible Upgrades
| Slot 1 |
|||||
|---|---|---|---|---|---|
| Slot 2 |
|||||
| Slot 3 |
|||||
| Slot 4 |
|||||
| Slot 5 |
|||||
| Slot 6 |
Player Opinion
Performance
In many ways, Kitakaze is extremely comparable to her predecessor, Akizuki, and is simply a straight upgrade in most regards. She improves on Akizuki's speed, maneuverability, torpedo launchers, concealment, and has access to the tier nine module slot. Players who enjoyed Akizuki should feel right at home in the tier nine version.
Kitakaze has four 100mm gun mounts, each with two barrels for a total of eight 100mm armaments. These guns provide most of Kitakaze's offensive firepower, especially when pared with her blistering three second base reload. This reload can be further lowered by selecting the Basic Firing Training skill in conjunction with the tier nine Main Battery Modification 3 ![]() module. Normally, a 100mm gun would not be capable of penetrating anything more than 17mm of armor—limiting the effectiveness of any such guns without the Inertia Fuse for HE Shells skill. However, all Japanese 100mm guns have an increased penetration for their base HE shells, allowing them to penetrate up to 25mm of armor even without the captain skill—And with IFHE, these shells can penetrate 32mm armor plating.
module. Normally, a 100mm gun would not be capable of penetrating anything more than 17mm of armor—limiting the effectiveness of any such guns without the Inertia Fuse for HE Shells skill. However, all Japanese 100mm guns have an increased penetration for their base HE shells, allowing them to penetrate up to 25mm of armor even without the captain skill—And with IFHE, these shells can penetrate 32mm armor plating.
In addition to her impressive main battery firepower, Kitakaze has a sextuple torpedo launcher. Along with her Torpedo Reload Booster ![]() , this allows her to put twelve torpedoes in the water during a short period of time. However, keep in mind that this launcher also has a very long reload speed, taking more than two and a half minutes to be ready. Kitakaze's torpedoes are a useful tool to have in combination with her main battery firepower, and proves to be a direct upgrade from the torpedoes found on Akizuki. In addition, Kitakaze gains an extra three knots of speed in comparison with Akizuki, a second off her rudder shift time, greater concealment, and slightly better short range AA.
, this allows her to put twelve torpedoes in the water during a short period of time. However, keep in mind that this launcher also has a very long reload speed, taking more than two and a half minutes to be ready. Kitakaze's torpedoes are a useful tool to have in combination with her main battery firepower, and proves to be a direct upgrade from the torpedoes found on Akizuki. In addition, Kitakaze gains an extra three knots of speed in comparison with Akizuki, a second off her rudder shift time, greater concealment, and slightly better short range AA.
Pros:
- Great firepower with her main battery guns.
- Able to fire twelve torpedoes using the Torpedo Reload Booster
 .
.
- Decent amount of health for a destroyer at tier nine.
- Pretty good concealment values.
Cons:
- Provides a large target for enemy ships to shoot at.
- Torpedoes take a monstrously long time to reload.
- Large and clumsy turning circle for a destroyer.
- Doesn't have Defensive AA Fire
 to boost her AA firepower.
Research
Optimal Configuration
Upgrades
The recommended upgrades for Kitakaze are as follows:
- Slot 1: Magazine Modification 1
 to help prevent the ship from blowing up too early.
- Slot 2: Propulsion Modification 1
 to lessen the changes of the engine blowing up and to get it running again faster.
- Slot 3: Aiming Systems Modification 1
 or AA Guns Modification 2 (
 ), depending on how important captains think having greater AA range is.
- Slot 4: Propulsion Modification 1 (
 ) so you get moving faster.
- Slot 5: Concealment System Modification 1
 to better sneak with.
- Slot 6: Main Battery Modification 3
 , because watching the world burn is wonderful.
Consumables
Kitakaze can equip the following consumables:
- Slot 1: Damage Control Party

- Slot 2: Smoke Generator

- Slot 3: Engine Boost

- Slot 4: Torpedo Reload Booster
Generally, using the premium versions of Damage Control Party ![]() , Smoke Generator
, Smoke Generator ![]() , and Torpedo Reload Booster
, and Torpedo Reload Booster ![]() greatly enhances Kitakaze's combat performance, and using them can be well worth the extra silver it costs.
greatly enhances Kitakaze's combat performance, and using them can be well worth the extra silver it costs.
Camouflage
Type 1, 2, or 5 camouflage can be equipped for credits; Types 1 or 5 are recommended at a minimum to reduce detectibility range.
Players who wish to spend doubloons can equip Kitakaze with Type 19 camouflage that lowers her detection radius, reduces the accuracy of incoming shells, reduces her repair costs, and increases the amount of experience she earns.Gallery


Historical Info
Historical Gallery