Leander
| Revision as of 06:33, 23 October 2016 Added historical photos and captions | Revision as of 06:23, 24 October 2016 | |||
| Line 5: | Line 5: | |||
| |Performance=<!-- write text about performance in battles below --> | |Performance=<!-- write text about performance in battles below --> | |||
| + | What is basically a new shift in British light cruiser gameplay, the Leander applies what you have learned from Caledon to Emerald and applies them with better functionality. If by anything, the Leander is basically a stalwart cruiser at her tier that can smash destroyers without mercy and stand up to her peers without any shed of fear as well as provide fire support if needed. In most aspects, she carries the air of that ship your destroyers will love to be with and enemy destroyers will try their hardest to destroy. This cruiser, however, can take her share of punishment due to her rather absurd repair party that practically heals a large chunk of her health. Sure she does not have the nominal pudgy thickness of the Cleveland, nor the big guns of the Aoba or even the insane ranges of the Budyonny or the Nunberg, but she's a cruiser you can put your hardy trust in as at her tier, she needs the full attention of her captain in order to get things done right and proper. | |||
| + | ||||
| + | However, she needs to get close at her effective range of 12km in order to start moving her guns which increases the risk involved when using the Leander when attempting to sink the enemy destroyers which is one reason she can mount a spotting plane to temporarily increase range as even with her absurd rapid repairs, the light cruiser can only take so much damage before sinking from a dedicated gun line. | |||
| + | ||||
| + | Either as the cruiser joining the destroyer group or as a second line ship or even as an independent raider, you will find the Leander willing and ready to serve in the line. | |||
| |Pros=<!-- write list of positive points below. use * as in ordinary wiki-list. --> | |Pros=<!-- write list of positive points below. use * as in ordinary wiki-list. --> | |||
| + | * Impressive concealment | |||
| + | * Good turret layout for the light cruiser shift for the British | |||
| + | * Second best torpedo range at her tier for a cruiser | |||
| + | * Maintains the same unique AP her colleagues fire | |||
| + | * Very deadly against destroyers and cruisers who underestimate her | |||
| + | * Has smoke screen | |||
| + | * Can mount a spotter plane | |||
| + | * Very impressive repair party | |||
| + | * Surprising AA suite for a light cruiser | |||
| + | * Maintains the same "single launch" torpedo tubes her colleagues have | |||
| |Cons=<!-- write list of negative points below. use * as in ordinary wiki-list. --> | |Cons=<!-- write list of negative points below. use * as in ordinary wiki-list. --> | |||
| + | * Shortest range amongst her colleagues, compared to Cleveland and Aoba | |||
| + | * Slow turret traverse | |||
| + | * As with her colleagues, lack of HE shells make the cruiser a daunting challenge | |||
| + | * AA suite is sufficient to defend herself alone | |||
| + | * No defensive fire consumable to increase AA suite's volume | |||
| + | * Very low AP damage rolls; do not expect screaching high AP damages unless you score normal penetrations or citadel hits | |||
| |Research=<!-- write text about priority sequence of research below --> | |Research=<!-- write text about priority sequence of research below --> | |||
| + | It is highly recommended to acquire the GFCS then the hull or vice versa. The torpedoes can go last. | |||
| |OptimalConfiguration=<!-- write some general text about selection of optimal configuration below (optional)--> | |OptimalConfiguration=<!-- write some general text about selection of optimal configuration below (optional)--> | |||
| |Upgrades=<!-- write text about best upgrades below --> | |Upgrades=<!-- write text about best upgrades below --> | |||
| + | It is suggested you mount the rudder shift upgrade as mandatory, damage control 1 as standard or engine upgrade to lessen engine incapacitations, then it is up to you if you would like to accurize her guns with the accurizer or mount the AA module for all round warfare with the first equipment being either increasing the survivability of your turrets from becoming incapacitated or your AA suite from being destroyed. | |||
| |CommanderSkills=<!-- write text about best set of Commander Skills below --> | |CommanderSkills=<!-- write text about best set of Commander Skills below --> | |||
Revision as of 06:23, 24 October 2016

| Research price33000 exp |
| Purchase price3,040,000 |
| Hit Points24,500 |
| 152 mm/50 BL Mk.XXIII on a Mk.XXI mount4 х 2 pcs. |
| Rate of Fire6.67 shots/min. |
| Reload Time9 sec. |
| Rotation Speed7 deg./sec. |
| 180 Degree Turn Time25.71 sec. |
| Firing Range11.97 km. |
| Maximum Dispersion123 m. |
| Chance of Fire on Target Caused by HE Shell0 % |
| AP Shell152 mm AP 6crh Mk IV |
| Maximum AP Shell Damage3,100 |
| Initial AP Shell Velocity841 m./s. |
| AP Shell Weight50.8 kg. |
| 102 mm/45 QF Mk.XVI on a Mk.XIX mount4 х 2 pcs. |
| Firing Range4.96 km. |
| Rate of Fire20 shots/min. |
| Reload Time3 sec. |
| HE Shell102 mm HE 35 lb |
| Maximum HE Shell Damage1,500 |
| Initial HE Shell Velocity811 m./s. |
| Chance of Fire on Target Caused by HE Shell6 % |
| 533 mm QR Mk IV2 х 4 pcs. |
| Rate of Fire0.59 shots/min. |
| Reload Time101 sec. |
| Rotation Speed25 deg./sec. |
| 180 Degree Turn Time7.2 sec. |
| Torpedo533 mm Mk VII |
| Maximum Damage15,733 |
| Torpedo Speed59 knot |
| Torpedo Range7.02 km. |
| 102 mm/45 QF Mk.XVI on a Mk.XIX mount4 х 2 pcs. |
| . . . Average Damage per Second37.6 |
| . . . Firing Range5.01 km. |
| 20 mm Oerlikon Mk.I on a Mk.IIA mount5 х 1 pcs. |
| . . . Average Damage per Second18 |
| . . . Firing Range2.01 km. |
| 12.7 mm Mk.III2 х 4 pcs. |
| . . . Average Damage per Second4.2 |
| . . . Firing Range1.2 km. |
| 40 mm/39 Vickers QF Mk.VIII on a Mk.VI mount2 х 8 pcs. |
| . . . Average Damage per Second39.6 |
| . . . Firing Range2.49 km. |
| Maximum Speed32.5 knot |
| Turning Circle Radius710 m. |
| Rudder Shift Time11 sec. |
| Surface Detectability Range9.96 km. |
| Air Detectability Range6.44 km. |

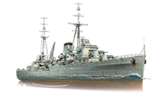
Leander — British Tier VI cruiser.
In 1928, the development of a reconnaissance cruiser that should act in tandem with a fleet commenced. The ship was tasked with leading destroyers and protecting sea communications. HMS Leander was laid down in 1930 and entered service in March 1933 as part of the New Zealand Division. During World War II, Leander intercepted hostile ships in the Pacific and Indian Oceans, and she operated in the Mediterranean during the Syria-Lebanon campaign. The cruiser was hit by a torpedo during the Battle of Kolombangara in 1943 and subsequently remained under repair until the end of the war.
Modules
 |
Rate of Fire (shots/min) | 180° Turn Time (sec) | Maximum Dispersion (m) | Maximum HE Shell Damage (HP) | Chance of Fire on Target Caused by HE Shell (%) | Maximum AP Shell Damage (HP) |
Research price (exp) |
Purchase price ( | |
|---|---|---|---|---|---|---|---|---|---|
| 152 mm/50 BL Mk.XXIII on a Mk.XXI mount | 6.7 | 25.7 | 123 | 3,100 | 0 | 200,000 |
 |
Hit Points (HP) | Armor (mm) | Armor (mm) | Main Turrets (pcs.) | Secondary Gun Turrets (pcs.) | AA Mounts (pcs.) | Torpedo Tubes (pcs.) | Hangar Capacity (pcs.) |
Research price (exp) |
Purchase price ( | |
|---|---|---|---|---|---|---|---|---|---|---|---|
| Leander (A) | 24,500 | 10 | 100 | 4 | 4 | 2/5/2/4 | 2 | 0 | 370,000 | ||
| Leander (B) | 28,700 | 10 | 100 | 4 | 4 | 5/4 | 2 | 12,000 | 780,000 |
 |
Rate of Fire (shots/min) | Torpedo Tubes Reload Time (sec) | 180° Turn Time (sec) | Maximum Damage (HP) | Torpedo Speed (knot) | Torpedo Range (km) |
Research price (exp) |
Purchase price ( | |
|---|---|---|---|---|---|---|---|---|---|
| 533 mm Mk VII | 0.6 | 101 | 7.2 | 15,733 | 59 | 7 | 0 | 400,000 | |
| 533 mm Mk IX | 0.6 | 101 | 7.2 | 15,433 | 61 | 8 | 4,000 | 500,000 |
 |
IDS_SHIP_PARAM_SUO_INCREASE_DIST (%) | Maximum Firing Range (km) |
Research price (exp) |
Purchase price ( | |
|---|---|---|---|---|---|
| Mk VI mod. 1 | 0 | 0 | 200,000 | ||
| Mk VI mod. 2 | 0 | 6,000 | 520,000 |
 |
Maximum Speed (knot) |
Research price (exp) |
Purchase price ( | |
|---|---|---|---|---|
| Propulsion: 72,000 hp | 32.5 | 0 | 200,000 |
Compatible Upgrades
| Slot 1 |
||||||
|---|---|---|---|---|---|---|
| Slot 2 |
||||||
| Slot 3 |
||||||
| Slot 4 |
Player Opinion
Performance
What is basically a new shift in British light cruiser gameplay, the Leander applies what you have learned from Caledon to Emerald and applies them with better functionality. If by anything, the Leander is basically a stalwart cruiser at her tier that can smash destroyers without mercy and stand up to her peers without any shed of fear as well as provide fire support if needed. In most aspects, she carries the air of that ship your destroyers will love to be with and enemy destroyers will try their hardest to destroy. This cruiser, however, can take her share of punishment due to her rather absurd repair party that practically heals a large chunk of her health. Sure she does not have the nominal pudgy thickness of the Cleveland, nor the big guns of the Aoba or even the insane ranges of the Budyonny or the Nunberg, but she's a cruiser you can put your hardy trust in as at her tier, she needs the full attention of her captain in order to get things done right and proper.
However, she needs to get close at her effective range of 12km in order to start moving her guns which increases the risk involved when using the Leander when attempting to sink the enemy destroyers which is one reason she can mount a spotting plane to temporarily increase range as even with her absurd rapid repairs, the light cruiser can only take so much damage before sinking from a dedicated gun line.
Either as the cruiser joining the destroyer group or as a second line ship or even as an independent raider, you will find the Leander willing and ready to serve in the line.Pros:
- Impressive concealment
- Good turret layout for the light cruiser shift for the British
- Second best torpedo range at her tier for a cruiser
- Maintains the same unique AP her colleagues fire
- Very deadly against destroyers and cruisers who underestimate her
- Has smoke screen
- Can mount a spotter plane
- Very impressive repair party
- Surprising AA suite for a light cruiser
- Maintains the same "single launch" torpedo tubes her colleagues have
Cons:
- Shortest range amongst her colleagues, compared to Cleveland and Aoba
- Slow turret traverse
- As with her colleagues, lack of HE shells make the cruiser a daunting challenge
- AA suite is sufficient to defend herself alone
- No defensive fire consumable to increase AA suite's volume
- Very low AP damage rolls; do not expect screaching high AP damages unless you score normal penetrations or citadel hits
Research
Optimal Configuration
Upgrades
It is suggested you mount the rudder shift upgrade as mandatory, damage control 1 as standard or engine upgrade to lessen engine incapacitations, then it is up to you if you would like to accurize her guns with the accurizer or mount the AA module for all round warfare with the first equipment being either increasing the survivability of your turrets from becoming incapacitated or your AA suite from being destroyed.
Commander Skills
| Recommended Commander Skills | ||||||||
|---|---|---|---|---|---|---|---|---|
| Cost (points) |
Endurance | Attack | Support | Versatility | ||||
| 1 |
|
★ |
|
|
|
|
★★ |
|
| 2 |
★★ |
★★ |
★★★ |
|
|
|
|
★ |
| 3 |
★★★ |
★★★ |
|
|
★ |
★★★ |
|
★★ |
| 4 |
|
★★ |
|
|
★ |
|
|
★★★ |
| Key: ★★★ - Extremely Useful ★★ - Frequently Useful ★ - Occasionally Useful No stars - Meh Χ - Not recommended | ||||||||
Camouflage
Type 1, 2, or 5 camouflage can be equipped for credits; Types 2 or 5 are recommended at a minimum to reduce the accuracy of incoming shells.Gallery
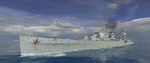
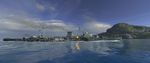
Leander prepares to enter battle.
Leander fires upon the enemy in the safety of smoke.
An enemy Yorck is penetrated by a Leander armor piercing shell while engaging in evasive maneuvers.

An enemy Tirpitz class battleship shrugs off the Leander's salvo.

The returning salvo by the Tirpitz easily penetrates Leander armor.

Leander takes a battleship salvo to the bow.
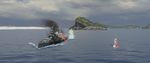
Leander closes in with an enemy Bayern class battleship, desperately firing torpedoes and secondaries.


Historical Info
Historical Gallery


.jpg)
