Leander
| Revision as of 23:43, 11 December 2016 Adjusted historical specifications format | Revision as of 14:21, 8 May 2020 Updated upgrade recommendations | |||
33 intermediate revisions by 17 users not shown | ||||
| Line 3: | Line 3: | |||
| |Anno=<!-- you can write below short description for the ship. it will replace default once. --> | |Anno=<!-- you can write below short description for the ship. it will replace default once. --> | |||
| + | A new generation light cruiser designed to serve as a scout both within a squadron and independently. In contrast to her predecessors, the ship's main advantage was that her main guns were placed in gun turrets. The ship also had stronger AA defenses and better armor protection.<br><br>{{Model3DViewer|a65dbe7156434ff4892835ffa953d3c1}} | |||
| |Performance=<!-- write text about performance in battles below --> | |Performance=<!-- write text about performance in battles below --> | |||
| ? | Tier VI brings a new shift in British light cruiser gameplay, as '' | + | Tier VI brings a new shift in British light cruiser gameplay, as ''{{#var:ship_name}}'' takes the lessons learned from ''[[Caledon]]'' through ''[[Emerald]]'' and applies them to a more well-equipped vessel. ''{{#var:ship_name}}'' is fairly stalwart cruiser for her tier, capable of mercilessly smashing enemy destroyers, holding her ground against her cruiser contemporaries, and providing fire support as needed. | |
| ? | Captains familiar with Tier VI American cruiser ''[[ | + | Captains familiar with Tier VI American cruiser ''[[Dallas]]'' will feel at home in ''{{#var:ship_name}}''. She exemplifies a ship that friendly destroyers love to ride shotgun with and enemy destroyers try their hardest to avoid (or destroy). ''{{#var:ship_name}}'' can take a fair bit of punishment from lighter enemy units due to her access to the {{Repair Party}} consumable, and while she lacks ''[[Aoba]]''’s big guns and envies the range of ''[[Budyonny]]'' and ''[[Nürnberg]]'', she's a fairly solid cruiser for her tier. Her upgraded torpedoes go a long way towards closing the gap between her and her contemporaries when they are used well. Her torpedo firing arcs are excellent. | |
| ? | Unfortunately, '' | + | Unfortunately, ''{{#var:ship_name}}'' needs to get almost suicidally close — her stock range is a paltry 12.0 km — in order to get her main battery into action, greatly increasing the risk involved when she engages enemy destroyers who have support nearby. While she can mount a {{Spotting Aircraft}} to temporarily increase her range, doing so requires her to give up {{Smoke Generator}} and a chunk of her longevity with it. | |
| ? | '' | + | ''{{#var:ship_name}}'' is a ship that functions best with friends close by, especially given her vulnerability to battleships. She has very little she can threaten them with as long as they angle well against her armor-piercing rounds and avoid her torpedoes. | |
| |Pros=<!-- write list of positive points below. use * as in ordinary wiki-list. --> | |Pros=<!-- write list of positive points below. use * as in ordinary wiki-list. --> | |||
| ? | * Lowest detection radius of all non-premium Tier VI cruisers ( | + | * Lowest detection radius of all non-premium Tier VI cruisers (''[[Perth]]'' and ''[[Huanghe]]'' are better). | |
| * Solid torpedo range (with the upgrade). | * Solid torpedo range (with the upgrade). | |||
| * Very deadly against destroyers and cruisers who end up at close range. | * Very deadly against destroyers and cruisers who end up at close range. | |||
| ? | * Has access to | + | * Has access to {{Smoke Generator}}, {{Catapult Fighter}}, or {{Spotting Aircraft}}. | |
| ? | * Has access to the | + | * Has access to the {{Repair Party}} ability. | |
| + | * Better secondary battery than other same-tier cruisers. | |||
| |Cons=<!-- write list of negative points below. use * as in ordinary wiki-list. --> | |Cons=<!-- write list of negative points below. use * as in ordinary wiki-list. --> | |||
| * Shortest main battery range of all Tier VI cruisers. | * Shortest main battery range of all Tier VI cruisers. | |||
| * Lack of high explosive shells makes damaging enemy capital ships very challenging. | * Lack of high explosive shells makes damaging enemy capital ships very challenging. | |||
| ? | * Anti-aircraft suite is on par with ''[[Aoba]]'' and ''[[Budyonny]]'', but cannot be made more potent with | + | * Anti-aircraft suite is on par with ''[[Aoba]]'' and ''[[Budyonny]]'', but cannot be made more potent with {{Defensive AA Fire}}. | |
| ? | * Damage from armor piercing salvos is consistent, but not spectacular. '' | + | * Damage from armor piercing salvos is consistent, but not spectacular. ''{{#var:ship_name}}'' has a very low alpha-strike damage potential. | |
| + | * Struggles to penetrate any bow on destroyer. | |||
| |Research=<!-- write text about priority sequence of research below --> | |Research=<!-- write text about priority sequence of research below --> | |||
| + | Availability of researchable upgrades for ''{{#var:ship_name}}'' is as follows: | |||
| + | * '''Hull:''' Upgrade to Hull (B) for additional health, a small increase in AA, and improved rudder shift time. Research of this module unlocks progression to ''[[Fiji]]''. | |||
| + | * '''Torpedoes:''' The 533 mm Mk IX torpedoes reload faster, travel farther, move faster, have a higher flood chance, and hit nearly as hard as the stock 533 mm Mk VII torpedoes. | |||
| + | * '''Gun Fire Control System:''' Upgrade to Mk VI mod. 2 for an extra 10% range on the main battery. | |||
| + | ||||
| Given the paltry stock range of her main battery, the Fire Control System upgrade should be the first place experience gains are invested. After that, grab Hull (B) and the Torpedo upgrade (in that order). | Given the paltry stock range of her main battery, the Fire Control System upgrade should be the first place experience gains are invested. After that, grab Hull (B) and the Torpedo upgrade (in that order). | |||
| Line 32: | Line 40: | |||
| |Upgrades=<!-- write text about best upgrades below --> | |Upgrades=<!-- write text about best upgrades below --> | |||
| ? | + | The recommended upgrades for ''{{#var:ship_name}}'' are as follows: | ||
| + | *'''Slot 1''': {{Main Armaments Modification 1}}<nowiki>*</nowiki> | |||
| + | *'''Slot 2''': {{Engine Room Protection}} | |||
| + | *'''Slot 3''': {{Aiming Systems Modification 1}}<nowiki>*</nowiki> | |||
| + | *'''Slot 4''': {{Steering Gears Modification 2}} | |||
| ? | + | '''Slot 1''' allows players to mount one of two viable options. '''Main Armaments Modification 1''' is a generally viable choice, but players wishing to specialize for anti-aircraft duties should mount {{Auxiliary Armaments Modification 1}}. | ||
| ? | {{ | + | '''Slot 3''' offers choices for specialization in different roles. '''Aiming Systems Modification 1''' should be equipped for ship to ship combat. {{AA Guns Modification 1}} is a good choice to provide additional defense against aircraft. | |
| ? | + | |||
| ? | + | |||
| ? | + | |||
| ? | + | |||
| ? | | | + | |CommanderSkills=<!-- write text about best set of Commander Skills below --> | |
| ? | + | The standard ten-point commander skills should be implemented into Priority Target for number of enemies focusing on you, Adrenaline Rush for better reload, Superintendent for the extra consumables and Concealment Expert for the increased concealment. Subsequent points can be inserted for an AA build or General build. | ||
| ? | + | |||
| ? | + | |||
| ? | + | |||
| ? | | | + | {{Commander Skills 2 | |
| ? | | | + | <!-- This version enables a '0' rating. Use it for skills that have no effect (e.g. Improved Engines on a non-CV) or are detrimental to the ship. They should mirror what appears in the game client. --> | |
| ? | | | + | | rating11 = 3 <!-- Priority Target --> | |
| ? | | | + | | rating12 = 1 <!-- Preventive Maint --> | |
| ? | | | + | | rating13 = <!-- Expert Loader --> | |
| + | | rating14 = 0 <!-- Air Supremacy --> | |||
| + | | rating15 = 1 <!-- Direction Center for Fighters --> | |||
| + | | rating16 = 0 <!-- Improved Engine Boost --> | |||
| + | | rating17 = 1 <!-- Incoming Fire Alert --> | |||
| + | | rating18 = 0 <!-- Last Gasp --> | |||
| ? | | | + | | rating21 = 1 <!-- High Alert --> | |
| ? | | | + | | rating22 = 2 <!-- Jack of All Trades --> | |
| ? | | | + | | rating23 = 2 <!-- Expert Marksman --> | |
| ? | | | + | | rating24 = 2 <!-- Torpedo Acceleration --> | |
| ? | | | + | | rating25 = 3 <!-- Smoke Screen Expert --> | |
| + | | rating26 = 0 <!-- Improved Engines --> | |||
| + | | rating27 = 3 <!-- Adrenaline Rush --> | |||
| + | | rating28 = 1 <!-- Last Stand --> | |||
| ? | | | + | | rating31 = 1 <!-- Basics of Survivability --> | |
| ? | | Manual Fire Control for Secondary Armament= | + | | rating32 = 2 <!-- Survivability Expert--> | |
| ? | | | + | | rating33 = 2 <!-- Torpedo Armament Expertise--> | |
| ? | | | + | | rating34 = 0 <!-- Aircraft Armor --> | |
| ? | | | + | | rating35 = 1 <!-- Basic Firing Training --> | |
| ? | | | + | | rating36 = 3 <!-- Superintendent --> | |
| + | | rating37 = <!-- Demolition Expert --> | |||
| + | | rating38 = 3 <!-- Vigilance --> | |||
| + | ||||
| + | | rating41 = <!-- Manual Fire Control for Secondary Armament --> | |||
| + | | rating42 = <!-- Fire Prevention --> | |||
| + | | rating43 = <!-- Inertia Fuse for HE Shells --> | |||
| + | | rating44 = 0 <!-- Sight Stabilization --> | |||
| + | | rating45 = 2 <!-- Advanced Firing Training --> | |||
| + | | rating46 = <!-- Massive AA Fire --> | |||
| + | | rating47 = 2 <!-- Radio Position Finding --> | |||
| + | | rating48 = 3 <!-- Concealment Expert --> | |||
| }} | }} | |||
| |Consumables=<!-- write text about selection of Consumables below --> | |Consumables=<!-- write text about selection of Consumables below --> | |||
| ? | '' | + | ''{{#var:ship_name}}'' can equip the following consumables: | |
| + | * '''Slot 1:''' {{Damage Control Party}} | |||
| + | * '''Slot 2:''' {{Repair Party}} | |||
| + | * '''Slot 3:''' {{Hydroacoustic Search}} | |||
| + | * '''Slot 4:''' {{Smoke Generator}} '''or''' {{Spotting Aircraft}} '''or''' {{Catapult Fighter}} | |||
| + | ||||
| + | ''{{#var:ship_name}}'' is comparatively lightly armored for a Tier VI cruiser — especially compared to her contemporaries ''[[Budyonny]]'' and ''[[Dallas]]'' — and will need to make good use use of the {{Repair Party}} and {{Smoke Generator}} consumables. Captains are recommended to invest in the premium versions of both for better survivability. Premium consumable {{Hydroacoustic Search II}} will also help in hunting down destroyers and spotting torpedoes from within a smoke screen, as enemy players frequently send torpedoes into smoke banks hoping to hit stationary ships hiding within. {{Catapult Fighter}} is not recommended due to the little protection it provides and {{Spotting Aircraft}} would provide only a small bonus to her already meager range. | |||
| |Camouflage=<!-- write text about useful camouflage below --> | |Camouflage=<!-- write text about useful camouflage below --> | |||
| [[Ship:Camouflage#Standard Camouflage|Type 1, 2, or 5 camouflage]] can be equipped for credits; Types 2 or 5 are recommended at a minimum to reduce the accuracy of incoming shells. | [[Ship:Camouflage#Standard Camouflage|Type 1, 2, or 5 camouflage]] can be equipped for credits; Types 2 or 5 are recommended at a minimum to reduce the accuracy of incoming shells. | |||
| + | ||||
| + | Players who wish to spend doubloons can equip ''{{#var:ship_name}}'' with [[Ship:Camouflage#Permanent_Camouflage|Type 16 camouflage]] that lowers her detection radius, reduces the accuracy of incoming shells, reduces her repair costs, and increases the amount of experience she earns. | |||
| |Signals=<!-- write text about best set of signals below --> | |Signals=<!-- write text about best set of signals below --> | |||
| ? | Again, due to '' | + | Again, due to ''{{#var:ship_name}}''’s weak armor scheme, captains are encouraged to mount the following [[Ship:Flags#Signals|signals]] for better survivability: India Delta ({{India Delta|Size=18px}}) and November Foxtrot ({{November Foxtrot|Size=18px}}). Additionally, Equal Speed Charlie London ({{Equal Speed Charlie London|Size=18px}}) can be used to quickly grind to the much-needed Fire Control Systems module upgrade (Mk VI mod. 2), as her stock range is abnormally low for a Tier VI cruiser. | |
| + | ||||
| + | {{Signal Flags | |||
| + | | November Echo Setteseven = | |||
| + | | Mike Yankee Soxisix = | |||
| + | | India X-Ray = | |||
| + | | Juliet Whiskey Unaone = 1 | |||
| + | | Victor Lima = | |||
| + | | Hotel Yankee = | |||
| + | ||||
| + | | November Foxtrot = 3 | |||
| + | | Sierra Mike = 2 | |||
| + | | India Delta = 3 | |||
| + | | Juliet Yankee Bissotwo = | |||
| + | | India Yankee = | |||
| + | | Juliet Charlie = 1 | |||
| + | ||||
| + | | Zulu = 1 | |||
| + | | India Bravo Terrathree = | |||
| + | | Equal Speed Charlie London = 3 | |||
| + | | Zulu Hotel = 2 | |||
| + | | Papa Papa = 1 | |||
| + | ||||
| + | | Wyvern = | |||
| + | | Red Dragon = 2 | |||
| + | | Dragon Flag = 1 | |||
| + | | Ouroboros = | |||
| + | | Hydra = | |||
| + | | Basilisk = | |||
| + | ||||
| + | | Leviathan = | |||
| + | | Scylla = | |||
| + | }} | |||
| |Gallery=<!-- write below list of files with description (if necessary) separated with | --><gallery> | |Gallery=<!-- write below list of files with description (if necessary) separated with | --><gallery> | |||
| File:Leanderprepares.jpg|''Leander'' prepares to enter battle. | File:Leanderprepares.jpg|''Leander'' prepares to enter battle. | |||
| File:LeanderSmoke.jpg|''Leander'' fires upon the enemy in the safety of smoke. | File:LeanderSmoke.jpg|''Leander'' fires upon the enemy in the safety of smoke. | |||
| ? | File:YorckDodges.jpg|An enemy [[ | + | File:YorckDodges.jpg|An enemy ''[[Yorck]]'' is penetrated by a ''Leander'' armor piercing shell while engaging in evasive maneuvers. | |
| ? | File:LeanderTirpitz.jpg|An enemy [[ | + | File:LeanderTirpitz.jpg|An enemy ''[[Bismarck]]'' class battleship shrugs off the ''Leander's'' salvo. | |
| ? | File:TirpitzResponds.jpg|The returning salvo by the [[ | + | File:TirpitzResponds.jpg|The returning salvo by the ''[[Tirpitz]]'' easily penetrates ''Leander'' armor. | |
| File:Leanderhit.jpg|''Leander'' takes a battleship salvo to the bow. | File:Leanderhit.jpg|''Leander'' takes a battleship salvo to the bow. | |||
| ? | File:LeanderTorps.jpg|''Leander'' closes in with an enemy [[ | + | File:LeanderTorps.jpg|''Leander'' closes in with an enemy ''[[Bayern]]'' class battleship, desperately firing torpedoes and secondaries. | |
| + | </gallery> | |||
| ? | + | |History=<!-- write text below --> | ||
| ? | == | + | <div class="thumb tright"> | |
| ? | :Devonport Dockyard; Plymouth, England, United Kingdom | + | {{AnnoWiki|content= | |
| ? | :Laid down: 8 September 1930 | + | <h2>HMS ''Leander'', 1933</h2> | |
| ? | :Launched: 24 September 1931 | + | <h3>Construction</h3> | |
| + | :Builder: Devonport Dockyard; Plymouth,<br> England, United Kingdom | |||
| + | :Laid down: 8 September 1930 | |||
| + | :Launched: 24 September 1931 | |||
| :Commissioned: 24 March 1933 | :Commissioned: 24 March 1933 | |||
| ? | + | ---- | ||
| ===Specifications=== | ===Specifications=== | |||
| ? | :7,270 tons displacement, standard | + | :7,270 tons displacement, standard | |
| ? | :169m length | + | :9,280 tons displacement, full load | |
| ? | :16.76m beam | + | :169m length | |
| + | :16.76m beam | |||
| :5.79m draft | :5.79m draft | |||
| ? | + | ---- | ||
| ====Machinery==== | ====Machinery==== | |||
| ? | :6 boilers | + | :Six (6) Admiralty three-drum boilers | |
| ? | + | :Four (4) Parsons steam turbines | ||
| + | ---- | |||
| ====Performance==== | ====Performance==== | |||
| ? | :32.5 knots at 72,000 shaft horsepower | + | :32.5 knots at 72,000 shaft horsepower | |
| :5,730nm at 13 knots | :5,730nm at 13 knots | |||
| ? | + | ---- | ||
| ====Armor==== | ====Armor==== | |||
| ? | :Main belt: 76. | + | :Main belt: 76.2mm (+25mm backing plate) | |
| ? | :Decks: 25.4mm, 31.75mm over machinery | + | :Magazine Box: 88.9- 25.4mm | |
| ? | :Turrets: 25.4mm | + | :Decks: 25.4mm, 31.75mm over machinery space | |
| ? | + | :Bulkheads : 38.1mm | ||
| + | :Turrets: 25.4mm | |||
| + | ---- | |||
| ====Armament==== | ====Armament==== | |||
| =====Main===== | =====Main===== | |||
| ? | :Eight (4x2) 152mm guns | + | :Eight (4x2) 152mm BL Mk.XXXIII guns | |
| + | =====Secondary===== | |||
| + | :Four (4x1) 102mm QF Mk.V guns | |||
| =====Anti-Aircraft===== | =====Anti-Aircraft===== | |||
| ? | + | :Twelve (3x4) 12.7mm MG Mk.III guns | ||
| ? | :Twelve (3x4) 12.7mm guns | + | ||
| =====Torpedoes===== | =====Torpedoes===== | |||
| :Eight (2x4) 533mm torpedo tubes | :Eight (2x4) 533mm torpedo tubes | |||
| ? | + | =====Aircraft===== | ||
| + | : One E-II-H Catapult | |||
| + | : Two Aircraft (Fairey Seal, Fairey III, Hawker Osprey) | |||
| + | }} | |||
| + | </div> | |||
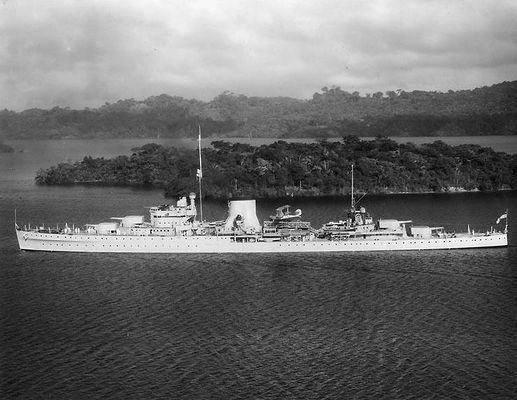
| + | [[File:HMS Leander 2A.JPG|none|frame|x400px|link=|HMS ''Leander'' in Gatun Lake, Panama Canal, July 1937.]] | |||
| ===History=== | ===History=== | |||
| ? | ||||
| ====Design==== | ====Design==== | |||
| ? | + | In January 1929, design work began on new light cruisers for the Royal Navy, the previous ''[[Emerald]]'' class being 3 years old by that time. The preliminary designs included aspects such as single mount 6-inch (152mm) guns, single mount 5.5-inch (140mm) guns, 6-inch guns in two-gun turrets, a catapult, and a single large funnel amidships. These preliminary designs displaced around 6,000 tons, however the design that was entered into the 1929 building program (called the Type "O" cruiser) displaced 6,500 tons, using many aspects that would become part of the ''Leander'' class. | ||
| + | ||||
| + | The armament of the ''Leander'' class consisted of Eight new 6-inch /50 caliber Mk. XXIII guns, mounted in four two-gun turrets, in 'A', 'B', 'X' and 'Y' positions. An experimental twin turret was installed upon the ''Emerald''-class cruiser ''Enterprise'', which proved to be very successful, and influenced the design of the Mk.XXI turret used on ''Leander''. The secondary armament as built consisted of four single 4-inch (102mm) QF Mk.V guns, capable of dual purpose work. However, like most Royal Navy cruisers of this generation, these were subsequently replaced before the second world war by the more effective Mk.XIX twin mounting using the 4-inch QF Mk.XVI guns. However, ''Achilles'' never received the new mounts until 1943. Though some preliminary designs had used two triple torpedo tubes per side, the ''Leander''s used two quadruple torpedo tubes per side instead. An aircraft catapult was also mounted amidships behind the single funnel. | |||
| + | ||||
| + | The original anti-aircraft armament was the 4-inch secondary guns, and 3 quadruple mount 12.7mm (0.5-inch) Vickers Machine gun mounts, however during World War 2, the anti-aircraft suite was upgraded substantially, with the addition of quadruple 40mm 'pompom' mounts and single 20mm 'Oerlikon' mounts. Later on, quadruple 40mm 'Bofors' were fitted to ''Ajax'' and ''Leander'', and twin 20mm 'Oerlikon' mounts were used. The aircraft catapult was also removed when allowed to make space for extra guns. On ''Leander'' and ''Achilles'', the 'X' turret was removed late in the war for more guns. | |||
| + | ||||
| + | The armor of the ships was a 3-inch 76mm belt protecting the machinery, with the magazines being protected a box with a maximum thickness of 3.5-inches (89mm). The turrets used 25mm armor all over, as did the deck, except for above the machinery, where it was 31mm. The ships appearance took a lot from the contemporary heavy cruisers, such as the ''York''-class and cancelled ''Surrey'' sub-class of the County-class. | |||
| + | ||||
| + | Maximum speed was rated for 32.5 knots, using six Admiralty three-drum boilers, at a shaft horsepower of 72,000. The machinery was successful and sound, with ''Achilles'' recording up to 82,000 shaft horsepower during the Battle of the River Plate. However, since the boilers were all grouped into a single funnel, the ships machinery could potentially be disabled by damage amidships. | |||
| + | ||||
| + | Although original plans called for up to sixteen of these cruisers, this was reduced to eight, of which only five were built of the ''Leander'' sub-class. A further three were constructed of the ''Amphion'' sub-class, in which the machinery was spaced out more, allowing for two funnels instead of one. All eight ships were laid down and completed between 1930 and 1936. | |||
| ====Service==== | ====Service==== | |||
| ? | ''Leander'' was commissioned in 1933 and served with the Home Fleet. In 1937, she replaced '' | + | HMS ''Leander'' (75) was commissioned in 1933 and served with the Home Fleet. In 1937, she replaced the ''[[Danae]]'' class cruiser, ''Dunedin'' in the New Zealand division of the Royal Navy. Serving as a shipping escort in the Indian Ocean after the beginning of World War II, HMNZS ''Leander'' sank the Italian raider ''Ramb I'' off India in 1941 as well as two blockade runners. ''Leander'' was assigned to assist in operations in the Persian Gulf during the Iraqi rebellion but took no action. Joining the fleet in the Mediterranean in mid-1941, ''Leander'' was engaged in patrols off Syria and fought a small action with the Vichy French destroyers ''Guépard'' and ''Valmy'' in June of that year. | |
| ? | ''Leander'' returned to New Zealand in late 1941, then joined the ANZAC command in 1942 for operations in the Solomon Islands. ''Leander'' participated in the Guadalcanal Campaign as a convoy escort until 1943, when she joined USN CruDiv (Cruiser Division) 9. In July 1943, ''Leander'' was part of the task force which participated in the Battle of Kolombangara, where she was torpedoed and sustained heavy damage. Made fully seaworthy in late 1943, ''Leander'' sailed for Boston for full repairs, where she remained until complete just weeks after the Japanese surrender negotiations. ''Leander'' returned to the UK, where she was paid off and sold for scrapping in 1949. | + | ''Leander'' returned to New Zealand in late 1941, then joined the ANZAC command in 1942 for operations in the Solomon Islands. ''Leander'' participated in the Guadalcanal Campaign as a convoy escort until 1943, when she joined USN CruDiv (Cruiser Division) 9. In July 1943, ''Leander'' was part of the task force which participated in the Battle of Kolombangara, where she was torpedoed and sustained heavy damage. Made fully seaworthy in late 1943, ''Leander'' sailed for Boston for full repairs, where she remained until complete just weeks after the Japanese surrender negotiations. ''Leander'' returned to the UK, and was returned to the Royal Navy, where she was involved in the Corfu Channel incident. She was paid off and sold for scrapping in 1949. | |
| ? | ''Orion'', commissioned in 1934, also served with the Home Fleet until 1937, when she was transferred to the Americas. After the beginning of World War II, she conducted patrol and convoy duties until 1940, when she was reassigned to the Mediterranean. ''Orion'' participated in engagements with the Italian fleet, shore bombardment of Italian positions, and convoy escort duties | + | HMS ''Orion'' (85), commissioned in 1934, also served with the Home Fleet until 1937, when she was transferred to the Americas. After the beginning of World War II, she conducted patrol and convoy duties until 1940, when she was reassigned to the Mediterranean. ''Orion'' participated in engagements with the Italian fleet, shore bombardment of Italian positions, and convoy escort duties from 1940 to 1941, where she was active in the Battle of Calabria, the Battle of the Strait of Otranto, and the Battle of Cape Matapan. ''Orion'' also participated in convoy duties to Greece and Crete both assisting in the transport of army troops to the region, their subsequent evacuation, and engaging Axis forces in the area. Damaged by air attack during the Battle of Crete, ''Orion'' was withdrawn to South Africa, then on to California, and finally back to the UK for repairs until early 1942. | |
| ? | Rejoining the fleet in the Mediterranean in mid-1943, ''Orion'' helped to cover the invasions of Sicily, Salerno, and Anzio before returning to the UK in preparation for joining the Normandy invasion force in early 1944. ''Orion'' provided naval gunfire support in Normandy, and was then returned to the Mediterranean to assist in the invasion of southern France. Returning once again to the Aegean Sea, ''Orion'' supported Allied operations there before once again assisting land operations in the Mediterranean, this time off the northwest Italian coast. After the war, ''Orion'' was assigned as a target ship before being paid off and sold for scrapping in 1949. | + | Rejoining the fleet in the Mediterranean in mid-1943, ''Orion'' helped to cover the invasions of Sicily, Salerno, and Anzio before returning to the UK in preparation for joining the Normandy invasion force in early 1944. ''Orion'' provided naval gunfire support in Normandy, and was then returned to the Mediterranean to assist in the invasion of southern France. Returning once again to the Aegean Sea, ''Orion'' supported Allied operations there before once again assisting land operations in the Mediterranean, this time off the northwest Italian coast. After the war, ''Orion'' was involved in the Corfu Channel incident, and assigned as a target ship before being paid off and sold for scrapping in 1949. She earned 13 battle honours during her service, joint second most for an individual ship in the Royal Navy, behind only the battleship ''[[Warspite]]''. | |
| ? | ''Neptune'', like ''Leander'', ''Orion'', and ''Achilles'', also served with the Home Fleet until 1937, when she joined the Africa Squadron and participated in operations in the South Atlantic at the beginning of World War II | + | HMS ''Neptune'' (20), like ''Leander'', ''Orion'', and ''Achilles'', also served with the Home Fleet until 1937, when she joined the Africa Squadron and participated in operations in the South Atlantic at the beginning of World War II, ''Neptune'' took two German merchants in 1939, and participated in the pursuit of ''[[Admiral Graf Spee]]''. Like ''Orion'', ''Neptune'' was assigned in 1940 to the Mediterranean, engaging in shore bombardment missions as well as a sortie into Greek waters after the Italian declaration of war on that nation. She took part in the Battle of Calabria, being hit once, but striking the Italian heavy cruiser ''Bolzano'' three times in return. | |
| ? | ''Neptune'' was then reassigned to the Atlantic to counter the increased presence of German raiders, joining in the search for ''Admiral Scheer'' and the ''[[Bismarck]]'' group, and sinking one of ''Bismarck''’s supply vessels. Returned again to the Mediterranean in 1941, ''Neptune'' operated out of Malta searching for Italian merchants on the supply routes to North Africa. In mid-December 1941, ''Neptune'' struck | + | ''Neptune'' was then reassigned to the Atlantic to counter the increased presence of German raiders, joining in the search for ''Admiral Scheer'' and the ''[[Bismarck]]'' group, and sinking one of ''Bismarck''’s supply vessels. Returned again to the Mediterranean in 1941, ''Neptune'' operated out of Malta searching for Italian merchants on the supply routes to North Africa, as part of Force K. In mid-December 1941, ''Neptune'' was leading Force K and struck two mines damaging her. Although attempts were made to rescue her, the commander of ''Neptune'' ordered other ships to keep away, mindful that 2 other cruisers and a destroyer which was later scuttled were damaged by the mines. Striking a third mine destroyed her propellers, and a fourth mine finally sunk her. Of her crew of over 700, only one survived to be rescued by an Italian torpedo boat. | |
| ? | ''Ajax'' was sent to the Americas upon completion in 1935, and remained there through the beginning of World War II. Patrolling off the South American coast, ''Ajax'' managed to take three German merchants before joining Force G in the search for ''Admiral Graf Spee'' which was finally run down off Argentina. In the resulting Battle of the River | + | HMS ''Ajax'' (22) was sent to the Americas upon completion in 1935, and remained there through the beginning of World War II. Patrolling off the South American coast, ''Ajax'' managed to take three German merchants before joining Force G in the search for the German raider ''Admiral Graf Spee'' which was finally run down off Argentina. In the resulting Battle of the River Plate, ''Ajax'' was moderately damaged, with 'X' and 'Y' turrets out of action, but came out the victor when ''Admiral Graf Spee'' was scuttled 4 days later on the 17th December 1939. ''Ajax'' returned to the UK for repairs, joining the fleet in the Mediterranean in mid-1940. There she escorted convoys, and was a major part of the Battle of Cape Passero, a close range night battle where she sunk the ''Spica'' class torpedo boats ''Ariel'' and ''Airone'' and damaged the ''Soldati'' class destroyers ''Aviere'' and ''Artigliere'', though she sustained superstructure damage and casualties too. ''Ajax'' also participated in the Battle of the Strait of Otranto, and the Battle of Cape Matapan in 1941. When not savaging Axis warships or bombarding land targets, ''Ajax'' was engaged in convoy escort duties to Malta, the evacuation of Crete where she was damaged by air attack, and supporting Allied operations in Vichy Syria. She remained in the Mediterranean until mid-1942 when she was withdrawn to the UK for refit. | |
| ? | Returning to the Mediterranean again in January 1943, ''Ajax'' was again damaged by air attack and was withdrawn for repairs, this time to New York City, where she remained until late in the year. She returned once again to the Mediterranean, but only briefly, before being withdrawn in preparation for the Normandy invasion for which she provided naval gunfire support. Returning yet again to the Mediterranean in August 1944, ''Ajax'' supported Operation Dragoon and later Allied operations in Greece before the end of a remarkable war career. ''Ajax'' was placed on inactive status shortly after the end of the war, then sold for scrapping in 1949. | + | Returning to the Mediterranean again in January 1943, ''Ajax'' was again damaged by air attack, being hit by a single 1,000-lb bomb, and was withdrawn for repairs, this time to New York City, where she remained until late in the year. She returned once again to the Mediterranean, but only briefly, before being withdrawn in preparation for the Normandy invasion for which she provided naval gunfire support. Returning yet again to the Mediterranean in August 1944, ''Ajax'' supported Operation Dragoon and later Allied operations in Greece before the end of a remarkable war career. ''Ajax'' was placed on inactive status shortly after the end of the war, then sold for scrapping in 1949. | |
| ? | ''Achilles'' was commissioned in 1933 and, like most of her sister ships, served in the Home Fleet for several years. In 1936, she was transferred to the | + | HMS ''Achilles'' was commissioned in 1933 and, like most of her sister ships, served in the Home Fleet for several years. In 1936, she was transferred to the New Zealand Division, replacing the ''Danae''-class ''Diomede''. After the beginning of World War II in 1939, ''Achilles'' began operations in the South Atlantic and was attached to Force G. Participating in the Battle of the River Plate alongside her sister ''Ajax'', ''Achilles'' sustained relatively minor damage in the first major Royal Navy victory of the war. Returning to New Zealand for convoy escort duty, ''Achilles'' formed part of the force providing cover for the influx of supplies and troops to New Zealand and Australia until 1942 when she joined the ANZAC squadron. | |
| ? | ''Achilles'' participated in operations in the South Pacific and Solomon | + | ''Achilles'' (70) participated in operations in the South Pacific and Solomon Islands until 1943 when she was damaged by air attack necessitating a return to the UK for repairs, as a bomb had hit her 'X' turret. Leaving the UK in mid-1944, having traded her 'X' turret in for extra anti-aircraft armament, ''Achilles'' joined the Eastern Fleet, until 1945. She then joined the British Pacific Fleet, accompanying the aircraft carriers as they conducted raids to suppress bypassed Japanese garrisons in the Central Pacific as well as the Home Islands of Japan. ''Achilles'' was returned to the Royal Navy in 1946, and in 1947, she was sold to India, becoming INS ''Delhi''. She was finally scrapped in 1978. | |
| + | ===Historical Inaccuracies=== | |||
| + | * In game, ''Leander''’s main belt armor is 100mm thick, while historically it was 76.2mm (3 inches) thick, with 25mm (1 inch) of backing plate, which have been combined to give the in game value of 100mm. | |||
| + | * Hull (A) has a fictional anti-aircraft armament, no ''Leander''-class ship ever carried the octuple 40mm 'pompom' mount, and although ''Leander'' did carry 2x4 12.7mm and 5x1 20mm 'Oerlikons'; the latter guns were fitted after the 12.7mm were removed from the ship. | |||
| + | * The anti-aircraft armament for Hull (B) is accurate for sister ship HMS ''Ajax'' between late 1943 and 1944, however, the aircraft catapult was removed in 1942, and therefore shouldn't be present. | |||
| + | * 38mm bulkhead armor isn't observable, and may not be present. | |||
| + | * The permanent premium camouflage is actually the historical camouflage of HMS ''Ajax''. It was painted in October 1943 and remained in place until 1944. The colours on this camouflage pattern in game however, appear to be inaccurate. | |||
| + | * Although ''Leander'' uses the same 152mm Mk.XXVIII guns as ''[[Belfast]]'', ''[[Fiji]]'', ''[[Edinburgh]]'' and ''[[Perth]]'', ''Leander'' — like other tech tree Royal Navy light cruisers in game — only gets access to armor-piercing (AP) shells. Historically, ships using the Mk.XXVIII gun were outfitted with both AP/CPBC (Common Pointed Ballistic Cap) and HE shells. | |||
| |HistoricalGallery=<!-- write below list of files with description (if necessary) separated with | --><gallery> | |HistoricalGallery=<!-- write below list of files with description (if necessary) separated with | --><gallery> | |||
| Line 159: | Line 253: | |||
| File:Photo06clLeander1NPMarkTeadham.jpg | File:Photo06clLeander1NPMarkTeadham.jpg | |||
| File:Leander (1).jpg | File:Leander (1).jpg | |||
| ? | ||||
| </gallery> | </gallery> | |||
| Line 165: | Line 258: | |||
| |Ref= <!-- write below --> | |Ref= <!-- write below --> | |||
| + | # [https://en.wikipedia.org/wiki/HMNZS_Leander HMNZS ''Leander'' - Wikipedia] | |||
| + | # [https://en.wikipedia.org/wiki/Leander-class_cruiser_(1931) ''Leander''-class cruiser (1931) - Wikipedia] | |||
| + | # [https://www.youtube.com/watch?v=QQgEojJcjUo 1:42 Scale: HMS Ajax - World of Warships - YouTube] | |||
| }}<!-- DO NOT DELETE THIS LINE. DO NOT INSERT ANYTHING BELOW THIS LINE --> | }}<!-- DO NOT DELETE THIS LINE. DO NOT INSERT ANYTHING BELOW THIS LINE --> | |||
Revision as of 14:21, 8 May 2020

| Research price33000 exp |
| Purchase price3,040,000 |
| Hit Points24,500 |
| 152 mm/50 BL Mk.XXIII on a Mk.XXI mount4 х 2 pcs. |
| Rate of Fire6.67 shots/min. |
| Reload Time9 sec. |
| Rotation Speed7 deg./sec. |
| 180 Degree Turn Time25.71 sec. |
| Firing Range11.97 km. |
| Maximum Dispersion123 m. |
| Chance of Fire on Target Caused by HE Shell0 % |
| AP Shell152 mm AP 6crh Mk IV |
| Maximum AP Shell Damage3,100 |
| Initial AP Shell Velocity841 m./s. |
| AP Shell Weight50.8 kg. |
| 102 mm/45 QF Mk.XVI on a Mk.XIX mount4 х 2 pcs. |
| Firing Range4.96 km. |
| Rate of Fire20 shots/min. |
| Reload Time3 sec. |
| HE Shell102 mm HE 35 lb |
| Maximum HE Shell Damage1,500 |
| Initial HE Shell Velocity811 m./s. |
| Chance of Fire on Target Caused by HE Shell6 % |
| 533 mm QR Mk IV2 х 4 pcs. |
| Rate of Fire0.59 shots/min. |
| Reload Time101 sec. |
| Rotation Speed25 deg./sec. |
| 180 Degree Turn Time7.2 sec. |
| Torpedo533 mm Mk VII |
| Maximum Damage15,733 |
| Torpedo Speed59 knot |
| Torpedo Range7.02 km. |
| 102 mm/45 QF Mk.XVI on a Mk.XIX mount4 х 2 pcs. |
| . . . Average Damage per Second37.6 |
| . . . Firing Range5.01 km. |
| 20 mm Oerlikon Mk.I on a Mk.IIA mount5 х 1 pcs. |
| . . . Average Damage per Second18 |
| . . . Firing Range2.01 km. |
| 12.7 mm Mk.III2 х 4 pcs. |
| . . . Average Damage per Second4.2 |
| . . . Firing Range1.2 km. |
| 40 mm/39 Vickers QF Mk.VIII on a Mk.VI mount2 х 8 pcs. |
| . . . Average Damage per Second39.6 |
| . . . Firing Range2.49 km. |
| Maximum Speed32.5 knot |
| Turning Circle Radius710 m. |
| Rudder Shift Time11 sec. |
| Surface Detectability Range9.96 km. |
| Air Detectability Range6.44 km. |

Leander — British Tier VI cruiser.
A new generation light cruiser designed to serve as a scout both within a squadron and independently. In contrast to her predecessors, the ship's main advantage was that her main guns were placed in gun turrets. The ship also had stronger AA defenses and better armor protection.
Modules
 |
Rate of Fire (shots/min) | 180° Turn Time (sec) | Maximum Dispersion (m) | Maximum HE Shell Damage (HP) | Chance of Fire on Target Caused by HE Shell (%) | Maximum AP Shell Damage (HP) |
Research price (exp) |
Purchase price ( | |
|---|---|---|---|---|---|---|---|---|---|
| 152 mm/50 BL Mk.XXIII on a Mk.XXI mount | 6.7 | 25.7 | 123 | 3,100 | 0 | 200,000 |
 |
Hit Points (HP) | Armor (mm) | Armor (mm) | Main Turrets (pcs.) | Secondary Gun Turrets (pcs.) | AA Mounts (pcs.) | Torpedo Tubes (pcs.) | Hangar Capacity (pcs.) |
Research price (exp) |
Purchase price ( | |
|---|---|---|---|---|---|---|---|---|---|---|---|
| Leander (A) | 24,500 | 10 | 100 | 4 | 4 | 2/5/2/4 | 2 | 0 | 370,000 | ||
| Leander (B) | 28,700 | 10 | 100 | 4 | 4 | 5/4 | 2 | 12,000 | 780,000 |
 |
Rate of Fire (shots/min) | Torpedo Tubes Reload Time (sec) | 180° Turn Time (sec) | Maximum Damage (HP) | Torpedo Speed (knot) | Torpedo Range (km) |
Research price (exp) |
Purchase price ( | |
|---|---|---|---|---|---|---|---|---|---|
| 533 mm Mk VII | 0.6 | 101 | 7.2 | 15,733 | 59 | 7 | 0 | 400,000 | |
| 533 mm Mk IX | 0.6 | 101 | 7.2 | 15,433 | 61 | 8 | 4,000 | 500,000 |
 |
IDS_SHIP_PARAM_SUO_INCREASE_DIST (%) | Maximum Firing Range (km) |
Research price (exp) |
Purchase price ( | |
|---|---|---|---|---|---|
| Mk VI mod. 1 | 0 | 0 | 200,000 | ||
| Mk VI mod. 2 | 0 | 6,000 | 520,000 |
 |
Maximum Speed (knot) |
Research price (exp) |
Purchase price ( | |
|---|---|---|---|---|
| Propulsion: 72,000 hp | 32.5 | 0 | 200,000 |
Compatible Upgrades
| Slot 1 |
||||||
|---|---|---|---|---|---|---|
| Slot 2 |
||||||
| Slot 3 |
||||||
| Slot 4 |
Player Opinion
Performance
Tier VI brings a new shift in British light cruiser gameplay, as Leander takes the lessons learned from Caledon through Emerald and applies them to a more well-equipped vessel. Leander is fairly stalwart cruiser for her tier, capable of mercilessly smashing enemy destroyers, holding her ground against her cruiser contemporaries, and providing fire support as needed.
Captains familiar with Tier VI American cruiser Dallas will feel at home in Leander. She exemplifies a ship that friendly destroyers love to ride shotgun with and enemy destroyers try their hardest to avoid (or destroy). Leander can take a fair bit of punishment from lighter enemy units due to her access to the Repair Party ![]() consumable, and while she lacks Aoba’s big guns and envies the range of Budyonny and Nürnberg, she's a fairly solid cruiser for her tier. Her upgraded torpedoes go a long way towards closing the gap between her and her contemporaries when they are used well. Her torpedo firing arcs are excellent.
consumable, and while she lacks Aoba’s big guns and envies the range of Budyonny and Nürnberg, she's a fairly solid cruiser for her tier. Her upgraded torpedoes go a long way towards closing the gap between her and her contemporaries when they are used well. Her torpedo firing arcs are excellent.
Unfortunately, Leander needs to get almost suicidally close — her stock range is a paltry 12.0 km — in order to get her main battery into action, greatly increasing the risk involved when she engages enemy destroyers who have support nearby. While she can mount a Spotting Aircraft ![]() to temporarily increase her range, doing so requires her to give up Smoke Generator
to temporarily increase her range, doing so requires her to give up Smoke Generator ![]() and a chunk of her longevity with it.
and a chunk of her longevity with it.
Pros:
- Lowest detection radius of all non-premium Tier VI cruisers (Perth and Huanghe are better).
- Solid torpedo range (with the upgrade).
- Very deadly against destroyers and cruisers who end up at close range.
- Has access to Smoke Generator
 , Catapult Fighter
  , or Spotting Aircraft
  .
.
- Has access to the Repair Party
 ability.
- Better secondary battery than other same-tier cruisers.
Cons:
- Shortest main battery range of all Tier VI cruisers.
- Lack of high explosive shells makes damaging enemy capital ships very challenging.
- Anti-aircraft suite is on par with Aoba and Budyonny, but cannot be made more potent with Defensive AA Fire
 .
.
- Damage from armor piercing salvos is consistent, but not spectacular. Leander has a very low alpha-strike damage potential.
- Struggles to penetrate any bow on destroyer.
Research
Availability of researchable upgrades for Leander is as follows:
- Hull: Upgrade to Hull (B) for additional health, a small increase in AA, and improved rudder shift time. Research of this module unlocks progression to Fiji.
- Torpedoes: The 533 mm Mk IX torpedoes reload faster, travel farther, move faster, have a higher flood chance, and hit nearly as hard as the stock 533 mm Mk VII torpedoes.
- Gun Fire Control System: Upgrade to Mk VI mod. 2 for an extra 10% range on the main battery.
Optimal Configuration
Upgrades
The recommended upgrades for Leander are as follows:
- Slot 1: Main Armaments Modification 1
 *
*
- Slot 2: Engine Room Protection

- Slot 3: Aiming Systems Modification 1
 *
*
- Slot 4: Steering Gears Modification 2

Slot 1 allows players to mount one of two viable options. Main Armaments Modification 1 is a generally viable choice, but players wishing to specialize for anti-aircraft duties should mount Auxiliary Armaments Modification 1 ![]() .
.
Slot 3 offers choices for specialization in different roles. Aiming Systems Modification 1 should be equipped for ship to ship combat. AA Guns Modification 1 ![]() is a good choice to provide additional defense against aircraft.
is a good choice to provide additional defense against aircraft.
Commander Skills
The standard ten-point commander skills should be implemented into Priority Target for number of enemies focusing on you, Adrenaline Rush for better reload, Superintendent for the extra consumables and Concealment Expert for the increased concealment. Subsequent points can be inserted for an AA build or General build.
| Recommended Commander Skills | ||||||||
|---|---|---|---|---|---|---|---|---|
| Cost (points) |
Endurance | Attack | Support | Versatility | ||||
| 1 |
★★★ |
★ |
|
Χ |
★ |
Χ |
★ |
Χ |
| 2 |
★ |
★★ |
★★ |
★★ |
★★★ |
Χ |
★★★ |
★ |
| 3 |
★ |
★★ |
★★ |
Χ |
★ |
★★★ |
|
★★★ |
| 4 |
|
|
|
Χ |
★★ |
|
★★ |
★★★ |
| Key: ★★★ - Extremely Useful ★★ - Frequently Useful ★ - Occasionally Useful No stars - Meh Χ - Not recommended | ||||||||
Consumables
Leander can equip the following consumables:
- Slot 1: Damage Control Party

- Slot 2: Repair Party
- Slot 3: Hydroacoustic Search

- Slot 4: Smoke Generator or Spotting Aircraft or Catapult Fighter
Leander is comparatively lightly armored for a Tier VI cruiser — especially compared to her contemporaries Budyonny and Dallas — and will need to make good use use of the Repair Party ![]() and Smoke Generator
and Smoke Generator ![]() consumables. Captains are recommended to invest in the premium versions of both for better survivability. Premium consumable Hydroacoustic Search II (
consumables. Captains are recommended to invest in the premium versions of both for better survivability. Premium consumable Hydroacoustic Search II (![]() ) will also help in hunting down destroyers and spotting torpedoes from within a smoke screen, as enemy players frequently send torpedoes into smoke banks hoping to hit stationary ships hiding within. Catapult Fighter
) will also help in hunting down destroyers and spotting torpedoes from within a smoke screen, as enemy players frequently send torpedoes into smoke banks hoping to hit stationary ships hiding within. Catapult Fighter ![]() is not recommended due to the little protection it provides and Spotting Aircraft
is not recommended due to the little protection it provides and Spotting Aircraft ![]() would provide only a small bonus to her already meager range.
would provide only a small bonus to her already meager range.
Camouflage
Type 1, 2, or 5 camouflage can be equipped for credits; Types 2 or 5 are recommended at a minimum to reduce the accuracy of incoming shells.
Players who wish to spend doubloons can equip Leander with Type 16 camouflage that lowers her detection radius, reduces the accuracy of incoming shells, reduces her repair costs, and increases the amount of experience she earns.
Signals
Again, due to Leander’s weak armor scheme, captains are encouraged to mount the following signals for better survivability: India Delta (![]() ) and November Foxtrot (
) and November Foxtrot (![]() ). Additionally, Equal Speed Charlie London (🚫) can be used to quickly grind to the much-needed Fire Control Systems module upgrade (Mk VI mod. 2), as her stock range is abnormally low for a Tier VI cruiser.
). Additionally, Equal Speed Charlie London (🚫) can be used to quickly grind to the much-needed Fire Control Systems module upgrade (Mk VI mod. 2), as her stock range is abnormally low for a Tier VI cruiser.
Recommended Signal Flags 
| |||||
|---|---|---|---|---|---|
| Combat | |||||
 ★ |

|

|

|

|

|
 ★ |

|

|
 ★★ |
 ★★★ |
 ★★★ |

|

| ||||
Note: Use of the Juliet Charlie signal makes detonation impossible.
Gallery
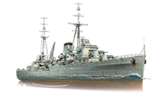
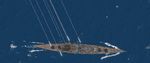
Leander prepares to enter battle.
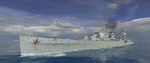
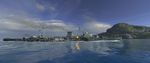
Leander fires upon the enemy in the safety of smoke.
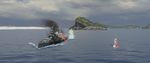
An enemy Yorck is penetrated by a Leander armor piercing shell while engaging in evasive maneuvers.
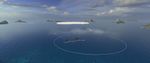
An enemy Bismarck class battleship shrugs off the Leander's salvo.

The returning salvo by the Tirpitz easily penetrates Leander armor.

Leander takes a battleship salvo to the bow.
Leander closes in with an enemy Bayern class battleship, desperately firing torpedoes and secondaries.


Historical Info
Historical Gallery


.jpg)
References
- HMNZS Leander - Wikipedia
- Leander-class cruiser (1931) - Wikipedia
- 1:42 Scale: HMS Ajax - World of Warships - YouTube