Lion
| Revision as of 15:02, 17 August 2017 Changed pack to pride, incorporated skill and flag changes. | Revision as of 21:54, 7 September 2017 Overall polish #1. | |||
| Line 8: | Line 8: | |||
| |Performance=<!-- write text about performance in battles below --> | |Performance=<!-- write text about performance in battles below --> | |||
| ? | ''Lion'' has the ability to roar into action anywhere on a map to protect her cubs. Her low concealment makes her great at stalking and pouncing on unsuspecting prey. Keep in mind that even the mightiest of predators can fall victim to coordinated attacks. Therefore, she is best played at the head of her pride, able to be reinforced as needed. Her gameplay is very similar to that of the [[ | + | ''Lion'' has the ability to roar into action anywhere on a map to protect her cubs. Her low concealment makes her great at stalking and pouncing on unsuspecting prey. Keep in mind that even the mightiest of predators can fall victim to coordinated attacks. Therefore, she is best played at the head of her pride, able to be reinforced as needed. Her gameplay is very similar to that of the ''[[Iowa]]'', with the added benefit of a strong {{Repair Party}} [[ship:Consumables|consumable]]. Use islands to mask your movements as you continue to advance and put pressure on the enemy. At the right moment, pounce! | |
| |Pros=<!-- write list of positive points below. use * as in ordinary wiki-list. --> | |Pros=<!-- write list of positive points below. use * as in ordinary wiki-list. --> | |||
| ? | ||||
| * Great armor piercing shell penetration - sinking her teeth into the toughest of enemy skin. | * Great armor piercing shell penetration - sinking her teeth into the toughest of enemy skin. | |||
| * High chance of fire with high explosive shells - her roar sets enemies ablaze. | * High chance of fire with high explosive shells - her roar sets enemies ablaze. | |||
| Line 20: | Line 19: | |||
| |Cons=<!-- write list of negative points below. use * as in ordinary wiki-list. --> | |Cons=<!-- write list of negative points below. use * as in ordinary wiki-list. --> | |||
| ? | ||||
| * Weak side - her vulnerable to broadside hits from enemy battleships. | * Weak side - her vulnerable to broadside hits from enemy battleships. | |||
| * Long body - making her difficult to dodge torpedoes. | * Long body - making her difficult to dodge torpedoes. | |||
| Line 27: | Line 25: | |||
| |Research=<!-- write text about priority sequence of research below --> | |Research=<!-- write text about priority sequence of research below --> | |||
| ? | ||||
| ''Lion'' begins her life with decent teeth, but she is very weak to enemy air attacks. Therefore, it is probably best to focus on upgrading her hull first. With this, she can take more hits and be more effective on the battlefield. Afterwards, it depends on the player's style. For players who like to run and gun, the engine modification would be next, followed by gun fire control system, and finally main battery. For players who prefer to hunt and pounce on their unsuspecting prey, upgrade the ship's main battery first, followed by engine, and finally gun fire control system. Only a fully matured ''Lion'' can rule the pride. | ''Lion'' begins her life with decent teeth, but she is very weak to enemy air attacks. Therefore, it is probably best to focus on upgrading her hull first. With this, she can take more hits and be more effective on the battlefield. Afterwards, it depends on the player's style. For players who like to run and gun, the engine modification would be next, followed by gun fire control system, and finally main battery. For players who prefer to hunt and pounce on their unsuspecting prey, upgrade the ship's main battery first, followed by engine, and finally gun fire control system. Only a fully matured ''Lion'' can rule the pride. | |||
| Line 33: | Line 30: | |||
| |Upgrades=<!-- write text about best upgrades below --> | |Upgrades=<!-- write text about best upgrades below --> | |||
| ? | + | The recommended upgrades for ''{{#var:ship_name}}'' are as follows: | ||
| ? | * Slot 1 | + | * '''Slot 1:''' [[Ship:Upgrades#Main_Armaments_Modification.C2.A01|Main Armaments Modification 1]] ensures healthy and strong teeth (main battery guns). | |
| ? | * Slot 2 | + | * '''Slot 2:''' [[Ship:Upgrades#AA_Guns_Modification.C2.A02|AA Guns Modification 2]] helps resist enemy fleas and ticks (aircraft). | |
| ? | * Slot 3 | + | * '''Slot 3:''' [[Ship:Upgrades#Main_Battery_Modification.C2.A03|Main Battery Modification 3]] enables more vicious and rapid attacks (faster reload speed). | |
| ? | * Slot 4 | + | * '''Slot 4:''' [[Ship:Upgrades#Damage_Control_System_Modification.C2.A01|Damage Control System Modificaiton 1]] helps prevent open wounds (fewer fires and floods). | |
| ? | * Slot 5 | + | * '''Slot 5:''' [[Ship:Upgrades#Damage_Control_System_Modification.C2.A02|Damage Control System Modification 2]] helps control excessive bleeding (reduced time on fires and floods). | |
| ? | * Slot 6 | + | * '''Slot 6:''' [[Ship:Upgrades#Concealment_System_Modification.C2.A01|Concealment System Modification 1]] allows ''Lion'' to strike from stealth (because 11.1 km detection radius on a Tier IX battleship puts some Tier IX cruisers to shame). | |
| ? | + | |||
| ? | + | |||
| ? | + | |||
| ? | + | |||
| ? | + | |||
| ? | + | |||
| ? | + | |||
| ? | + | |||
| ? | + | |||
| |CommanderSkills=<!-- write text about best set of Commander Skills below --> | |CommanderSkills=<!-- write text about best set of Commander Skills below --> | |||
| + | Given her low health pool, ''Lion'' will benefit most from skills that maximize her survivability, chiefly Priority Target at Level 1, High Alert at Level 2, Superintendent at Level 3, and Fire Prevention at Level 4. Once those core skills are unlocked, captains are advised to invest in Concealment Expert, Adrenaline Rush, and either Basics of Survivability or Vigilance in whichever order suits them best. | |||
| {{Commander Skills | {{Commander Skills | |||
| Line 62: | Line 51: | |||
| | Evasive Maneuver = | | Evasive Maneuver = | |||
| ? | | High Alert = | + | | High Alert = 3 | |
| ? | | Jack of All Trades = | + | | Jack of All Trades = 2 | |
| ? | | Expert Marksman = | + | | Expert Marksman = 2 | |
| | Torpedo Acceleration = | | Torpedo Acceleration = | |||
| | Smoke Screen Expert = | | Smoke Screen Expert = | |||
| Line 72: | Line 61: | |||
| | Basics of Survivability = 3 | | Basics of Survivability = 3 | |||
| ? | | Survivability Expert = | + | | Survivability Expert = | |
| | Torpedo Armament Expertise = | | Torpedo Armament Expertise = | |||
| | Emergency Takeoff = | | Emergency Takeoff = | |||
| Line 80: | Line 69: | |||
| | Vigilance = 2 | | Vigilance = 2 | |||
| ? | | Manual Fire Control for Secondary Armament = | + | | Manual Fire Control for Secondary Armament = 1 | |
| | Fire Prevention = 3 | | Fire Prevention = 3 | |||
| | Inertia Fuse for HE Shells = | | Inertia Fuse for HE Shells = | |||
| | Air Supremacy = | | Air Supremacy = | |||
| | Advanced Firing Training = 2 | | Advanced Firing Training = 2 | |||
| ? | | Manual Fire Control for AA Armament = | + | | Manual Fire Control for AA Armament = | |
| ? | | Radio Position Finding = | + | | Radio Position Finding = | |
| | Concealment Expert = 3 | | Concealment Expert = 3 | |||
| }} | }} | |||
| |Consumables=<!-- write text about selection of Consumables below --> | |Consumables=<!-- write text about selection of Consumables below --> | |||
| + | ''{{#var:ship_name}}'' can equip the following consumables: | |||
| + | * '''Slot 1:''' {{Damage Control Party}} | |||
| + | * '''Slot 2:''' {{Repair Party}} | |||
| + | * '''Slot 3:''' {{Spotting Aircraft}} '''or''' {{Catapult Fighter}} | |||
| ? | ''Lion'' should always invest in her hunt with | + | ''Lion'' should always invest in her hunt with {{Damage Control Party II}}, {{Repair Party II}}, and premium aircraft [[Ship:Consumables|consumables]]. {{Spotting Aircraft II}} provides better vision, enabling her to mangle prey. {{Catapult Fighter II}} is mainly intended to keep the fleas and ticks at bay. Played properly, ''Lion'' always repays her debts. | |
| |Camouflage=<!-- write text about useful camouflage below --> | |Camouflage=<!-- write text about useful camouflage below --> | |||
| + | [[Ship:Camouflage#Standard Camouflage|Type 1, 2, or 5 camouflage]] can be equipped for credits; Types 2 or 5 are recommended at a minimum to reduce the accuracy of incoming shells. | |||
| ? | + | Players who wish to spend doubloons can equip ''{{#var:ship_name}}'' with [[Ship:Camouflage#Permanent_Camouflage|Type 19 camouflage]] that lowers her detection radius, reduces the accuracy of incoming shells, reduces her repair costs, and increases the amount of experience she earns. | ||
| |Signals=<!-- write text about best set of signals below --> | |Signals=<!-- write text about best set of signals below --> | |||
| Line 102: | Line 96: | |||
| {{Signal Flags | {{Signal Flags | |||
| | November Echo Setteseven = 2 | | November Echo Setteseven = 2 | |||
| ? | | Mike Yankee Soxisix = | + | | Mike Yankee Soxisix = 1 | |
| | India X-Ray = 1 | | India X-Ray = 1 | |||
| ? | | Juliet | + | | Juliet Whiskey Unaone = | |
| | Victor Lima = 1 | | Victor Lima = 1 | |||
| ? | | Hotel Yankee = | + | | Hotel Yankee = 1 | |
| ? | | November Foxtrot = | + | | November Foxtrot = 2 | |
| | Sierra Mike = 2 | | Sierra Mike = 2 | |||
| | India Delta = 3 | | India Delta = 3 | |||
| ? | | Juliet | + | | Juliet Yankee Bissotwo = 2 | |
| | India Yankee = 3 | | India Yankee = 3 | |||
| ? | | Juliet Charlie = | + | | Juliet Charlie = 1 | |
| ? | | Zulu = | + | | Zulu = 1 | |
| | India Bravo Terrathree = 2 | | India Bravo Terrathree = 2 | |||
| ? | | Equal Speed Charlie London = | + | | Equal Speed Charlie London = 3 | |
| | Zulu Hotel = 2 | | Zulu Hotel = 2 | |||
| ? | | Papa Papa = | + | | Papa Papa = 1 | |
| ? | | Wyvern = | + | | Wyvern = | |
| | Red Dragon = 2 | | Red Dragon = 2 | |||
| | Dragon Flag = 2 | | Dragon Flag = 2 | |||
| ? | | Ouroboros = | + | | Ouroboros = | |
| ? | | Hydra = | + | | Hydra = | |
| }} | }} | |||
| |Gallery=<!-- write below list of files with description (if necessary) separated with | --><gallery> | |Gallery=<!-- write below list of files with description (if necessary) separated with | --><gallery> | |||
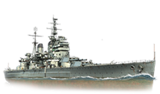
| File:LionStart.png | File:LionStart.png | |||
| ? | File:LionFlyby.png|An Aichi D3A1 from [[ | + | File:LionFlyby.png|An Aichi D3A1 from ''[[Kaga]]'' inspects the new cub. | |
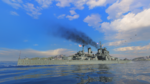
| ? | File:LionRoar.png| | + | File:LionRoar.png|''Lion'' roars. | |
| File:LionDetail.jpg | File:LionDetail.jpg | |||
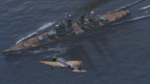
| File:LionNeptune.jpg|''Lion'' leads the pride. | File:LionNeptune.jpg|''Lion'' leads the pride. | |||
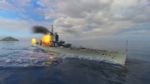
| File:LionTown.jpg|''Lion'' pounces on an enemy cruiser. | File:LionTown.jpg|''Lion'' pounces on an enemy cruiser. | |||
| ? | File:LionTB.png|''Lion'' shreds the enemy [[ | + | File:LionTB.png|''Lion'' shreds the enemy ''[[Hiryu]]''’s torpedo bombers. | |
| File:LionPouncesOnCruiser.jpg|''Lion'' pounces on another victim. | File:LionPouncesOnCruiser.jpg|''Lion'' pounces on another victim. | |||
| File:LionDamage.png|Three ships attempt to take down the ''Lion''. | File:LionDamage.png|Three ships attempt to take down the ''Lion''. | |||
| ? | File:HoodTriesLion.jpg|An enemy [[ | + | File:HoodTriesLion.jpg|An enemy ''[[Hood]]'' attempts to tame ''Lion''. | |
| </gallery> | </gallery> | |||
| |History=<!-- write text below --> | |History=<!-- write text below --> | |||
| ? | The ''Lion''-class battleships were a class of six fast battleships designed for the Royal Navy in the late 1930s. They were a larger, improved version of the ''[[King George V]]'' class with 16-inch (406 mm) guns. Only two ships were laid down before World War II began in September 1939 and a third was ordered during the war, but their construction was suspended shortly afterwards. Their design changed several times in response to the removal of treaty restrictions on size and in light of war experience. None of the other ships planned were laid down, although there was a proposal to modify one of the suspended ships into a hybrid battleship/aircraft carrier with two 16-inch gun turrets and a flight deck. The two ships already begun were scrapped after the end of the war. | + | The ''Lion''-class battleships were a class of six fast battleships designed for the Royal Navy in the late 1930s. They were a larger, improved version of the ''[[King George V]]'' class with 16-inch (406 mm) guns. Only two ships were laid down before World War II began in September 1939 and a third was ordered during the war, but their construction was suspended shortly afterwards. Their design changed several times in response to the removal of treaty restrictions on size and in light of war experience. None of the other ships planned were laid down, although there was a proposal to modify one of the suspended ships into a hybrid battleship/aircraft carrier with two 16-inch gun turrets and a flight deck. The two ships already begun were scrapped after the end of the war. | |
| |HistoricalGallery=<!-- write below list of files with description (if necessary) separated with | --><gallery> | |HistoricalGallery=<!-- write below list of files with description (if necessary) separated with | --><gallery> | |||
Revision as of 21:54, 7 September 2017

| Research price180000 exp |
| Purchase price15,900,000 |
| Hit Points58,600 |
| 406 mm/45 Mk.II on a Mk.IV Type A mount3 х 3 pcs. |
| Rate of Fire2.07 shots/min. |
| Reload Time29 sec. |
| Rotation Speed4 deg./sec. |
| 180 Degree Turn Time45 sec. |
| Firing Range19.21 km. |
| Maximum Dispersion271 m. |
| HE Shell406 mm HE Mk II |
| Maximum HE Shell Damage6,900 |
| Chance of Fire on Target Caused by HE Shell46 % |
| Initial HE Shell Velocity792 m./s. |
| HE Shell Weight929 kg. |
| AP Shell406 mm AP Mk III |
| Maximum AP Shell Damage12,600 |
| Initial AP Shell Velocity747 m./s. |
| AP Shell Weight1080 kg. |
| 133 mm/50 QF Mk.I on a Mk.I mount8 х 2 pcs. |
| Firing Range6.95 km. |
| Rate of Fire9 shots/min. |
| Reload Time6.67 sec. |
| HE Shell133 mm HE Mk IC |
| Maximum HE Shell Damage1,900 |
| Initial HE Shell Velocity792 m./s. |
| Chance of Fire on Target Caused by HE Shell8 % |
| 133 mm/50 QF Mk.I on a Mk.I mount8 х 2 pcs. |
| . . . Average Damage per Second64.8 |
| . . . Firing Range4.5 km. |
| 40 mm/39 Vickers QF Mk.VIII on a Mk.VI mount10 х 8 pcs. |
| . . . Average Damage per Second198 |
| . . . Firing Range2.49 km. |
| 40 mm/56 OQF Mk.1/2 on an RP Mk.II mount2 х 4 pcs. |
| . . . Average Damage per Second31.8 |
| . . . Firing Range3.51 km. |
| 20 mm Oerlikon Mk.II on a Mk.V mount6 х 2 pcs. |
| . . . Average Damage per Second36.6 |
| . . . Firing Range2.01 km. |
| 40 mm/56 OQF Mk.XI on a Mk.V mount4 х 2 pcs. |
| . . . Average Damage per Second49.2 |
| . . . Firing Range3.51 km. |
| Maximum Speed28.03 knot |
| Turning Circle Radius830 m. |
| Rudder Shift Time22.2 sec. |
| Surface Detectability Range14.84 km. |
| Air Detectability Range10.51 km. |

Lion — British Tier IX battleship.
The last British battleship designed and laid down before the breakout of World War II. In many respects, the ship was a development of the King George V-class ships, but, unlike her predecessors, she had greater dimensions, heavier armor, and modern 406 mm main guns.
Modules
 |
Rate of Fire (shots/min) | 180° Turn Time (sec) | Maximum Dispersion (m) | Maximum HE Shell Damage (HP) | Chance of Fire on Target Caused by HE Shell (%) | Maximum AP Shell Damage (HP) |
Research price (exp) |
Purchase price ( | |
|---|---|---|---|---|---|---|---|---|---|
| 406 mm/45 Mk.II on a Mk.IV Type A/B mount | 2.1 | 45 | 271 | 6,900 | 46 | 12,600 | 0 | 2,000,000 | |
| 419 mm/45 Mk.I on a Type C/D mount | 2.1 | 45 | 271 | 7,200 | 48 | 13,000 | 35,000 | 2,500,000 |
 |
Hit Points (HP) | Armor (mm) | Armor (mm) | Main Turrets (pcs.) | Secondary Gun Turrets (pcs.) | AA Mounts (pcs.) | Torpedo Tubes (pcs.) | Hangar Capacity (pcs.) |
Research price (exp) |
Purchase price ( | |
|---|---|---|---|---|---|---|---|---|---|---|---|
| Lion (A) | 58,600 | 19 | 381 | 2/1 | 8 | 6/4/2/10/8 | 0 | 2,400,000 | |||
| Lion (B) | 67,900 | 19 | 381 | 2/1 | 8 | 4/6/10/8 | 54,000 | 5,100,000 |
 |
IDS_SHIP_PARAM_SUO_INCREASE_DIST (%) | Maximum Firing Range (km) |
Research price (exp) |
Purchase price ( | |
|---|---|---|---|---|---|
| Mk IX mod. 1 | 0 | 0 | 1,000,000 | ||
| Mk IX mod. 2 | 0 | 26,000 | 2,600,000 |
 |
Maximum Speed (knot) |
Research price (exp) |
Purchase price ( | |
|---|---|---|---|---|
| Propulsion: 120,000 hp | 28 | 0 | 600,000 | |
| Propulsion: 130,000 hp | 29.5 | 20,000 | 1,500,000 |
Compatible Upgrades
| Slot 1 |
|||||
|---|---|---|---|---|---|
| Slot 2 |
|||||
| Slot 3 |
|||||
| Slot 4 |
|||||
| Slot 5 |
|||||
| Slot 6 |
Player Opinion
Performance
Pros:
- Great armor piercing shell penetration - sinking her teeth into the toughest of enemy skin.
- High chance of fire with high explosive shells - her roar sets enemies ablaze.
- Ability to change course quickly - exploiting weaknesses in her prey.
- Great concealment - she can hide in plain sight and silently observe.
- High healing capability - hurting her will only make her stronger when combined with the Adrenaline Rush commander skill.
- Decent anti-air weaponry allows her to avoid aircraft that attempt to sting her.
Cons:
- Weak side - her vulnerable to broadside hits from enemy battleships.
- Long body - making her difficult to dodge torpedoes.
- Thin skin - very low hit points compared to other tier IX battleships as well as a lower Torpedo Defense System.
- Medium top speed - not fast enough to hunt every ship, instead forced to pounce on her prey rather than chase.
Research
Optimal Configuration
Upgrades
The recommended upgrades for Lion are as follows:
- Slot 1: Main Armaments Modification 1 ensures healthy and strong teeth (main battery guns).
- Slot 2: AA Guns Modification 2 helps resist enemy fleas and ticks (aircraft).
- Slot 3: Main Battery Modification 3 enables more vicious and rapid attacks (faster reload speed).
- Slot 4: Damage Control System Modificaiton 1 helps prevent open wounds (fewer fires and floods).
- Slot 5: Damage Control System Modification 2 helps control excessive bleeding (reduced time on fires and floods).
- Slot 6: Concealment System Modification 1 allows Lion to strike from stealth (because 11.1 km detection radius on a Tier IX battleship puts some Tier IX cruisers to shame).
Commander Skills
Given her low health pool, Lion will benefit most from skills that maximize her survivability, chiefly Priority Target at Level 1, High Alert at Level 2, Superintendent at Level 3, and Fire Prevention at Level 4. Once those core skills are unlocked, captains are advised to invest in Concealment Expert, Adrenaline Rush, and either Basics of Survivability or Vigilance in whichever order suits them best.
| Recommended Commander Skills | ||||||||
|---|---|---|---|---|---|---|---|---|
| Cost (points) |
Endurance | Attack | Support | Versatility | ||||
| 1 |
★★★ |
★ |
★ |
|
|
|
★ |
|
| 2 |
★★★ |
★★ |
★★ |
|
|
|
★★★ |
|
| 3 |
★★★ |
|
|
|
★★ |
★★★ |
★ |
★★ |
| 4 |
★ |
★★★ |
|
|
★★ |
|
|
★★★ |
| Key: ★★★ - Extremely Useful ★★ - Frequently Useful ★ - Occasionally Useful No stars - Meh Χ - Not recommended | ||||||||
Consumables
Lion can equip the following consumables:
- Slot 1: Damage Control Party

- Slot 2: Repair Party

- Slot 3: Spotting Aircraft
 or Catapult Fighter
Lion should always invest in her hunt with Damage Control Party II (![]() ), Repair Party II (
), Repair Party II (![]() ), and premium aircraft consumables. Spotting Aircraft II (
), and premium aircraft consumables. Spotting Aircraft II (![]() ) provides better vision, enabling her to mangle prey. Catapult Fighter II (
) provides better vision, enabling her to mangle prey. Catapult Fighter II (![]() ) is mainly intended to keep the fleas and ticks at bay. Played properly, Lion always repays her debts.
) is mainly intended to keep the fleas and ticks at bay. Played properly, Lion always repays her debts.
Camouflage
Type 1, 2, or 5 camouflage can be equipped for credits; Types 2 or 5 are recommended at a minimum to reduce the accuracy of incoming shells.
Players who wish to spend doubloons can equip Lion with Type 19 camouflage that lowers her detection radius, reduces the accuracy of incoming shells, reduces her repair costs, and increases the amount of experience she earns.
Signals
Recommended Signal Flags 
| |||||
|---|---|---|---|---|---|
| Combat | |||||
 ★ |
 ★★ |
 ★★★ |
 ★ |
 ★ |
 ★ |

|
 ★ |
 ★★ |
 ★★ |
 ★★ |
 ★★★ |

|

| ||||
Note: Use of the Juliet Charlie signal makes detonation impossible.
Gallery
An Aichi D3A1 from Kaga inspects the new cub.
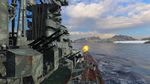
Lion roars.
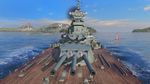
Lion leads the pride.
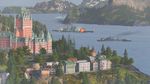
Lion pounces on an enemy cruiser.
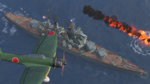
Lion shreds the enemy Hiryu’s torpedo bombers.
Lion pounces on another victim.

Three ships attempt to take down the Lion.
An enemy Hood attempts to tame Lion.


Historical Info
Historical Gallery
