Mahan
| Revision as of 18:55, 20 December 2016 | Revision as of 15:07, 15 October 2020 | |||
20 intermediate revisions by 6 users not shown | ||||
| Line 3: | Line 3: | |||
| |Anno=<!-- you can write below short description for the ship. it will replace default once. --> | |Anno=<!-- you can write below short description for the ship. it will replace default once. --> | |||
| ? | Developed from the ''[[Farragut]]'' class, ''Mahan'' carried a more powerful torpedo armament. At the beginning of World War II, these destroyers were modernized with several automatic AA guns to fight enemy aircraft more efficiently. | + | Developed from the ''[[Farragut]]'' class, ''Mahan'' carried a more powerful torpedo armament. At the beginning of World War II, these destroyers were modernized with several automatic AA guns to fight enemy aircraft more efficiently.<!-- <br><br>{{Model3DViewer|e1993a3737914466ab43d5643305f5b7}}--> | |
| |Performance=<!-- write text about performance in battles below --> | |Performance=<!-- write text about performance in battles below --> | |||
| ''Mahan'' is a fairly well-rounded destroyer by the standards of the class. She is the first American destroyer to have the capability to fire torpedoes from beyond her detection range — via the upgraded torpedoes she has access to upon equipping Hull (B) — as well as sporting a solid pool of hit points and fast firing guns that turn quickly. | ''Mahan'' is a fairly well-rounded destroyer by the standards of the class. She is the first American destroyer to have the capability to fire torpedoes from beyond her detection range — via the upgraded torpedoes she has access to upon equipping Hull (B) — as well as sporting a solid pool of hit points and fast firing guns that turn quickly. | |||
| ? | Overall, ''Mahan'' is good at almost anything her enemies can throw at her | + | Overall, ''Mahan'' is good at almost anything her enemies can throw at her. She is able to defend herself from enemy destroyers adequately; even more so once she gains additional hit points from upgrading to Hull (B). Her upgraded torpedoes are somewhat slow, but hit decently hard and can be fired from stealth. One thing of note about her torpedo launchers: she has one port, one starboard, and one centerline. This allows her to put a very respectable eight fish into the water on either side; however, many opponents forget about the launcher on the opposite side of the ship. It can make for a nasty surprise at close range if they believe that she's launched all of the torpedoes she had loaded. | |
| ? | ''Mahan''’s primary | + | ''Mahan''’s primary weakness is her large detection range. Lacking access to [[Ship:Upgrades#Tier_VIII.2B_Equipment_.28Slot_5.29|Upgrade Slot 5]], there is little that ''Mahan'' can do for her large detection radius other than spend commander skill points on [[Ship:Commander#Concealment Expert|Concealment Expert]]; even then, she remains one of the easiest Tier VII destroyers to spot. | |
| Overall, ''Mahan'' is a definite upgrade from ''[[Farragut]]'' and a solid Tier VII destroyer. | Overall, ''Mahan'' is a definite upgrade from ''[[Farragut]]'' and a solid Tier VII destroyer. | |||
| |Pros=<!-- write list of positive points below. use * as in ordinary wiki-list. --> | |Pros=<!-- write list of positive points below. use * as in ordinary wiki-list. --> | |||
| ? | * Fast turret rotation | + | * Fast turret rotation. | |
| * Outstanding main battery rate of fire. | * Outstanding main battery rate of fire. | |||
| * Three torpedo tube launchers provide additional flexibility and will frequently catch opponents off-guard. | * Three torpedo tube launchers provide additional flexibility and will frequently catch opponents off-guard. | |||
| ? | ||||
| * Long range torpedoes reach out to 9.2 km, making her the first American destroyer capable of firing torpedoes from beyond her detection range. | * Long range torpedoes reach out to 9.2 km, making her the first American destroyer capable of firing torpedoes from beyond her detection range. | |||
| ? | * Has access to the | + | * Fairly good AA defense. | |
| + | * Has access to the {{Defensive AA Fire}} consumable. | |||
| |Cons=<!-- write list of negative points below. use * as in ordinary wiki-list. --> | |Cons=<!-- write list of negative points below. use * as in ordinary wiki-list. --> | |||
| * Very weak armor. | * Very weak armor. | |||
| ? | ||||
| * Large silhouette and a fairly large detection range. | * Large silhouette and a fairly large detection range. | |||
| * Shorter main battery range compared to ''[[Farragut]]''. | * Shorter main battery range compared to ''[[Farragut]]''. | |||
| ? | * | + | * One of the slowest Tier VII destroyers at 35 knots. | |
| |Research=<!-- write text about priority sequence of research below --> | |Research=<!-- write text about priority sequence of research below --> | |||
| ? | Hull (B) is the best place to invest early gains in ''Mahan''; the additional hit points will increase her survivability immeasurably. The Torpedo upgrade is the next best place to spend experience gains; pick up the Fire Control System upgrade last | + | Availability of researchable upgrades for ''{{#var:ship_name}}'' is as follows: | |
| + | * '''Hull:''' Upgrade to Hull (B) for additional health and improved rudder shift time; researching Hull (B) unlocks progression to ''[[Benson]]''. | |||
| + | * '''Torpedoes:''' The Mk15 mod. 0 torpedoes don't hit quite as hard and also travel slower, but they have far more range than her stock fish. Hull (B) must be equipped before they can be installed. | |||
| + | * '''Gun Fire Control System:''' Upgrade to Mk7 mod. 2 for an extra 10% range on the main battery. | |||
| + | ||||
| + | Hull (B) is the best place to invest early gains in ''Mahan''; the additional hit points will increase her survivability immeasurably. The Torpedo upgrade is the next best place to spend experience gains; pick up the Fire Control System upgrade last. | |||
| |OptimalConfiguration=<!-- write some general text about selection of optimal configuration below (optional)--> | |OptimalConfiguration=<!-- write some general text about selection of optimal configuration below (optional)--> | |||
| |Upgrades=<!-- write text about best upgrades below --> | |Upgrades=<!-- write text about best upgrades below --> | |||
| ? | Upgrade options are pretty thin on the ground for ''Mahan''. Main Armaments Modification 1 is the best choice for | + | *'''Slot 1''': {{Main Armaments Modification 1}} | |
| + | *'''Slot 2''': {{Engine Room Protection}} | |||
| + | *'''Slot 3''': {{Aiming Systems Modification 1}} | |||
| + | *'''Slot 4''': {{Propulsion Modification 1}} | |||
| + | ||||
| + | Upgrade options are pretty thin on the ground for ''Mahan''. '''Main Armaments Modification 1''' is the best choice for '''Slot 1'''. '''Slot 3''' is fairly well restricted to '''Aiming Systems Modification 1'''; {{AA Guns Modification 1}} is not recommended given how anemic ''Mahan''’s suite of anti-aircraft guns is. | |||
| |CommanderSkills=<!-- write text about best set of Commander Skills below --> | |CommanderSkills=<!-- write text about best set of Commander Skills below --> | |||
| ? | + | Level 1's best choice is Preventative Maintenance, as it reduces the chance of ''Mahan'' having her engine or rudder knocked out while under heavy fire. Last Stand is the best of the lot at Level 2; ''Mahan'' captains will find themselves under enemy fire frequently, and losing her engine is the worst possible module knockout she can suffer. Concealment Expert is clearly the best option at Level 4. | ||
| ? | + | Level 3 offers a ton of great skill choices: Basic Firing Training improves ''Mahan''’s abysmal anti-aircraft DPS as well as improving the rate of fire of her main battery guns; Survivability Expert adds more than 17% extra health; Vigilance allows her to better screen her allies from enemy torpeodes; Superintendent provides extra charges of valuable consumables; Demolition Expert increases the damage potency of her main battery. None of these are bad choices, but Survivability Expert should be the first one chosen. A dead ''Mahan'' does no damage, after all. | ||
| ? | {{Commander Skills | + | {{Commander Skills 2 | |
| ? | | Expert Loader= | + | <!-- This version enables a '0' rating. Use it for skills that have no effect (e.g. Improved Engines on a non-CV) or are detrimental to the ship. They should mirror what appears in the game client. --> | |
| ? | | | + | | rating11 = 1 <!-- Priority Target --> | |
| ? | | | + | | rating12 = 3 <!-- Preventive Maint --> | |
| ? | | | + | | rating13 = <!-- Expert Loader --> | |
| + | | rating14 = 0 <!-- Air Supremacy --> | |||
| + | | rating15 = <!-- Direction Center for Fighters --> | |||
| + | | rating16 = 0 <!-- Improved Engine Boost --> | |||
| + | | rating17 = <!-- Incoming Fire Alert --> | |||
| + | | rating18 = 0 <!-- Last Gasp --> | |||
| ? | | Expert Marksman | + | | rating21 = 2 <!-- High Alert --> | |
| ? | | Torpedo | + | | rating22 = 1 <!-- Jack of All Trades --> | |
| ? | | | + | | rating23 = <!-- Expert Marksman --> | |
| ? | | | + | | rating24 = <!-- Torpedo Acceleration --> | |
| ? | | Last Stand | + | | rating25 = 1 <!-- Smoke Screen Expert --> | |
| + | | rating26 = 0 <!-- Improved Engines --> | |||
| + | | rating27 = 2 <!-- Adrenaline Rush --> | |||
| + | | rating28 = 3 <!-- Last Stand --> | |||
| ? | | | + | | rating31 = <!-- Basics of Survivability --> | |
| ? | | | + | | rating32 = 3 <!-- Survivability Expert--> | |
| ? | | | + | | rating33 = 2 <!-- Torpedo Armament Expertise--> | |
| ? | | | + | | rating34 = 0 <!-- Aircraft Armor --> | |
| ? | | | + | | rating35 = 3 <!-- Basic Firing Training --> | |
| + | | rating36 = 2 <!-- Superintendent --> | |||
| + | | rating37 = 2 <!-- Demolition Expert --> | |||
| + | | rating38 = 1 <!-- Vigilance --> | |||
| ? | | | + | | rating41 = <!-- Manual Fire Control for Secondary Armament --> | |
| ? | | | + | | rating42 = <!-- Fire Prevention --> | |
| ? | | | + | | rating43 = 1 <!-- Inertia Fuse for HE Shells --> | |
| ? | | | + | | rating44 = 0 <!-- Sight Stabilization --> | |
| ? | | | + | | rating45 = 1 <!-- Advanced Firing Training --> | |
| ? | + | | rating46 = <!-- Massive AA Fire --> | ||
| ? | | | + | | rating47 = <!-- Radio Position Finding --> | |
| ? | | | + | | rating48 = 3 <!-- Concealment Expert --> | |
| ? | | | + | ||
| ? | + | |||
| ? | + | |||
| ? | + | |||
| }} | }} | |||
| |Consumables=<!-- write text about selection of Consumables below --> | |Consumables=<!-- write text about selection of Consumables below --> | |||
| ? | + | ''{{#var:ship_name}}'' can equip the following consumables: | ||
| + | * '''Slot 1:''' {{Damage Control Party}} | |||
| + | * '''Slot 2:''' {{Smoke Generator}} | |||
| + | * '''Slot 3:''' {{Engine Boost}} '''or''' {{Defensive AA Fire}} | |||
| |Camouflage=<!-- write text about useful camouflage below --> | |Camouflage=<!-- write text about useful camouflage below --> | |||
| Line 83: | Line 102: | |||
| |Signals=<!-- write text about best set of signals below --> | |Signals=<!-- write text about best set of signals below --> | |||
| ? | Equipping | + | Equipping Sierra Mike ({{Sierra Mike|Size=18px}}) is an excellent way to help make up for ''Mahan''’s deficiency in maximum speed. Captains should also consider Victor Lima ({{Victor Lima|Size=18px}}) and India X-Ray ({{India X-Ray|Size=18px}}) signals to increase the fire chance of her main battery shells, though they should be paired with a Juliet Charlie ({{Juliet Charlie|Size=18px}}) to ensure that ''Mahan'' doesn't [[Ship:Detonation|detonate]] under enemy fire. | |
| + | ||||
| + | {{Signal Flags | |||
| + | | November Echo Setteseven = 1 | |||
| + | | Mike Yankee Soxisix = | |||
| + | | India X-Ray = 3 | |||
| + | | Juliet Whiskey Unaone = 2 | |||
| + | | Victor Lima = 3 | |||
| + | | Hotel Yankee = 1 | |||
| + | ||||
| + | | November Foxtrot = 1 | |||
| + | | Sierra Mike = 3 | |||
| + | | India Delta = | |||
| + | | Juliet Yankee Bissotwo = | |||
| + | | India Yankee = | |||
| + | | Juliet Charlie = 3 | |||
| + | ||||
| + | | Zulu = 1 | |||
| + | | India Bravo Terrathree = | |||
| + | | Equal Speed Charlie London = 3 | |||
| + | | Zulu Hotel = 2 | |||
| + | | Papa Papa = | |||
| + | ||||
| + | | Wyvern = | |||
| + | | Red Dragon = 2 | |||
| + | | Dragon Flag = 2 | |||
| + | | Ouroboros = | |||
| + | | Hydra = | |||
| + | }} | |||
| |Gallery=<!-- write below list of files without tags. description (if necessary) for each should be separated with | --><gallery> | |Gallery=<!-- write below list of files without tags. description (if necessary) for each should be separated with | --><gallery> | |||
| Line 90: | Line 137: | |||
| |History=<!-- write text below --> | |History=<!-- write text below --> | |||
| + | <div class="thumb tright"> | |||
| + | {{AnnoWiki|content= | |||
| + | <h2>USS ''{{#var:ship_name}}'', 1936</h2> | |||
| ===Construction=== | ===Construction=== | |||
| ? | :United Dry Docks; Staten Island, New York | + | :Builder: United Dry Docks; Staten Island, New York, United States | |
| :Laid down: 12 June 1934 | :Laid down: 12 June 1934 | |||
| :Launched: 15 October 1935 | :Launched: 15 October 1935 | |||
| Line 114: | Line 164: | |||
| =====Torpedoes===== | =====Torpedoes===== | |||
| :Twelve (3x4) 533mm torpedo tubes | :Twelve (3x4) 533mm torpedo tubes | |||
| ? | + | }}</div> | ||
| ? | ===Design=== | + | ===History=== | |
| + | ====Design==== | |||
| The ''Mahan'' class were a series of 18 destroyers built between 1934 and 1937. Developed from the ''[[Farragut]]'' class, the chief improvements were an increase in torpedo tubes, superimposed gun turrets, emergency generators and an improved steam turbine system. Six ships were lost in combat and two were used in the Operation Crossroads nuclear test. No examples survive today. | The ''Mahan'' class were a series of 18 destroyers built between 1934 and 1937. Developed from the ''[[Farragut]]'' class, the chief improvements were an increase in torpedo tubes, superimposed gun turrets, emergency generators and an improved steam turbine system. Six ships were lost in combat and two were used in the Operation Crossroads nuclear test. No examples survive today. | |||
| Line 132: | Line 183: | |||
| |Ref= <!-- write below --> | |Ref= <!-- write below --> | |||
| + | #[https://en.wikipedia.org/wiki/USS_Mahan_(DD-364) USS ''Mahan'' (DD-364) - Wikipedia] | |||
| + | #[https://en.wikipedia.org/wiki/Mahan-class_destroyer ''Mahan''-class destroyer - Wikipedia] | |||
| }}<!-- DO NOT DELETE THIS LINE. DO NOT INSERT ANYTHING BELOW THIS LINE --> | }}<!-- DO NOT DELETE THIS LINE. DO NOT INSERT ANYTHING BELOW THIS LINE --> | |||
Revision as of 15:07, 15 October 2020

| Research price65000 exp |
| Purchase price5,350,000 |
| Hit Points11,700 |
| IDS_PAGM022_5IN38_MK245 х 1 pcs. |
| Rate of Fire18.18 shots/min. |
| Reload Time3.3 sec. |
| Rotation Speed15 deg./sec. |
| 180 Degree Turn Time12 sec. |
| Firing Range10.61 km. |
| Maximum Dispersion102 m. |
| HE Shell127 mm HE Mk32 |
| Maximum HE Shell Damage1,800 |
| Chance of Fire on Target Caused by HE Shell5 % |
| Initial HE Shell Velocity792 m./s. |
| HE Shell Weight24.5 kg. |
| AP Shell127 mm AP/SC Mk38 |
| Maximum AP Shell Damage2,100 |
| Initial AP Shell Velocity792 m./s. |
| AP Shell Weight25 kg. |
| 533 mm Quad3 х 4 pcs. |
| Rate of Fire0.68 shots/min. |
| Reload Time88 sec. |
| Rotation Speed25 deg./sec. |
| 180 Degree Turn Time7.2 sec. |
| TorpedoMk12 |
| Maximum Damage11,733 |
| Torpedo Speed64 knot |
| Torpedo Range6.39 km. |
| 127 mm/38 Mk.12 on a Mk.21 mod.1 mount2 х 1 pcs. |
| . . . Average Damage per Second6.4 |
| . . . Firing Range5.01 km. |
| IDS_PAGM022_5IN38_MK243 х 1 pcs. |
| . . . Average Damage per Second9.6 |
| . . . Firing Range5.01 km. |
| 12.7 mm Browning on a single mount6 х 1 pcs. |
| . . . Average Damage per Second22.8 |
| . . . Firing Range1.2 km. |
| 127 mm/38 Mk.12 on a Mk.21 mod.1 mount2 х 1 pcs. |
| . . . Average Damage per Second6.4 |
| . . . Firing Range5.01 km. |
| IDS_PAGM022_5IN38_MK243 х 1 pcs. |
| . . . Average Damage per Second9.6 |
| . . . Firing Range5.01 km. |
| Maximum Speed35 knot |
| Turning Circle Radius560 m. |
| Rudder Shift Time4 sec. |
| Surface Detectability Range7.41 km. |
| Air Detectability Range2.86 km. |

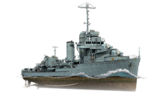
Mahan — American Tier VII destroyer.
Developed from the Farragut class, Mahan carried a more powerful torpedo armament. At the beginning of World War II, these destroyers were modernized with several automatic AA guns to fight enemy aircraft more efficiently.
Modules
 |
Rate of Fire (shots/min) | 180° Turn Time (sec) | Maximum Dispersion (m) | Maximum HE Shell Damage (HP) | Chance of Fire on Target Caused by HE Shell (%) | Maximum AP Shell Damage (HP) |
Research price (exp) |
Purchase price ( | |
|---|---|---|---|---|---|---|---|---|---|
| 127 mm/38 Mk.12 on a Mk.24 mount | 18.2 | 12 | 102 | 1,800 | 5 | 2,100 | 0 | 420,000 |
 |
Hit Points (HP) | Armor (mm) | Armor (mm) | Main Turrets (pcs.) | Secondary Gun Turrets (pcs.) | AA Mounts (pcs.) | Torpedo Tubes (pcs.) | Hangar Capacity (pcs.) |
Research price (exp) |
Purchase price ( | |
|---|---|---|---|---|---|---|---|---|---|---|---|
| Mahan (A) | 11,700 | 6 | 16 | 5 | 6/5 | 3 | 0 | 600,000 | |||
| Mahan (B) | 14,100 | 6 | 16 | 5 | 6/5 | 3 | 14,200 | 1,240,000 |
 |
Rate of Fire (shots/min) | Torpedo Tubes Reload Time (sec) | 180° Turn Time (sec) | Maximum Damage (HP) | Torpedo Speed (knot) | Torpedo Range (km) |
Research price (exp) |
Purchase price ( | |
|---|---|---|---|---|---|---|---|---|---|
| Mk12 | 0.7 | 88 | 7.2 | 11,733 | 64 | 6.4 | 0 | 575,000 | |
| Mk15 mod. 0 | 0.7 | 87 | 7.2 | 11,600 | 55 | 9.2 | 10,500 | 780,000 |
 |
IDS_SHIP_PARAM_SUO_INCREASE_DIST (%) | Maximum Firing Range (km) |
Research price (exp) |
Purchase price ( | |
|---|---|---|---|---|---|
| Mk7 mod. 1 | 0 | 0 | 320,000 | ||
| Mk7 mod. 2 | 0 | 8,200 | 750,000 |
 |
Maximum Speed (knot) |
Research price (exp) |
Purchase price ( | |
|---|---|---|---|---|
| Propulsion: 49,000 hp | 35 | 0 | 395,000 |
Compatible Upgrades
| Slot 1 |
|||||
|---|---|---|---|---|---|
| Slot 2 |
|||||
| Slot 3 |
|||||
| Slot 4 |
Player Opinion
Performance
Mahan is a fairly well-rounded destroyer by the standards of the class. She is the first American destroyer to have the capability to fire torpedoes from beyond her detection range — via the upgraded torpedoes she has access to upon equipping Hull (B) — as well as sporting a solid pool of hit points and fast firing guns that turn quickly.
Overall, Mahan is good at almost anything her enemies can throw at her. She is able to defend herself from enemy destroyers adequately; even more so once she gains additional hit points from upgrading to Hull (B). Her upgraded torpedoes are somewhat slow, but hit decently hard and can be fired from stealth. One thing of note about her torpedo launchers: she has one port, one starboard, and one centerline. This allows her to put a very respectable eight fish into the water on either side; however, many opponents forget about the launcher on the opposite side of the ship. It can make for a nasty surprise at close range if they believe that she's launched all of the torpedoes she had loaded.
Mahan’s primary weakness is her large detection range. Lacking access to Upgrade Slot 5, there is little that Mahan can do for her large detection radius other than spend commander skill points on Concealment Expert; even then, she remains one of the easiest Tier VII destroyers to spot.
Overall, Mahan is a definite upgrade from Farragut and a solid Tier VII destroyer.Pros:
- Fast turret rotation.
- Outstanding main battery rate of fire.
- Three torpedo tube launchers provide additional flexibility and will frequently catch opponents off-guard.
- Long range torpedoes reach out to 9.2 km, making her the first American destroyer capable of firing torpedoes from beyond her detection range.
- Fairly good AA defense.
- Has access to the Defensive AA Fire
 consumable.
Cons:
- Very weak armor.
- Large silhouette and a fairly large detection range.
- Shorter main battery range compared to Farragut.
- One of the slowest Tier VII destroyers at 35 knots.
Research
Availability of researchable upgrades for Mahan is as follows:
- Hull: Upgrade to Hull (B) for additional health and improved rudder shift time; researching Hull (B) unlocks progression to Benson.
- Torpedoes: The Mk15 mod. 0 torpedoes don't hit quite as hard and also travel slower, but they have far more range than her stock fish. Hull (B) must be equipped before they can be installed.
- Gun Fire Control System: Upgrade to Mk7 mod. 2 for an extra 10% range on the main battery.
Optimal Configuration
Upgrades
- Slot 1: Main Armaments Modification 1

- Slot 2: Engine Room Protection

- Slot 3: Aiming Systems Modification 1

- Slot 4: Propulsion Modification 1

Upgrade options are pretty thin on the ground for Mahan. Main Armaments Modification 1 is the best choice for Slot 1. Slot 3 is fairly well restricted to Aiming Systems Modification 1; AA Guns Modification 1 ![]() is not recommended given how anemic Mahan’s suite of anti-aircraft guns is.
is not recommended given how anemic Mahan’s suite of anti-aircraft guns is.
Commander Skills
Level 1's best choice is Preventative Maintenance, as it reduces the chance of Mahan having her engine or rudder knocked out while under heavy fire. Last Stand is the best of the lot at Level 2; Mahan captains will find themselves under enemy fire frequently, and losing her engine is the worst possible module knockout she can suffer. Concealment Expert is clearly the best option at Level 4.
Level 3 offers a ton of great skill choices: Basic Firing Training improves Mahan’s abysmal anti-aircraft DPS as well as improving the rate of fire of her main battery guns; Survivability Expert adds more than 17% extra health; Vigilance allows her to better screen her allies from enemy torpeodes; Superintendent provides extra charges of valuable consumables; Demolition Expert increases the damage potency of her main battery. None of these are bad choices, but Survivability Expert should be the first one chosen. A dead Mahan does no damage, after all.
| Recommended Commander Skills | ||||||||
|---|---|---|---|---|---|---|---|---|
| Cost (points) |
Endurance | Attack | Support | Versatility | ||||
| 1 |
★ |
★★★ |
|
Χ |
|
Χ |
|
Χ |
| 2 |
★★ |
★ |
|
|
★ |
Χ |
★★ |
★★★ |
| 3 |
|
★★★ |
★★ |
Χ |
★★★ |
★★ |
★★ |
★ |
| 4 |
|
|
★ |
Χ |
★ |
|
|
★★★ |
| Key: ★★★ - Extremely Useful ★★ - Frequently Useful ★ - Occasionally Useful No stars - Meh Χ - Not recommended | ||||||||
Consumables
Mahan can equip the following consumables:
- Slot 1: Damage Control Party

- Slot 2: Smoke Generator

- Slot 3: Engine Boost
 or Defensive AA Fire
Camouflage
Type 1, 2, or 5 camouflage can be equipped for credits; Types 1 or 5 are recommended at a minimum to reduce detectibility range.
Players who wish to spend doubloons can equip Mahan with Type 17 camouflage that lowers her detection radius, reduces the accuracy of incoming shells, reduces her repair costs, and increases the amount of experience she earns.
Signals
Equipping Sierra Mike (![]() ) is an excellent way to help make up for Mahan’s deficiency in maximum speed. Captains should also consider Victor Lima (
) is an excellent way to help make up for Mahan’s deficiency in maximum speed. Captains should also consider Victor Lima (![]() ) and India X-Ray (
) and India X-Ray (![]() ) signals to increase the fire chance of her main battery shells, though they should be paired with a Juliet Charlie (
) signals to increase the fire chance of her main battery shells, though they should be paired with a Juliet Charlie (![]() ) to ensure that Mahan doesn't detonate under enemy fire.
) to ensure that Mahan doesn't detonate under enemy fire.
Recommended Signal Flags 
| |||||
|---|---|---|---|---|---|
| Combat | |||||
 ★★★ |

|

|
 ★ |
 ★★★ |
 ★★★ |
 ★★ |

|
 ★ |
 ★★★ |
 ★ |

|

|

| ||||
Note: Use of the Juliet Charlie signal makes detonation impossible.


