Omaha

| Research price10500 exp |
| Purchase price1,200,000 |
| Hit Points23,100 |
| 152 mm/53 Mk.12 on a Mk.13 casemate mount8 х 1 / 2 х 2 pcs. |
| Rate of Fire7.5 shots/min. |
| Reload Time8 sec. |
| Rotation Speed8 deg./sec. |
| 180 Degree Turn Time22.5 sec. |
| Firing Range13.83 km. |
| Maximum Dispersion137 m. |
| HE Shell152 mm HE/HC Mk34 mod. 1 |
| Maximum HE Shell Damage2,200 |
| Chance of Fire on Target Caused by HE Shell12 % |
| Initial HE Shell Velocity914 m./s. |
| HE Shell Weight47.7 kg. |
| AP Shell152 mm AP/SC Mk27 mod. 5 |
| Maximum AP Shell Damage3,100 |
| Initial AP Shell Velocity914 m./s. |
| AP Shell Weight47.6 kg. |
| 533 mm Triple4 х 3 pcs. |
| Rate of Fire0.91 shots/min. |
| Reload Time66 sec. |
| Rotation Speed25 deg./sec. |
| 180 Degree Turn Time7.2 sec. |
| TorpedoMk11 |
| Maximum Damage11,733 |
| Torpedo Speed56 knot |
| Torpedo Range5.49 km. |
| 28 mm Mk.1 on a Mk.2 mount8 х 4 pcs. |
| . . . Average Damage per Second18.4 |
| . . . Firing Range2.4 km. |
| 12.7 mm Browning on a single mount4 х 1 pcs. |
| . . . Average Damage per Second15.2 |
| . . . Firing Range1.2 km. |
| Maximum Speed34 knot |
| Turning Circle Radius600 m. |
| Rudder Shift Time7.5 sec. |
| Surface Detectability Range13.09 km. |
| Air Detectability Range5.36 km. |

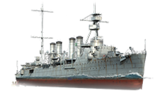
Omaha — American Tier V cruiser.
The previous design of the scout cruiser was poorly armed, so it was subjected to revision. Two twin-gun mounts were placed on the ship—one fore and one aft. To reduce her weight, the single guns located amidships were removed, and the catapult was also abandoned. For the first time in the U.S. Navy's practice, the engine and boiler rooms were arranged en échelon. During World War II, the cruiser served in the Atlantic Ocean, carrying out patrol duties and escorting Allied ships. Later, she participated in the amphibious landing operations in southern France.
Modules
 |
Rate of Fire (shots/min) | 180° Turn Time (sec) | Maximum Dispersion (m) | Maximum HE Shell Damage (HP) | Chance of Fire on Target Caused by HE Shell (%) | Maximum AP Shell Damage (HP) |
Research price (exp) |
Purchase price ( | |
|---|---|---|---|---|---|---|---|---|---|
| 152 mm/53 Mk.12 on a Mk.16 mount/Mk.13 mount/Mk.13 casemate mount | 7.5 | 22.5 | 137 | 2,200 | 12 | 3,100 | 0 | 110,000 | |
| 152 mm/53 Mk.12 on a Mk.16 mount/Mk.13 mount/Mk.13 casemate mount | 8.6 | 24 | 137 | 2,200 | 12 | 3,100 | 2,700 | 280,000 |
 |
Hit Points (HP) | Armor (mm) | Armor (mm) | Main Turrets (pcs.) | Secondary Gun Turrets (pcs.) | AA Mounts (pcs.) | Torpedo Tubes (pcs.) | Hangar Capacity (pcs.) |
Research price (exp) |
Purchase price ( | |
|---|---|---|---|---|---|---|---|---|---|---|---|
| Omaha (A) | 23,100 | 10 | 76 | 8/2 | 4/8 | 4 | 0 | 145,000 | |||
| Omaha (B) | 26,800 | 10 | 76 | 8/2 | 10/2/6 | 4 | 4,700 | 400,000 |
 |
Rate of Fire (shots/min) | Torpedo Tubes Reload Time (sec) | 180° Turn Time (sec) | Maximum Damage (HP) | Torpedo Speed (knot) | Torpedo Range (km) |
Research price (exp) |
Purchase price ( | |
|---|---|---|---|---|---|---|---|---|---|
| Mark 11 | 0.9 | 66 | 7.2 | 11,733 | 56 | 5.5 | 0 | 56,000 |
 |
IDS_SHIP_PARAM_SUO_INCREASE_DIST (%) | Maximum Firing Range (km) |
Research price (exp) |
Purchase price ( | |
|---|---|---|---|---|---|
| Mk5 mod. 1 | 0 | 0 | 90,000 | ||
| Mk5 mod. 2 | 0 | 2,300 | 210,000 |
 |
Maximum Speed (knot) |
Research price (exp) |
Purchase price ( | |
|---|---|---|---|---|
| Propulsion: 90,000 hp | 34 | 0 | 84,000 |
Compatible Upgrades
| Slot 1 |
||||
|---|---|---|---|---|
| Slot 2 |
||||
| Slot 3 |
Player Opinion
Performance
Note that the third hull upgrade actually reduces your guns and torpedo tube numbers in exchange for better AA performance and better range. The long range is needed in open seas, and the extra AA is needed at higher tiers where carriers become a more prevalent problem.
The Omaha has a gun range of 14.8km fully upgraded, It has more guns than the Phoenix and they are placed in more strategic places, having an eight gun broadside, seven with the C hull and being able to aim 6 guns forward, which is great for chasing targets like aircraft carriers or low health vessels while presenting a smaller silhouette.
The torpedoes of the Omaha leave something to be desired, having a range of 5.5km. There are two launchers on each side that start initially as double barreled, they become triple barreled with the B hull and one launcher on each side is lost with the C hull. These torpedo launchers should be used when the guns can't do enough damage per minute or you get in very close to another ship. Alternatively, you could use the torpedo launchers to cause enemy ships to scatter when they see them. However, if a torpedo salvo hits, it will do massive amounts of damage. They become very useful when ambushing in close quarters.
The armor on the Omaha is also something to be questioned. It has been known for a ship with full health to blow up with one well placed salvo. The rear of the ship where turret 10 (turret 8 on the C hull) is the most vulnerable part of the ship. If struck correctly, it can permanently destroy the rear turrets and take out the steering and engine. The Omaha relies mainly on speed to avoid damage from other ships, and dodging shells and torpedoes is key to surviving.
As a team member, the Omaha is the perfect escort for battleships, providing decent AA cover, extra firepower and the very useful sonar equipment to see where torpedos are coming from in advance.Pros:
- High damage per minute, even without firing with a broadside.
- Speed that matches destroyers of that tier and above.
- Good AA for its tier.
- Excellent support ship for battleships.
- Can aim 6 guns forward, which is very good in pursuits.
Cons:
- Being a light cruiser, it has only slightly more armor than a destroyer, can suffer from criticals and citadel hits from American and USSR destroyers' AP
- Torpedoes are rather slow at 56 knots, having a range of only 5.5 km and half of the torpedo tubes are lost with the (C) hull
Research
- Get the (B) hull first, adds 3,700 hit points & leads to guns upgrade
- Next the guns upgrade which adds 1.2 rounds per minute ROF
- Next the Fire Control System for increase of range from 11.5 to 12.7km
- The "C" hull last. Most will not even bother buying the (C) hull. Mounting causes loss of 2 main battery turrets and 2 torpedo tubes for addition of 9 AA mounts. Hardly worth the offense loss unless you play it often in an air defense role, which at this Tier seems unlikely. Hull C extends the maximum range to 14.8 km.
- Research of the (C) hull is required to move on to the Cleveland.
Optimal Configuration
Commander Skills
| Recommended Commander Skills | ||||||||
|---|---|---|---|---|---|---|---|---|
| Cost (points) |
Endurance | Attack | Support | Versatility | ||||
| 1 |
|
★★ |
★ |
|
|
|
★★ |
|
| 2 |
★★ |
★★ |
★★★ |
|
|
|
|
★★ |
| 3 |
★★ |
★ |
★ |
|
★★ |
★★ |
★★★ |
★★★ |
| 4 |
|
★★ |
|
|
★★ |
|
|
★★★ |
| Key: ★★★ - Extremely Useful ★★ - Frequently Useful ★ - Occasionally Useful No stars - Meh Χ - Not recommended | ||||||||
Gallery
Historical Info
Historical Gallery
_1.jpg)
