Phra Ruang
| Revision as of 22:03, 24 April 2018 | Revision as of 18:40, 1 March 2021 wg recommendations | |||
5 intermediate revisions by 5 users not shown | ||||
| Line 45: | Line 45: | |||
| Key skills for ''{{#var:ship_name}}'' commanders include Last Stand, Survivability Expert, and Concealment Expert. It's difficult to recommend investing skill points into buffing her main battery via Advanced/Basic Firing Training or Demolition Expert, but it's all she can rely on when up against enemy destroyers and may be worth sinking some points into for highly aggressive captains. | Key skills for ''{{#var:ship_name}}'' commanders include Last Stand, Survivability Expert, and Concealment Expert. It's difficult to recommend investing skill points into buffing her main battery via Advanced/Basic Firing Training or Demolition Expert, but it's all she can rely on when up against enemy destroyers and may be worth sinking some points into for highly aggressive captains. | |||
| ? | {{Commander Skills | + | {{Commander Skills 3 DD | |
| ? | + | <!-- Ratings 1,2,3 are legit. Others are ignored.--> | ||
| ? | | | + | | rating11 = <!-- Grease the Gears --> | |
| ? | | | + | | rating12 = <!-- Liquidator --> | |
| ? | | | + | | rating13 = <!-- Consumables Specialist --> | |
| ? | | | + | | rating14 = <!-- Gun Feeder --> | |
| ? | | | + | | rating15 = <!-- Incoming Fire Alert --> | |
| ? | + | | rating16 = 2 <!-- Preventive Maintenance --> | ||
| ? | | | + | ||
| ? | | | + | | rating21 = <!-- Pyrotechnician --> | |
| ? | | | + | | rating22 = 2 <!-- Swift Fish --> | |
| ? | | | + | | rating23 = 2 <!-- Consumables Enhancements --> | |
| ? | | | + | | rating24 = <!-- Extra-Heavy AP Shells --> | |
| ? | | | + | | rating25 = <!-- Priority Target --> | |
| ? | | | + | | rating26 = 2 <!-- Last Stand --> | |
| ? | + | |||
| ? | + | |||
| ? | | | + | | rating31 = <!-- Main Battery & AA Specialist --> | |
| ? | | | + | | rating32 = 2 <!-- Fill the Tubes --> | |
| ? | | | + | | rating33 = 2 <!-- Adrenaline Rush --> | |
| ? | | | + | | rating34 = <!-- Inertial Fuse for HE Shells --> | |
| ? | | | + | | rating35 = <!-- Superintendent --> | |
| ? | | | + | | rating36 = <!-- Survivability Expert --> | |
| ? | + | |||
| ? | + | |||
| ? | | | + | | rating41 = <!-- Main Battery & AA Expert --> | |
| ? | | | + | | rating42 = 2 <!-- Swift in Silence --> | |
| ? | | | + | | rating43 = <!-- Radio Location --> | |
| ? | | | + | | rating44 = <!-- Fearless Brawler --> | |
| ? | | | + | | rating45 = 2 <!-- Concealment Expert --> | |
| ? | | | + | | rating46 = <!-- Dazzle --> | |
| ? | + | |||
| ? | + | |||
| }} | }} | |||
| + | ||||
| |Consumables=<!-- write text about selection of Consumables below --> | |Consumables=<!-- write text about selection of Consumables below --> | |||
| Line 88: | Line 82: | |||
| * '''Slot 2:''' {{Smoke Generator}} | * '''Slot 2:''' {{Smoke Generator}} | |||
| * '''Slot 3:''' {{Engine Boost}} | * '''Slot 3:''' {{Engine Boost}} | |||
| ? | ||||
| ? | ||||
| ? | ||||
| |Camouflage=<!-- write text about useful camouflage below --> | |Camouflage=<!-- write text about useful camouflage below --> | |||
| Line 199: | Line 190: | |||
| |Ref= <!-- write below --> | |Ref= <!-- write below --> | |||
| + | # [https://en.wikipedia.org/wiki/HMS_Radiant_(1916) HMS ''Radiant'' (1916) - Wikipedia] | |||
| + | # [https://en.wikipedia.org/wiki/R-class_destroyer_(1916) R-class destroyer (1916) - Wikipedia] | |||
| }}<!-- DO NOT DELETE THIS LINE. DO NOT INSERT ANYTHING BELOW THIS LINE --> | }}<!-- DO NOT DELETE THIS LINE. DO NOT INSERT ANYTHING BELOW THIS LINE --> | |||
Revision as of 18:40, 1 March 2021

| Research price2100 exp |
| Purchase price252,000 |
| Hit Points7,900 |
| 102 mm/40 QF Mk.IV on a PIX mount3 х 1 pcs. |
| Rate of Fire12 shots/min. |
| Reload Time5 sec. |
| Rotation Speed8 deg./sec. |
| 180 Degree Turn Time22.5 sec. |
| Firing Range7.88 km. |
| Maximum Dispersion80 m. |
| HE Shell102 mm HE |
| Maximum HE Shell Damage1,500 |
| Chance of Fire on Target Caused by HE Shell6 % |
| Initial HE Shell Velocity664 m./s. |
| HE Shell Weight14.1 kg. |
| AP Shell102 mm AP |
| Maximum AP Shell Damage1,500 |
| Initial AP Shell Velocity664 m./s. |
| AP Shell Weight14.1 kg. |
| 533 mm DR Mk II2 х 2 pcs. |
| Rate of Fire1.46 shots/min. |
| Reload Time41 sec. |
| Rotation Speed25 deg./sec. |
| 180 Degree Turn Time7.2 sec. |
| TorpedoIDS_PZPT009_533_MKII_D |
| Maximum Damage10,000 |
| Torpedo Speed51 knot |
| Torpedo Range7.32 km. |
| 40 mm/39 Vickers QF Mk.II on a Mk.II HA mount1 х 1 pcs. |
| . . . Average Damage per Second5.7 |
| . . . Firing Range2.49 km. |
| Maximum Speed36 knot |
| Turning Circle Radius450 m. |
| Rudder Shift Time3.3 sec. |
| Surface Detectability Range5.59 km. |
| Air Detectability Range2.04 km. |

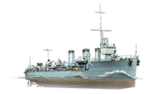
Phra Ruang — Pan-Asian Tier III destroyer.
Modules
 |
Rate of Fire (shots/min) | 180° Turn Time (sec) | Maximum Dispersion (m) | Maximum HE Shell Damage (HP) | Chance of Fire on Target Caused by HE Shell (%) | Maximum AP Shell Damage (HP) |
Research price (exp) |
Purchase price ( | |
|---|---|---|---|---|---|---|---|---|---|
| 102 mm/40 QF Mk.IV on a PIX mount | 12 | 22.5 | 80 | 1,500 | 6 | 1,500 | 0 | 25,000 |
 |
Hit Points (HP) | Armor (mm) | Armor (mm) | Main Turrets (pcs.) | Secondary Gun Turrets (pcs.) | AA Mounts (pcs.) | Torpedo Tubes (pcs.) | Hangar Capacity (pcs.) |
Research price (exp) |
Purchase price ( | |
|---|---|---|---|---|---|---|---|---|---|---|---|
| Phra Ruang (A) | 7,900 | 6 | 6 | 3 | 1 | 2 | 0 | 38,000 | |||
| Phra Ruang (B) | 8,700 | 6 | 6 | 3 | 3 | 2 | 800 | 96,000 |
 |
Rate of Fire (shots/min) | Torpedo Tubes Reload Time (sec) | 180° Turn Time (sec) | Maximum Damage (HP) | Torpedo Speed (knot) | Torpedo Range (km) |
Research price (exp) |
Purchase price ( | |
|---|---|---|---|---|---|---|---|---|---|
| 533 mm Mk II | 1.5 | 41 | 7.2 | 0 | 21,000 |
 |
IDS_SHIP_PARAM_SUO_INCREASE_DIST (%) | Maximum Firing Range (km) |
Research price (exp) |
Purchase price ( | |
|---|---|---|---|---|---|
| Mk III mod. 1 | 0 | 0 | 20,500 | ||
| Mk III mod. 2 | 0 | 400 | 52,000 |
 |
Maximum Speed (knot) |
Research price (exp) |
Purchase price ( | |
|---|---|---|---|---|
| Propulsion: 27,000 hp | 36 | 0 | 21,000 |
Compatible Upgrades
| Slot 1 |
||||
|---|---|---|---|---|
| Slot 2 |
Player Opinion
Performance
Tier III's Phra Ruang plays very similarly to her predecessor Longjiang, and shares many of the same strengths and weaknesses.
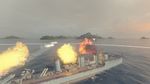
Phra Ruang’s torpedoes are quite good for her tier, and will inflict heavy damage upon the cruisers and battleships — and occasional aircraft carriers — she encounters; unfortunately, as deep water torpedoes, they are useless against smaller enemy units. This means she must rely upon her main battery when in close combat with opposing destroyers. Her 102mm guns are adequate, but not exceptional. At point-blank ranges (~5.0 km or less) they are good enough for self-defense, and fire quickly enough that they are likely to discourage enemy destroyers from pushing closer. Shell flight times out near her maximum range of 8.7 km, however, will make hitting anything but slow-moving battleships very challenging.
Phra Ruang captains should use her stealth and torpedoes to make quick work of enemy battleships and avoid engaging enemy destroyers at all costs. Her stealth makes her an excellent ship to capture control points in, as long as captains have a pre-planned exit strategy if spotted. Aggressive captains may feel comfortable taking on wounded destroyers — or hiding in a bank of smoke to harass enemy capital ships — with her main battery; this is a valid tactic, of course, but given her very low health pool (second-lowest at Tier III) the price for getting spotted is likely a quick trip back to port.Pros:
- Lowest detection range of all Tier III destroyers.
- Capable of delivering torpedo strikes from beyond detection range.
- Torpedo reload is relatively quick.
- Fastest Tier III destroyer.
Cons:
- Painfully slow torpedoes.
- Torpedoes are not useful when engaged in close combat with other destroyers.
- Main battery shell velocity makes long-range gunnery very difficult.
- Exceedingly fragile, Phra Ruang combines a low health pool with non-existent armor.
Research
Availability of researchable upgrades for Phra Ruang is as follows:
- Hull: Upgrade to Hull (B) for additional health, a touch more AA, and a quicker rudder shift time. Research of this module unlocks progression to Shenyang.
- Gun Fire Control System: Upgrade to Mk III mod. 2 for an extra 10% range on the main battery.
Optimal Configuration
Upgrades
The recommended upgrades for Phra Ruang are as follows:
- Slot 1: Main Armaments Modification 1
- Slot 2: Propulsion Modification 1
Captains without Juliet Charlie (![]() ) flags to use are strongly encouraged to equip Magazine Modification 1 in Slot 1 instead.
) flags to use are strongly encouraged to equip Magazine Modification 1 in Slot 1 instead.
Commander Skills
Key skills for Phra Ruang commanders include Last Stand, Survivability Expert, and Concealment Expert. It's difficult to recommend investing skill points into buffing her main battery via Advanced/Basic Firing Training or Demolition Expert, but it's all she can rely on when up against enemy destroyers and may be worth sinking some points into for highly aggressive captains.
| Recommended Commander Skills | ||||||
|---|---|---|---|---|---|---|
| Cost (points) |
Attack | Defense | ||||
| 1 |
|
|
|
|
|
★★ |
| 2 |
|
★★ |
★★ |
|
|
★★ |
| 3 |
|
★★ |
★★ |
|
|
|
| 4 |
|
★★ |
|
|
★★ |
|
| Key: ★★★ - Extremely Useful ★★ - Frequently Useful ★ - Occasionally Useful No stars - Not Useful | ||||||
Consumables
Phra Ruang can equip the following consumables:
- Slot 1: Damage Control Party

- Slot 2: Smoke Generator

- Slot 3: Engine Boost

Camouflage
Type 1, 2, or 5 camouflage can be equipped for credits; Types 1 or 5 are recommended at a minimum to reduce detectibility range.
Signals
The two best flags to equip on Phra Ruang are Equal Speed Charlie London (🚫) and Red Dragon (🚫) in order to quickly advance up the line. Sierra Mike (![]() ) is always a good idea for a destroyer, though Phra Ruang is already the fastest destroyer at Tier III. Zulu Hotel (🚫) and/or Dragon Flag (🚫) will help captains advance towards that crucial Level 4 commander skill more quickly.
) is always a good idea for a destroyer, though Phra Ruang is already the fastest destroyer at Tier III. Zulu Hotel (🚫) and/or Dragon Flag (🚫) will help captains advance towards that crucial Level 4 commander skill more quickly.
Recommended Signal Flags 
| |||||
|---|---|---|---|---|---|
| Combat | |||||
 ★ |

|

|

|
 ★ |
 ★ |
 ★★ |

|

|
 ★★★ |
 ★ |

|

|

| ||||
Note: Use of the Juliet Charlie signal makes detonation impossible.
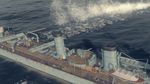
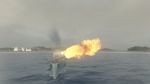
Gallery
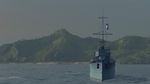
Phra Ruang waits patiently for her prey.
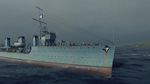


Historical Gallery


References
| Destroyers | II Longjiang • III Phra Ruang • IV Shenyang • V Jianwei • VI Fushun • VI Anshan |
| Cruisers | I Chengan • III Ning Hai |
| Battleships | IX Bajie |
| Aircraft Carriers | VIII Sanzang |