Shikishima
| Revision as of 01:32, 5 December 2020 | Revision as of 08:15, 25 July 2021 commander skills and pros and cons updates | |||
9 intermediate revisions by 8 users not shown | ||||
| Line 6: | Line 6: | |||
| |Anno=<!-- you can write below short description for the ship. it will replace default once. --> | |Anno=<!-- you can write below short description for the ship. it will replace default once. --> | |||
| ? | ||||
| |Performance=<!-- write text about performance in battles below --> | |Performance=<!-- write text about performance in battles below --> | |||
| ? | Playstyle-wise, with only short-ranged AA, a high, poorly | + | Playstyle-wise, with only short-ranged AA, a high, poorly armored citadel, and being one of the largest ships in the game, ''Shikishima'' is not meant to be played as a brawler, or as the vanguard of a formation of ships, but with decent accuracy and outstanding sigma (even better dispersion than ''Yamato''), as well as the largest guns of the game means that it can and will be able to fairly easily overmatch battleship- and cruiser-sized plating. As a battleship, your target should be other battleships and heavy cruisers. You should shoot AP at their broadsides, and with good ballistics, you can theoretically penetrate the citadel from any angle as the AP shells will fuse on time if you shoot through a heavily-armored bow or broadside. Poor vertical dispersion, as well as having only six barrels means that landing shots on target from long distance will pose a challenge, but ''Shikishima'' makes up for it with a stock reload of 27 seconds (which can be further decreased with the right captain skills and mods, such as Main Battery Mod. 3) that allows for it to squeeze opportunistic salvos at fast cruisers and battleships alike, incidentally making it a great platform for hunting cruisers. However, these 20in guns will not save you should you encounter lightly armored cruisers (such as [[Ship:Smolensk|Smolensk]]), as well as destroyers (which is a given), as the AP shells will simply over-penetrate their thin armor. | |
| ? | Ideally, Shikishima should be played as the second or third ship in a formation, with cruisers and destroyers | + | Ideally, ''Shikishima'' should be played as the second or third ship in a formation, with cruisers and destroyers mopping up smaller targets, such as those aforementioned light cruisers and destroyers, giving you the time to focus on deleting CAs and BBs from the map. If worst comes to worst then ''Shikishima'' does have a pretty good array of secondaries which can whittle down destroyers. | |
| ? | Furthermore, with only six guns in three turrets; sustained HE spam, fires, floods, and turret destruction is her worst nightmare, as a) taking out a turret decreases firepower by a third, b) having more HP is irrelevant against fire and floods. Keep in mind that you are essentially a [[Ship:Yamato|Yamato]] with larger guns. Your hull shares the same strengths and weaknesses - you can be penetrated by AP in the stern and "cheek", and being a battleship that can virtually threaten any other ship in the game regardless of | + | Furthermore, with only six guns in three turrets; sustained HE spam, fires, floods, and turret destruction is her worst nightmare, as a) taking out a turret decreases firepower by a third, b) having more HP is irrelevant against fire and floods. Keep in mind that you are essentially a ''[[Ship:Yamato|Yamato]]'' with larger guns. Your hull shares the same strengths and weaknesses - you can be penetrated by AP in the stern and "cheek", and being a battleship that can virtually threaten any other ship in the game regardless of armor you will be a large target for every ship in the game. In the right hands, ''Shikishima'' captains can make this ship shine in mid- to late-game, and provide valuable fire support to fellow teammates. Just keep in mind that your ability to overmatch the armor of enemy ships does not make you invincible. | |
| <!-- | <!-- | |||
| Line 28: | Line 27: | |||
| * Good accuracy relative to her tech tree counterpart [[Ship:Yamato|Yamato]]. | * Good accuracy relative to her tech tree counterpart [[Ship:Yamato|Yamato]]. | |||
| * Ability to [[Ship:Armor_Penetration#Overmatch|overmatch]] 32mm plating, which is standard tier 8-10 battleship plating. | * Ability to [[Ship:Armor_Penetration#Overmatch|overmatch]] 32mm plating, which is standard tier 8-10 battleship plating. | |||
| ? | * | + | * Secondaries have high fire rate with improved HE pen, similar to the Japanese gunboat DDs. | |
| + | * Earth splitting crack of main guns firing is unique to this ship and can be heard across the map. | |||
| |Cons=<!-- write list of negative points below. use * as in ordinary wiki-list. --> | |Cons=<!-- write list of negative points below. use * as in ordinary wiki-list. --> | |||
| ? | * Low barrel count, with only 6 | + | * Low barrel count, with only 6 rifles. | |
| * Large citadel with a poor shape that makes her very susceptible to citadels from battleships. | * Large citadel with a poor shape that makes her very susceptible to citadels from battleships. | |||
| * Low DPM output due to lack of shells. | * Low DPM output due to lack of shells. | |||
| ? | * Poor vertical dispersion, which causes shells to go over and under the target Shikishima is firing at. | + | * Poor vertical dispersion, which causes shells to go over and under the target ''Shikishima'' is firing at. | |
| * Excessive overpenetration at close range against most cruisers, leading to situations that could get the player killed. | * Excessive overpenetration at close range against most cruisers, leading to situations that could get the player killed. | |||
| * Slow turret traverse hinders close range reactivity. | * Slow turret traverse hinders close range reactivity. | |||
| Line 64: | Line 64: | |||
| |CommanderSkills=<!-- write text about best set of Commander Skills below --> | |CommanderSkills=<!-- write text about best set of Commander Skills below --> | |||
| ? | {{Commander Skills | + | {{Commander Skills 3 BB | |
| ? | + | | rating11 = <!-- Gun Feeder --> | ||
| ? | | rating11 = | + | | rating12 = <!-- Pyrotechnician --> | |
| ? | | rating12 = | + | | rating13 = <!-- Consumables Specialist --> | |
| ? | | rating13 = <!-- | + | | rating14 = 1 <!-- Emergency Repair Specialist --> | |
| ? | | rating14 = | + | | rating15 = <!-- Incoming Fire Alert --> | |
| ? | | rating15 | + | | rating16 = 2 <!-- Preventive Maintenance --> | |
| ? | + | |||
| ? | + | |||
| ? | | | + | ||
| ? | | rating21 = | + | | rating21 = 3 <!-- Grease the Gears --> | |
| ? | | rating22 = | + | | rating22 = <!-- Inertial Fuse for HE Shells --> | |
| ? | | rating23 = | + | | rating23 = <!-- Consumables Enhancements --> | |
| ? | | rating24 = | + | | rating24 = 1 <!-- Vigilance --> | |
| ? | | rating25 = | + | | rating25 = 2 <!-- Priority Target --> | |
| ? | | rating26 | + | | rating26 = <!-- AA Gunner --> | |
| ? | + | |||
| ? | + | |||
| ? | | rating31 = | + | | rating31 = <!-- Super-Heavy AP Shells --> | |
| ? | | rating32 = <!-- | + | | rating32 = <!-- Long-Range Secondary Battery Shells --> | |
| ? | | rating33 = | + | | rating33 = 3 <!-- Adrenaline Rush --> | |
| ? | | rating34 = | + | | rating34 = 2 <!-- Basics of Survivability --> | |
| ? | | rating35 = | + | | rating35 = <!-- Enhanced Anti-Torpedo Protection --> | |
| ? | | rating36 | + | | rating36 = <!-- Expert AA Marksman --> | |
| ? | + | |||
| ? | + | |||
| ? | | rating41 = | + | | rating41 = <!-- swift in silence --> | |
| ? | | rating42 = | + | | rating42 = <!-- Improved Secondary Battery Aiming --> | |
| ? | | rating43 = | + | | rating43 = <!-- Close Quarters Combat --> | |
| ? | | rating44 = | + | | rating44 = 3 <!-- Emergency Repair Expert --> | |
| ? | | rating45 = | + | | rating45 = 3 <!-- Concealment Expert --> | |
| ? | | rating46 = | + | | rating46 = 3 <!-- Fire Prevention Expert --> | |
| ? | + | |||
| ? | + | |||
| }} | }} | |||
| Line 159: | Line 150: | |||
| |Gallery=<!-- write below list of files with description (if necessary) separated with | --><gallery> | |Gallery=<!-- write below list of files with description (if necessary) separated with | --><gallery> | |||
| ? | + | File:ShikiDies.jpg|A ''Shikishima'' listing dangerously to port. | ||
| + | File:ShikiDies2.jpg|Shiki goes boom. | |||
| </gallery> | </gallery> | |||
| |History=<!-- write text below --> | |History=<!-- write text below --> | |||
| + | ||||
| + | ===Historical Inaccuracies=== | |||
| + | * Design A-150 was not a repeat of ''Yamato''’s hull with larger 510mm guns. No sketches of the design survive and it's likely that the hull would've been broadly similar to ''Yamato'' if the smallest 6-gun proposal (which ''Shikishima'' represents) had been built, but one known difference is that the belt was intended to be 457mm thick rather than 410mm as on ''Yamato''. | |||
| |HistoricalGallery=<!-- write below list of files with description (if necessary) separated with | --><gallery> | |HistoricalGallery=<!-- write below list of files with description (if necessary) separated with | --><gallery> | |||
| Line 172: | Line 167: | |||
| |Ref= <!-- write below --> | |Ref= <!-- write below --> | |||
| # [https://en.wikipedia.org/wiki/Design_A-150_battleship Design A-150 battleship - Wikipedia] | # [https://en.wikipedia.org/wiki/Design_A-150_battleship Design A-150 battleship - Wikipedia] | |||
| ? | + | <br /> | ||
| + | <div class="b-popup"><div class="b-popup_head js-tech-nav_head"><div><h2>Ship Change Log</h2></div><span class="b-tech-nav_arrow"></span></div><div class="b-popup_content" style="display: none;"><div> | |||
| + | See [[Changelogs_for_World_of_Warships|here]] for links to Update notes. | |||
| + | *Available for testing by supertesters in the game starting from update 0.9.1 under the name Yashima. | |||
| + | *Update 0.9.2: | |||
| + | **ship renamed to Shikishima. The old name was too similar to that of another Japanese Tier X ship, the Yoshino. The new name, like the old one, was used for a battleship of the early 20th century. | |||
| + | *Update 0.9.5: | |||
| + | **available for purchase in the Armory for 32,000 Steel. | |||
| + | *Update 0.9.11: | |||
| + | **fixed geometry and textures of the ship. | |||
| + | *Update 0.10.0: | |||
| + | **the audible range of main battery firing was increased. | |||
| + | *Update 0.10.6: | |||
| + | **fighters, as well as spotting aircraft, now launch from the catapults a bit faster. | |||
| + | </div></div></div> | |||
| }}<!-- DO NOT DELETE THIS LINE. DO NOT INSERT ANYTHING BELOW THIS LINE --> | }}<!-- DO NOT DELETE THIS LINE. DO NOT INSERT ANYTHING BELOW THIS LINE --> | |||
Revision as of 08:15, 25 July 2021

| Purchase priceSpecial |
| Hit Points97,200 |
| 510 mm/45 Type 98 in a twin turret3 х 2 pcs. |
| Rate of Fire2.22 shots/min. |
| Reload Time27 sec. |
| Rotation Speed3 deg./sec. |
| 180 Degree Turn Time60 sec. |
| Firing Range26.63 km. |
| Maximum Dispersion249 m. |
| HE Shell510 mm HE Type98 |
| Maximum HE Shell Damage8,100 |
| Chance of Fire on Target Caused by HE Shell40 % |
| Initial HE Shell Velocity765 m./s. |
| HE Shell Weight2620 kg. |
| AP Shell510 mm AP Type98 |
| Maximum AP Shell Damage19,400 |
| Initial AP Shell Velocity765 m./s. |
| AP Shell Weight2620 kg. |
| 100 mm/65 Type 98 on a Model A mount6 х 2 pcs. |
| Firing Range7.7 km. |
| Rate of Fire20 shots/min. |
| Reload Time3 sec. |
| HE Shell100 mm HE Type98 |
| Maximum HE Shell Damage1,700 |
| Initial HE Shell Velocity1000 m./s. |
| Chance of Fire on Target Caused by HE Shell6 % |
| 100 mm/65 Type 98 on a twin mount4 х 2 pcs. |
| Firing Range7.7 km. |
| Rate of Fire20 shots/min. |
| Reload Time3 sec. |
| HE Shell100 mm HE Type98 |
| Maximum HE Shell Damage1,700 |
| Initial HE Shell Velocity1000 m./s. |
| Chance of Fire on Target Caused by HE Shell6 % |
| 155 mm/60 3rd Year Type in a triple turret2 х 3 pcs. |
| Firing Range7.7 km. |
| Rate of Fire5 shots/min. |
| Reload Time12 sec. |
| HE Shell155 mm HE Type0 |
| Maximum HE Shell Damage2,600 |
| Initial HE Shell Velocity925 m./s. |
| Chance of Fire on Target Caused by HE Shell10 % |
| 100 mm/65 Type 98 on a Model A mount6 х 2 pcs. |
| . . . Average Damage per Second124.8 |
| . . . Firing Range5.01 km. |
| 100 mm/65 Type 98 on a twin mount4 х 2 pcs. |
| . . . Average Damage per Second83.2 |
| . . . Firing Range5.01 km. |
| 40 mm/60 Type 5 on a twin mount24 х 2 pcs. |
| . . . Average Damage per Second271.2 |
| . . . Firing Range3.51 km. |
| 25 mm/60 Type 96 on a triple mount16 х 3 pcs. |
| . . . Average Damage per Second52.8 |
| . . . Firing Range2.49 km. |
| Maximum Speed27 knot |
| Turning Circle Radius900 m. |
| Rudder Shift Time18.7 sec. |
| Surface Detectability Range17.46 km. |
| Air Detectability Range12.78 km. |

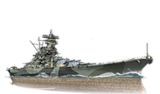
Shikishima — Japanese special premium Tier X battleship.
The plans for the Yamato-class battleships included the construction of eight ships before 1950. At the beginning of 1941, the program was adjusted: Based on intelligence data on the scale of construction of capital ships in the U.S., the leadership of the Japanese Navy decided to increase the number of battleships under construction. One of the ships was supposed to be built according to the design of the Yamato class, and all subsequent ones—according to an improved design with 510 mm main battery artillery. A six-gun variant with three main battery turrets had a standard displacement of 65,700 tons.
Modules
 |
Rate of Fire (shots/min) | 180° Turn Time (sec) | Maximum Dispersion (m) | Maximum HE Shell Damage (HP) | Chance of Fire on Target Caused by HE Shell (%) | Maximum AP Shell Damage (HP) |
Research price (exp) |
Purchase price ( | |
|---|---|---|---|---|---|---|---|---|---|
| 510 mm/45 Type 98 in a twin turret | 2.2 | 60 | 249 | 8,100 | 40 | 19,400 | 0 | 0 |
 |
Hit Points (HP) | Armor (mm) | Armor (mm) | Main Turrets (pcs.) | Secondary Gun Turrets (pcs.) | AA Mounts (pcs.) | Torpedo Tubes (pcs.) | Hangar Capacity (pcs.) |
Research price (exp) |
Purchase price ( | |
|---|---|---|---|---|---|---|---|---|---|---|---|
| Shikishima | 97,200 | 19 | 650 | 3 | 10/2 | 16/24/10 | 0 | 0 |
 |
IDS_SHIP_PARAM_SUO_INCREASE_DIST (%) | Maximum Firing Range (km) |
Research price (exp) |
Purchase price ( | |
|---|---|---|---|---|---|
| Type10 mod. 1 | 0 | 0 | 0 |
 |
Maximum Speed (knot) |
Research price (exp) |
Purchase price ( | |
|---|---|---|---|---|
| Propulsion: 158,000 hp | 27 | 0 | 0 |
Compatible Upgrades
| Slot 1 |
|||||
|---|---|---|---|---|---|
| Slot 2 |
|||||
| Slot 3 |
|||||
| Slot 4 |
|||||
| Slot 5 |
|||||
| Slot 6 |
Player Opinion
Performance
Playstyle-wise, with only short-ranged AA, a high, poorly armored citadel, and being one of the largest ships in the game, Shikishima is not meant to be played as a brawler, or as the vanguard of a formation of ships, but with decent accuracy and outstanding sigma (even better dispersion than Yamato), as well as the largest guns of the game means that it can and will be able to fairly easily overmatch battleship- and cruiser-sized plating. As a battleship, your target should be other battleships and heavy cruisers. You should shoot AP at their broadsides, and with good ballistics, you can theoretically penetrate the citadel from any angle as the AP shells will fuse on time if you shoot through a heavily-armored bow or broadside. Poor vertical dispersion, as well as having only six barrels means that landing shots on target from long distance will pose a challenge, but Shikishima makes up for it with a stock reload of 27 seconds (which can be further decreased with the right captain skills and mods, such as Main Battery Mod. 3) that allows for it to squeeze opportunistic salvos at fast cruisers and battleships alike, incidentally making it a great platform for hunting cruisers. However, these 20in guns will not save you should you encounter lightly armored cruisers (such as Smolensk), as well as destroyers (which is a given), as the AP shells will simply over-penetrate their thin armor. Ideally, Shikishima should be played as the second or third ship in a formation, with cruisers and destroyers mopping up smaller targets, such as those aforementioned light cruisers and destroyers, giving you the time to focus on deleting CAs and BBs from the map. If worst comes to worst then Shikishima does have a pretty good array of secondaries which can whittle down destroyers.
Furthermore, with only six guns in three turrets; sustained HE spam, fires, floods, and turret destruction is her worst nightmare, as a) taking out a turret decreases firepower by a third, b) having more HP is irrelevant against fire and floods. Keep in mind that you are essentially a Yamato with larger guns. Your hull shares the same strengths and weaknesses - you can be penetrated by AP in the stern and "cheek", and being a battleship that can virtually threaten any other ship in the game regardless of armor you will be a large target for every ship in the game. In the right hands, Shikishima captains can make this ship shine in mid- to late-game, and provide valuable fire support to fellow teammates. Just keep in mind that your ability to overmatch the armor of enemy ships does not make you invincible.Pros:
- Highest per-shell alpha in the game.
- Extremely good penetration with her armor piercing shells. No ship is safe from Shikishima's guns if they hit.
- Armor is resistant to high-explosive shells.
- Good accuracy relative to her tech tree counterpart Yamato.
- Ability to overmatch 32mm plating, which is standard tier 8-10 battleship plating.
- Secondaries have high fire rate with improved HE pen, similar to the Japanese gunboat DDs.
- Earth splitting crack of main guns firing is unique to this ship and can be heard across the map.
Cons:
- Low barrel count, with only 6 rifles.
- Large citadel with a poor shape that makes her very susceptible to citadels from battleships.
- Low DPM output due to lack of shells.
- Poor vertical dispersion, which causes shells to go over and under the target Shikishima is firing at.
- Excessive overpenetration at close range against most cruisers, leading to situations that could get the player killed.
- Slow turret traverse hinders close range reactivity.
Research
Optimal Configuration
Upgrades
The recommended upgrades for Shikishima are as follows:
- Slot 1: Main Armaments Modification 1

- Slot 2: Damage Control System Modification 1

- Slot 3: Aiming Systems Modification 1

- Slot 4: Damage Control System Modification 2

- Slot 5: Concealment System Modification 1

- Slot 6: Main Battery Modification 3

Commander Skills
| Recommended Commander Skills | ||||||
|---|---|---|---|---|---|---|
| Cost (points) |
Attack | Defense | ||||
| 1 |
|
|
|
★ |
|
★★ |
| 2 |
★★★ |
|
|
★ |
★★ |
|
| 3 |
|
|
★★★ |
★★ |
|
|
| 4 |
|
|
|
★★★ |
★★★ |
★★★ |
| Key: ★★★ - Extremely Useful ★★ - Frequently Useful ★ - Occasionally Useful No stars - Not Useful | ||||||
Consumables
Shikishima can equip the following consumables:
- Slot 1: Damage Control Party

- Slot 2: Repair Party

- Slot 3: Spotting Aircraft
 or Catapult Fighter
Gallery
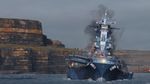
A Shikishima listing dangerously to port.
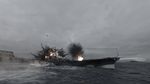
Shiki goes boom.


Historical Info
Historical Gallery
References