Wakatake
| Revision as of 04:49, 10 October 2018 Undo revision 278737 by destawaits:na (talk) | Revision as of 17:49, 7 July 2020 Blank IFHE | |||
7 intermediate revisions by 5 users not shown | ||||
| Line 4: | Line 4: | |||
| |Anno=<!-- you can write below short description for the ship. it will replace default once. --> | |Anno=<!-- you can write below short description for the ship. it will replace default once. --> | |||
| ? | A small yet well-armed and very fast destroyer. | + | A small yet well-armed and very fast destroyer. ''Wakatake'' carries 533 mm torpedoes with better range than similar munitions used by potential rivals. An unconventional placement of torpedo launchers allows her to fire from the bow sectors.<br><br>{{Model3DViewer|b6a6b37329f84f1db1cb1b90ffafa402}} | |
| |Performance=<!-- write text about performance in battles below --> | |Performance=<!-- write text about performance in battles below --> | |||
| ? | + | ''Wakatake'' is a fragile ship, so one would need to keep the concealment distance (6.1 KM) and torpedo range (7 KM) memorized and balance between them. With only 8,200 HP, there isn't much leeway for mistakes, so be sure to only go for a certain attack. Stay away from areas with many ships and attack stragglers. The artillery on the ship isn't the strongest, so the guns should be used on few occasions such as lighting a permanent fire, or when the enemy ship is low on HP and can be killed. It is a very bad idea, worse than usual, to shoot at an enemy if there are multiple enemy ships in the area, if you have not been spotted, or if there are ships that can cut you down at a range i.e. cruisers and battleships. Also, it is important to turn off your AA, as it is literally worthless. Your AA gives away your position to enemy aircraft very quickly at a greater range than aerial spotting range. Also, when using torpedoes, launch them when the enemy is showing their broadside. This will make turning to avoid the torpedoes much harder and will yield greater success. | ||
| |Pros=<!-- write list of positive points below. use * as in ordinary wiki-list. --> | |Pros=<!-- write list of positive points below. use * as in ordinary wiki-list. --> | |||
| *Very agile and maneuverable, can out-run and out-turn almost any ship. | *Very agile and maneuverable, can out-run and out-turn almost any ship. | |||
| *Detection range allows for close range torpedo drops and easy flanking. | *Detection range allows for close range torpedo drops and easy flanking. | |||
| ? | *The Torpedoes on | + | *The Torpedoes on ''Wakatake'' are the strongest at Tier III. ''Wakatake'' has the ability to destroy any ship at tier with a perfect salvo. | |
| *High speed and good concealment make for a good ship to get these torpedoes on target. | *High speed and good concealment make for a good ship to get these torpedoes on target. | |||
| Line 22: | Line 22: | |||
| *Almost no AA. | *Almost no AA. | |||
| *Has very weak artillery. | *Has very weak artillery. | |||
| ? | * | + | *Exchanges shorter torpedo range than her predecessor ''Umikaze'' for increased damage. | |
| ? | *Has fewer hit points than | + | *Has fewer hit points than ''Umikaze''. | |
| |Research=<!-- write text about priority sequence of research below --> | |Research=<!-- write text about priority sequence of research below --> | |||
| ? | ''Wakatake'' only has one upgrade to research | + | ''Wakatake'' only has one upgrade to research: the hull, which must be researched to unlock ''Isokaze''. | |
| |OptimalConfiguration=<!-- write some general text about selection of optimal configuration below (optional)--> | |OptimalConfiguration=<!-- write some general text about selection of optimal configuration below (optional)--> | |||
| + | ||||
| + | *Slot 1 - {{Magazine Modification 1}} may seem tempting here, but the signal [[Ship:Flags#Juliet Charlie|Juliet Charlie]] {{Juliet Charlie|Size=18px}} accomplishes the same thing. Prefer {{Main Armaments Modification 1}} to preserve the torpedo tubes as long as possible. | |||
| + | *Slot 2 - Give a slight preference to {{Propulsion Modification 1}} over {{Steering Gears Modification 1}}, though without the [[Ship:Commander Skills#Last Stand|Last Stand]] skill, both are equally desperate. | |||
| |CommanderSkills=<!-- write text about best set of Commander Skills below --> | |CommanderSkills=<!-- write text about best set of Commander Skills below --> | |||
| ? | ||||
| ? | ||||
| ? | ||||
| ? | ||||
| ? | ||||
| ? | ||||
| ? | ||||
| ? | ||||
| ? | ||||
| ? | | | + | {{Commander Skills 2 | |
| ? | | Jack of All Trades | + | <!-- This version enables a '0' rating. Use it for skills that have no effect (e.g. Improved Engines on a non-CV) or are detrimental to the ship. They should mirror what appears in the game client. --> | |
| ? | | | + | | rating11 = 1 <!-- Priority Target --> | |
| ? | | | + | | rating12 = 3 <!-- Preventive Maint --> | |
| ? | | Smoke Screen Expert | + | | rating13 = <!-- Expert Loader --> | |
| ? | | | + | | rating14 = 0 <!-- Air Supremacy --> | |
| ? | | | + | | rating15 = 0 <!-- Direction Center for Fighters --> | |
| ? | | | + | | rating16 = 0 <!-- Improved Engine Boost --> | |
| + | | rating17 = 1 <!-- Incoming Fire Alert --> | |||
| + | | rating18 = 0 <!-- Last Gasp --> | |||
| + | ||||
| + | | rating21 = 1 <!-- High Alert --> | |||
| + | | rating22 = 2 <!-- Jack of All Trades --> | |||
| + | | rating23 = 1 <!-- Expert Marksman --> | |||
| + | | rating24 = 1 <!-- Torpedo Acceleration --> | |||
| + | | rating25 = 1 <!-- Smoke Screen Expert --> | |||
| + | | rating26 = 0 <!-- Improved Engines --> | |||
| + | | rating27 = 1 <!-- Adrenaline Rush --> | |||
| + | | rating28 = 3 <!-- Last Stand --> | |||
| ? | | | + | | rating31 = 2 <!-- Basics of Survivability --> | |
| ? | + | | rating32 = <!-- Survivability Expert--> | ||
| ? | | Torpedo Armament Expertise | + | | rating33 = 2 <!-- Torpedo Armament Expertise--> | |
| ? | | | + | | rating34 = 0 <!-- Aircraft Armor --> | |
| ? | | Basic Firing Training | + | | rating35 = <!-- Basic Firing Training --> | |
| ? | | | + | | rating36 = 3 <!-- Superintendent --> | |
| ? | | Demolition Expert | + | | rating37 = <!-- Demolition Expert --> | |
| ? | | | + | | rating38 = 1 <!-- Vigilance --> | |
| ? | | Manual Fire Control for Secondary Armament | + | | rating41 = <!-- Manual Fire Control for Secondary Armament --> | |
| ? | | Fire Prevention | + | | rating42 = <!-- Fire Prevention --> | |
| ? | | Inertia Fuse for HE Shells | + | | rating43 = <!-- Inertia Fuse for HE Shells --> | |
| ? | | | + | | rating44 = 0 <!-- Sight Stabilization --> | |
| ? | | Advanced Firing Training | + | | rating45 = 2 <!-- Advanced Firing Training --> | |
| ? | | | + | | rating46 = <!-- Massive AA Fire --> | |
| ? | | Radio Position Finding | + | | rating47 = 2 <!-- Radio Position Finding --> | |
| ? | | Concealment Expert | + | | rating48 = 3 <!-- Concealment Expert --> | |
| }} | }} | |||
| Line 78: | Line 83: | |||
| [[Ship:Camouflage#Standard Camouflage|Type 1, 2, or 5 camouflage]] can be equipped for credits; Types 1 or 5 are recommended at a minimum to reduce detectability range. | [[Ship:Camouflage#Standard Camouflage|Type 1, 2, or 5 camouflage]] can be equipped for credits; Types 1 or 5 are recommended at a minimum to reduce detectability range. | |||
| ? | ''{{#var:ship_name}}'' also has a permanent camouflage called "Blade", in which she appears as she does during the Halloween scenarios "[[Saving Translyvania]]" and "[[ | + | ''{{#var:ship_name}}'' also has a permanent camouflage called "Blade", in which she appears as she does during the Halloween scenarios "[[Ship:Saving_Transylvania|Saving Translyvania]]" and "[[Ship:Sunray_in_the_Darkness|Sunray in the Darkness]]". | |
| |Signals=<!-- write text about best set of signals below --> | |Signals=<!-- write text about best set of signals below --> | |||
| Line 111: | Line 116: | |||
| |Gallery=<!-- write below list of files without tags. description (if necessary) for each should be separated with template {{!}} --><gallery> | |Gallery=<!-- write below list of files without tags. description (if necessary) for each should be separated with template {{!}} --><gallery> | |||
| ? | + | File:Wakatake Bow.jpeg | ||
| + | File:Wakatake Stern.jpeg | |||
| + | File:Blade Bow.jpeg | |||
| + | File:Blade Propulsion.jpeg | |||
| + | File:Blade Stern.jpeg | |||
| </gallery> | </gallery> | |||
| Line 159: | Line 168: | |||
| |Ref= <!-- write below --> | |Ref= <!-- write below --> | |||
| + | # [https://en.wikipedia.org/wiki/Wakatake-class_destroyer ''Wakatake''-class destroyer - Wikipedia] | |||
| }}<!-- DO NOT DELETE THIS LINE. DO NOT INSERT ANYTHING BELOW THIS LINE --> | }}<!-- DO NOT DELETE THIS LINE. DO NOT INSERT ANYTHING BELOW THIS LINE --> | |||
Revision as of 17:49, 7 July 2020

| Research price2000 exp |
| Purchase price256,000 |
| Hit Points7,300 |
| 120 mm/45 3rd Year Type on a Model G mount3 х 1 pcs. |
| Rate of Fire5 shots/min. |
| Reload Time12 sec. |
| Rotation Speed6 deg./sec. |
| 180 Degree Turn Time30 sec. |
| Firing Range9.41 km. |
| Maximum Dispersion85 m. |
| HE Shell120 mm HE Type1 |
| Maximum HE Shell Damage1,700 |
| Chance of Fire on Target Caused by HE Shell7 % |
| Initial HE Shell Velocity825 m./s. |
| HE Shell Weight20.3 kg. |
| AP Shell120 mm AP Type0 |
| Maximum AP Shell Damage2,000 |
| Initial AP Shell Velocity825 m./s. |
| AP Shell Weight20.3 kg. |
| 533 mm Twin2 х 2 pcs. |
| Rate of Fire1.54 shots/min. |
| Reload Time39 sec. |
| Rotation Speed25 deg./sec. |
| 180 Degree Turn Time7.2 sec. |
| Torpedo533 mm Type44 mod. 2 |
| Maximum Damage9,067 |
| Torpedo Speed57 knot |
| Torpedo Range6.99 km. |
| 6.5 mm/115 3rd Year Type on a single mount2 х 1 pcs. |
| . . . Average Damage per Second2.4 |
| . . . Firing Range0.99 km. |
| Maximum Speed35.5 knot |
| Turning Circle Radius470 m. |
| Rudder Shift Time4 sec. |
| Surface Detectability Range5.94 km. |
| Air Detectability Range2.04 km. |

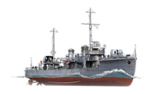
Wakatake — Japanese Tier III destroyer.
A small yet well-armed and very fast destroyer. Wakatake carries 533 mm torpedoes with better range than similar munitions used by potential rivals. An unconventional placement of torpedo launchers allows her to fire from the bow sectors.
Modules
 |
Rate of Fire (shots/min) | 180° Turn Time (sec) | Maximum Dispersion (m) | Maximum HE Shell Damage (HP) | Chance of Fire on Target Caused by HE Shell (%) | Maximum AP Shell Damage (HP) |
Research price (exp) |
Purchase price ( | |
|---|---|---|---|---|---|---|---|---|---|
| 120 mm/45 3rd Year Type on a Model G mount | 5 | 30 | 85 | 1,700 | 7 | 2,000 | 0 | 21,000 |
 |
Hit Points (HP) | Armor (mm) | Armor (mm) | Main Turrets (pcs.) | Secondary Gun Turrets (pcs.) | AA Mounts (pcs.) | Torpedo Tubes (pcs.) | Hangar Capacity (pcs.) |
Research price (exp) |
Purchase price ( | |
|---|---|---|---|---|---|---|---|---|---|---|---|
| Wakatake (A) | 7,300 | 6 | 12 | 3 | 2 | 2 | 0 | 30,000 | |||
| Wakatake (B) | 8,200 | 6 | 12 | 3 | 1 | 2 | 950 | 70,000 |
 |
Rate of Fire (shots/min) | Torpedo Tubes Reload Time (sec) | 180° Turn Time (sec) | Maximum Damage (HP) | Torpedo Speed (knot) | Torpedo Range (km) |
Research price (exp) |
Purchase price ( | |
|---|---|---|---|---|---|---|---|---|---|
| Type44 mod. 2 | 1.5 | 39 | 7.2 | 9,066 | 57 | 7 | 0 | 24,000 |
 |
IDS_SHIP_PARAM_SUO_INCREASE_DIST (%) | Maximum Firing Range (km) |
Research price (exp) |
Purchase price ( | |
|---|---|---|---|---|---|
| Type3 mod. 1 | 0 | 0 | 18,500 |
 |
Maximum Speed (knot) |
Research price (exp) |
Purchase price ( | |
|---|---|---|---|---|
| Propulsion: 21,500 hp | 35.5 | 0 | 19,500 |
Compatible Upgrades
| Slot 1 |
||||
|---|---|---|---|---|
| Slot 2 |
Player Opinion
Performance
Pros:
- Very agile and maneuverable, can out-run and out-turn almost any ship.
- Detection range allows for close range torpedo drops and easy flanking.
- The Torpedoes on Wakatake are the strongest at Tier III. Wakatake has the ability to destroy any ship at tier with a perfect salvo.
- High speed and good concealment make for a good ship to get these torpedoes on target.
Cons:
- Turret rotation cannot keep up with maneuvers. Hard to get a shot off in twisting attacks.
- Torpedo range similar to detection range, thus leaving you a small window of attack.
- Vulnerable to rudder and engine damage.
- Low HP compared to other ships.
- Almost no AA.
- Has very weak artillery.
- Exchanges shorter torpedo range than her predecessor Umikaze for increased damage.
- Has fewer hit points than Umikaze.
Research
Optimal Configuration
- Slot 1 - Magazine Modification 1
 may seem tempting here, but the signal Juliet Charlie
  accomplishes the same thing. Prefer Main Armaments Modification 1
  to preserve the torpedo tubes as long as possible.
- Slot 2 - Give a slight preference to Propulsion Modification 1
 over Steering Gears Modification 1
  , though without the Last Stand skill, both are equally desperate.
Commander Skills
| Recommended Commander Skills | ||||||||
|---|---|---|---|---|---|---|---|---|
| Cost (points) |
Endurance | Attack | Support | Versatility | ||||
| 1 |
★ |
★★★ |
|
Χ |
Χ |
Χ |
★ |
Χ |
| 2 |
★ |
★★ |
★ |
★ |
★ |
Χ |
★ |
★★★ |
| 3 |
★★ |
|
★★ |
Χ |
|
★★★ |
|
★ |
| 4 |
|
|
|
Χ |
★★ |
|
★★ |
★★★ |
| Key: ★★★ - Extremely Useful ★★ - Frequently Useful ★ - Occasionally Useful No stars - Meh Χ - Not recommended | ||||||||
Consumables
Wakatake can equip the following consumables:
- Slot 1: Damage Control Party

- Slot 2: Smoke Generator

- Slot 3: Engine Boost

Camouflage
Type 1, 2, or 5 camouflage can be equipped for credits; Types 1 or 5 are recommended at a minimum to reduce detectability range.
Wakatake also has a permanent camouflage called "Blade", in which she appears as she does during the Halloween scenarios "Saving Translyvania" and "Sunray in the Darkness".
Signals
Recommended Signal Flags 
| |||||
|---|---|---|---|---|---|
| Combat | |||||
 ★ |

|

|

|
 ★★ |
 ★★ |
 ★★★ |

|

|
 ★★ |

|

|

|

| ||||
Note: Use of the Juliet Charlie signal makes detonation impossible.


