Yūgumo
| Revision as of 11:16, 21 November 2016 VER_03:ru moved page Ship:Yugumo to Ship:Yūgumo | Revision as of 17:57, 7 July 2020 Blank IFHE | |||
24 intermediate revisions by 12 users not shown | ||||
| Line 3: | Line 3: | |||
| |Anno=<!-- you can write below short description for the ship. it will replace default once. --> | |Anno=<!-- you can write below short description for the ship. it will replace default once. --> | |||
| + | Developed from the preceding ''[[Kagero]]''-class destroyers, the very similar ''Yūgumo''-class was a minor revision featuring new main gun mounts capable of high angle fire, reinforced AA defenses and a streamlined bridge structure.<br><br> | |||
| + | {{Model3DViewer|e6488f58b16b46d5a461673543d4f3ba}} | |||
| |Performance=<!-- write text about performance in battles below --> | |Performance=<!-- write text about performance in battles below --> | |||
| ? | + | Replacing ''[[Kagero]]'' (as of [[Ship:Update 0.5.15|Update 0.5.15]]) as the penultimate destroyer in this particular branch of the Japanese destroyer line is ''Yūgumo''. Captains who have progressed this far up the branch will be well-familiar with the layout of the ship, but will probably be disappointed in how few improvements there are over Tier VIII's ''[[Kagero]]'' lurking inside the hull. | ||
| + | ||||
| + | One drastic improvement is the reload time of ''Yūgumo''’s main battery guns. Her reload time is a mere 5.7 seconds; glacially slow by American destroyer standards, but a speed heretofore unseen with Japanese 127 mm guns. With the right mix of upgrades and commander skills that number can drop even lower, bringing her DPM close to a true gunboat, though she will still lack the raw DPM of American destroyers or the excellent ballistics of Russian destroyers. Her main battery range goes up significantly as well, further emphasizing the benefits of her improved reload speed. | |||
| + | ||||
| + | From [[Ship:Update 0.6.6|Update 0.6.6]] ''Yūgumo'' has the option of two torpedo upgrades from the stock Type 93 mod. 2s. First, there are the Type F3s, which are outrageously fast at 76 knots but at the cost of only having 8 km of range. The more recommended choice, however, are the Type 93 mod. 3s, which remain at 67 knots but offer a boost in range to 12 km as well as a damage increase. Most captains will choose to use the new final upgrade slot to improve the torpedo reload speed, further increasing her torpedo potential. | |||
| + | ||||
| + | Most everything else remains as it was from ''Kagero''. Her speed improves slightly (0.5 knots), and her handling characteristics remain virtually identical. Her main battery is now dual-purpose, but practically in name only; it does a better job giving away her presence to nearby planes than actually defending the ship and should generally be ordered to hold fire. Her health pool goes up by the slimmest of amounts (400 hit points). Even ''Yūgumo''’s detection radius is worse than ''Kagero''’s, but it's very slight and not a serious handicap. | |||
| |Pros=<!-- write list of positive points below. use * as in ordinary wiki-list. --> | |Pros=<!-- write list of positive points below. use * as in ordinary wiki-list. --> | |||
| + | * Excellent reload speed for her main battery guns (in comparison to most other Japanese destroyers, that is). | |||
| + | * Has access to [[Ship:Upgrades#Tier_IX.2B_Equipment_.28Slot_3.29|Upgrade Slot 3]]. | |||
| + | * Lowest detection radius among Tier IX destroyers. | |||
| + | * Very potent torpedo armament, capable of impressive reload speeds with the right mix of upgrades and commander skills. | |||
| + | * Can equip [[Ship:Consumables#Torpedo Reload Booster|Torpedo Reload Booster]]. | |||
| |Cons=<!-- write list of negative points below. use * as in ordinary wiki-list. --> | |Cons=<!-- write list of negative points below. use * as in ordinary wiki-list. --> | |||
| + | * Lowest top speed among Tier IX destroyers; ''Yūgumo'' has a difficult time escaping enemy gunboat destroyers that are able to close with her. | |||
| + | * Highly vulnerable to enemy aircraft, especially if equipping Torpedo Reload Booster instead of Smoke Generator. | |||
| + | * Turret traverse time for main battery remains slow. | |||
| + | * Detection range of Type 93 torpedoes gives opponents more time to react than torpedoes from ''[[Fletcher]]'' or ''[[Udaloi]]''. | |||
| |Research=<!-- write text about priority sequence of research below --> | |Research=<!-- write text about priority sequence of research below --> | |||
| + | The mod. 3 torpedoes offer a boost in damage and increased flexibility due to the improved range, and should be researched first. Next, the hull will give a bit of extra survivability. The gun range can be saved for last. | |||
| |OptimalConfiguration=<!-- write some general text about selection of optimal configuration below (optional)--> | |OptimalConfiguration=<!-- write some general text about selection of optimal configuration below (optional)--> | |||
| |Upgrades=<!-- write text about best upgrades below --> | |Upgrades=<!-- write text about best upgrades below --> | |||
| + | Like so many of her Japanese destroyer brethren before her, ''Yugumo''’s flexibility in upgrade options is somewhat limited. [[Ship:Upgrades#Tier_I.2B_Equipment_.28Slot_1.29|Upgrade Slot 1]] is best filled with Main Armaments Modification 1, while [[Ship:Upgrades#Tier_III.2B_Equipment_.28Slot_4.29|Upgrade Slot 4]] and [[Ship:Upgrades#Tier_VI.2B_Equipment_.28Slot_5.29|Upgrade Slot 5]] should be filled with Propulsion Modifications 1 and 2, respectively. Concealment System Modification 1 is mandatory in [[Ship:Upgrades#Tier_VIII.2B_Equipment_.28Slot_6.29|Upgrade Slot 6]]. This leaves only a couple of upgrade slots that can truly customize how ''Yugumo'' plays. | |||
| + | ||||
| + | '''Torpedo Build:''' Most captains will opt to fully maximize ''Yūgumo''’s torpedo armament. This means installing Torpedo Tubes Modification 3 in [[Ship:Upgrades#Tier_IX.2B_Equipment_.28Slot_3.29|Upgrade Slot 3]], and either Aiming Systems Modification 1 or Main Battery Modification 2 in [[Ship:Upgrades#Tier_V.2B_Equipment_.28Slot_2.29|Upgrade Slot 2]]. The latter may seem like an odd choice, but is a good hedge bet for when she finds herself in a close-quarters gunfight with the likes of a ''[[Fletcher]]'' or ''[[Gearing]]''. In either case, stacking Torpedo Tubes Modification 3 with Tier 3 commander skill Torpedo Armament Expertise brings ''Yūgumo''’s torpedo reload time for her Type 93 torpedoes down to slightly under 86 seconds; it drops to less than 80 seconds for the Type F3 torpedoes. These are terrifyingly low numbers that no opposing battleship driver wants to hear given how hard those torpedoes hit. | |||
| + | ||||
| + | '''Main Battery Build:''' Alternatively, ''Yūgumo'' is one of the only Japanese destroyers not named ''[[Akizuki]]'' that can realistically consider tailoring the ship around her main battery guns. By combining Aiming Systems Modification 1 in [[Ship:Upgrades#Tier_V.2B_Equipment_.28Slot_2.29|Upgrade Slot 2]], Main Battery Modification 3 in [[Ship:Upgrades#Tier_IX.2B_Equipment_.28Slot_3.29|Upgrade Slot 3]], and the Tier 1 commander skill Basic Firing Training, ''Yūgumo'' drops her main battery reload time down to 4.5 seconds. While this is still 50% slower than ''Fletcher'', it compares favorably to ''[[Udaloi]]''. Playing ''Yūgumo'' in this style of build is challenging, but not impossible. | |||
| |CommanderSkills=<!-- write text about best set of Commander Skills below --> | |CommanderSkills=<!-- write text about best set of Commander Skills below --> | |||
| ? | | | + | {{Commander Skills 2 | |
| + | <!-- This version enables a '0' rating. Use it for skills that have no effect (e.g. Improved Engines on a non-CV) or are detrimental to the ship. They should mirror what appears in the game client. --> | |||
| + | | rating11 = 2 <!-- Priority Target --> | |||
| + | | rating12 = 3 <!-- Preventive Maint --> | |||
| + | | rating13 = <!-- Expert Loader --> | |||
| + | | rating14 = 0 <!-- Air Supremacy --> | |||
| + | | rating15 = 0 <!-- Direction Center for Fighters --> | |||
| + | | rating16 = 0 <!-- Improved Engine Boost --> | |||
| + | | rating17 = <!-- Incoming Fire Alert --> | |||
| + | | rating18 = 0 <!-- Last Gasp --> | |||
| + | | rating21 = 1 <!-- High Alert --> | |||
| + | | rating22 = 1 <!-- Jack of All Trades --> | |||
| + | | rating23 = 3 <!-- Expert Marksman --> | |||
| + | | rating24 = <!-- Torpedo Acceleration --> | |||
| + | | rating25 = 1 <!-- Smoke Screen Expert --> | |||
| + | | rating26 = 0 <!-- Improved Engines --> | |||
| + | | rating27 = 2 <!-- Adrenaline Rush --> | |||
| + | | rating28 = 3 <!-- Last Stand --> | |||
| + | ||||
| + | | rating31 = 1 <!-- Basics of Survivability --> | |||
| + | | rating32 = 2 <!-- Survivability Expert--> | |||
| + | | rating33 = 1 <!-- Torpedo Armament Expertise--> | |||
| + | | rating34 = 0 <!-- Aircraft Armor --> | |||
| + | | rating35 = 1 <!-- Basic Firing Training --> | |||
| + | | rating36 = 3 <!-- Superintendent --> | |||
| + | | rating37 = 2 <!-- Demolition Expert --> | |||
| + | | rating38 = 1 <!-- Vigilance --> | |||
| + | ||||
| + | | rating41 = <!-- Manual Fire Control for Secondary Armament --> | |||
| + | | rating42 = <!-- Fire Prevention --> | |||
| + | | rating43 = <!-- Inertia Fuse for HE Shells --> | |||
| + | | rating44 = 0 <!-- Sight Stabilization --> | |||
| + | | rating45 = 2 <!-- Advanced Firing Training --> | |||
| + | | rating46 = 0 <!-- Massive AA Fire --> | |||
| + | | rating47 = 2 <!-- Radio Position Finding --> | |||
| + | | rating48 = 3 <!-- Concealment Expert --> | |||
| + | }} | |||
| + | ||||
| + | |Consumables=<!-- write text about selection of Consumables below --> | |||
| + | ''Yugumo'' can equip the following consumables: | |||
| + | * '''Slot 1:''' {{Damage Control Party}} | |||
| + | * '''Slot 2:''' {{Smoke Generator}} '''or''' {{Torpedo Reload Booster}} | |||
| + | * '''Slot 3:''' {{Engine Boost}} | |||
| |Camouflage=<!-- write text about useful camouflage below --> | |Camouflage=<!-- write text about useful camouflage below --> | |||
| + | [[Ship:Camouflage#Standard Camouflage|Type 1, 2, or 5 camouflage]] can be equipped for credits; Types 1 or 5 are recommended at a minimum to reduce detectibility range. | |||
| + | ||||
| + | Players who wish to spend doubloons can equip ''Yūgumo'' with [[Ship:Camouflage#Permanent_Camouflage|Type 19 camouflage]] that lowers her detection radius, reduces the accuracy of incoming shells, reduces her repair costs, and increases the amount of experience she earns. | |||
| |Signals=<!-- write text about best set of signals below --> | |Signals=<!-- write text about best set of signals below --> | |||
| + | ''Yūgumo''’s reliance on her torpedoes for much of her damage output make equipping Juliet Whiskey Unaone [[Ship:Consumables#Signal Flags|signal flags]] highly attractive, particularly for '''Torpedo Build''' captains; '''Torpedo Build''' captains will want to equip November Foxtrot flags as well, in order to improve the cooldown speed of [[Ship:Consumables#Torpedo Reload Booster|Torpedo Reload Booster]]. '''Main Battery Build''' captains should equip India X-Ray and Victor Lima flags. Juliet Charlie and Sierra Mike flags are recommended regardless of build. | |||
| |Gallery=<!-- write below list of files with description (if necessary) separated with | --><gallery> | |Gallery=<!-- write below list of files with description (if necessary) separated with | --><gallery> | |||
| ? | + | File:YugumoTorps.jpg|''Yūgumo'' fires a salvo of torpedoes. | ||
| + | File:YugumoSupports.jpg|''Yūgumo'' lays a smokescreen to shield a friendly [[ship:Friedrich_der_Große|''Friedrich der Große'']] battleship. | |||
| + | File:YugumoMelee.jpg|''Yūgumo'' joins an [[ship:Amagi|''Amagi'']] in the melee. | |||
| + | File:YugumoBroadside.jpg|''Yūgumo'' fires a broadside at range. | |||
| </gallery> | </gallery> | |||
| |History=<!-- write text below --> | |History=<!-- write text below --> | |||
| ? | + | <div class="thumb tright"> | ||
| ? | | | + | {{AnnoWiki|content= | |
| + | <h3>Construction</h3> | |||
| + | :Maizuru Naval Arsenal; Kyoto, Japan | |||
| + | :Laid down: 12 June 1940 | |||
| + | :Launched: 16 March 1941 | |||
| + | :Commissioned: 5 December 1941 | |||
| + | ---- | |||
| + | ===Specifications=== | |||
| + | :2,077 tons displacement, standard | |||
| + | :119.17m length | |||
| + | :10.8m beam | |||
| + | :3.76m draft | |||
| + | ---- | |||
| + | ====Machinery==== | |||
| + | :3 boilers, 2 turbines | |||
| + | ---- | |||
| + | ====Performance==== | |||
| + | :35 knots at 52,000 shaft horsepower | |||
| + | :5,000nm at 18 knots | |||
| + | ---- | |||
| + | ====Armament==== | |||
| + | =====Main===== | |||
| + | :Six (3x2) 127mm dual purpose guns | |||
| + | =====Anti-aircraft===== | |||
| + | :Four (4x1) 25mm guns | |||
| + | =====Torpedoes===== | |||
| + | :Eight (2x4) 610mm torpedo tubes | |||
| + | }} | |||
| + | </div> | |||
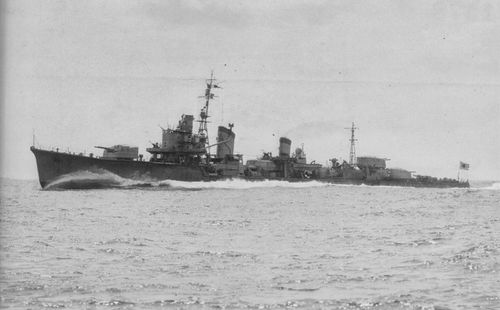
| + | [[File:Hayanami 24JUL43.jpg|500px|link=]] | |||
| + | ===History=== | |||
| + | ====Design==== | |||
| + | Yūgumo (夕雲?, "Evening Clouds") was the lead ship of her class of destroyer built for the Imperial Japanese Navy during World War II. Apart from the modified bridge structure — which reduced wind resistance and turbulence compared to the design on the ''Kagero''-class — her class was visually indistinguishable from ''Kagero'' class vessels, and was otherwise very similar. These would be the final class of large anti-surface destroyer the Imperial Japanese Navy would produce. | |||
| + | ||||
| + | ====Service==== | |||
| + | ||||
| + | '''DesDiv 10''' (''Kazagumo'', ''Makigumo'', ''Yugumo'') | |||
| + | Participated in the Battle of Midway. Participated in the Battle of the Eastern Solomons. Participated in the Battle of Santa Cruz. Participated in the Naval Battles of Guadalcanal. Participated in the Guadalcanal Campaign. Participated in the Solomons Campaign. Participated in the evacuation of the Aleutians. Participated in the Battle of Vella Lavella. | |||
| + | :''Kazagumo'' was torpedoed and sunk by submarine on 8 June 1944. | |||
| + | :''Makigumo'' struck a mine and was sunk on 1 February 1943. | |||
| + | :''Yugumo'' was sunk by surface gunfire and torpedo on 7 October 1943, during the Battle of Vella Lavella. | |||
| + | ||||
| + | '''DesDiv 31''' (''Naganami'', ''Makinami'', ''Takanami'', ''Onami'', ''Kishinami'', ''Kiyonami'', ''Okinami'', ''Asashimo'') | |||
| + | Participated in the Guadalcanal Campaign. Participated in the Battle of Santa Cruz. Participated in the Naval Battles of Guadalcanal. Participated in the Battle of Tassafaronga. Participated in the evacuation of the Aleutians. Participated in the Battle of Empress Augusta Bay. Participated in the Battle of Cape St. George. Participated in the Battle of the Philippine Sea. Participated in the Battle of Leyte Gulf. Participated in the reinforcement of Leyte. Participated in Operation Tenichigo. | |||
| + | :''Naganami'' was sunk by air attack on 11 November 1944. | |||
| + | :''Makinami'' was sunk by surface gunfire and torpedo on 25 November 1943, during the Battle of Cape St. George. | |||
| + | :''Takanami'' was sunk by surface gunfire on 30 November 1942, during the Battle of Tassafaronga. | |||
| + | :''Onami'' was sunk by torpedo on 25 November 1943, during the Battle of Cape St. George. | |||
| + | :''Kishinami'' was torpedoed and sunk by submarine on 4 December 1944. | |||
| + | :''Kiyonami'' was sunk by air attack on 20 July 1943. | |||
| + | :''Okinami'' was sunk by air attack on 13 November 1944. | |||
| + | :''Asashimo'' was sunk by air attack on 7 April 1945, during Operation Tenichigo. | |||
| + | ||||
| + | '''DesDive 32''' (''Hayanami'', ''Fujinami'', ''Suzunami'', ''Hamanami'', ''Tamanami'') | |||
| + | Participated in the Battle of the Philippine Sea. Participated in the Battle of Leyte Gulf. Participated in the reinforcement of Leyte. | |||
| + | :''Hayanami'' was torpedoed and sunk by submarine on 7 June 1944. | |||
| + | :''Fujinami'' was sunk by air attack on 27 October 1944, after the Battle of Leyte Gulf. | |||
| + | :''Suzunami'' was sunk by air attack on 11 November 1943. | |||
| + | :''Hamanami'' was sunk by air attack on 11 November 1944. | |||
| + | :''Tamanami'' was torpedoed and sunk by submarine on 7 July 1944. | |||
| + | ||||
| + | '''DesDiv 2''' (''Kiyoshimo'', ''Hayashimo'', ''Akishimo'') | |||
| + | Participated in the Battle of Leyte Gulf. Participated in the reinforcement of Leyte. | |||
| + | :''Kiyoshimo'' was sunk by air attack and surface torpedo on 26 December 1944. | |||
| + | :''Hayashimo'' was damaged by air attack and intentionally grounded on 25 October 1944, during the Battle of Leyte Gulf. She settled and was repeatedly attacked over the next 40 days until finally abandoned as a wreck on 3 December 1944. | |||
| + | :''Akishimo'' was sunk by air attack on 14 November 1944. | |||
| + | ||||
| + | |HistoricalGallery=<!-- write below list of files with description (if necessary) separated with | --><gallery> | |||
| + | File:Makigumo.jpg|''Makigumo'' at anchor, 14 March 1942. | |||
| + | File:Kazagumo.jpg|''Kazagumo'' at anchor, March 1942. | |||
| + | File:Hayanami_24JUL43.jpg|''Hayanami'' underway, 24 July 1943. | |||
| + | File:Ijn_dd_hamanami.jpeg|''Hamanami'' on sea trials in Miyazu Bay, 10 October 1943. | |||
| + | File:Asashimo_Осака-бэй_ноябрь_1943.jpg|''Asashimo'' at Osaka Bay, November 1943. | |||
| + | File:Hayashimo_FEB44.jpg|''Hayashimo'' at anchor, February 1944. | |||
| + | File:Kiyoshimo_в_Урага_15_мая_1944.jpg|''Kiyoshimo'' underway, 15 March 1944. | |||
| + | File:Akishimo_на_рейде_Манилы.jpg|The remains of ''Akishimo'' in Manila Harbor, December 1944. | |||
| + | File:Asashimo_1945.JPG|''Asashimo'' streams a large oil slick as she founders 150 miles south of Nagasaki, 7 April 1945. | |||
| + | File:Yugumo_1941_чертеж.jpg|Line drawing of ''Yūgumo'', with compartmentalization shown at bottom. | |||
| </gallery> | </gallery> | |||
| |Video=<!-- put below video clips with using template VideoYT. You can use html-tags for formatting. --> | |Video=<!-- put below video clips with using template VideoYT. You can use html-tags for formatting. --> | |||
| ? | + | {{VideoYT|aJt1qVuGJTA}} | ||
| |Ref= <!-- write below --> | |Ref= <!-- write below --> | |||
| + | # [https://en.wikipedia.org/wiki/Japanese_destroyer_Y%C5%ABgumo_(1941) Japanese destroyer ''Yūgumo'' (1941) - Wikipedia] | |||
| + | # [https://en.wikipedia.org/wiki/Y%C5%ABgumo-class_destroyer ''Yūgumo-class'' destroyer - Wikipedia] | |||
| + | # [https://www.youtube.com/watch?v=aJt1qVuGJTA Japanese Destroyers - Yugumo - World of Warships Official Channel - YouTube] | |||
| }}<!-- DO NOT DELETE THIS LINE. DO NOT INSERT ANYTHING BELOW THIS LINE --> | }}<!-- DO NOT DELETE THIS LINE. DO NOT INSERT ANYTHING BELOW THIS LINE --> | |||
Revision as of 17:57, 7 July 2020

| Research price154000 exp |
| Purchase price13,200,000 |
| Hit Points13,900 |
| 127 mm/50 3rd Year Type on a Type C mount3 х 2 pcs. |
| Rate of Fire10.51 shots/min. |
| Reload Time5.71 sec. |
| Rotation Speed7.9 deg./sec. |
| 180 Degree Turn Time22.78 sec. |
| Firing Range10.95 km. |
| Maximum Dispersion97 m. |
| HE Shell127 mm HE Type1 |
| Maximum HE Shell Damage2,150 |
| Chance of Fire on Target Caused by HE Shell9 % |
| Initial HE Shell Velocity915 m./s. |
| HE Shell Weight23 kg. |
| AP Shell127 mm AP Type0 |
| Maximum AP Shell Damage2,200 |
| Initial AP Shell Velocity915 m./s. |
| AP Shell Weight23 kg. |
| 610 mm Quad2 х 4 pcs. |
| Rate of Fire0.54 shots/min. |
| Reload Time112 sec. |
| Rotation Speed25 deg./sec. |
| 180 Degree Turn Time7.2 sec. |
| TorpedoType93 mod. 2 |
| Maximum Damage20,967 |
| Torpedo Speed67 knot |
| Torpedo Range9.99 km. |
| 127 mm/50 3rd Year Type on a Type C mount3 х 2 pcs. |
| . . . Average Damage per Second30.3 |
| . . . Firing Range5.01 km. |
| 25 mm/60 Type 96 on a single mount4 х 1 pcs. |
| . . . Average Damage per Second7.2 |
| . . . Firing Range2.49 km. |
| 25 mm/60 Type 96 on a twin mount3 х 2 pcs. |
| . . . Average Damage per Second8.1 |
| . . . Firing Range2.49 km. |
| Maximum Speed35.5 knot |
| Turning Circle Radius640 m. |
| Rudder Shift Time5.1 sec. |
| Surface Detectability Range6.81 km. |
| Air Detectability Range3.12 km. |

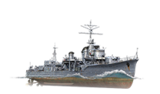
Yūgumo — Japanese Tier IX destroyer.
Developed from the preceding Kagero-class destroyers, the very similar Yūgumo-class was a minor revision featuring new main gun mounts capable of high angle fire, reinforced AA defenses and a streamlined bridge structure.
Modules
 |
Rate of Fire (shots/min) | 180° Turn Time (sec) | Maximum Dispersion (m) | Maximum HE Shell Damage (HP) | Chance of Fire on Target Caused by HE Shell (%) | Maximum AP Shell Damage (HP) |
Research price (exp) |
Purchase price ( | |
|---|---|---|---|---|---|---|---|---|---|
| 127 mm/50 3rd Year Type on a Type C mount | 10.5 | 22.8 | 97 | 2,150 | 9 | 2,200 | 0 | 1,000,000 |
 |
Hit Points (HP) | Armor (mm) | Armor (mm) | Main Turrets (pcs.) | Secondary Gun Turrets (pcs.) | AA Mounts (pcs.) | Torpedo Tubes (pcs.) | Hangar Capacity (pcs.) |
Research price (exp) |
Purchase price ( | |
|---|---|---|---|---|---|---|---|---|---|---|---|
| Yūgumo (A) | 13,900 | 6 | 20 | 3 | 4/3/3 | 2 | 0 | 980,000 | |||
| Yūgumo (B) | 15,500 | 6 | 20 | 3 | 4/5/3 | 2 | 26,000 | 2,000,000 |
 |
Rate of Fire (shots/min) | Torpedo Tubes Reload Time (sec) | 180° Turn Time (sec) | Maximum Damage (HP) | Torpedo Speed (knot) | Torpedo Range (km) |
Research price (exp) |
Purchase price ( | |
|---|---|---|---|---|---|---|---|---|---|
| Type93 mod. 2 | 0.5 | 112 | 7.2 | 20,966 | 67 | 10 | 0 | 1,800,000 | |
| Type93 mod. 3 | 0.5 | 114 | 7.2 | 23,766 | 67 | 12 | 30,000 | 2,500,000 | |
| Type F3 | 0.6 | 104 | 7.2 | 21,366 | 76 | 8 | 30,000 | 2,500,000 |
 |
IDS_SHIP_PARAM_SUO_INCREASE_DIST (%) | Maximum Firing Range (km) |
Research price (exp) |
Purchase price ( | |
|---|---|---|---|---|---|
| Type9 mod. 1 | 0 | 0 | 530,000 | ||
| Type9 mod. 2 | 0 | 14,000 | 1,100,000 |
 |
Maximum Speed (knot) |
Research price (exp) |
Purchase price ( | |
|---|---|---|---|---|
| Propulsion: 52,000 hp | 35.5 | 0 | 900,000 |
Compatible Upgrades
| Slot 1 |
|||||
|---|---|---|---|---|---|
| Slot 2 |
|||||
| Slot 3 |
|||||
| Slot 4 |
|||||
| Slot 5 |
|||||
| Slot 6 |
Player Opinion
Performance
Replacing Kagero (as of Update 0.5.15) as the penultimate destroyer in this particular branch of the Japanese destroyer line is Yūgumo. Captains who have progressed this far up the branch will be well-familiar with the layout of the ship, but will probably be disappointed in how few improvements there are over Tier VIII's Kagero lurking inside the hull.
One drastic improvement is the reload time of Yūgumo’s main battery guns. Her reload time is a mere 5.7 seconds; glacially slow by American destroyer standards, but a speed heretofore unseen with Japanese 127 mm guns. With the right mix of upgrades and commander skills that number can drop even lower, bringing her DPM close to a true gunboat, though she will still lack the raw DPM of American destroyers or the excellent ballistics of Russian destroyers. Her main battery range goes up significantly as well, further emphasizing the benefits of her improved reload speed.
From Update 0.6.6 Yūgumo has the option of two torpedo upgrades from the stock Type 93 mod. 2s. First, there are the Type F3s, which are outrageously fast at 76 knots but at the cost of only having 8 km of range. The more recommended choice, however, are the Type 93 mod. 3s, which remain at 67 knots but offer a boost in range to 12 km as well as a damage increase. Most captains will choose to use the new final upgrade slot to improve the torpedo reload speed, further increasing her torpedo potential.
Most everything else remains as it was from Kagero. Her speed improves slightly (0.5 knots), and her handling characteristics remain virtually identical. Her main battery is now dual-purpose, but practically in name only; it does a better job giving away her presence to nearby planes than actually defending the ship and should generally be ordered to hold fire. Her health pool goes up by the slimmest of amounts (400 hit points). Even Yūgumo’s detection radius is worse than Kagero’s, but it's very slight and not a serious handicap.Pros:
- Excellent reload speed for her main battery guns (in comparison to most other Japanese destroyers, that is).
- Has access to Upgrade Slot 3.
- Lowest detection radius among Tier IX destroyers.
- Very potent torpedo armament, capable of impressive reload speeds with the right mix of upgrades and commander skills.
- Can equip Torpedo Reload Booster.
Cons:
- Lowest top speed among Tier IX destroyers; Yūgumo has a difficult time escaping enemy gunboat destroyers that are able to close with her.
- Highly vulnerable to enemy aircraft, especially if equipping Torpedo Reload Booster instead of Smoke Generator.
- Turret traverse time for main battery remains slow.
- Detection range of Type 93 torpedoes gives opponents more time to react than torpedoes from Fletcher or Udaloi.
Research
Optimal Configuration
Upgrades
Like so many of her Japanese destroyer brethren before her, Yugumo’s flexibility in upgrade options is somewhat limited. Upgrade Slot 1 is best filled with Main Armaments Modification 1, while Upgrade Slot 4 and Upgrade Slot 5 should be filled with Propulsion Modifications 1 and 2, respectively. Concealment System Modification 1 is mandatory in Upgrade Slot 6. This leaves only a couple of upgrade slots that can truly customize how Yugumo plays.
Torpedo Build: Most captains will opt to fully maximize Yūgumo’s torpedo armament. This means installing Torpedo Tubes Modification 3 in Upgrade Slot 3, and either Aiming Systems Modification 1 or Main Battery Modification 2 in Upgrade Slot 2. The latter may seem like an odd choice, but is a good hedge bet for when she finds herself in a close-quarters gunfight with the likes of a Fletcher or Gearing. In either case, stacking Torpedo Tubes Modification 3 with Tier 3 commander skill Torpedo Armament Expertise brings Yūgumo’s torpedo reload time for her Type 93 torpedoes down to slightly under 86 seconds; it drops to less than 80 seconds for the Type F3 torpedoes. These are terrifyingly low numbers that no opposing battleship driver wants to hear given how hard those torpedoes hit.
Main Battery Build: Alternatively, Yūgumo is one of the only Japanese destroyers not named Akizuki that can realistically consider tailoring the ship around her main battery guns. By combining Aiming Systems Modification 1 in Upgrade Slot 2, Main Battery Modification 3 in Upgrade Slot 3, and the Tier 1 commander skill Basic Firing Training, Yūgumo drops her main battery reload time down to 4.5 seconds. While this is still 50% slower than Fletcher, it compares favorably to Udaloi. Playing Yūgumo in this style of build is challenging, but not impossible.
Commander Skills
| Recommended Commander Skills | ||||||||
|---|---|---|---|---|---|---|---|---|
| Cost (points) |
Endurance | Attack | Support | Versatility | ||||
| 1 |
★★ |
★★★ |
|
Χ |
Χ |
Χ |
|
Χ |
| 2 |
★ |
★ |
★★★ |
|
★ |
Χ |
★★ |
★★★ |
| 3 |
★ |
★★ |
★ |
Χ |
★ |
★★★ |
★★ |
★ |
| 4 |
|
|
|
Χ |
★★ |
Χ |
★★ |
★★★ |
| Key: ★★★ - Extremely Useful ★★ - Frequently Useful ★ - Occasionally Useful No stars - Meh Χ - Not recommended | ||||||||
Consumables
Yugumo can equip the following consumables:
- Slot 1: Damage Control Party

- Slot 2: Smoke Generator
 or Torpedo Reload Booster
- Slot 3: Engine Boost

Camouflage
Type 1, 2, or 5 camouflage can be equipped for credits; Types 1 or 5 are recommended at a minimum to reduce detectibility range.
Players who wish to spend doubloons can equip Yūgumo with Type 19 camouflage that lowers her detection radius, reduces the accuracy of incoming shells, reduces her repair costs, and increases the amount of experience she earns.
Signals
Yūgumo’s reliance on her torpedoes for much of her damage output make equipping Juliet Whiskey Unaone signal flags highly attractive, particularly for Torpedo Build captains; Torpedo Build captains will want to equip November Foxtrot flags as well, in order to improve the cooldown speed of Torpedo Reload Booster. Main Battery Build captains should equip India X-Ray and Victor Lima flags. Juliet Charlie and Sierra Mike flags are recommended regardless of build.Gallery
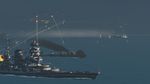
Yūgumo fires a salvo of torpedoes.
Yūgumo lays a smokescreen to shield a friendly Friedrich der Große battleship.
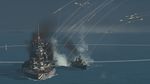
Yūgumo joins an Amagi in the melee.
Yūgumo fires a broadside at range.


Historical Info
Historical Gallery


Video
References
- Japanese destroyer Yūgumo (1941) - Wikipedia
- Yūgumo-class destroyer - Wikipedia
- Japanese Destroyers - Yugumo - World of Warships Official Channel - YouTube