Yamato
| Revision as of 21:17, 12 September 2018 tried to have more accurate information in here, the text sounds a bit "dramatic" | Revision as of 05:52, 25 September 2018 updated inaccuracies | |||
| Line 218: | Line 218: | |||
| ===Historical Inaccuracies=== | ===Historical Inaccuracies=== | |||
| ? | * | + | * Two triple mount 25mm anti-aircraft guns fitted on 'Y' turret are missing. | |
| ? | * ''Yamato''’s overall dark gray paint scheme is missing. | + | * ''Yamato''’s overall dark gray paint scheme is missing. Demounting the premium camouflage reveals the ship's historical appearance, but players will not benefit from the camouflage's bonuses. | |
| ? | * Light and dark green camouflage was only applied to aircraft carriers. | + | * Light and dark green camouflage was only applied to aircraft carriers. ''Yamato'' was painted in dark gray throughout her career. | |
| |HistoricalGallery=<!-- write below list of files without tags. description (if necessary) for each should be separated with | --><gallery> | |HistoricalGallery=<!-- write below list of files without tags. description (if necessary) for each should be separated with | --><gallery> | |||
Revision as of 05:52, 25 September 2018
| 460 mm/45 Type 94 in a triple turret3 х 3 pcs. |
| Rate of Fire2 shots/min. |
| Reload Time30 sec. |
| Rotation Speed3 deg./sec. |
| 180 Degree Turn Time60 sec. |
| Firing Range26.63 km. |
| Maximum Dispersion275 m. |
| HE Shell460 mm HE Type0 |
| Maximum HE Shell Damage7,300 |
| Chance of Fire on Target Caused by HE Shell35 % |
| Initial HE Shell Velocity805 m./s. |
| HE Shell Weight1360 kg. |
| AP Shell460 mm AP/APC Type91 |
| Maximum AP Shell Damage14,800 |
| Initial AP Shell Velocity780 m./s. |
| AP Shell Weight1460 kg. |
| 127 mm/40 Type 89 on a Model A1 Mod.3 mount6 х 2 pcs. |
| Firing Range7.3 km. |
| Rate of Fire10 shots/min. |
| Reload Time6 sec. |
| HE Shell127 mm HE Type0 |
| Maximum HE Shell Damage2,100 |
| Initial HE Shell Velocity725 m./s. |
| Chance of Fire on Target Caused by HE Shell8 % |
| 127 mm/40 Type 89 on a Model A1 mount6 х 2 pcs. |
| Firing Range7.3 km. |
| Rate of Fire12 shots/min. |
| Reload Time5 sec. |
| HE Shell127 mm HE Type0 |
| Maximum HE Shell Damage2,100 |
| Initial HE Shell Velocity725 m./s. |
| Chance of Fire on Target Caused by HE Shell8 % |
| 155 mm/60 3rd Year Type in a triple turret2 х 3 pcs. |
| Firing Range7.3 km. |
| Rate of Fire5 shots/min. |
| Reload Time12 sec. |
| HE Shell155 mm HE Type0 |
| Maximum HE Shell Damage2,600 |
| Initial HE Shell Velocity925 m./s. |
| Chance of Fire on Target Caused by HE Shell10 % |
| 127 mm/40 Type 89 on a Model A1 Mod.3 mount6 х 2 pcs. |
| . . . Average Damage per Second60.6 |
| . . . Firing Range5.01 km. |
| 127 mm/40 Type 89 on a Model A1 mount6 х 2 pcs. |
| . . . Average Damage per Second60.6 |
| . . . Firing Range5.01 km. |
| 25 mm/60 Type 96 on a triple mount4 х 3 pcs. |
| . . . Average Damage per Second13.2 |
| . . . Firing Range2.49 km. |
| 25 mm/60 Type 96 on a triple mount24 х 3 pcs. |
| . . . Average Damage per Second79.2 |
| . . . Firing Range2.49 km. |
| 25 mm/60 Type 96 on a triple mount16 х 3 pcs. |
| . . . Average Damage per Second52.8 |
| . . . Firing Range2.49 km. |
| 25 mm/60 Type 96 on a single mount6 х 1 pcs. |
| . . . Average Damage per Second10.8 |
| . . . Firing Range2.49 km. |
| 25 mm/60 Type 96 on a triple mount8 х 3 pcs. |
| . . . Average Damage per Second26.4 |
| . . . Firing Range2.49 km. |
| 13 mm/76 Type 93 on a twin mount2 х 2 pcs. |
| . . . Average Damage per Second4 |
| . . . Firing Range1.2 km. |
| Maximum Speed27 knot |
| Turning Circle Radius900 m. |
| Rudder Shift Time22.1 sec. |
| Surface Detectability Range17.46 km. |
| Air Detectability Range12.79 km. |
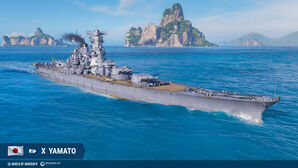
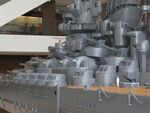
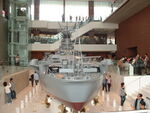
Yamato — Japanese Tier X battleship.
The biggest warship of World War II and the world's largest battleship. Yamato was designed around the idea that an individual ship could have superiority over any battleship of a potential enemy. Her main guns had overwhelming firepower. The ship maintained a very high level of survivability due to reliable armor and robust torpedo protection. Yamato’s AA capabilities were highly efficient due to carrying numerous AA artillery guns.
Modules
Compatible Upgrades
| Slot 1 |
|||||
|---|---|---|---|---|---|
| Slot 2 |
|||||
| Slot 3 |
|||||
| Slot 4 |
|||||
| Slot 5 |
|||||
| Slot 6 |
Player Opinion
Performance
The pinnacle of all Japanese battleship design philosophy and possibly of the entire world, Yamato gains its place as the one of the most solid battleship at her tier. She has the second largest hit points of any ship in the game at a staggering 97200 next to Großer Kurfürst’s 105800 and her guns have the highest citadel hit damage of any round in the game, at 14800 HP per citadel hit. While individual AA mounts are mediocre, the sheer number of AA guns, nearly 150 25mm AA barrels (in real life, 162 25mm AA barrels in latest upgrade) and 24 127mm DP guns, provides a mild deterrent particularly against lower tier carriers. She, along with her sister ship Musashi holds the record for best torpedo protection in game, with a value of 56%, which is rather surprising considering that in real life, they both suffered from weak torpedo protection due to design flaws with the area joining the upper and lower armour belts. In game, Yamato represents the upgraded 1945 variant while Musashi depicts the original version. With a turning radius of 800m and a top speed of 27.2 kts, she is also surprisingly maneuverable despite her large size, though still quite short of her real life maneuverability. However, with a long rudder shift time and extremely slow turret traverse, one must plan all actions in advance, or risk being caught off-guard and unable to react. The guns, while having better accuracy than Conqueror, Montana and Großer Kurfürst, are very unforgiving, with a 30 second reload stock, which can be decreased to just under 27 seconds at the expense of further reducing its abysmal turret traverse by using a piece of equipment. Being one of the biggest ships in the game, Yamato is constantly targeted by Aircraft Carriers, and despite the numerous AA guns, high tier carriers can still get planes through, so it is advised to stay near ships that have solid AA suites such as cruisers for an AA "aegis" to be created. In addition, even though your armor is the most solid in the game you should still try to angle your ship as sometimes shells may have a chance to hit home and deal glaring damage. Keep in mind that her high citadel can easily be hit if the enemy manages to penetrate your armor.
Despite all of these drawbacks, Yamato is by far, the most powerful battleship in the game in a long ranged and defensive position. She may not be the fastest, the stealthiest or the Tier X battleship with the highest RoF, but her armor, gun caliber and health more than makes up for it. Her guns are so massive that they can score citadels on virtually any Tier VIII+ battleship and combined with their immense accuracy, she is a formidable foe. With good aim and some luck, Yamato's glaring damage can wipe battleships off the sea, allowing other more vulnerable cruisers, such as Des Moines and Hindenburg, to quickly mop up the remaining enemies while simultaneously serving as an AA screen for Yamato. Overall, she is a powerful asset that, with the right build, good teammates and in the hands of a skilled player, will dominate the battle and can even control it.Pros:
- Unrivaled main battery guns that can even penetrate other battleships at close range when they're bow on.
- Extremely good dispersion, but landing hits on targets beyond 18km is still challenging.
- Accuracy and firing time can be improved even further with a legendary upgrade.
- Second largest health pool and heaviest armor in the game.
- Large quantity of secondaries can easily kill a destroyer at very close range.
- Surprisingly good agility for its size.
- Impressive torpedo bulge as long as torpedoes hit her torpedo belt.
- Rather good concealment for her size, with the right build, she can get down to 13.5km or less, just a touch bigger than a similarly built Montana
- Longest main battery stock range in the game.
- Legendary upgrade takes advantage of her massive range and improves her accuracy.
- Insane turret armor that deflects all but tier X battleship AP shells at point blank.
- No ship is safe when facing Yamato's guns, even Yamato itself; their caliber is so big they can even score citadel hits on bow-on battleships (due to overmatching rule)!
- Firing from a distance of over 20 km will form an immunity zone that helps deflect AP shell effectively, but don't expect to reliably score hits against an enemy.
- Despite modest muzzle velocity, the huge shell mass means the shell travel time even at longer ranges is quite respectable.
- Longest range in the game at 26.6 km, Spotting Aircraft can increase this to 32 km, which basically allows you to hit enemy ships across the entire map.
Cons:
- Extremely large size (but still smaller than Izumo and Großer Kurfürst) makes direct hits more likely.
- Very high notoriety and potential danger make her a priority target for the enemy team the moment she becomes visible(though this is somewhat mitigated by her decent detection radius).
- Though buffed, turret traverse rate of 60 seconds for traversing 180 degrees is quite slow, decreased even further if a legendary upgrade is taken.
- Long rudder shift time.
- The majority of her AA defenses are short ranged, rendering her unable to shoot down planes before they drop their payloads. Her 127mm guns have underwhelming AA damage output.
- Despite her citadel being well armored, its large size and octagonal shape mean she is still very vulnerable to any sorts of citadel damage when improperly angled.
Research
Optimal Configuration
Upgrades
The recommended upgrades for Yamato are as follows:
- Slot 1: Main Armaments Modification 1
 *
*
- Slot 2: Damage Control System Modification 1

- Slot 3: Aiming Systems Modification 1
 *
*
- Slot 4: Damage Control System Modification 2

- Slot 5: Concealment System Modification 1

- Slot 6: Main Battery Modification 3
 */Main Battery Director System (
 )*
)*
Slot 1 provides players with the first option in choosing a desired role. Typically, Main Armaments Modification 1 is recommended to provide additional survivability to the main battery, but players who desire to specialize in the secondary or anti-aircraft armament should choose Auxiliary Armaments Modification 1 ![]() .
.
Slot 3 allows for further specialization. Generally, Aiming Systems Modification 1 is recommended because it reduces shell dispersion of the main and secondary armaments. To increase the effectiveness of the anti-aircraft armament, mount AA Guns Modification 2 (![]() ). Players wishing to specialize for secondaries should mount Secondary Battery Modification 1 (
). Players wishing to specialize for secondaries should mount Secondary Battery Modification 1 (![]() ).
).
Slot 6 gives players options to finalize their build. For gunnery, mount Main Battery Modification 3 to decrease the reload time of the main battery, or Enhanced Main Battery Guns for lower dispersion and a reload boost(albeit only half as much as the former). Template:AA Guns Modification 3 should be mounted for AA duties to increase the DPS of AA guns. Players wishing to increase the effectiveness of the secondaries should mount Secondary Battery Modification 3 (![]() ).
).
Commander Skills
Yamato can be built for survivability, anti-aicraft, or secondary focus. For a survival captain, skills like Fire Prevention and Basics of Survivability are very important. Captains wanting to focus on secondaries should pick up Basic Firing Training, Advanced Firing Training, and possibly Manual Fire Control for Secondary Armament. Captains wishing to spec for anti-aircraft should take Manual Fire Control for AA Armament. Concealment Expert is highly recommended with all builds, but one must weigh the benefits and trade-offs of investing an additional four points here instead of somewhere else.
| Recommended Commander Skills | ||||||||
|---|---|---|---|---|---|---|---|---|
| Cost (points) |
Endurance | Attack | Support | Versatility | ||||
| 1 |
★★ |
★ |
|
|
|
|
|
|
| 2 |
★★ |
★★ |
★★★ |
|
|
|
★★★ |
|
| 3 |
★★ |
|
|
|
★ |
★★★ |
|
★★ |
| 4 |
★ |
★★★ |
|
|
★★ |
|
|
★★★ |
| Key: ★★★ - Extremely Useful ★★ - Frequently Useful ★ - Occasionally Useful No stars - Meh Χ - Not recommended | ||||||||
Consumables
Yamato can equip the following consumables:
- Slot 1: Damage Control Party

- Slot 2: Repair Party

- Slot 3: Spotting Aircraft
 or Catapult Fighter
It is strongly recommended to take the Premium versions of Damage Control Party ![]() and Repair Party
and Repair Party ![]() to maximize surviveability. Catapult Fighter
to maximize surviveability. Catapult Fighter ![]() is also recommended to defend against aircraft.
is also recommended to defend against aircraft.
Camouflage
Type 1, 2, or 5 camouflage can be equipped for credits; Types 2 or 5 are recommended at a minimum to reduce the accuracy of incoming shells.
Players who wish to spend doubloons can equip Yamato with Type 20 camouflage that lowers her detection radius, reduces the accuracy of incoming shells, reduces her repair costs, increases her credit earnings, and increases the amount of experience she earns. She also has an alternative permanent camo, "K-117" it is only obtainable by completing the HSF Collection as an end reward. K-117 provides most of the same benifets as the Type 20 the only change between the camos are that the Type 20 provides +20% more credits while the K-117 provides +50% in commander XP in exchange for the additional credit earning; however the collection was a limited time by signup between version 0.7.2 and 0.7.3, as such it is unobtainable.
Signals
As with all battleships, Yamato comes with 8 signal flag slots. The three most important flags are India Delta, Juliet Yankee Bissotwo and India Yankee; all of which will improve your surviveability. If the captain goes with the Secondary Build, the addition of Mike Yankee Soxisix will further improve the performance of Yamato`s secondaries.
Recommended Signal Flags 
| |||||
|---|---|---|---|---|---|
| Combat | |||||
 ★ |
 ★★ |
 ★★★ |
 ★ |

|

|

|
 ★★★ |
 ★ |
 ★ |
 ★ |
 ★★★ |

|

| ||||
Note: Use of the Juliet Charlie signal makes detonation impossible.
Gallery
Historical Info
Historical Gallery
Video
