Yamato
| Revision as of 16:52, 5 January 2017 | Revision as of 05:35, 6 January 2017 Added Research, Camouflage and Commander Skills sections. Re-organized Historical section. Improved wording of Pros/Cons. | |||
| Line 3: | Line 3: | |||
| |Anno=<!-- you can write below short description for the ship. it will replace default once. --> | |Anno=<!-- you can write below short description for the ship. it will replace default once. --> | |||
| + | The biggest warship of World War II and the world's largest battleship. ''Yamato'' was designed around the idea that an individual ship could have superiority over any battleship of a potential enemy. Her main guns had overwhelming firepower. The ship maintained a very high level of survivability due to reliable armor and robust torpedo protection. ''Yamato''’s AA capabilities were highly efficient due to carrying numerous AA artillery guns. | |||
| |Performance=<!-- write text about performance in battles below --> | |Performance=<!-- write text about performance in battles below --> | |||
| ? | The pinnacle of all Japanese battleship design philosophy and possibly of the entire world, | + | The pinnacle of all Japanese battleship design philosophy and possibly of the entire world, ''Yamato'' gains its place as the most solid battleship at her tier. She has the second largest hit points of any ship in the game at a staggering 97200 next to ''[[Großer Kurfürst]]''’s 105k and her guns have the highest citadel hit damage of any round in the game, at 14800 HP per citadel hit. The AA suite aboard matches her size and potency, with nearly 150 25mm AA barrels (in real life, 162 25mm AA barrels in latest upgrade). With a turning radius of 800m and a top speed of 27.2 kts, she is also surprisingly maneuverable despite her large size, but with a long rudder shift time and extremely slow turret traverse, one must plan all actions in advance, or risk being caught off-guard and unable to react. The guns, while accurate, are very unforgiving, with a 30 second reload stock, which can be decreased to just under 27 seconds at the expense of further reducing its abysmal turret traverse further by using a piece of equipment. Being one of the biggest ships in the game, ''Yamato'' is constantly targeted by Aircraft Carriers, and despite the numerous AA guns, high tier carriers can still get planes through, so it is advised to stay near ships that have solid AA suites such as cruisers for an AA "aegis" to be created. In addition, even though your armor is the most solid in the game you should still try to angle your ship as sometimes shells may have a chance to hit home and deal glaring damage. Keep in mind that her citadel can easily be hit if the enemy manages to penetrate your armor. | |
| ? | + | {{VideoYT|Cs5RQneOrrs|320}} | ||
| ? | {{VideoYT|Cs5RQneOrrs}} | + | ||
| |Pros=<!-- write list of positive points below. use * as in ordinary wiki-list. --> | |Pros=<!-- write list of positive points below. use * as in ordinary wiki-list. --> | |||
| ? | * Unrivaled guns | + | * Unrivaled main battery guns that can even penetrate other battleships at close range when they're bow on. | |
| ? | * Extremely good dispersion but | + | * Extremely good dispersion, but landing hits on targets beyond beyond 18km is still challenging. | |
| ? | * Second largest | + | * Second largest health pool and heaviest armor in the game. | |
| ? | * Large quantity of secondaries can easily kill a | + | * Large quantity of secondaries can easily kill a destroyer at very close range. | |
| ? | * Surprisingly good agility for its size | + | * Surprisingly good agility for its size. | |
| ? | * Impressive torpedo bulge as long as torpedoes hit | + | * Impressive torpedo bulge as long as torpedoes hit her torpedo belt. | |
| ? | * | + | * Longest main battery range in the game, but shells take a long time to travel and are extremely inaccurate when firing at targets that far out. | |
| |Cons=<!-- write list of negative points below. use * as in ordinary wiki-list. --> | |Cons=<!-- write list of negative points below. use * as in ordinary wiki-list. --> | |||
| ? | * Extremely large size but still smaller than Izumo and | + | * Extremely large size but still smaller than ''[[Izumo]]'' and ''[[Großer Kurfürst]]''. | |
| ? | * Very high notoriety and potential danger makes her a priority target | + | * Very high notoriety and potential danger makes her a priority target for the enemy team. | |
| ? | * Even with upgraded AA the lack of short range AA guns will make you very vulnerable to enemy carriers should their strike aircraft get close enough to dump their payload | + | * Even with upgraded AA the lack of short range AA guns will make you very vulnerable to enemy carriers should their strike aircraft get close enough to dump their payload. | |
| * Extremely slow turret traverse rate of 72 seconds for traversing 180 degrees. | * Extremely slow turret traverse rate of 72 seconds for traversing 180 degrees. | |||
| * Poor shell velocity of the main battery makes it difficult to hit distant targets. | * Poor shell velocity of the main battery makes it difficult to hit distant targets. | |||
| * Long rudder shift time. | * Long rudder shift time. | |||
| ? | * | + | * Casemate armor can be easily penetrated by other battleships, and even cruiser armor piercing rounds at close range. | |
| ? | + | |||
| * Extremely vulnerable to fires due to the percent damage dealt to health pools. | * Extremely vulnerable to fires due to the percent damage dealt to health pools. | |||
| ? | ||||
| * Portion of her frontal deck armor relies heavily on angle. | * Portion of her frontal deck armor relies heavily on angle. | |||
| ? | * | + | * Armor penetration at long ranges is abysmal. | |
| ? | * Despite being heavily armored, her citadel is still | + | * Despite being heavily armored, her citadel is still highly vulnerable when enemies have a clear shot at her broadside. | |
| ? | + | |||
| |Research=<!-- write text about priority sequence of research below --> | |Research=<!-- write text about priority sequence of research below --> | |||
| + | As a Tier X ship, ''Yamato'' has no additional modules to research. | |||
| ? | + | |OptimalConfiguration=<!-- write some general text about selection of optimal configuration below (optional)--> | ||
| ? | < | + | ||
| ? | + | |Upgrades=<!-- write text about best upgrades below --> | ||
| ? | + | |||
| ? | ==== | + | |CommanderSkills=<!-- write text about best set of Commander Skills below --> | |
| ? | + | |||
| + | {{Commander Skills | |||
| + | | Expert Loader= | |||
| + | | Basic Firing Training=1 | |||
| + | | Basics of Survivability=3 | |||
| + | | Expert Rear Gunner= | |||
| + | ||||
| + | | Expert Marksman=3 | |||
| + | | Torpedo Armament Expertise= | |||
| + | | Fire Prevention=2 | |||
| + | | Incoming Fire Alert= | |||
| + | | Last Stand= | |||
| + | ||||
| + | | Torpedo Acceleration= | |||
| + | | High Alert=2 | |||
| + | | Vigilance=2 | |||
| + | | Dogfighting Expert = | |||
| + | | Superintendent=3 | |||
| + | ||||
| + | | Demolition Expert= | |||
| + | | Advanced Firing Training=3 | |||
| + | | Survivability Expert= | |||
| + | | Aircraft Servicing Expert= | |||
| + | | Manual Fire Control for AA Armament=2 | |||
| + | ||||
| + | | Last Chance= | |||
| + | | Manual Fire Control for Secondary Armament=2 | |||
| + | | Preventative Maintenance=3 | |||
| + | | Concealment Expert=1 | |||
| + | | Air Supremacy= | |||
| + | | Jack of All Trades=2 | |||
| + | }} | |||
| + | ||||
| + | |Consumables=<!-- write text about selection of Consumables below --> | |||
| + | ||||
| + | ||||
| + | |Camouflage=<!-- write text about useful camouflage below --> | |||
| + | [[Ship:Camouflage#Standard Camouflage|Type 1, 2, or 5 camouflage]] can be equipped for credits; Types 2 or 5 are recommended at a minimum to reduce the accuracy of incoming shells. | |||
| + | ||||
| + | Players who wish to spend doubloons can equip ''Yamato'' with [[Ship:Camouflage#Permanent_Camouflage|Type 20 camouflage]] that lowers her detection radius, reduces the accuracy of incoming shells, reduces her repair costs, increases her credit earnings, and increases the amount of experience she earns. | |||
| + | ||||
| + | |Signals=<!-- write text about best set of signals below --> | |||
| |Gallery=<!-- write below list of files without tags. description (if necessary) for each should be separated with template {{!}} --><gallery> | |Gallery=<!-- write below list of files without tags. description (if necessary) for each should be separated with template {{!}} --><gallery> | |||
| ? | </gallery> | + | </gallery> | |
| ? | + | |||
| ? | + | |||
| ? | + | |||
| ? | + | |||
| ? | + | |||
| ? | ==== | + | |History=<!-- write text below --> | |
| ? | :62,315 tons displacement, standard | + | <div class="thumb tright"> | |
| ? | :263m length | + | {{AnnoWiki|content=<h3>Construction</h3> | |
| ? | :36.9m beam | + | :Kure Naval Yard; Kure, Japan | |
| + | :Laid down: 4 November 1937 | |||
| + | :Launched: 8 August 1940 | |||
| + | :Commissioned: 16 December 1941 | |||
| + | ---- | |||
| + | ===Specifications=== | |||
| + | :62,315 tons displacement, standard | |||
| + | :263m length | |||
| + | :36.9m beam | |||
| :10.86m draft | :10.86m draft | |||
| ? | + | ---- | ||
| ====Machinery==== | ====Machinery==== | |||
| :12 boilers, 4 turbines | :12 boilers, 4 turbines | |||
| ? | + | ---- | ||
| ====Performance==== | ====Performance==== | |||
| ? | :27. | + | :27.4 knots at 150,000 shaft horsepower | |
| ? | :7,200nm at | + | :7,200nm at 16 knots | |
| ? | + | ---- | ||
| ====Armor==== | ====Armor==== | |||
| ? | :Main belt: 410mm | + | :Main belt: 410mm | |
| ? | :Decks: 200-232mm main | + | :Decks: 200-232mm main | |
| ? | :Bulkheads: 300mm | + | :Bulkheads: 300mm | |
| ? | :Barbettes and Turrets: 546mm barbette, 650mm turrets | + | :Barbettes and Turrets: 546mm barbette, 650mm turrets | |
| :Conning tower: 500mm | :Conning tower: 500mm | |||
| ? | + | ---- | ||
| ====Armament==== | ====Armament==== | |||
| =====Main===== | =====Main===== | |||
| :Nine (3x3) 460mm guns | :Nine (3x3) 460mm guns | |||
| =====Secondary===== | =====Secondary===== | |||
| ? | :Twelve (4x3) 155mm guns | + | :Twelve (4x3) 155mm guns | |
| :Twelve (6x2) 127mm dual purpose guns | :Twelve (6x2) 127mm dual purpose guns | |||
| =====Anti-Aircraft===== | =====Anti-Aircraft===== | |||
| ? | :Twenty-four (8x3) 25mm guns | + | :Twenty-four (8x3) 25mm guns | |
| :Four (4x1) 13mm guns | :Four (4x1) 13mm guns | |||
| ? | + | ---- | ||
| ====Aircraft==== | ====Aircraft==== | |||
| :7 float planes, 2 catapults | :7 float planes, 2 catapults | |||
| + | }}</div> | |||
| + | ||||
| + | ||||
| + | ||||
| ? | ||||
| ? | ||||
| ? | ||||
| ? | ||||
| ? | ||||
| {{VideoYT|zYrj3gzXgeA}} | {{VideoYT|zYrj3gzXgeA}} | |||
| + | ||||
| + | ||||
| + | ||||
| + | ||||
| + | ===History=== | |||
| + | ''Yamato'' (大和) was the lead ship of the ''Yamato''-class of Imperial Japanese Navy World War II battleships. She and her sister ship, ''Musashi'' (武藏) , were the heaviest and most powerfully armed battleships ever constructed, displacing 72,800 tonnes at full load and armed with nine 46 cm (18.1 inch) 45 Caliber Type 94 main guns. Neither ship survived the war. | |||
| + | ||||
| + | Named after the ancient Japanese Yamato Province, ''Yamato'' was designed to counter the numerically superior battleship fleet of the United States, Japan's main rival in the Pacific. She was laid down in 1937 and formally commissioned a week after the Pearl Harbor attack in late 1941. Throughout 1942, she served as the flagship of the Japanese Combined Fleet, and in June 1942 Admiral Isoroku Yamamoto directed the fleet from her bridge during the Battle of Midway, a disastrous defeat for Japan. ''Musashi'' took over as the Combined Fleet flagship in early 1943, and ''Yamato'' spent the rest of the year, and much of 1944, moving between the major Japanese naval bases of Truk and Kure in response to American threats. Although present at the Battle of the Philippine Sea in June 1944, she played no part in the battle. | |||
| + | ||||
| + | The only time ''Yamato'' fired her main guns at enemy surface targets was in October 1944, when she was sent to engage American forces invading the Philippines during the Battle of Leyte Gulf. On the verge of success the Japanese force turned back, believing they were engaging an entire US carrier fleet rather than the light escort carrier group that was all that stood between the battleship and the vulnerable troop transports. | |||
| + | ||||
| + | During 1944, the balance of naval power in the Pacific decisively turned against Japan, and by early 1945 its fleet was much depleted and badly hobbled by critical fuel shortages in the home islands. In a desperate attempt to slow the Allied advance, ''Yamato'' was dispatched on a one-way mission to Okinawa in April 1945, with orders to beach herself and fight until destroyed protecting the island. The task force was spotted south of Kyushu by US submarines and aircraft, and on 7 April 1945 she was sunk by American carrier-based bombers and torpedo bombers with the loss of most of her crew. | |||
| + | ||||
| |HistoricalGallery=<!-- write below list of files without tags. description (if necessary) for each should be separated with template {{!}} --><gallery> | |HistoricalGallery=<!-- write below list of files without tags. description (if necessary) for each should be separated with template {{!}} --><gallery> | |||
| ? | image:Yamato_during_Trial_Service.jpg|Yamato on trials in 1941 | + | image:Yamato_during_Trial_Service.jpg|''Yamato'' on trials in 1941 | |
| ? | image:YamatoClassBattleships.jpg|Yamato and Musashi anchored in the waters off of the Truk Islands in 1943 | + | image:YamatoClassBattleships.jpg|''Yamato'' and ''Musashi'' anchored in the waters off of the Truk Islands in 1943 | |
| ? | image:Yamato_history_1.jpg | + | image:Yamato_history_1.jpg| | |
| ? | image:Yamato_hit_by_bomb.jpeg | + | image:Yamato_hit_by_bomb.jpeg| | |
| ? | File:Yamato sea trials 2.jpg|Yamato undergoing trials | + | File:Yamato sea trials 2.jpg|''Yamato'' undergoing trials | |
| ? | File:Yamato model AA guns.jpg| | + | File:Yamato model AA guns.jpg|''Yamato''’s port-side anti-aircraft armament as depicted in the model of the ship at the 'Yamato Museum' in Kure | |
| File:Yamato-armorsheme-DE - magazines cut.svg|Protection schematics of the class at the rear turret. Here is another cut amidships | File:Yamato-armorsheme-DE - magazines cut.svg|Protection schematics of the class at the rear turret. Here is another cut amidships | |||
| File:YAMATO Moder.JPG|Visitors to the Yamato Museum examine the museum's 1:10 scale model of the battleship in 2006 | File:YAMATO Moder.JPG|Visitors to the Yamato Museum examine the museum's 1:10 scale model of the battleship in 2006 | |||
| ? | + | </gallery> | ||
| ? | + | |Video=<!-- put below video clips with using template VideoYT. You can use html-tags for formatting. --> | ||
| |Ref= <!-- write below --> | |Ref= <!-- write below --> | |||
| }}<!-- DO NOT DELETE THIS LINE. DO NOT INSERT ANYTHING BELOW THIS LINE --> | }}<!-- DO NOT DELETE THIS LINE. DO NOT INSERT ANYTHING BELOW THIS LINE --> | |||
Revision as of 05:35, 6 January 2017

| Research price249000 exp |
| Purchase price20,600,000 |
| Hit Points97,200 |
| 460 mm/45 Type 94 in a triple turret3 х 3 pcs. |
| Rate of Fire2 shots/min. |
| Reload Time30 sec. |
| Rotation Speed3 deg./sec. |
| 180 Degree Turn Time60 sec. |
| Firing Range26.63 km. |
| Maximum Dispersion275 m. |
| HE Shell460 mm HE Type0 |
| Maximum HE Shell Damage7,300 |
| Chance of Fire on Target Caused by HE Shell35 % |
| Initial HE Shell Velocity805 m./s. |
| HE Shell Weight1360 kg. |
| AP Shell460 mm AP/APC Type91 |
| Maximum AP Shell Damage14,800 |
| Initial AP Shell Velocity780 m./s. |
| AP Shell Weight1460 kg. |
| 127 mm/40 Type 89 on a Model A1 Mod.3 mount6 х 2 pcs. |
| Firing Range7.3 km. |
| Rate of Fire10 shots/min. |
| Reload Time6 sec. |
| HE Shell127 mm HE Type0 |
| Maximum HE Shell Damage2,100 |
| Initial HE Shell Velocity725 m./s. |
| Chance of Fire on Target Caused by HE Shell8 % |
| 127 mm/40 Type 89 on a Model A1 mount6 х 2 pcs. |
| Firing Range7.3 km. |
| Rate of Fire12 shots/min. |
| Reload Time5 sec. |
| HE Shell127 mm HE Type0 |
| Maximum HE Shell Damage2,100 |
| Initial HE Shell Velocity725 m./s. |
| Chance of Fire on Target Caused by HE Shell8 % |
| 155 mm/60 3rd Year Type in a triple turret2 х 3 pcs. |
| Firing Range7.3 km. |
| Rate of Fire5 shots/min. |
| Reload Time12 sec. |
| HE Shell155 mm HE Type0 |
| Maximum HE Shell Damage2,600 |
| Initial HE Shell Velocity925 m./s. |
| Chance of Fire on Target Caused by HE Shell10 % |
| 127 mm/40 Type 89 on a Model A1 Mod.3 mount6 х 2 pcs. |
| . . . Average Damage per Second60.6 |
| . . . Firing Range5.01 km. |
| 127 mm/40 Type 89 on a Model A1 mount6 х 2 pcs. |
| . . . Average Damage per Second60.6 |
| . . . Firing Range5.01 km. |
| 25 mm/60 Type 96 on a triple mount4 х 3 pcs. |
| . . . Average Damage per Second13.2 |
| . . . Firing Range2.49 km. |
| 25 mm/60 Type 96 on a triple mount24 х 3 pcs. |
| . . . Average Damage per Second79.2 |
| . . . Firing Range2.49 km. |
| 25 mm/60 Type 96 on a triple mount16 х 3 pcs. |
| . . . Average Damage per Second52.8 |
| . . . Firing Range2.49 km. |
| 25 mm/60 Type 96 on a single mount6 х 1 pcs. |
| . . . Average Damage per Second10.8 |
| . . . Firing Range2.49 km. |
| 25 mm/60 Type 96 on a triple mount8 х 3 pcs. |
| . . . Average Damage per Second26.4 |
| . . . Firing Range2.49 km. |
| 13 mm/76 Type 93 on a twin mount2 х 2 pcs. |
| . . . Average Damage per Second4 |
| . . . Firing Range1.2 km. |
| Maximum Speed27 knot |
| Turning Circle Radius900 m. |
| Rudder Shift Time22.1 sec. |
| Surface Detectability Range17.46 km. |
| Air Detectability Range12.79 km. |

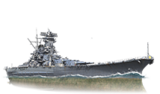
Yamato — Japanese Tier X battleship.
The biggest warship of World War II and the world's largest battleship. Yamato was designed around the idea that an individual ship could have superiority over any battleship of a potential enemy. Her main guns had overwhelming firepower. The ship maintained a very high level of survivability due to reliable armor and robust torpedo protection. Yamato’s AA capabilities were highly efficient due to carrying numerous AA artillery guns.
Modules
 |
Rate of Fire (shots/min) | 180° Turn Time (sec) | Maximum Dispersion (m) | Maximum HE Shell Damage (HP) | Chance of Fire on Target Caused by HE Shell (%) | Maximum AP Shell Damage (HP) |
Research price (exp) |
Purchase price ( | |
|---|---|---|---|---|---|---|---|---|---|
| 460 mm/45 Type 94 in a triple turret | 2 | 60 | 275 | 7,300 | 35 | 14,800 | 0 | 2,300,000 |
 |
Hit Points (HP) | Armor (mm) | Armor (mm) | Main Turrets (pcs.) | Secondary Gun Turrets (pcs.) | AA Mounts (pcs.) | Torpedo Tubes (pcs.) | Hangar Capacity (pcs.) |
Research price (exp) |
Purchase price ( | |
|---|---|---|---|---|---|---|---|---|---|---|---|
| Yamato | 97,200 | 19 | 650 | 3 | 6/6/2 | 2/6/52/6/6 | 0 | 3,300,000 |
 |
IDS_SHIP_PARAM_SUO_INCREASE_DIST (%) | Maximum Firing Range (km) |
Research price (exp) |
Purchase price ( | |
|---|---|---|---|---|---|
| Type10 mod. 1 | 0 | 0 | 2,100,000 |
 |
Maximum Speed (knot) |
Research price (exp) |
Purchase price ( | |
|---|---|---|---|---|
| Propulsion: 150,000 hp | 27 | 0 | 590,000 |
Compatible Upgrades
| Slot 1 |
|||||
|---|---|---|---|---|---|
| Slot 2 |
|||||
| Slot 3 |
|||||
| Slot 4 |
|||||
| Slot 5 |
|||||
| Slot 6 |
Player Opinion
Performance
The pinnacle of all Japanese battleship design philosophy and possibly of the entire world, Yamato gains its place as the most solid battleship at her tier. She has the second largest hit points of any ship in the game at a staggering 97200 next to Großer Kurfürst’s 105k and her guns have the highest citadel hit damage of any round in the game, at 14800 HP per citadel hit. The AA suite aboard matches her size and potency, with nearly 150 25mm AA barrels (in real life, 162 25mm AA barrels in latest upgrade). With a turning radius of 800m and a top speed of 27.2 kts, she is also surprisingly maneuverable despite her large size, but with a long rudder shift time and extremely slow turret traverse, one must plan all actions in advance, or risk being caught off-guard and unable to react. The guns, while accurate, are very unforgiving, with a 30 second reload stock, which can be decreased to just under 27 seconds at the expense of further reducing its abysmal turret traverse further by using a piece of equipment. Being one of the biggest ships in the game, Yamato is constantly targeted by Aircraft Carriers, and despite the numerous AA guns, high tier carriers can still get planes through, so it is advised to stay near ships that have solid AA suites such as cruisers for an AA "aegis" to be created. In addition, even though your armor is the most solid in the game you should still try to angle your ship as sometimes shells may have a chance to hit home and deal glaring damage. Keep in mind that her citadel can easily be hit if the enemy manages to penetrate your armor.
Pros:
- Unrivaled main battery guns that can even penetrate other battleships at close range when they're bow on.
- Extremely good dispersion, but landing hits on targets beyond beyond 18km is still challenging.
- Second largest health pool and heaviest armor in the game.
- Large quantity of secondaries can easily kill a destroyer at very close range.
- Surprisingly good agility for its size.
- Impressive torpedo bulge as long as torpedoes hit her torpedo belt.
- Longest main battery range in the game, but shells take a long time to travel and are extremely inaccurate when firing at targets that far out.
Cons:
- Extremely large size but still smaller than Izumo and Großer Kurfürst.
- Very high notoriety and potential danger makes her a priority target for the enemy team.
- Even with upgraded AA the lack of short range AA guns will make you very vulnerable to enemy carriers should their strike aircraft get close enough to dump their payload.
- Extremely slow turret traverse rate of 72 seconds for traversing 180 degrees.
- Poor shell velocity of the main battery makes it difficult to hit distant targets.
- Long rudder shift time.
- Casemate armor can be easily penetrated by other battleships, and even cruiser armor piercing rounds at close range.
- Extremely vulnerable to fires due to the percent damage dealt to health pools.
- Portion of her frontal deck armor relies heavily on angle.
- Armor penetration at long ranges is abysmal.
- Despite being heavily armored, her citadel is still highly vulnerable when enemies have a clear shot at her broadside.
Research
Optimal Configuration
Commander Skills
| Recommended Commander Skills | ||||||||
|---|---|---|---|---|---|---|---|---|
| Cost (points) |
Endurance | Attack | Support | Versatility | ||||
| 1 |
|
★★★ |
|
|
|
|
|
|
| 2 |
★★ |
★★ |
★★★ |
|
|
|
|
|
| 3 |
★★★ |
|
|
|
★ |
★★★ |
|
★★ |
| 4 |
★★ |
★★ |
|
|
★★★ |
|
|
★ |
| Key: ★★★ - Extremely Useful ★★ - Frequently Useful ★ - Occasionally Useful No stars - Meh Χ - Not recommended | ||||||||
Camouflage
Type 1, 2, or 5 camouflage can be equipped for credits; Types 2 or 5 are recommended at a minimum to reduce the accuracy of incoming shells.
Players who wish to spend doubloons can equip Yamato with Type 20 camouflage that lowers her detection radius, reduces the accuracy of incoming shells, reduces her repair costs, increases her credit earnings, and increases the amount of experience she earns.Gallery
Historical Info
Historical Gallery


