Zao

| Research price238000 exp |
| Purchase price20,000,000 |
| Hit Points44,900 |
| IDS_PJGM092_203MM554 х 3 pcs. |
| Rate of Fire4.38 shots/min. |
| Reload Time13.7 sec. |
| Rotation Speed6 deg./sec. |
| 180 Degree Turn Time30 sec. |
| Firing Range16.23 km. |
| Maximum Dispersion136 m. |
| HE Shell203 mm HE Type1 |
| Maximum HE Shell Damage3,400 |
| Chance of Fire on Target Caused by HE Shell19 % |
| Initial HE Shell Velocity920 m./s. |
| HE Shell Weight155 kg. |
| AP Shell203 mm AP Type92 |
| Maximum AP Shell Damage5,400 |
| Initial AP Shell Velocity920 m./s. |
| AP Shell Weight155 kg. |
| 100 mm/65 Type 98 on a Model A mount6 х 2 pcs. |
| Firing Range7.3 km. |
| Rate of Fire20 shots/min. |
| Reload Time3 sec. |
| HE Shell100 mm HE Type98 |
| Maximum HE Shell Damage1,700 |
| Initial HE Shell Velocity1000 m./s. |
| Chance of Fire on Target Caused by HE Shell6 % |
| 610 mm Quintuple4 х 5 pcs. |
| Rate of Fire0.58 shots/min. |
| Reload Time104 sec. |
| Rotation Speed25 deg./sec. |
| 180 Degree Turn Time7.2 sec. |
| TorpedoType F3 |
| Maximum Damage21,367 |
| Torpedo Speed76 knot |
| Torpedo Range8.01 km. |
| 100 mm/65 Type 98 on a Model A mount6 х 2 pcs. |
| . . . Average Damage per Second124.8 |
| . . . Firing Range5.01 km. |
| 40 mm/60 Type 5 on a twin mount9 х 2 pcs. |
| . . . Average Damage per Second99 |
| . . . Firing Range3.51 km. |
| 25 mm/60 Type 96 on a single mount20 х 1 pcs. |
| . . . Average Damage per Second36 |
| . . . Firing Range2.49 km. |
| 25 mm/60 Type 96 on a triple mount11 х 3 pcs. |
| . . . Average Damage per Second36.3 |
| . . . Firing Range2.49 km. |
| Maximum Speed34.5 knot |
| Turning Circle Radius840 m. |
| Rudder Shift Time7.7 sec. |
| Surface Detectability Range12.22 km. |
| Air Detectability Range7.46 km. |

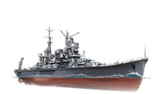
Zaō — Japanese Tier X cruiser.
A very powerful cruiser in all respects. Compared with the preceding classes of heavy cruisers, Zao had a greater number of main battery and AA guns, thick armor, and a reinforced torpedo armament.
Modules
 |
Rate of Fire (shots/min) | 180° Turn Time (sec) | Maximum Dispersion (m) | Maximum HE Shell Damage (HP) | Chance of Fire on Target Caused by HE Shell (%) | Maximum AP Shell Damage (HP) |
Research price (exp) |
Purchase price ( | |
|---|---|---|---|---|---|---|---|---|---|
| 203 mm/50 3rd Year Type No.2 in a triple turret | 4.4 | 30 | 136 | 3,400 | 19 | 5,400 | 0 | 2,100,000 |
 |
Hit Points (HP) | Armor (mm) | Armor (mm) | Main Turrets (pcs.) | Secondary Gun Turrets (pcs.) | AA Mounts (pcs.) | Torpedo Tubes (pcs.) | Hangar Capacity (pcs.) |
Research price (exp) |
Purchase price ( | |
|---|---|---|---|---|---|---|---|---|---|---|---|
| Zaō | 44,900 | 16 | 203 | 4 | 6 | 20/11/9/6 | 4 | 0 | 2,800,000 |
 |
Rate of Fire (shots/min) | Torpedo Tubes Reload Time (sec) | 180° Turn Time (sec) | Maximum Damage (HP) | Torpedo Speed (knot) | Torpedo Range (km) |
Research price (exp) |
Purchase price ( | |
|---|---|---|---|---|---|---|---|---|---|
| Type93 mod. 3 | 0.4 | 171 | 7.2 | 23,766 | 67 | 12 | 30,000 | 2,500,000 | |
| Type F3 | 0.6 | 104 | 7.2 | 21,366 | 76 | 8 | 0 | 2,500,000 |
 |
IDS_SHIP_PARAM_SUO_INCREASE_DIST (%) | Maximum Firing Range (km) |
Research price (exp) |
Purchase price ( | |
|---|---|---|---|---|---|
| Type10 mod. 1 | 0 | 0 | 1,600,000 |
 |
Maximum Speed (knot) |
Research price (exp) |
Purchase price ( | |
|---|---|---|---|---|
| Propulsion: 159,000 hp | 34.5 | 0 | 1,400,000 |
Compatible Upgrades
| Slot 1 |
|||||
|---|---|---|---|---|---|
| Slot 2 |
|||||
| Slot 3 |
|||||
| Slot 4 |
|||||
| Slot 5 |
|||||
| Slot 6 |
Player Opinion
Performance
The ninja among Tier X cruisers, the Zao specializes in striking with a single massive salvo, then slipping away before the enemy can retaliate.
Japanese cruiser captains will be delighted to know that the Zao finally gets an entire new model of gun, replacing the venerable 3rd Year Type that has been the trademark of the line since the Furutaka all the way back in Tier V. And what an upgrade it is! The HE and especially AP shells gain considerable potency, and Zao delivers them with an accuracy and velocity unprecedented in the line. To further sweeten the deal, Zao also gains two barrels for a total of twelve, and they are mounted in a friendlier setup of four triple turrets. The one downside is that the turret traverse---already a drawback of the line---suffers a further setback. This makes it especially important that the Zao is doing the ambushing rather than the reverse.
Fortunately this is not difficult to ensure: Zao can reach a detectability radius of 9.90 km with a (highly recommended) stealth build, which is the best among all Tier X heavy cruisers and nearly as good as the light cruisers. This stealth combines well with her high-alpha, low-rate-of-fire main battery: she can fire a punishing salvo, then go dark before the enemy can effectively return fire.
Her upgraded torpedoes offer another opportunity to use her stealth: with a 12 km range, she can launch these from beyond her detection radius, and even from beyond the range of radar. With two quintuple launchers on each side they can easily devastate unwary victims, and can serve as a good area denial tool. However, their poor firing angles and extremely long reload means they must be used judiciously, with their poor usefulness in brawls being worth a special mention because of their poor firing angles. (The stock torpedoes offer ludicrous speed and a faster reload, but their much shorter range renders them useless in most situations.)
Zao's survivability is on the lower side of T10 cruisers, and can sometimes be a mixed bag. She has the smallest health pool of all Tier X cruisers, even counting the light cruisers (with the exception of Smolensk and Colbert), and her armor is not particularly thick. Her anti-aircraft suite and consumable toolkit are unremarkable. However, she does have a few factors working in her favor. She is relatively fast and has a good rudder shift (albeit with a slightly lackluster turning circle), giving her decent ability to reposition and dodge incoming fire. Her citadel is quite hard to hit, is protected by a small but steeply angled turtleback, and her hull is rather narrow - the so-called "troll armor" - often allowing her to seem to cheat death by the virtue of avoiding taking citadel hits and yielding over penetrations against large caliber AP when broadside. Still, taking Zao into a stand-up fight is not advisable, as her low HP pool can prove to be her undoing in fights against enemy BBs with large caliber (434mm+) guns due to overmatch, as well as against some cruisers.Pros:
- Very good HE firepower with high alpha damage, good fire starting ability and superb accuracy (which can be further enhanced by equipping the Improved Bridge (
 ) unique upgrade and the Aiming Systems Modification 1
  upgrade)
- Good AP performance with high damage per volley, great accuracy and decent penetration
- Very good ballistics performance with fast flight time at all ranges
- High base speed of 34.5 knots
- Good maneuverability (7.7 seconds rudder shift time)
- Fast, powerful torpedoes, with two quintuple launchers on each side of the ship
- Excellent concealment with all relevant upgrades
Cons:
- One of the lowest health pools among Tier 10 cruisers
- Poor main battery firing angles - bringing all guns to bear while staying reasonably well protected can be quite tricky and must be done with care
- Subpar turret traverse speed
- Very poor torpedo firing arcs, with the launchers being located in the aft section
- Because of their exposed position, her torpedo launchers are prone to incapacitations and destruction
Research
Optimal Configuration
Upgrades
The recommended upgrades for Zaō are as follows:
- Slot 1: Main Armaments Modification 1
 or Spotting Aircraft Modification 1
- Slot 2: Engine Room Protection

- Slot 3: Aiming Systems Modification 1
- Slot 4: Steering Gears Modification 1
 or Propulsion Modification 1
- Slot 5: Concealment System Modification 1

- Slot 6: Gun Fire Control System Modification 2
 or Improved Bridge ()
Commander Skills
| Recommended Commander Skills | ||||||||
|---|---|---|---|---|---|---|---|---|
| Cost (points) |
Endurance | Attack | Support | Versatility | ||||
| 1 |
★★★ |
★ |
★★ |
Χ |
|
Χ |
★ |
Χ |
| 2 |
★ |
★★ |
★★ |
Χ |
Χ |
Χ |
★★★ |
Χ |
| 3 |
|
★★ |
|
Χ |
|
★★★ |
★ |
|
| 4 |
Χ |
|
Χ |
Χ |
|
|
★★ |
★★★ |
| Key: ★★★ - Extremely Useful ★★ - Frequently Useful ★ - Occasionally Useful No stars - Meh Χ - Not recommended | ||||||||
Consumables
Zaō can equip the following consumables:
- Slot 1: Damage Control Party

- Slot 2: Defensive AA Fire
 or Hydroacoustic Search
- Slot 3: Spotting Aircraft
 or Catapult Fighter
- Slot 4: Repair Party

Camouflage
Type 1, 2, or 5 camouflage can be equipped for credits; Types 1 or 5 are recommended at a minimum to reduce detectability range.
Players who wish to spend doubloons can equip Zaō with Type 20 camouflage that lowers her detection radius, reduces the accuracy of incoming shells, reduces her repair costs, and increases the amount of experience she earns.
Signals
Recommended Signal Flags 
| |||||
|---|---|---|---|---|---|
| Combat | |||||
 ★ |

|

|

|
 ★★★ |
 ★★★ |

|

|
 ★ |

|
 ★ |
 ★★★ |

|

| ||||
Note: Use of the Juliet Charlie signal makes detonation impossible.
Gallery
Historical Info
Historical Gallery


