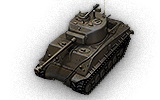
M4A3E8 Sherman
| Revision as of 08:47, 23 May 2017 | Revision as of 14:37, 23 December 2018 Somewhat updated & corrected. | |||
| Line 17: | Line 17: | |||
| |InTheGame_pros= | |InTheGame_pros= | |||
| * Rapid rate of fire and reasonably good damage per minute | * Rapid rate of fire and reasonably good damage per minute | |||
| ? | * | + | * Mobile: usable top speed and maneuverability, also great hull traverse | |
| ? | * Excellent 12 degrees of gun depression plus strong gun mantlet make hulldown tactic a viable option | + | * Excellent 12 degrees of gun depression plus strong gun mantlet make hulldown tactic a viable option | |
| ? | * OK dispersion on the move, ability to use Vertical Stabilizer | + | * OK dispersion on the move, ability to use Vertical Stabilizer | |
| |InTheGame_cons= | |InTheGame_cons= | |||
| ? | * | + | * Practically no armor except for gun mantlet | |
| ? | + | * Tall profile, large and weak sides are easily hit, penetrated, sometimes even overmatched | ||
| ? | * Tall profile, large and weak sides are easily hit | + | * Disappointing firepower: accuracy, penetration and alpha damage are all comparatively bad | |
| ? | * Does not have particularly good acceleration for a flanking medium | + | * Does not have particularly good acceleration for a flanking medium due to subpar ground resistance | |
| ? | + | |||
| ? | + | |||
| |InTheGame_performance= | |InTheGame_performance= | |||
| ? | If you enjoyed the M4, but wished it was faster, then you | + | If you enjoyed the M4, but wished it was faster, then you may love this tank. Like the M4A3E2, it gets the more powerful Ford GAA engine. Unlike the Jumbo, it doesn't have a bunch of extra armor welded on to weigh it down. As a result, this tank is the fastest and most maneuverable of the Sherman variants. It can also take advantage of a Vertical Stabilizer. Coupled with its good mobility and already good gun dispersion on the move, it can easily flank and destroy less maneuverable vehicles in a hail of 76mm shells. | |
| ? | Despite the fact it is considered a fragile tank, it has | + | Despite the fact it is considered a fragile tank, it has still a strongpoint on its armor; the gun mantlet. Covering the majority of its turret face, tall height plus the E8's amazing gun depression makes hull-down positions useful. Of all the Tier 6 flanking mediums, it has the best armor. From the front, it is able to withstand low-tier autocannon, absorb direct hits from large-caliber high-explosive shells and if hull-down, medium tank cannon if they strike the large mantlet. Despite the resilience of the armor, it is no Sherman Jumbo and should always be treated as a medium tank. | |
| ? | It's biggest asset and crippling flaw is its gun; the 76mm Gun M1A2 has excellent DPM and dispersion, and can be augmented by Gun Rammers and Vertical Stabilizers to make a formidable flanker. However, it achieves its excellent DPM through its rate of fire; it's DPS of 115 is the lowest for any top gun on any vehicle, tied with the Sherman Jumbo which employs the same selection of guns. Furthermore, with an AP penetration of 128mm, it is the lowest on any Tier 6 medium tank. Because of its low DPS and AP penetration combined with pitiful armor, many players consider the Jumbo a better vehicle due to its armor. But the Easy Eight was never a particularly easy tank to play; in the hands of a skilled player, it will easily out-flank the clumsier opponent. | + | It's biggest asset and crippling flaw is its gun; the 76mm Gun M1A2 has excellent DPM and decent dispersion penalty, and can be augmented by Gun Rammers and Vertical Stabilizers to make a formidable flanker. However, it achieves its excellent DPM through its rate of fire; it's DPS of 115 is the lowest for any top gun on any vehicle, tied with the Sherman Jumbo which employs the same selection of guns. Furthermore, with an AP penetration of 128mm, it is the lowest on any Tier 6 medium tank. Because of its low DPS and AP penetration combined with pitiful armor, many players consider the Jumbo a better vehicle due to its armor. But the Easy Eight was never a particularly easy tank to play; in the hands of a skilled player, it will easily out-flank the clumsier opponent. | |
| ? | Run and gun tactics are a must with the E8, as it has enough speed and maneuverability to | + | Run and gun tactics are a must with the E8, as it has enough speed and maneuverability to relocate in time. Coupled with a high rate of fire, good gun dispersion on the move and the ability to use a Vertical Stabilizer, it is capable of executing flanking maneuvers well. The higher than average gun depression angle allows the E8 to take up hull-down positions quite effectively as well. With the rapid rate of fire the E8 can devastate misplaced enemies. | |
| The E8 tends to be most successful as a flanker a passive scout. It has the speed and maneuverability to succeed at flanking where the E2 couldn't. This lets it hit the sides more easily, where the low-penetration is less of an issue. The high rate of fire, combined with a Deadeye perk on the gunner will devastate any victim. Work with teammates to distract victims to ensure maximum surprise. | The E8 tends to be most successful as a flanker a passive scout. It has the speed and maneuverability to succeed at flanking where the E2 couldn't. This lets it hit the sides more easily, where the low-penetration is less of an issue. The high rate of fire, combined with a Deadeye perk on the gunner will devastate any victim. Work with teammates to distract victims to ensure maximum surprise. | |||
| Line 55: | Line 54: | |||
| |InTheGame_equipment= | |InTheGame_equipment= | |||
| ? | Vents, Tank Gun Rammer | + | Vents, Tank Gun Rammer, Vertical Stabilizer, GLD, Coated Optics | |
| |Gallery= | |Gallery= | |||
Revision as of 14:37, 23 December 2018
M4A3E8 Sherman

Mouse over "
[Client Values; Actual values in
| 930,500 |
| 892180 HP Hit Points |
| 30/3315.62/34.5 t Weight Limit |
- Commander
- Gunner
- Driver
- Radio Operator
- Loader
| 400520 hp Engine Power |
| 48/18 km/h Speed Limit |
| 3740 deg/s Traverse |
| 13.3333.29 hp/t Power/Wt Ratio |
| NoNo Pivot |
| // mm Hull Armor |
| 63.5/63.5/63.563.5/63.5/63.5 mm Turret Armor |
AP/APCR/HE
AP/APCR/HE Shells |
56/2800/56
96/2800/68 Shell Cost |
| 110/110/175115/115/185 HP Damage |
| 92/127/38128/177/38 mm Penetration |
|
15.79 r/m ▲
18.18 r/m Standard Gun ▲ Rate of Fire Standard Gun |
|
1736.9 ▲
Standard Gun
▼
Standard Gun
▲
2090.7 Standard Gun ▲
Standard Gun
▼
Standard Gun
▲ Damage Per Minute Standard Gun |
|
0.46 m ▲
0.38 m With 50% Crew: 0.57 m ▲ Accuracy With 50% Crew: 0.471 m |
| 2.1 s 1.9 s Aim time |
| 3839 deg/s Turret Traverse |
| 360° Gun Arc |
| -10°/+25°-12°/+25° Elevation Arc |
| 10571 rounds Ammo Capacity |
| 2020 % Chance of Fire |
| 330 m 370 m View Range |
| 395 m 615 m Signal Range |
Additional Statistics
(Top Configuration)
Camouflage
- Stationary: 12.6%
- When Moving: 9.4%
- When Firing: 3.4%
Terrain Resistance
- On Hard Ground: 0.96
- On Medium Ground: 1.06
- On Soft Ground: 1.63
Dispersion Change Values
- Turret Contribution
- Rotation: 0.12
- Shot Recoil: 3.36
- Suspension Contribution
- Acceleration: 0.18
- Turning: 0.18
With 100% Crew
VI
930500
The M4A3E8 Sherman is an American tier 6 medium tank.
The M4A3E8 is one of the most mass-produced modifications of the main U.S. armored vehicle of the World War II period. The tank featured the welded hull and Ford GAA carburetor engine. A total of 11,424 vehicles with the improved HVSS suspension were produced by Fisher Tank Arsenal and Detroit Tank Arsenal from June 1942 through March 1945. The vehicle is also known as M4A3(76)W. It took part in many after-war conflicts up to the Indo-Pakistani War of 1965.
Nicknamed as the "Easy-Eight" or "E8", this tank is a quicker, slightly better armored version of the M4 Sherman. It also has an upgraded 76mm gun with an improved rate of fire and better accuracy. Considering all this, the M1A2 should not be overlooked on the upgrade path in comparison to the M1A1 as it really brings out the E8's strengths. Despite the increased armor compared to the M4 Sherman however, the E8 is still a very soft target and will be easily destroyed if it stays exposed to enemy fire. In addition it's twin, the M4A3E2 Sherman Jumbo has thicker armor and a few more hitpoints than the M4A3E8 Sherman, but worse gun handling (dispersion on the move) and gun depression.
Finding a balance is a necessity and is excellent practice for the American mediums that are to follow, which all share a similar lack of armor. Its strongest point is its excellent mobility. It accelerates very quickly on all grounds, and loses little energy in turns which makes it an ideal flanking tank. Anyone who underestimates this gem will very soon become a smoking wreck.
The M4A3E8 Sherman leads to the T20.
Modules / Available Equipment and Consumables
Modules

Guns
| Tier | Gun | Penetration (mm) |
Damage (HP) |
Rate of fire (rounds/minute) |
Dispersion (m/100m) |
Aiming time (s) |
Weight (kg) |
Price (
| |
|---|---|---|---|---|---|---|---|---|---|
| IV | 75 mm Gun M3 | 92/127/38 | 110/110/175 | 15.79 | 0.46 | 2.1 | 1437 | 30000 | |
| VI | 76 mm Gun M1A1 | 128/177/38 | 115/115/185 | 14.29 | 0.43 | 2.3 | 1567 | 50330 | |
| VI | 76 mm Gun M1A2 | 128/177/38 | 115/115/185 | 18.18 | 0.38 | 1.9 | 1590 | 62000 | |
| V | 105 mm M4 | 53/102/38 | 410/350/175 | 7.5 | 0.55 | 2.3 | 2600 | 40300 |

Engines
| Tier | Engine | Engine Power (hp) |
Chance of Fire on Impact (%) |
Weight (kg) |
Price (
| |
|---|---|---|---|---|---|---|
| IV | Wright Continental R-975C1 | 400 | 20 | 516 | 11000 | |
| V | Wright Continental R-975C4 | 460 | 20 | 550 | 13900 | |
| VII | Ford GAA | 520 | 20 | 569 | 36000 |

Suspensions
| Tier | Suspension | Load Limit (т) |
Traverse Speed (gr/sec) |
Rmin | Weight (kg) |
Price (
| |
|---|---|---|---|---|---|---|---|
| V | NVSS T66 | 33 | 37 | B/2 | 8300 | 9600 | |
| VI | NVSS T80 | 34.5 | 40 | B/2 | 8300 | 16300 |

Radios
| Tier | Radio | Signal Range (m) |
Weight (kg) |
Price (
| |
|---|---|---|---|---|---|
| IX | SCR 506 | 615 | 110 | 33600 | |
| VI | SCR 508 | 395 | 100 | 21600 |
Compatible Equipment


![]()


![]()
![]()
![]()
![]()
![]()
![]()


![]()

![]()

Compatible Consumables
![]()
![]()
![]()
![]()
![]()
![]()
![]()
![]()
![]()
![]()
![]()
![]()
![]()
![]()
![]()
![]()
![]()
![]()
![]()
![]()
![]()
![]()
![]()
![]()
Player Opinion
Pros and Cons
Pros:
- Rapid rate of fire and reasonably good damage per minute
- Mobile: usable top speed and maneuverability, also great hull traverse
- Excellent 12 degrees of gun depression plus strong gun mantlet make hulldown tactic a viable option
- OK dispersion on the move, ability to use Vertical Stabilizer
Cons:
- Practically no armor except for gun mantlet
- Tall profile, large and weak sides are easily hit, penetrated, sometimes even overmatched
- Disappointing firepower: accuracy, penetration and alpha damage are all comparatively bad
- Does not have particularly good acceleration for a flanking medium due to subpar ground resistance
Performance
If you enjoyed the M4, but wished it was faster, then you may love this tank. Like the M4A3E2, it gets the more powerful Ford GAA engine. Unlike the Jumbo, it doesn't have a bunch of extra armor welded on to weigh it down. As a result, this tank is the fastest and most maneuverable of the Sherman variants. It can also take advantage of a Vertical Stabilizer. Coupled with its good mobility and already good gun dispersion on the move, it can easily flank and destroy less maneuverable vehicles in a hail of 76mm shells.
Despite the fact it is considered a fragile tank, it has still a strongpoint on its armor; the gun mantlet. Covering the majority of its turret face, tall height plus the E8's amazing gun depression makes hull-down positions useful. Of all the Tier 6 flanking mediums, it has the best armor. From the front, it is able to withstand low-tier autocannon, absorb direct hits from large-caliber high-explosive shells and if hull-down, medium tank cannon if they strike the large mantlet. Despite the resilience of the armor, it is no Sherman Jumbo and should always be treated as a medium tank.
It's biggest asset and crippling flaw is its gun; the 76mm Gun M1A2 has excellent DPM and decent dispersion penalty, and can be augmented by Gun Rammers and Vertical Stabilizers to make a formidable flanker. However, it achieves its excellent DPM through its rate of fire; it's DPS of 115 is the lowest for any top gun on any vehicle, tied with the Sherman Jumbo which employs the same selection of guns. Furthermore, with an AP penetration of 128mm, it is the lowest on any Tier 6 medium tank. Because of its low DPS and AP penetration combined with pitiful armor, many players consider the Jumbo a better vehicle due to its armor. But the Easy Eight was never a particularly easy tank to play; in the hands of a skilled player, it will easily out-flank the clumsier opponent.
Run and gun tactics are a must with the E8, as it has enough speed and maneuverability to relocate in time. Coupled with a high rate of fire, good gun dispersion on the move and the ability to use a Vertical Stabilizer, it is capable of executing flanking maneuvers well. The higher than average gun depression angle allows the E8 to take up hull-down positions quite effectively as well. With the rapid rate of fire the E8 can devastate misplaced enemies.
The E8 tends to be most successful as a flanker a passive scout. It has the speed and maneuverability to succeed at flanking where the E2 couldn't. This lets it hit the sides more easily, where the low-penetration is less of an issue. The high rate of fire, combined with a Deadeye perk on the gunner will devastate any victim. Work with teammates to distract victims to ensure maximum surprise.
If flanking is not an option, then sniping is entirely possible. However, the low accuracy, low penetration and low alpha damage tend to reduce its role. Still, passive scouting is entirely viable, with its 370 meter view range.
Compared to the Cromwell, this tank suffers from a high profile, lower damage per shot with the top guns, lower penetration, slower top speed, worse acceleration and inferior turret traverse. However, the Easy Eight has substantially better protection, better damage per minute, better hull traverse, superior view range, better terrain passability and significantly better gun depression and elevation. Both vehicles have the same hitpool, 750, a fairly typical value for Tier 6 medium tanks. Gun handling is also a very significant advantage over the Cromwell, especially with Vertical Stabilizer mounted. Even when compared to vehicles such as the Cromwell, in a battle between both vehicles, assuming all relevant parameters are the same and the optimum equipment is fitted, it usually comes down to who starts the engagement.
While the 76mm M1A1 and M1A2 may only seem to differ in rate of fire, it is important to note that the M1A2 is slightly more accurate than the M1A1, which can make all the difference in this tank's role of providing support for better armored vehicles. Adding the vertical stabilizer makes the M4A3E8 with a 76mm Gun M1A2 a formidable opponent in close combat as well. By circling the enemy, the E8 is more than capable of devastating higher tier tanks with the high rate of fire. The devastation is even more prevalent if the gunner has a Deadeye perk, dealing ridiculous damage to any modules it will hit. A wolf-pack of E8s can be a devastating force on the battlefield.
On a side-note: if the E8 were accurate to its design during WWII, the E8 would have wet-ammunition storage automatically, an evolutionary improvement over older models.
Early Research
- Upon purchasing this tank, immediately install the Wright Continental R-975C4 engine, M1A1 gun and upgrade the radio, which you unlocked on the M4.
- Next work on upgrading the turret and getting the M1A2 gun, which increases the rate of fire and has better accuracy.
- To improve mobility, getting the tracks is advised.
- Go from there.
Suggested Equipment
![]()
![]()
![]()
![]()
![]()
Gallery


Historical Info

The official name is the M4A3(76)W HVSS, but "Sherman Easy Eight" is the nickname this tank is widely remembered. Sherman M4A3E8 earned the nickname from its experimental E8 designation. This new variant entered into WWII late in the war (Dec 1944), and was kept in service in various western allied nations deep into the Cold war.
Evolutionary differences from the prior Sherman variants

This tank sported the much-vaunted HVSS (horizontal volute spring suspension) wide track and suspension upgrade. HVSS suspension increased the Sherman's weight by 2950lbs with the T66 single-pin track and 4780 lbs with the T84 double-pin track. HVSS allowed the installation of wider tracks, thereby decreasing the tank's ground pressure, and eased maintenance on the running gear since the bogie no longer had to be disassembled to remove road wheels. HVSS also provided more wheel travel, which gave the tank an easier and more stable ride, it also made the tank a much more stable firing platform.
The turret was also enlarged to accommodate the more powerful 76 mm gun. Muzzle velocity of the 76 mm cannon, the vehicle's primary armament, was 792 m/sec, causing penetration of 101 mm of armor at a distance of 1,000 yards (914 m). Maximum range of the cannon in indirect fire mode was 15,000 yards (13,716 meters). From it's predecessor, the M4A3E8 inherited glacis sloped to 47 degrees to the vertical, while driver and co-driver vision slots were changed to periscopes housed in the top of the hatches.

The most significant change that distinguished the "Easy Eight" from it's predecessors was the "wet storage" of ammunition to reduce fire risk in the event of penetration from an enemy AP round. The primary place of storage of ammunition was moved from the side of the turret (dry storage) into protected folders on the floor of the tank under the turret (wet storage).
Production of "Easy Eights" began in early 1944 and continued until April 1945. The "Easy Eight" became the standard tank of the American 3rd and seventh Army in Europe, and after the war, was successfully deployed in Korea and the Middle East. In the postwar years, it was included in the armament of various Western Allied armies. A total of 4,542 M4A3 tanks of both suspension types were produced.
Historical Gallery


