T95
| Revision as of 01:43, 24 February 2017 | Latest revision as of 20:35, 2 May 2020 | |||
23 intermediate revisions by 11 users not shown | ||||
| Line 1: | Line 1: | |||
| ? | {{TankData|Tank=T95 | + | {{TankData|Tank= T95 | |
| ? | |Affectionately nicknamed the "Doom Turtle", "Doom Snail" or the "Boomstick", the T95 is | + | |Affectionately nicknamed the '''"Doom Turtle"''', '''"Doom Snail"''' or the '''"Boomstick"''', the T95 is slower than the [[T28]], but has massively improved armor. In fact, this behemoth has the highest value of frontal armor of any tank in the game, tied with the [[T110E3]], and its armor is very good for its tier, especially in the sides; but in exchange for heavy armor, the T95 has a top speed and hull traverse same the [[Maus]]. Having the 105 mm AT Gun T5E1 mounted is rather lacking for its tier, so getting the 120 mm AT Gun T53 from the T28 is a must to help the grind for the 155 mm AT Gun T7. The T95 equipped with this gun is a force to be reckoned with, rivaling even the nasty [[Gun#152 mm BL-10|152 mm BL-10]] of the [[Object 704]]. Having a top speed of 20 km/h, it is obviously an easy target for artillery, much like the [[T28]], so using cover will greatly increase your chances of survival. However, keep in mind that even some artillery shells can bounce off the front of your armor, so don't be afraid to advance in the line of fire if it's required; just seeing the front of a T95 sends most tankers scrambling for cover. | |
| |InTheGame_pros= | |InTheGame_pros= | |||
| ? | - Frontal armor is immune to A LOT of enemy fire; large mantlet is impenetrable. | + | - Frontal armor is immune to '''A LOT''' of enemy fire; large mantlet is nigh impenetrable. | |
| ? | - Spaced side armor is deceptively bouncy and | + | - Spaced side armor is deceptively bouncy and will eat HE and HEAT Shells for low damage or none at all. | |
| ? | - 155mm gun can pen nearly anything and has frightening | + | - 155mm gun can pen nearly anything and has frightening alpha damage; 120mm trades alpha damage and some penetration for a higher RoF, but is still deadly. | |
| ? | - | + | - Lower glacis is well angled and small, making it hard to hit from a distance | |
| ? | - | + | - Scares other tankers regardless of tier, especially with its flanks covered; you are in trouble if you come face to face with one that has support. | |
| ? | - After 9.17.1, | + | - Super Heavy Spall Liner will render HE shells (especially smaller caliber shells) nearly useless from the front. | |
| + | ||||
| + | - After 9.17.1, this tank is no longer the slowest tank in the game; speed was boosted to 20 km/h and traverse speed was increased to 20 deg/s. | |||
| |InTheGame_cons= | |InTheGame_cons= | |||
| ? | - Slow | + | - Slow as [[Maus]] even with the 9.17.1 buff, extremely sluggish speed on hills (only 8 - 13 kmh) | |
| ? | - | + | - Attracts a lot of premium ammo spam; high penetrating APCR will often get through frontal armor (except mantlet) | |
| ? | - | + | - Main priority for SPGs. You will be focused by arty a lot. | |
| ? | - | + | - Lower glacis is easily penned from close distance | |
| ? | - | + | - Cupolas are weakspots and get hit frequently at mid to close range. Needs wiggling to avoid direct hits. | |
| ? | - | + | - Roof is very thin and vulnerable to tall tanks (i.e. the Maus) and arty. | |
| ? | + | - Tracks get knocked off almost all the time - and pretty much everyone will try to detrack you and flank. | ||
| ? | + | |||
| ? | The | + | - The 155mm's accuracy is rather bad, and shells tend to dip low. | |
| ? | + | - Bad gun depression, not suitable for sniping behind hills. | ||
| ? | + | - The engine is very prone to being lit on fire when hit. | ||
| ? | The | + | |InTheGame_performance= | |
| + | The T95 can take an incredible amount of abuse before going down if handled correctly. Keep in mind that the T95 is very intimidating to anyone facing its front, making it perfect for defense or to block off an area and prevent the enemy from advancing. Its armor can hold entire corridors, enabling your team to focus their fire elsewhere. In some players' opinion, the T95 is superior in multiple ways to its upgrade, the [[T110E3]]. | |||
| ? | + | The T95 is a true force to be reckoned with as its massive amount of frontal armor, and armed with the ferocious 155mm it can quickly cause enemies to dive for cover, as they fear both the damage it can cause and its ability to take out some tanks in one fell blow. It's a tank that can both break stalemates single-handedly or else hold 4 tanks at bay by itself, as long as they are denied the ability to flank or easily hit weak spots. It is important to use those strengths to your advantage. Tall tanks, such as the [[Maus]], can use it as a shield to hide their lower glacis while providing very useful firepower to suppress targets from the side. Small tanks can almost completely hide behind it, letting the T95 push forward for them, blocking and absorbing damage while they pop out and take a quick shot or deny opponents the ability to flank the T95 itself. In desperate situations, the T95 can shatter a hostile push, given the right conditions. | ||
| ? | + | Although the T95 may have plenty going for it, the tank holds a few huge, Achilles' heel-scaled weaknesses. First, you cannot be alone. Scouts and mediums can taunt at the T95's inherent weak of turning speed. Though this steep disadvantage can be softened somewhat with clutch braking skill, this will not help the T95 in avoiding the deathly gaze of SPGs when out in the open, and with the T95's slow speed, tankers will learn to hate them with a passion. | ||
| ? | + | Prepare to get tracked countless times each game. There is almost no tank in the game that gets tracked so often. This is no surprise, since for many enemies flanking is basically the only thing they can do to have any chance of inflicting damage on T95. Invest everything you can in repair skill, BiA skill, Clutch Braking skill, and bring Large Repair Kit with you. Do not forget (rarely recommended) Toolbox as equipment (or, even better, its improved version purchased for bonds). With all of the aforementioned, you will repair tracks within a few seconds, denying the enemy the chance to permatrack you and in most cases you will be able to avoid flanking, especially if you are close to the wall or some other obstacle. | ||
| ? | + | The accuracy of the 155mm gun, the T95's greatest asset, is far from stellar. The guns accuracy is easily outmatched by nearly all other tier 9 and 10 guns found on the TDs of other nations. This makes firing on the move all the more complex. It also makes long distance sniping, which this tank should do well in on paper, according to its characteristics, in reality an unfairly poorer proposition for the T95. Even at close range, the albeit wonky accuracy is still hard felt, making intentional 'trick shots', hits on small or relatively tricky to hit weak spots, and in some cases even lower glacis shots miss their mark or land in the entirely wrong place, and in extreme cases, repeatedly. Yet in most cases, poor accuracy is countered with both a rather good rate of fire and exceptional damage. HE rounds on T95 are great, with enough penetrating power (90mm) to punch through extreme weak spots of other tanks. Do not be afraid to hammer lower tier tanks with HE where you know you can pen even with just the 90 millimeters. Get the shot correct, and you can find yourself nearly one-shotting tier 7s & 8s or chopping some tier 9 and 10 tanks HP in half. Against much more heavily armored foes however, stick to using AP or APCR and firing on weak spots whenever possible. | ||
| ? | In | + | In open maps, it is best to play like a 'Silent Hunter', by laying low, taking shots of opportunity, and sticking to cover. Staying near your teams base is also a wise option. | |
| ? | In | + | In mixed maps, such as Erlenberg, go down along "Urban Like" regions if you can, and try to avoid being detected or seen as a major threat for as long as possible, take clean pot-shots on enemies in range or in your line of fire when you can, but remember to keep moving. | |
| ? | + | In urban environments, the T95 becomes a completely different beast. In these situations, move forward and do not remain in very close proximity to the base unless in an encounter match or if the situation demands it. Play aggressively and land as much damage as you can, and remember to keep out of the reach of SPGs. A T95 driver that is able to effortlessly weave a trail through the urban streets without taking much damage can very easily mop the match floor, sweeping enemies off the battlefield, deflecting large amounts of damage and dealing an even larger amount right back. This can even be done on the defensive, and if done perfectly, you can snatch victory from the jaws of defeat. | ||
| ? | + | Another fantastic capability of this tank is that it can stall, especially in urban maps where enemies are denied an easy flanking opportunity. Simply park your tank in a key chokepoint where the enemy is threatening, preferably a street enclosed on both sides by buildings. After firing, turn side to side in order to feign enemies into missing your weak spots, and try to maintain moderate distance, the further your enemies are, the harder it is for them to land shots on your weak spots. | ||
| ? | + | Due to the insane amount of armor that nearly covers the entire tank's front, the two weak spots, the lower glacis and the two cupolas, are the only things any tier 7, 8, and even tier 9 and 10 tanks have a hope at penetrating if you greet them head on. With 200mm of sloped armor on the commanders turret many tanks have to use gold to get through the weakspots. And even then, wiggling, as if the entire tank were a turret (also known as "The Wigggle of Doom") leaves shots most could make while you are standing still extremely difficult. Handle this tank's armor correctly and you have a good chance to deflect jaw-droppingly enormous amounts of damage in matches, even from other T95s and tier 10 tank destroyers, and, if you are lucky, even laughing in the face of arties! | ||
| ? | + | |||
| ? | Due to the insane amount of armor that nearly covers the entire tank's front, the two weak spots, the lower glacis and the two cupolas, are the only things any tier | + | ||
| |InTheGame_research= | |InTheGame_research= | |||
| Line 64: | Line 64: | |||
| |InTheGame_equipment= | |InTheGame_equipment= | |||
| ? | Vents, Tank Gun Rammer, GLD, Spall Liner, Binocular Telescope, Camouflage Net | + | Vents, Tank Gun Rammer, Toolbox, GLD, Spall Liner, Binocular Telescope, Camouflage Net | |
| ? | + | |||
| |Gallery= | |Gallery= | |||
| image:T95_001.jpg{{!}}T95_001 | image:T95_001.jpg{{!}}T95_001 | |||
| image:T95_003.jpg{{!}}T95_003 | image:T95_003.jpg{{!}}T95_003 | |||
| image:T95_004.jpg{{!}}T95_004 | image:T95_004.jpg{{!}}T95_004 | |||
| + | ||||
| + | |External_Reviews= | |||
| + | {{#ev:youtube|SgwncAuEXRE}} | |||
| |History= | |History= | |||
| Line 98: | Line 100: | |||
| image:T95e.jpg | image:T95e.jpg | |||
| image:T95_front.jpg | image:T95_front.jpg | |||
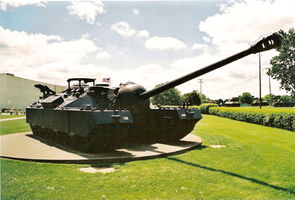
| + | image:1024px-T28 Front Quarter.jpg{{!}}T95 preserved at the Patton Museum, Note that the right mud flaps of this vehicle had "T28" code name on it. | |||
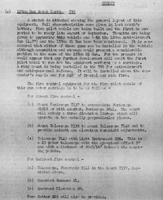
| + | File:T95_alternate_armament_information_1.png{{!}}Document detailing proposals to re-arm the T95 | |||
| + | File:T95_alternate_armament_information_2.png{{!}}Document detailing proposals to re-arm the T95 | |||
| + | ||||
| |HistAcc= | |HistAcc= | |||
| ? | The T95's only primary armament is the 105 mm AT Gun T5E1 which it still carries today. The 120 mm was planned but never | + | The T95's only primary armament is the 105 mm AT Gun T5E1 which it still carries today. The 120 mm was planned but never actually mounted. | |
| ? | * The | + | * The 155 mm T7 gun is actually the main armament of the [[T30]]. Its configuration on the T95 is fake. | |
| + | * Planned [[Gun/USA#155 mm Gun M1A1|155mm M2 "Long Tom"]] (no relation to the T7) is missing. | |||
| + | * The real life T95's max speed is 13 km/h. | |||
| + | * Ford GAF engine is considerably more powerful than in reality, with 670 hp compared to the historical 500. The 780 hp engine configuration is fake. | |||
| |Ref_references= | |Ref_references= | |||
| Line 113: | Line 122: | |||
| |Ref_links= | |Ref_links= | |||
| * https://www.youtube.com/watch?v=-kO5IsVHlTo - US T-28/T-95 super heavy Tank WW2 | * https://www.youtube.com/watch?v=-kO5IsVHlTo - US T-28/T-95 super heavy Tank WW2 | |||
| + | * https://worldoftanks.com/en/news/chieftain/t28_and_t95/ | |||
| |Sidebar_Camostop=18.3 | |Sidebar_Camostop=18.3 | |||
Latest revision as of 20:35, 2 May 2020
T95
Mouse over "
[Client Values; Actual values in
| 3,500,000 |
| 1800360 HP Hit Points |
| 86.79/86.8924/91.89 t Weight Limit |
- Commander (Radio Operator)
- Gunner
- Driver
- Loader
| 670780 hp Engine Power |
| 20/10 km/h Speed Limit |
| 2024 deg/s Traverse |
| 7.7232.5 hp/t Power/Wt Ratio |
| YesYes Pivot |
| // mm Hull Armor |
AP/APCR/HE
AP/APCR/HE Shells |
1000/4800/680
1650/4800/1120 Shell Cost |
| 320/320/420750/750/950 HP Damage |
| 198/245/53276/320/90 mm Penetration |
|
8.11 r/m ▲
3.28 r/m Standard Gun ▲ Rate of Fire Standard Gun |
|
2595.2 ▲
Standard Gun
▼
Standard Gun
▲
2460 Standard Gun ▲
Standard Gun
▼
Standard Gun
▲ Damage Per Minute Standard Gun |
|
0.38 m ▲
0.38 m With 50% Crew: 0.471 m ▲ Accuracy With 50% Crew: 0.471 m |
| 1.7 s 2.5 s Aim time |
| 2626 deg/s Gun Traverse Speed |
| 21° Gun Arc |
| -5°/+20°-5°/+20° Elevation Arc |
| 6230 rounds Ammo Capacity |
| 2020 % Chance of Fire |
| 380 m 380 m View Range |
| 395 m 745 m Signal Range |
Additional Statistics
(Top Configuration)
Camouflage
- Stationary: 18.3%
- When Moving: 11.1%
- When Firing: 2.6%
Terrain Resistance
- On Hard Ground: 1.25
- On Medium Ground: 1.34
- On Soft Ground: 2.21
Dispersion Change Values
- Turret Contribution
- Rotation: 0.08
- Shot Recoil: 3.84
- Suspension Contribution
- Acceleration: 0.16
- Turning: 0.16
With 100% Crew
IX
3500000
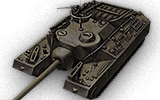
The T95 is an American tier 9 tank destroyer.
Development of this vehicle started in 1943, with 25 vehicles planned for production within a year. Two prototypes passed trials, but never saw action.
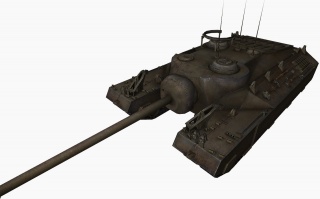
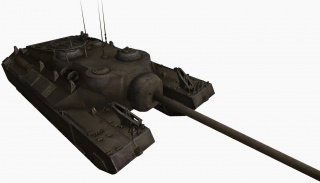
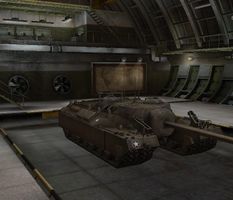
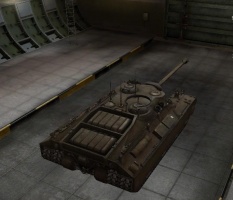
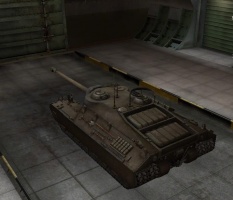
Affectionately nicknamed the "Doom Turtle", "Doom Snail" or the "Boomstick", the T95 is slower than the T28, but has massively improved armor. In fact, this behemoth has the highest value of frontal armor of any tank in the game, tied with the T110E3, and its armor is very good for its tier, especially in the sides; but in exchange for heavy armor, the T95 has a top speed and hull traverse same the Maus. Having the 105 mm AT Gun T5E1 mounted is rather lacking for its tier, so getting the 120 mm AT Gun T53 from the T28 is a must to help the grind for the 155 mm AT Gun T7. The T95 equipped with this gun is a force to be reckoned with, rivaling even the nasty 152 mm BL-10 of the Object 704. Having a top speed of 20 km/h, it is obviously an easy target for artillery, much like the T28, so using cover will greatly increase your chances of survival. However, keep in mind that even some artillery shells can bounce off the front of your armor, so don't be afraid to advance in the line of fire if it's required; just seeing the front of a T95 sends most tankers scrambling for cover.
The T95 leads to the T110E3.
Modules / Available Equipment and Consumables
Modules
| Tier | Engine | Engine Power (hp) |
Chance of Fire on Impact (%) |
Weight (kg) |
Price (
| |
|---|---|---|---|---|---|---|
| VI | Ford GAF | 670 | 20 | 569 | 25300 | |
| VI | Ford GAFM2A1 | 780 | 20 | 569 | 34600 |
| Tier | Suspension | Load Limit (т) |
Traverse Speed (gr/sec) |
Rmin | Weight (kg) |
Price (
| |
|---|---|---|---|---|---|---|---|
| VIII | T95HVSS | 86.89 | 20 | 0 | 18000 | 29300 | |
| IX | T95HVSSM2 | 91.89 | 24 | 0 | 18000 | 62500 |
Compatible Equipment
Compatible Consumables
Player Opinion
Pros and Cons
Pros:
- Frontal armor is immune to A LOT of enemy fire; large mantlet is nigh impenetrable.
- Spaced side armor is deceptively bouncy and will eat HE and HEAT Shells for low damage or none at all.
- 155mm gun can pen nearly anything and has frightening alpha damage; 120mm trades alpha damage and some penetration for a higher RoF, but is still deadly.
- Lower glacis is well angled and small, making it hard to hit from a distance
- Scares other tankers regardless of tier, especially with its flanks covered; you are in trouble if you come face to face with one that has support.
- Super Heavy Spall Liner will render HE shells (especially smaller caliber shells) nearly useless from the front.
- After 9.17.1, this tank is no longer the slowest tank in the game; speed was boosted to 20 km/h and traverse speed was increased to 20 deg/s.
Cons:
- Slow as Maus even with the 9.17.1 buff, extremely sluggish speed on hills (only 8 - 13 kmh)
- Attracts a lot of premium ammo spam; high penetrating APCR will often get through frontal armor (except mantlet)
- Main priority for SPGs. You will be focused by arty a lot.
- Lower glacis is easily penned from close distance
- Cupolas are weakspots and get hit frequently at mid to close range. Needs wiggling to avoid direct hits.
- Roof is very thin and vulnerable to tall tanks (i.e. the Maus) and arty.
- Tracks get knocked off almost all the time - and pretty much everyone will try to detrack you and flank.
- The 155mm's accuracy is rather bad, and shells tend to dip low.
- Bad gun depression, not suitable for sniping behind hills.
- The engine is very prone to being lit on fire when hit.
Performance
The T95 can take an incredible amount of abuse before going down if handled correctly. Keep in mind that the T95 is very intimidating to anyone facing its front, making it perfect for defense or to block off an area and prevent the enemy from advancing. Its armor can hold entire corridors, enabling your team to focus their fire elsewhere. In some players' opinion, the T95 is superior in multiple ways to its upgrade, the T110E3.
The T95 is a true force to be reckoned with as its massive amount of frontal armor, and armed with the ferocious 155mm it can quickly cause enemies to dive for cover, as they fear both the damage it can cause and its ability to take out some tanks in one fell blow. It's a tank that can both break stalemates single-handedly or else hold 4 tanks at bay by itself, as long as they are denied the ability to flank or easily hit weak spots. It is important to use those strengths to your advantage. Tall tanks, such as the Maus, can use it as a shield to hide their lower glacis while providing very useful firepower to suppress targets from the side. Small tanks can almost completely hide behind it, letting the T95 push forward for them, blocking and absorbing damage while they pop out and take a quick shot or deny opponents the ability to flank the T95 itself. In desperate situations, the T95 can shatter a hostile push, given the right conditions.
Although the T95 may have plenty going for it, the tank holds a few huge, Achilles' heel-scaled weaknesses. First, you cannot be alone. Scouts and mediums can taunt at the T95's inherent weak of turning speed. Though this steep disadvantage can be softened somewhat with clutch braking skill, this will not help the T95 in avoiding the deathly gaze of SPGs when out in the open, and with the T95's slow speed, tankers will learn to hate them with a passion.
Prepare to get tracked countless times each game. There is almost no tank in the game that gets tracked so often. This is no surprise, since for many enemies flanking is basically the only thing they can do to have any chance of inflicting damage on T95. Invest everything you can in repair skill, BiA skill, Clutch Braking skill, and bring Large Repair Kit with you. Do not forget (rarely recommended) Toolbox as equipment (or, even better, its improved version purchased for bonds). With all of the aforementioned, you will repair tracks within a few seconds, denying the enemy the chance to permatrack you and in most cases you will be able to avoid flanking, especially if you are close to the wall or some other obstacle.
The accuracy of the 155mm gun, the T95's greatest asset, is far from stellar. The guns accuracy is easily outmatched by nearly all other tier 9 and 10 guns found on the TDs of other nations. This makes firing on the move all the more complex. It also makes long distance sniping, which this tank should do well in on paper, according to its characteristics, in reality an unfairly poorer proposition for the T95. Even at close range, the albeit wonky accuracy is still hard felt, making intentional 'trick shots', hits on small or relatively tricky to hit weak spots, and in some cases even lower glacis shots miss their mark or land in the entirely wrong place, and in extreme cases, repeatedly. Yet in most cases, poor accuracy is countered with both a rather good rate of fire and exceptional damage. HE rounds on T95 are great, with enough penetrating power (90mm) to punch through extreme weak spots of other tanks. Do not be afraid to hammer lower tier tanks with HE where you know you can pen even with just the 90 millimeters. Get the shot correct, and you can find yourself nearly one-shotting tier 7s & 8s or chopping some tier 9 and 10 tanks HP in half. Against much more heavily armored foes however, stick to using AP or APCR and firing on weak spots whenever possible.
In open maps, it is best to play like a 'Silent Hunter', by laying low, taking shots of opportunity, and sticking to cover. Staying near your teams base is also a wise option.
In mixed maps, such as Erlenberg, go down along "Urban Like" regions if you can, and try to avoid being detected or seen as a major threat for as long as possible, take clean pot-shots on enemies in range or in your line of fire when you can, but remember to keep moving.
In urban environments, the T95 becomes a completely different beast. In these situations, move forward and do not remain in very close proximity to the base unless in an encounter match or if the situation demands it. Play aggressively and land as much damage as you can, and remember to keep out of the reach of SPGs. A T95 driver that is able to effortlessly weave a trail through the urban streets without taking much damage can very easily mop the match floor, sweeping enemies off the battlefield, deflecting large amounts of damage and dealing an even larger amount right back. This can even be done on the defensive, and if done perfectly, you can snatch victory from the jaws of defeat.
Another fantastic capability of this tank is that it can stall, especially in urban maps where enemies are denied an easy flanking opportunity. Simply park your tank in a key chokepoint where the enemy is threatening, preferably a street enclosed on both sides by buildings. After firing, turn side to side in order to feign enemies into missing your weak spots, and try to maintain moderate distance, the further your enemies are, the harder it is for them to land shots on your weak spots.
Due to the insane amount of armor that nearly covers the entire tank's front, the two weak spots, the lower glacis and the two cupolas, are the only things any tier 7, 8, and even tier 9 and 10 tanks have a hope at penetrating if you greet them head on. With 200mm of sloped armor on the commanders turret many tanks have to use gold to get through the weakspots. And even then, wiggling, as if the entire tank were a turret (also known as "The Wigggle of Doom") leaves shots most could make while you are standing still extremely difficult. Handle this tank's armor correctly and you have a good chance to deflect jaw-droppingly enormous amounts of damage in matches, even from other T95s and tier 10 tank destroyers, and, if you are lucky, even laughing in the face of arties!
Early Research
- The engine and the radio come from the T28, so mount them before upgrading the tracks.
- You need the tracks to mount the 120mm, then you can grind the 155mm, but you can use the Upgraded Suspension to unlock the 120mm.
Suggested Equipment
External Reviews and Opinions
Gallery
Historical Info
The rejected M6A2E1 project proposed that a limited number of assault vehicles be improvised by modifying the stock of T1E1 heavy tanks. However, a far more extensive program to develop a heavily armed and armored combat vehicle had been initiated in September 1943. Studies by the Ordnance Department indicated that such a vehicle would be required after the invasion of Europe to penetrate heavily fortified areas such as the German West Wall. The original concept proposed mounting the new 105mm gun T5E1 in a tank with the equivalent of 8 inch frontal armor using the electric drive system developed for the heavy tank T1E1 and the medium tank T23. The high velocity T5E1 gun had excellent penetration performance against concrete and when installed in a heavily armored chassis was expected to be extremely effective in reducing heavy fortifications. The Chief of Ordnance proposed that 25 of the new tanks be produced and estimated that they could be completed in eight to twelve months, approximately the same time that would be required to build a single pilot. Such a schedule was expected to make them available in time for operations in Europe. The Army Ground Forces did not agree and recommended that only three pilot models be constructed and that the electric drive be replaced by a mechanical transmission. After a conference with the various parties concerned, the Army Service Forces in March 1944 authorized the procurement of five vehicles, designating them as the heavy tank T28. The original specification was modified to increase the frontal armor to 12 inches raising the estimated combat weight to 95 tons.
Technical specifications
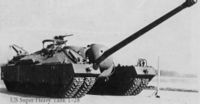
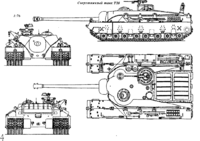
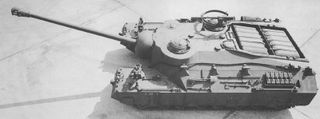
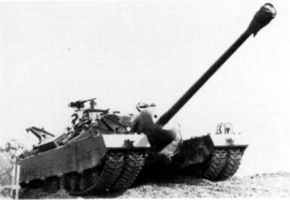
The proposed tank was a low silhouette vehicle without a turret. The 105mm gun T5E1 was to be mounted in the front of the hull with a traverse of 10 degrees to the right and left of center and an elevation range of -5 to +20 degrees.
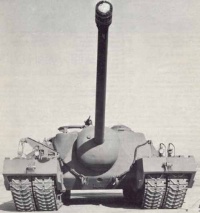
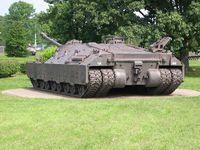
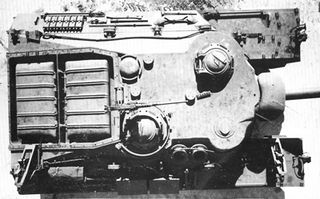
The power package in the T95 (T28) was essentially the same as in the M26 Pershing tank, although the weight of the new vehicle was more than twice that of the latter. To handle the T95 (T28), the 500 horsepower Ford GAF engine and the torqmatic transmission required a final drive gear ratio that reduced the maximum vehicle speed to about eight miles per hour. In fact, the maximum recommended sustained speed was seven miles per hour at 2600 rpm. Due to its extreme weight and low engine power, the T95 (T28) had extremely limited obstacle-crossing ability and could not cross any of the portable bridges available at the time. The great weight of the vehicle also required considerable ingenuity in design to reduce the ground pressure to an acceptable level. This objective was achieved by the use of two sets of tracks on each side. The outer set, along with the four inch thick armor side skirts, could be removed and towed behind the vehicle when operating on a hard surface. Removing the outer tracks also reduced the overall width from 179 1/2 inches to 124 inches permitting rail transportation. At Aberdeen, an inexperienced four man crew removed the outer tracks under field conditions in four hours on their first try. An equal amount of time was required to reassemble them onto the vehicle. By the third try, the same team had reduced the time to remove or replace the outer tracks to 2 1/2 hours.
Crew
A crew of four was carried with the driver and gunner in the front hull on the left and right of the cannon respectively. The loader was at the left rear of the fighting compartment and the commander at the right rear behind the gunner. The driver and the commander were each provided with a vision cupola. A ring mount for a .50 caliber machine gun was installed around the commanders cupola. It could be used only with the commander standing in the open hatch and was the only secondary armament on the vehicle, except for the individual crew weapons. The gunner was equipped with a telescope alongside the cannon and a periscopic sight in the hull roof.
History
On 7 February 1945, a memorandum from the Chief of Ordnance requested that the T28 be redesignated as the 105mm gun motor carriage T95 because the cannon was not turret mounted and because of its limited secondary armament. OCM 26898, dated 8 March 1945, approved the name change and recorded the characteristics of the new vehicle. Because of the pressure of the wartime production program as well as the size and weight of the proposed vehicle, there was some difficulty in finding a facility to manufacture the five pilots. However, the Pacific Car and Foundry Company agreed to take on the project and in May 1945, (they were supplied with the basic vehicle design as well as detailed information on the gun mount and the horizontal volute spring suspension. Final design work began immediately. The first front end casting was delivered on 20 June and welding was completed on the first hull in August 1945.
Historical Gallery
Historical Accuracy Errata
The T95's only primary armament is the 105 mm AT Gun T5E1 which it still carries today. The 120 mm was planned but never actually mounted.
- The 155 mm T7 gun is actually the main armament of the T30. Its configuration on the T95 is fake.
- Planned 155mm M2 "Long Tom" (no relation to the T7) is missing.
- The real life T95's max speed is 13 km/h.
- Ford GAF engine is considerably more powerful than in reality, with 670 hp compared to the historical 500. The 780 hp engine configuration is fake.


